How to Fix Xbox One Stuck in 640×480 Resolution
Xbox One users may encounter an issue where the console is unable to change the display resolution beyond 640 x 480, despite the TV or monitor supporting higher resolutions. This problem typically arises when the console fails to auto-detect the appropriate resolution, often due to a malfunctioning Auto-Detect feature.
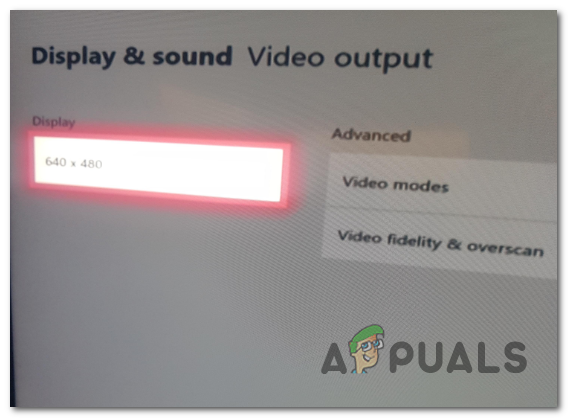
Firmware inconsistencies, such as those within the console’s temporary files, can also contribute to this issue. Additionally, unexpected console shutdowns, especially during updates, can result in system corruption, impacting resolution settings. Furthermore, a faulty HDMI cable can prevent the console from correctly reading display capabilities.
1. Disable Display Auto-detect
Consoles sometimes default to a low resolution like 640×480. Turning off the auto-detect feature allows the Xbox One to use a manual resolution setting, avoiding detection errors. Users can then manually set the display to match their TV or monitor’s optimal resolution.
- Press the Xbox button on your controller to open the guide menu and access Settings.
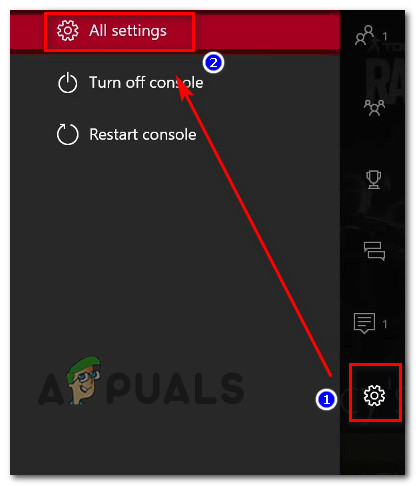
Accessing the Settings menu on Xbox One - In Settings, go to Display & Sound > Video Output > Video Fidelity & Overscan.
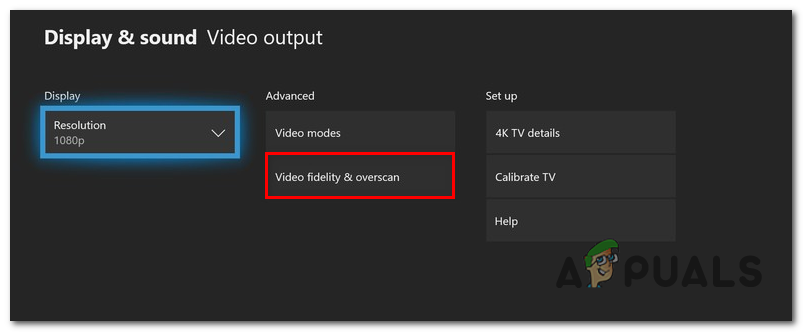
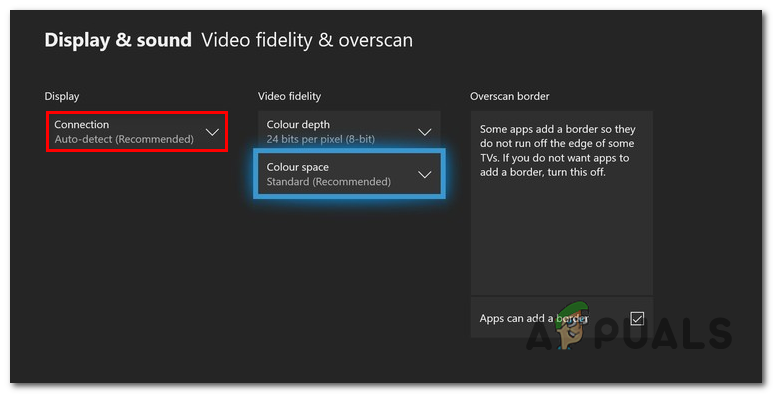
Accessing the Video fidelity & overscan menu - Within Video Fidelity & Overscan, find the TV connection drop-down under the Display column. By default, it’s set to Auto-Detect (Recommended). Change it to HDMI and confirm the change.
Disabling the Auto-detect feature - After confirmation, return to the Display menu and select your desired resolution. You should now see more options than just 640×480.
2. Perform a Power Cycling Procedure
Power cycling can fix deeper system problems beyond a standard restart. This process completely turns off the console, removing all power. When restarted, it starts fresh, addressing issues like bad HDMI connections or incorrect display settings.
- With the console on, press and hold the Xbox button on the front of the console for 10 seconds, or until the front LED stops.
Pressing the power button on Xbox One - Once the Xbox One turns off, wait one minute before turning it back on. For best results, disconnect the power cable from the outlet and wait a few seconds before reconnecting.
- Turn on the Xbox One by pressing the Xbox button (do not hold). Watch for the animation logo during startup as confirmation of a successful power cycle.

Xbox One Starting Animation - After startup, go to Display & Sound > Video Output to adjust the resolution if needed.
3. Perform a Soft/Hard Reset
A soft reset restarts the console while preserving all data and settings, helping fix temporary display issues. A hard reset is more thorough; it completely turns off the console and removes all power. This can fix bigger problems without losing data.
- Ensure the Xbox One console is on.
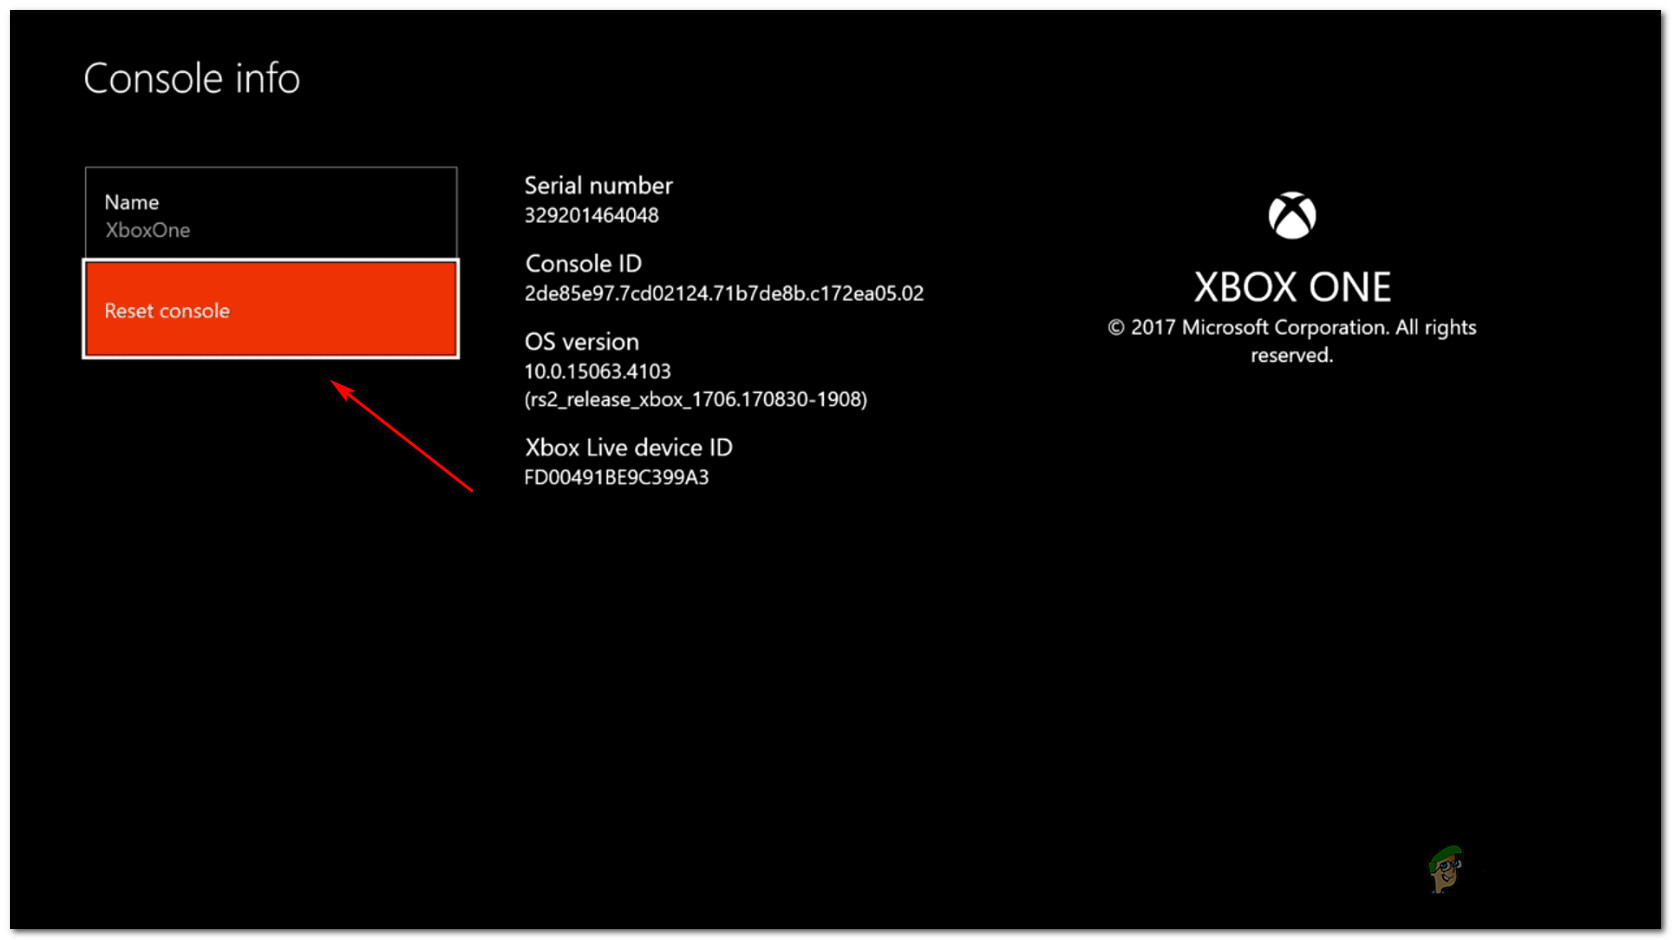
- On your Xbox controller, press the Xbox button to open the guide. Navigate to System > Settings > System > Console Info.
- Select Reset console from the Console Info menu.
Performing a soft factory reset - Choose Reset and keep my games & apps.
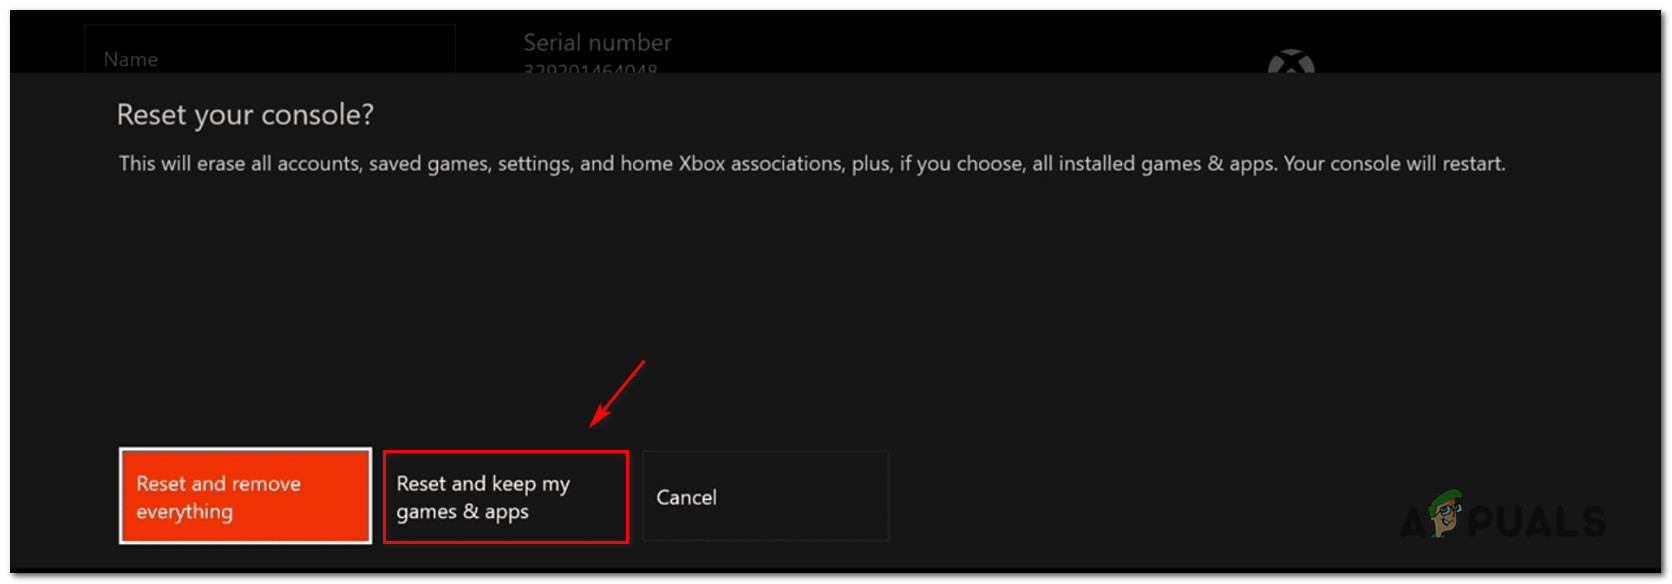
Soft Resetting Xbox One Note: For a hard reset, select Reset and remove everything. This deletes all data, including games and media like screenshots and videos.
- Once complete, restart your console if it doesn’t automatically. After rebooting, check Display & Sound > Video Output to see if the resolution issue is resolved.
4. Change the HDMI Cord
An easy fix might be to change the HDMI cable. A faulty cable can disrupt the signal between the Xbox and the screen, causing it to remain at 640×480 resolution. A new cable ensures a strong connection and helps the console display the best picture quality.
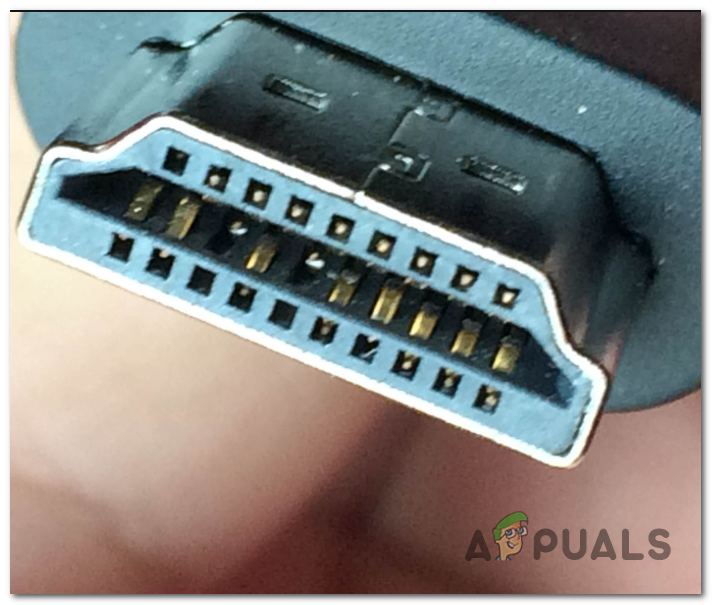
If applicable, replace the faulty HDMI cable with a new, problem-free one. Check for a spare HDMI cable at home, or temporarily borrow one from another device to test the connection.

Method 1: Disabling Display Auto-detect works but there is no 4k resolution only 1080p is working.
Fortunately i have warranty so i sent Xbox One X back to Microsoft.