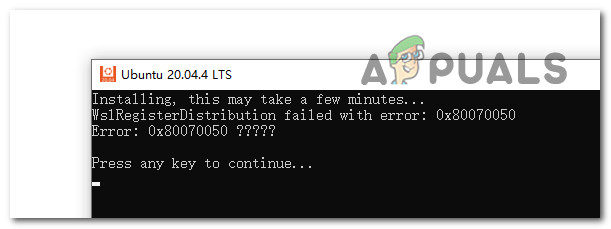
Fix: ‘WslRegisterDistribution Failed with Error: 0x80070050’
Some Windows 10 and Windows 11 users are reporting that whenever they attempt to update the Windows Subsystem for Linus (WSL) they end up with the error message ‘WslRegisterDistribution Failed with Error: 0x80070050‘. This problem is reported to occur on both Windows 10 and Windows 11.
After we’ve investigated this issue thoroughly, it turns out that there are several different scenarios that might directly or indirectly cause this type of behavior. Here’s what you should be on the lookout for:
- LXSS Manager is stuck in a limbo state – According to some affected users, you can expect to deal with this issue in situations where the LXX Manager service is neither opened nor closed and thus inaccessible. You can fix this particular issue by accessing the Services screen and restarting the service altogether.
- The Status of LXSS Manager is not set to Automatic – As it turns out, if you want the WSL updating process to be carried over seamlessly, one of the first things you need to do is ensure that the status of the LXSS Manager service is set to Automatic. You can do this from the Services screen of your Windows installation or using Registry Editor.
- The Windows Subsystem for Linux is Disabled – Another reason why you might expect to deal with this issue is a scenario in which the Windows Subsystem for Linux is actually disabled at a system level and thus cannot be updated. To fix this, access the Windows Features menu and re-enable this component. Additionally, you can do this from an elevated powershell window.
- Recent system change – If you only noticed the apparition of this problem after performing a certain driver installation or after an unexpected system interruption, it’s possible that a recent system change actually caused this behavior. In this case, you can try reverting your PC back to a state in which everything was functioning properly.
- Outdated driver fleet – As it turns out, you can expect the Windows Subsystem for Linux component to act up if you have outdated drivers that you’re currently using. Several affected users have managed to fix the issue by updating all your driver components to the latest versions.
- Outdated Windows installation – If you have pending Windows updates that you keep postponing, it might be wise to install them first before you try to update the WSL component. Several affected users have confirmed that the problem was resolved immediately after they brought their Windows installation to the latest build available.
- System file corruption – According to a lot of affected users, system file corruption can also be responsible for this particular issue. Our advice is to deploy a CHKDSK scan first to ensure that there aren’t any failing sectors, then deploy SFC & DISM scans in quick succession in order to repair corrupted system components. As a last resort, you should also consider going for a repair install or clean install.
- 3rd party interference – As it turns out, there are a lot of potential tools & 3rd party programs that might ultimately end up interfering with the Windows Subsystem for Linux. To make sure none of them are actually causing this behavior on your Windows installation, achieve a clean boot state and see if you are still unable to update the WSL component.
Now that we went over every potential reason why you might expect to experience this problem, let’s go over a series of fixes that other affected users have successfully used to get past this problem that prevented them from updating the Windows Subsystem for Linux.
1. Restart the LXSS Manager
Some impacted users claim that you should anticipate coping with this problem while the LXX Manager service is unavailable because it is neither opened nor closed. By going to the Services page and restarting the service from scratch, you can resolve this specific problem.
Note: This is one of the most commonly reported fixes that affected users have reported. But keep in mind that it’s likely that the fix is only temporary as you will be experiencing the same type of issue the next time WSL needs updating.
If you haven’t tried restarting the LXSS Manager yet, follow the instructions below for specific instructions on how to do this:
- Press Windows key + R to open up a Run dialog box. Next, type ‘services.msc‘ inside the text box and press Ctrl + Shift + Enter to open up the Services screen.
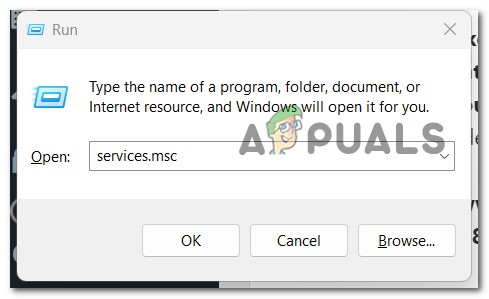
Open the Services screen - At the User Account Control (UAC), click Yes to grant admin access.
- Once you’re inside the Services screen, scroll down through the list of services and locate the entry named LxssManager.
- After you locate LxssManager, right-click on it and click on Stop to effectively stop the service.
- Wait for a full minute before right-clicking on LxssManager once again and click on Start to effectively restart the service.
If this problem didn’t allow you to fix the issue, move down to the next method below.
2. Modify the behavior of LxssManager
It turns out that one of the first things you need to do is make sure the LXSS Manager service’s status is set to Automatic if you want the WSL update process to proceed without a hitch. Using Registry Editor or the Services interface of your Windows installation, you can accomplish this.
Since one of the sub-methods might be unfollowable in your case, we decided to cover both potential scenarios so you have two different ways of modifying the status of Lxss Manager.
2.1. Modify the behavior of LxssManager from the Services Screen
If you can access the Services screen, this is certainly the easier method of modifying the behavior of LxssManager. All you need to do is access the Services screen and set the startup type of LxxManager to Automatic.
Follow the instructions below for the complete steps of doing this:
- Press Windows key + R to open up a Run dialog box. Next, type ‘services.msc‘ inside the text box and press Ctrl + Shift + Enter to open up the Services screen.
Open the Services screen - At the User Account Control (UAC), click Yes to grant admin access.
- Once you’re inside the Services screen, scroll down through the list of services and locate the entry named LxssManager.
- Right-click on LxssManager and click on Properties from the context menu that just appeared.
- Next, once you’re inside the Properties screen, access the General tab and change the Startup type to Automatic and click on Apply to save the changes.
- Reboot your PC and see if the problem is now fixed.
2.2. Modify the behavior of Lxss Manager via Registry Editor
A harder thing of doing the same thing as the method above is to rely on Registry Editor to modify the startup behavior of Lxss Manager.
Follow the instructions below for specific steps on navigating to the location of LxssManager via Registry Editor and change its value data to 2:
- Press Windows key + R to open up a Run dialog box. Next, type ‘regedit’ inside the text box and press Ctrl + Shift + Enter to open up the Registry Editor with admin access.
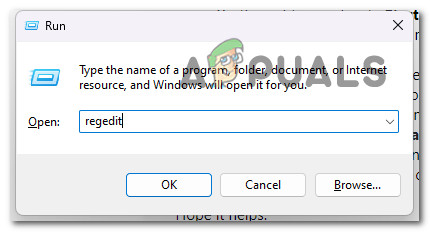
Open the Registry Editor - At the User Account Control (UAC), click Yes to grant admin access.
- Once you’re inside the Registry Editor, navigate to the following location using the menu on the left-hand side:
HKEY_LOCAL_MACHINE\SYSTEM\CurrentControlSet\Services\LxssManager
Note: You can either navigate to this location manually or you can paste the location directly into the nav bar at the top and press Enter to get there instantly.
- Once you’re inside the correct location, move over to the right-hand section and double-click on Start
- Next, set the base of Start to Hexadecimal and the Value to 2 before clicking Ok to save the changes.
- After the operation is completed, close the Registry Editor and see if the problem is now fixed.
If the same kind of problem is still occurring, move down to the next method below.
3. Enable Windows Subsystem for Linux & Virtual Machine Platform
A situation in which the Windows Subsystem for Linux is truly disabled at a system level and cannot be upgraded is another reason why you might anticipate having to deal with this problem. Re-enabling this component from the Windows Features menu will resolve this. Additionally, a powershell window that has been elevated can be used for this.
UPDATE: As it turns out, there’s one dependency (Virtual Machine Platform) that needs to be enabled to in order for the WSL component to be updated without issues.
In what follows, we will show you how to enable these components via the Windows Features screen and from an elevated Powershell. Feel free to follow whichever guide you feel most comfortable with.
3.1. Enable WSL & Virtual Machine Platform via Windows Features
In order to access the Windows Features screen and perform these modifications, you need to first access the classic Control Panel menu.
Here’s a quick step-by-step guide on how to do this:
- Press Windows key + R to open up a Run dialog box. Next, type ‘control’ inside the text box and press Ctrl + Shift + Enter to open up an elevated Control Panel window.
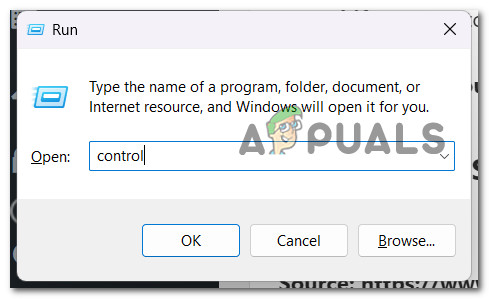
Open the classic Control Panel menu - At the User Account Control (UAC), click Yes to grant admin access.
- Once you’re inside the classic Control Panel menu, search for ‘apps’, then click on Programs and Features.
- Next, click on Turn Windows Features on or off from the left-hand side menu.
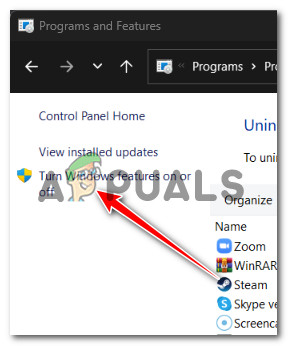
Turn Windows Features on or Off - From the Windows Features screen, check the boxes associated with Windows Subsystem for Linux and Virtual Machine Platform then click Ok to enable it.
- Reboot your PC to enforce the changes, then attempt to update WSL once again and see if the problem is now fixed.
3.2. Enable WSL & Virtual Machine Platform via Powershell
If you want to save yourself some time and you are comfortable with getting things done from a terminal, you can also enable WSL & Virtual Machine Platform from an elevated Powershell command.
Follow the instructions below for steps on how to do this:
- Press Windows key + R to open up a Run dialog box.
- Once you’re inside the Run dialog box, type ‘powershell’, then press Ctrl + Shift + Enter to open up an elevated Powershell window.
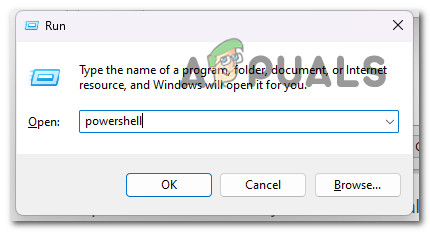
Access the Powershell window - At the User Account Control (UAC), click Yes to grant admin access.
- Once you’re inside the Powershell window, type the following command and press Enter to enable WSL + every required dependency:
Enable-WindowsOptionalFeature -Online -FeatureName Microsoft-Windows-Subsystem-Linux
- Reboot your PC and see if the problem is now fixed.
If the same kind of issue is still occurring, move down to the next method below.
4. Use the System Restore utility
It’s likely that a recent system modification actually caused this behavior if you only became aware of it after installing a specific driver or after an unplanned system outage. In this situation, you might attempt to return your PC to a time when everything was working as it should.
This has assisted numerous folks in solving their issue.
By using Windows System Restore tool, you can return your computer to a prior condition. This can be used to fix problems like malfunctioning systems where updating the WSL component is impossible.
Observe these methods to fix your computer and get it back in working order:
- Press the Windows key + R to start the Run command.
- Type “rstrui” in the Run box and hit Enter to start the System Restore wizard.
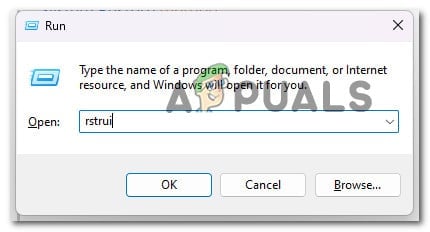
Open up the System Restore menu - On the next screen, select a different restoration point before pressing the Next button.
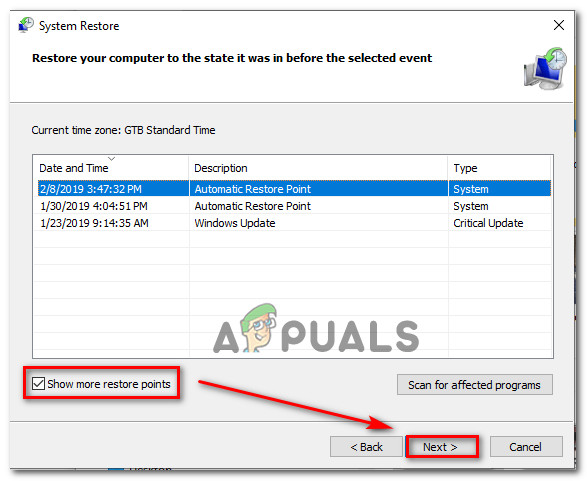
Open a Restore point Note: Select a restore point that was established before you realized this error, then click Next again.
- Click Finish when the restoration procedure has started, then watch as your computer restarts.
- Restart your Windows computer and see if you can update the WSL component.
If the problem is still not solved, proceed to the technique below.
5. Install every pending Windows Update
Installing any pending Windows updates before attempting to update the WSL component may be a good idea if you keep putting them off. A number of impacted users have indicated that the issue was quickly fixed once they updated their Windows installations to the most recent release.
Given that this problem extends back to Windows 10, Microsoft has had plenty of time to fix it. (even if unsuccessfully). Their most recent initiatives included several hotfixes that were distributed as cumulative updates for both Windows 10 and Windows 11. To see if the issue is fixed for you, install the missing hotfixes on your Windows machine.
Applying all pending Windows updates will allegedly frequently completely remedy the problem, according to many customers who have reported the Shell Infrastructure Host CPU resource hoarding issue.
This is the prospective solution you ought to test initially considering that Microsoft has previously issued a few upgrades designed to lessen this kind of problem.
To fix this problem, make sure you’re running the most recent build of your version of Windows 11 by utilizing the Windows Update feature.
To resolve the ‘WslRegisterDistribution Failed with Error: 0x80070050’, follow these steps to update Windows Update to the most recent version of Windows 11:
- Press Windows key + R to open the Run dialog box.
- In the text box, enter “ms-settings:windowsupdate” to open the Windows Update tab of the Settings application.
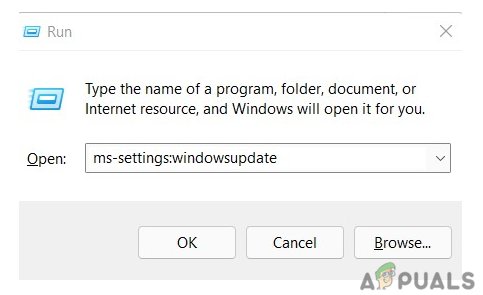
Access the Windows update Note: You may now encounter an account control prompt if you haven’t adjusted the default UAC settings. Click Yes to grant admin access in this instance.
- Next, choose to Check for Updates from the menu on the right side of the screen.
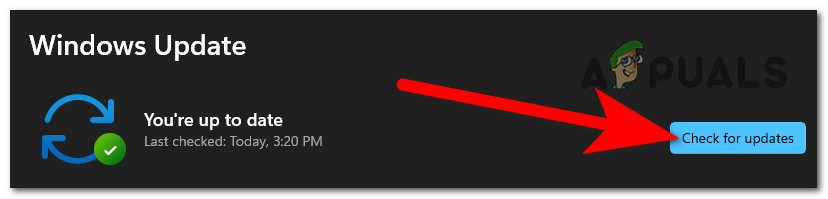
Checking for updates - Click Install Now to launch the local installation of the update after it has finished downloading locally.
- Check to see if the problem has been fixed by restarting your computer.
If you’ve installed every scheduled Windows update and you still have the issue, keep reading for the next potential fix below.
6. Deploy a CHKDSK scan
If you are still utilizing a hard disk drive (HDD), you should run CHKDSK to determine if the abnormal behavior is related to a failing disk sector. After this sort of scan, the damaged sectors are swapped out for their unutilized equivalents.
By doing a CHKDSK scan to swap out bad storage sectors for good ones, you may keep your storage hardware running for longer and confirm this scenario (for a few more months).
Running a Check Disk Scan will help you extend the life of your HDD in this situation by replacing damaged sectors with healthy ones. To rule out this scenario, try running a CHKDSK scan from an elevated CMD prompt.
Note: Fortunately, the built-in CHKDSK application in Windows can scan for faults and corruptions and repair any logical errors and damaged data that might have been left behind by a forcible deletion attempt.
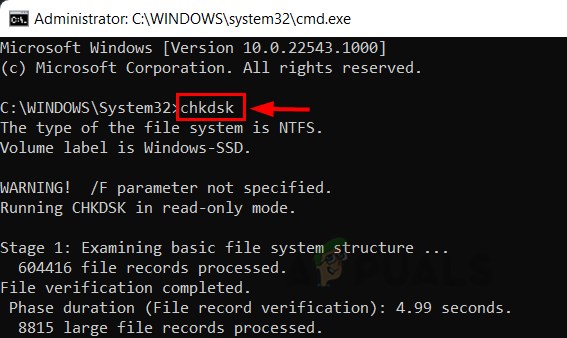
IMPORTANT: To grant CHKDSK the permissions it requires to repair damaged files, open it in an elevated CMD window. No matter what version of Windows you’re using, the procedures should function.
Once the CHKDSK scan is complete, restart your computer to see if the “WslRegisterDistribution Failed with Error: 0x80070050″ error is still visible.
If the same error is still occurring, move down to the next method below.
7. Perform a clean boot operation
It turns out that there are a lot of potential tools and third-party applications that could eventually interfere with the Windows Subsystem for Linux. Make sure your Windows installation is in a clean boot state and check to see if you can still update the WSL component. If not, one or more of them may be the real culprits behind this behavior.
If you’ve got this far without finding a workable solution, you should start focusing on a possible 3rd party offender who may be involved in the instability to update the WSL component.
You can anticipate dealing with this kind of problem as a result of an overly defensive security suite or as a result of a system optimizer program that ultimately has an impact on the power-related Kernel functions, according to other affected customers.
If this issue keeps coming up whenever you try to upgrade the WSL component, you should try a clean boot and see if the critical crashes are still happening.
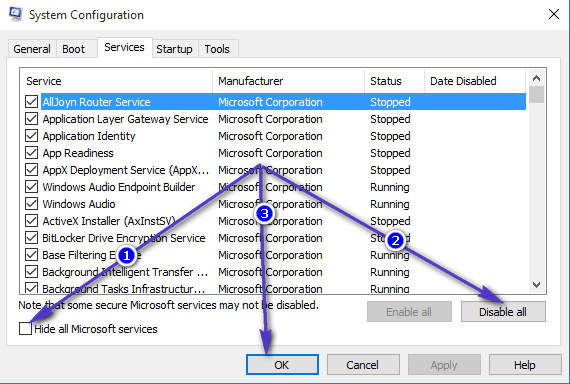
It is evident that a third-party processor starting service is the problem if you obtain a clean boot state and the error stops happening. Finding the problem is now just a matter of progressively re-enabling every previously deactivated item until you see the error reoccurring.
On the other hand, proceed to the next potential cure below if the same type of problem persists even after a clean boot state.
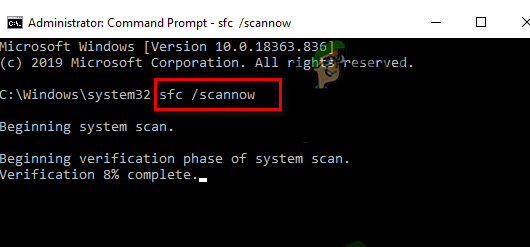
8. Deploy an SFC and DISM Scan
Investigating any system corruption issues should be your next step if you’re still unable to upgrade the WSL component.
The vast majority of possible problems that could be the cause of this error code can be fixed by immediately running SFC (System File Checker) and DISM (Deployment Image Servicing and Management) checks.
The two built-in utilities are essentially equal, but to enhance your chances of fixing the problem without having to perform a clean install or repair install, we advise running both types of scans quickly one after the other.
An SFC scan should be your first course of action. There is NO requirement for an Internet connection because this scan will use a local archive to replace damaged Windows files with intact ones.
Avoid stopping, restarting, or closing the elevated CMD window once this procedure has begun.
You run the risk of causing additional local problems for your PC’s HDD or SSD by doing this.
Restart your machine after the SFC scan is complete, and when it comes back up, start the DISM scan.
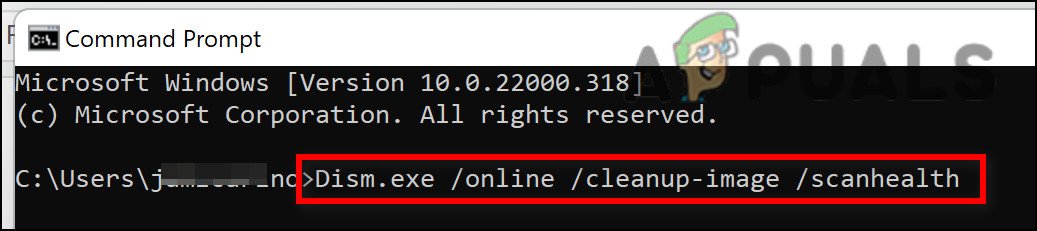
Notably, unlike an SFC check, DISM needs an ongoing Internet connection in order to replace corrupted files with their healthy counterparts. This is required because DISM receives fresh copies that are uncorrupted via a function of Windows Update, unlike SFC, which uses a local file archive.
Restart your computer once more to see if the issue has been resolved when the DISM scan is finished.
Continue to the next suggested solution below if the issue is still present.
9. Perform a Clean install or Repair install
If none of the aforementioned modifications have improved your situation, you likely have a serious system file corruption that is beyond the scope of typical techniques. If this is the case, you should simply reset any pertinent Windows components that might ultimately have an effect on the WSL component.
To do this, you can either execute a full OS drive wipe or just pick out the files associated with your operating system:
• Clean Install – This is the easier of the two procedures to carry out because you can do it directly from your Windows version’s menus and without the use of installation discs. Only if you don’t care what happens to the sensitive data you’re currently storing on the drive is this recommended.
• Repair install – This method, also known as an in-place repair, is suggested if the OS drive (C:) currently stores crucial information that you just cannot afford to lose. However, keep in mind that you must use appropriate installation media in order for this to function. The main advantage of this strategy is the preservation of all of your personal content, including games, apps, and user preferences.


