Fix WinGet COM Server High CPU Usage FAST! (Easy Fix)
WinGet COM Server is a Windows process that runs when something is being installed or updated in the background. As such, this process can use your CPU and the percentage can vary depending on what is being installed in the background.
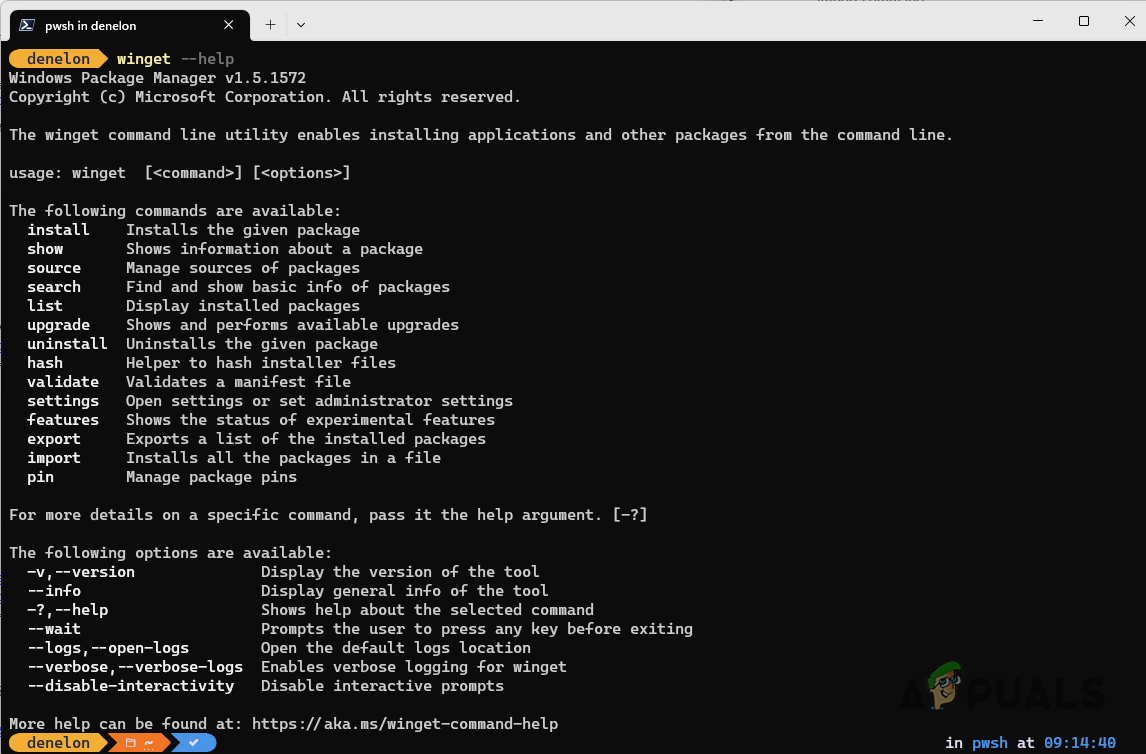
If a large number of applications are being updated in the background, the WinGet COM Server will utilize more CPU to get the job. Before we proceed with showing how to lower the CPU usage of the process, let us develop a better understanding of the WinGet utility in Windows.
What is WinGet?
WinGet is a command line utility that is used by Windows to install apps and other modules on your computer. WinGet is another name for the Windows Package Manager, so it is completely safe. If you see the process in your Task Manager window every now and then, do not fret, as you are not infected or at risk.
With that said, the WinGet COM Server is essentially used to communicate with other applications and processes on your computer. This is complementary to the WinGet utility and is required for the package manager to operate properly.
We will use this article to describe how you can lower the CPU usage of the WinGet process on your computer, so just follow along.
1. Update WinGet
While WinGet comes as a built-in feature in Windows now, you are still able to update it via the Microsoft Store. The utility can be found in the Microsoft Store by the App Installer name, which is quite self-explanatory.
Updating the utility on your system can often help with any inconsistencies that are leading to frequent high CPU usage of the process. To do this, follow the instructions below:
- First, open the Microsoft Store by searching for it in the Start Menu.
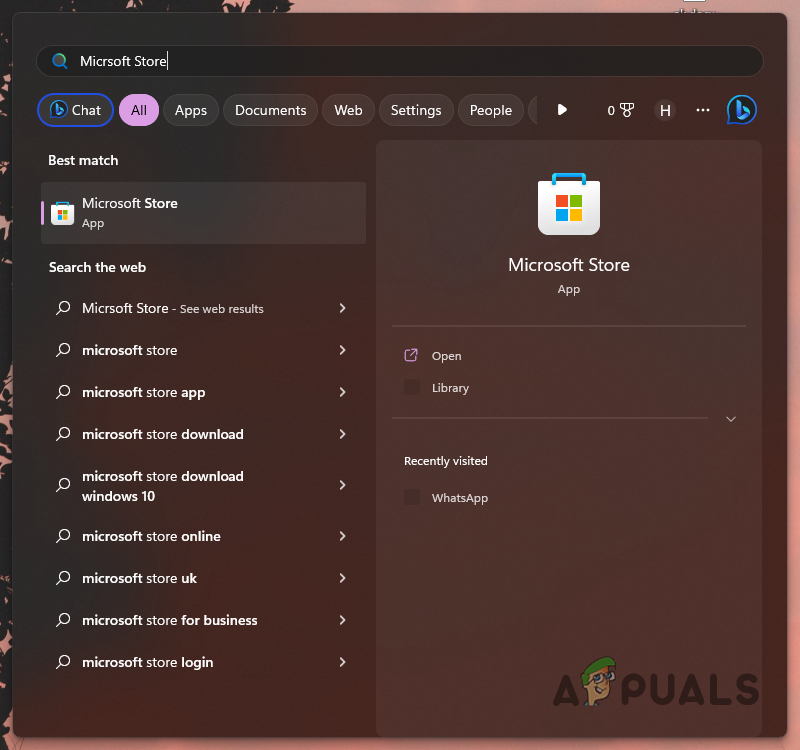
Opening Microsoft Store - Then, in the Microsoft Store window, navigate to the Library by clicking the icon on the left toolbar.
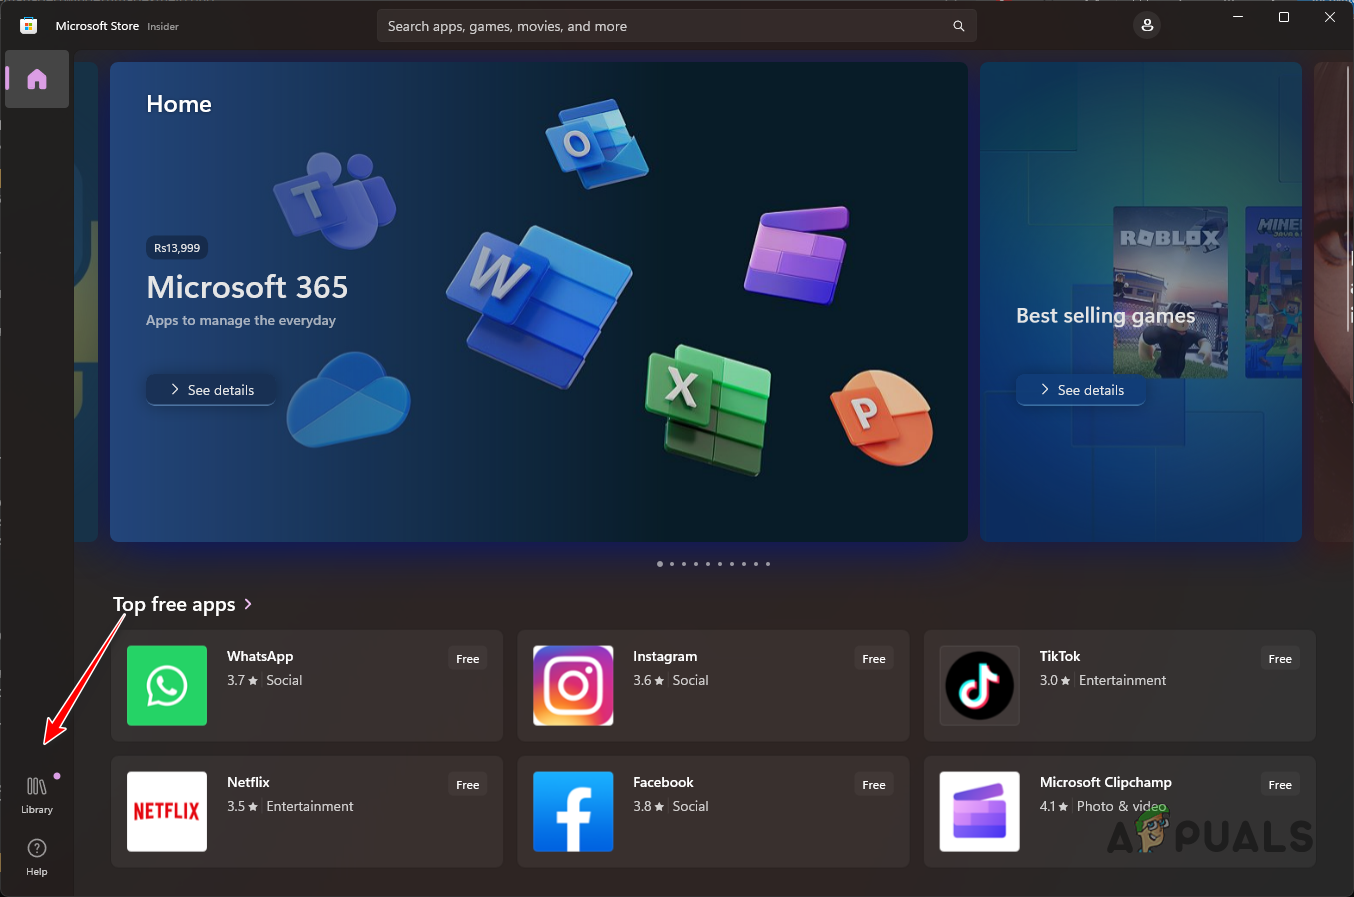
Navigating to Library - From the list, locate App Installer and click on it.
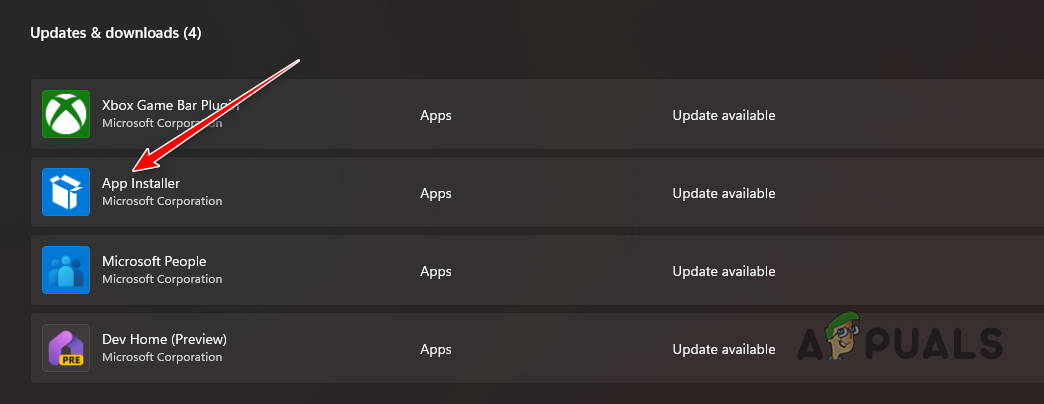
Navigating to App Installer - Finally, click the Update option to install any available updates to the utility.
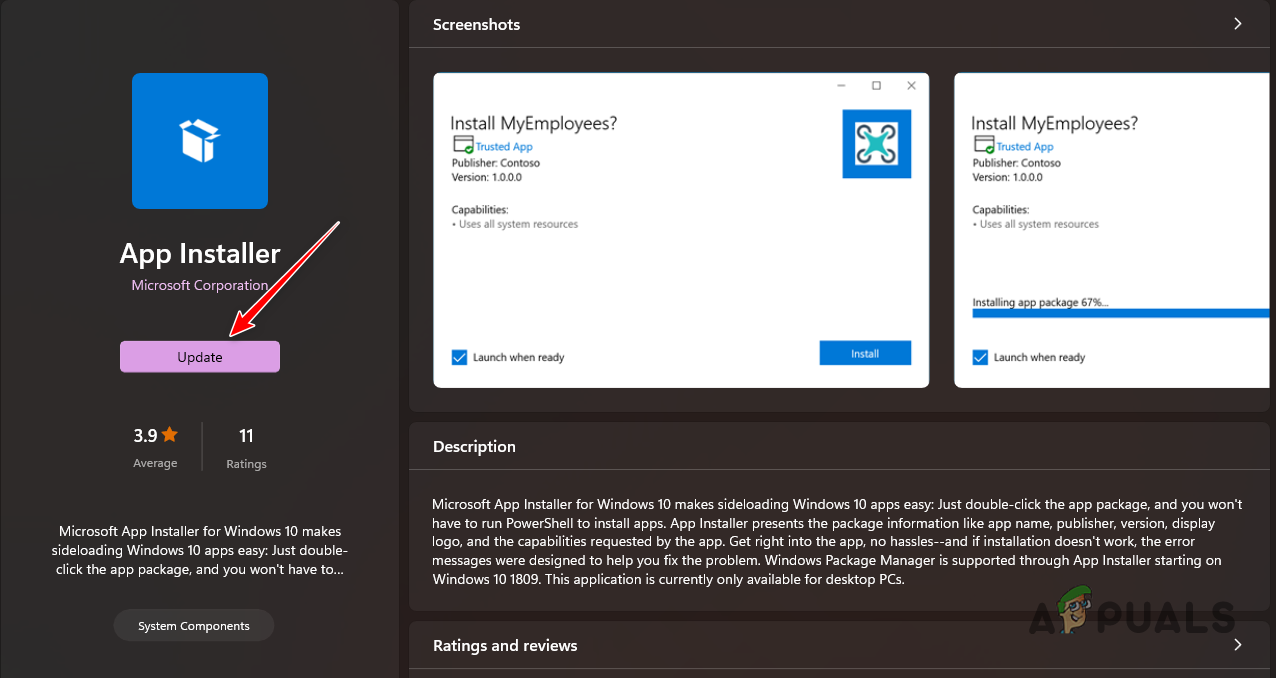
Updating App Installer - See if the high CPU usage persists after updating the app.
Alternatively, you can also download the latest version of WinGet directly from the official GitHub repository and run the setup file to update the tool. Make sure you download the .msixbundle file from the Assets section to install the latest version of the app.
2. Disable Unnecessary WinGet Sources
WinGet uses online repositories to download and install any apps on your computer. It uses the Microsoft Store repository by default. However, if you have ever used the app to provide additional links, it will use them to download and install any additional apps too.
You will have to remove the unnecessary WinGet sources to remove the possibility of installing any other unwanted apps. As a result, this will reduce the load and reduce the CPU usage. To do this, follow the instructions below:
- First, search for the Command Prompt in the Start Menu. Click the Run as administrator option to open an elevated window.
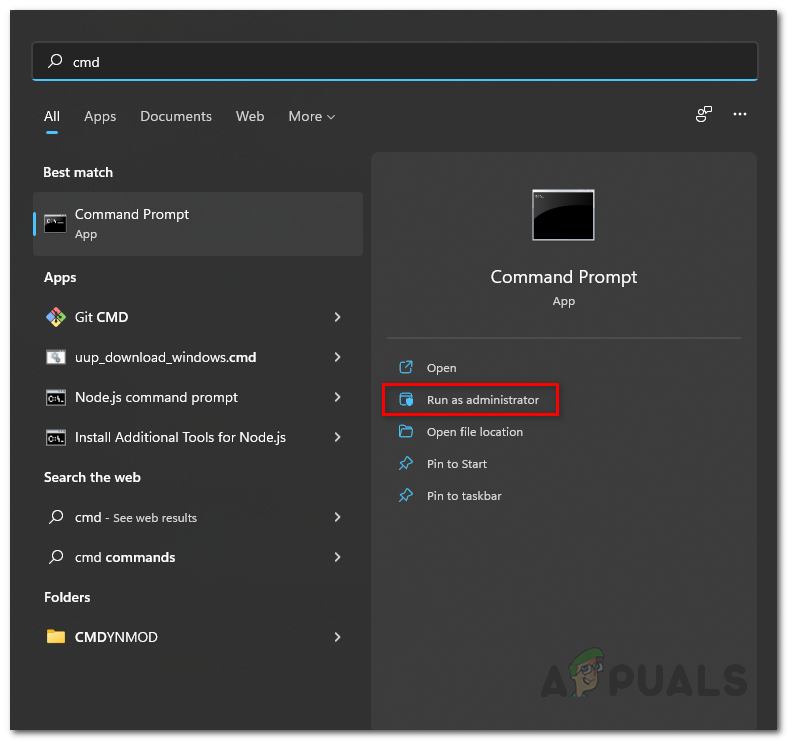
Opening the Command Prompt - After that, type in the following command and press Enter:
winget source list
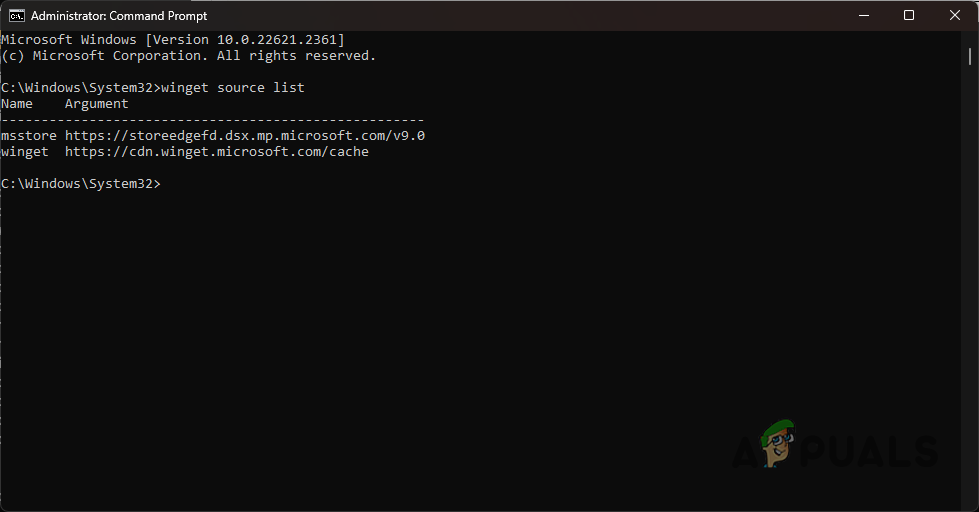
WinGet Sources - Then, use the following command to remove any source from the list:
winget source disable <name>
- Make sure to replace <name> with the name of the source shown in the output.
3. Re-register WinGet App
In some instances, the problem in question can be related to the WinGet utility files on your computer. In such a scenario, you will have to reset the utility by re-registering it. Since the tool comes by default from Windows, you can easily achieve this via a single command in the PowerShell window.
Re-registering the tool will reset the associated configuration and settings so you will be able to start afresh. Follow the instructions below to do this:
- Open the Start Menu and search for PowerShell. Click the Run as administrator option on the right.
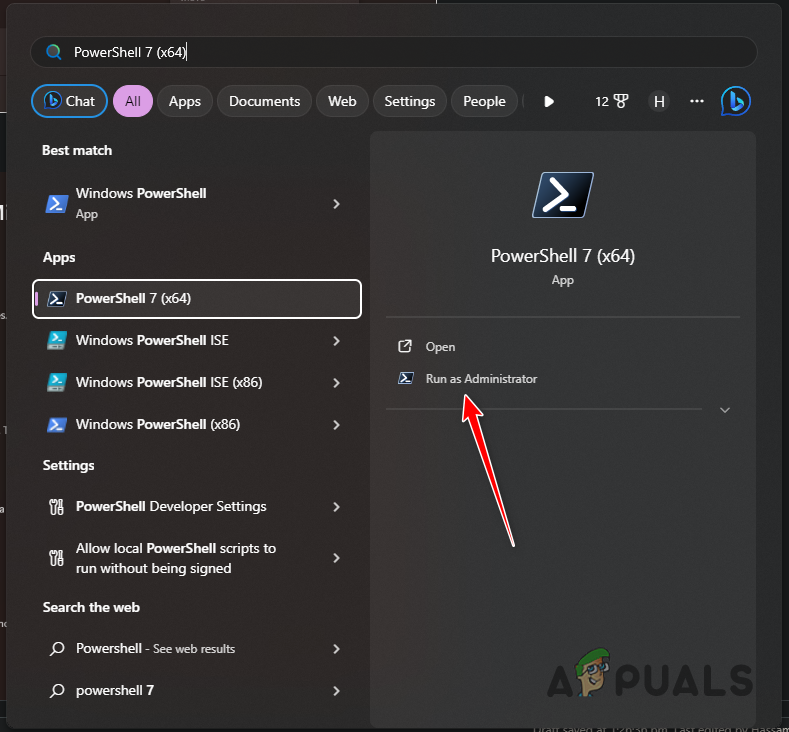
Opening PowerShell - Then, copy and paste the following command in the PowerShell window.
Add-AppxPackage -DisableDevelopmentMode -Register "C:\Program Files\WindowsApps\Microsoft.Winget.Source_2021.718.1322.843_neutral__8wekyb3d8bbwe\AppXManifest.xml" -Verbose
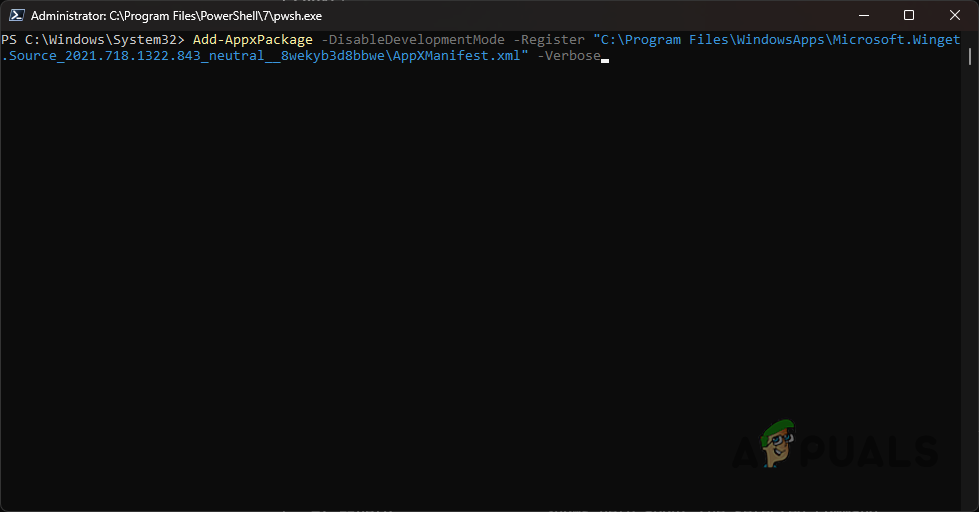
Registering WinGet - Once you do that, reboot your computer and see if the problem persists.
4. Repair System Files
Another potential cause for the high CPU usage of the WinGet utility can be the system files on your computer. This can happen when the system files are damaged, causing different abnormalities across your PC.
In such an instance, you will have to repair your system files via various system tools. You can use the System File Checker (SFC) and Deployment Image Servicing and Management (DISM) utilities to scan and repair your system files.
These utilities will perform scans across your computer and in case of any corruption, the system files will be replaced from a cache. Follow the instructions below to do this:
- First, open the Start Menu and search for the Command Prompt. Click the Run as administrator option on the right.

Opening the Command Prompt - Then, type in the following command and press Enter in the Command Prompt window:
sfc /scannow
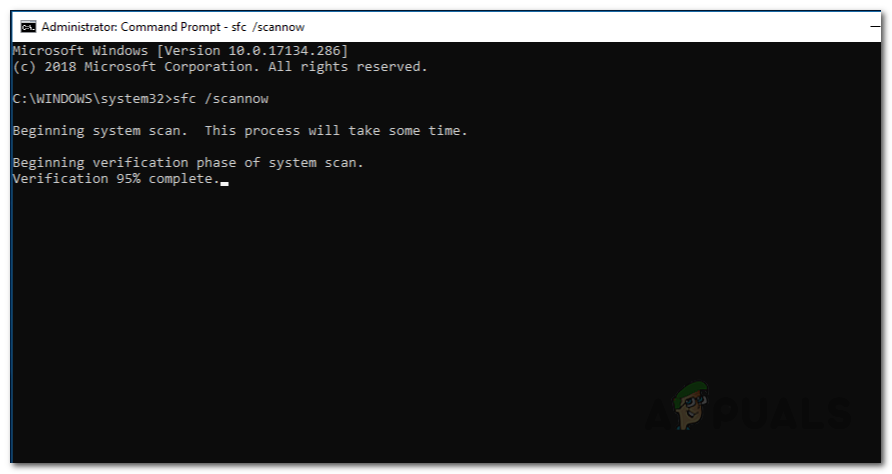
Running SFC Scan - Once the scan is complete, enter the following command in the Command Prompt window
DISM /Online /Cleanup-Image /RestoreHealth

Running DISM Scan - Wait for it to complete.
- Then, restart your PC and see if the issue is still occurring.
5. Perform Clean Boot
Finally, the third-party services or processes on your computer can also conflict with the WinGet utility which can lead to the high CPU usage issue. In such a circumstance, you will need to perform a clean boot. This will help you identify if the issue is being triggered by a background process.
This is because a clean boot starts your system with only the Windows-required services running in the background. All of the other services and apps are disabled on startup. If the problem goes away in clean boot, it will be evident a background app or service is resulting in the problem.
In such an instance, you will have to find the culprit and remove it from your computer. One way of doing this would be to enable the services back one by one. Follow the instructions below to perform a clean boot:
- First, press the Windows key + R shortcut on your keyboard to open the Run box.
- Then, enter msconfig in the Run command and click OK.
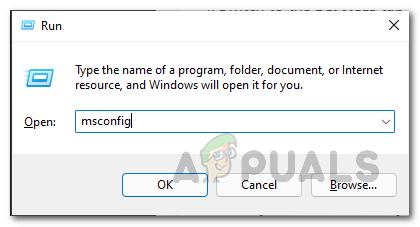
Running MSCONFIG in Run - After that, switch to the Services tab in the System Configuration window.
- Now, tick Hide all Microsoft services to remove system services from the list.
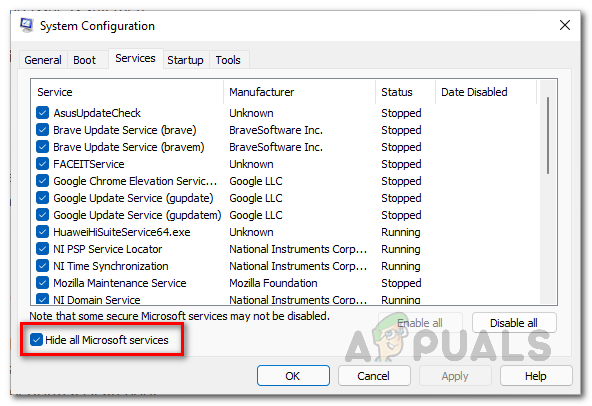
Hiding Microsoft Services from the List - Use the Disable all button to disable the third-party services.
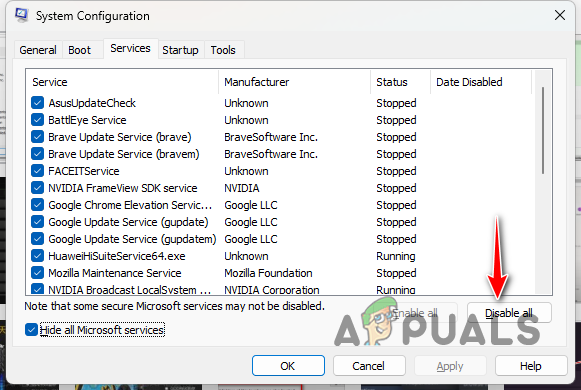
Disabling Background App Services - Then, click Apply.
- Once you do that, switch to the Startup tab.
- In the Startup tab, select the Open Task Manager option.
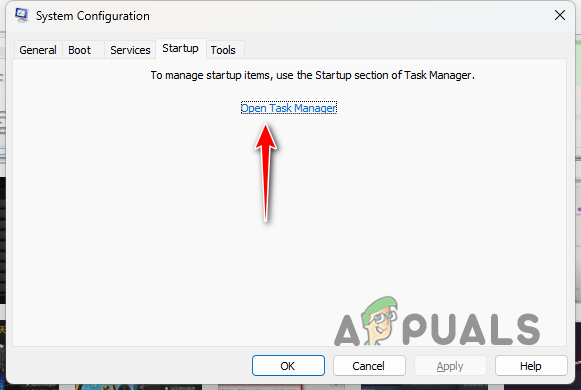
Startup Tab in System Configuration - Now, disable all of the startup apps by selecting them one at a time and clicking Disable.
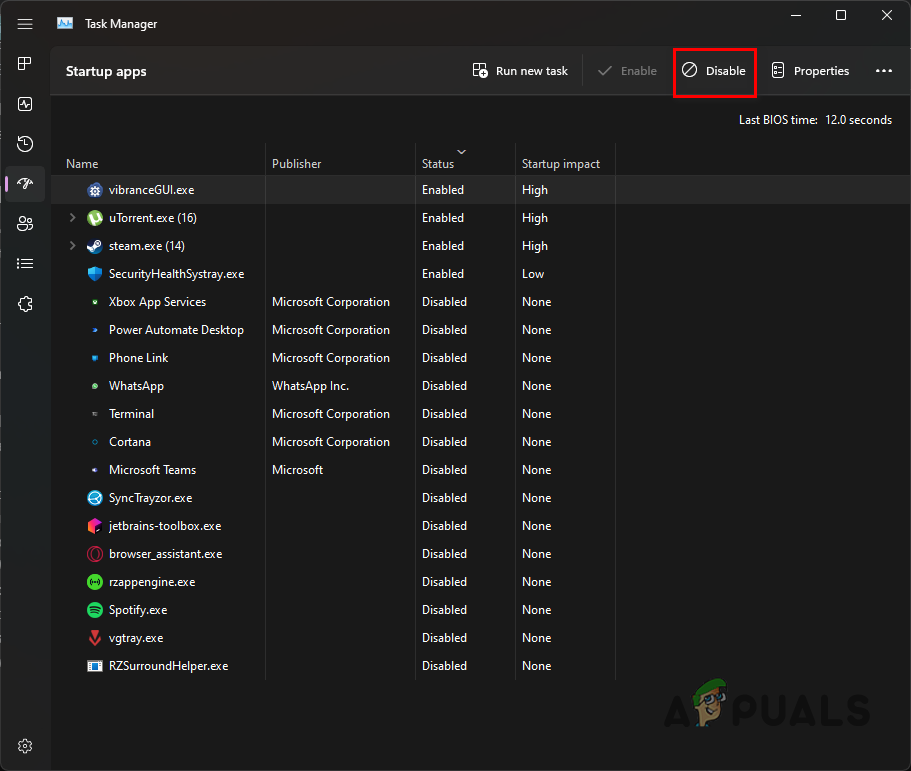
Disabling Startup Programs - Finally, restart your computer to perform a clean boot.
With these solutions, you should be able to overcome the high CPU usage of the WinGet COM Server on your computer. The issue is mostly related to the utility itself and you can often circumvent it by re-registering the tool on your system.
 Reviewed by


