SOLVED: Windows Update Error Code: (0x80070003)
 Reviewed by Muhammad Zubyan
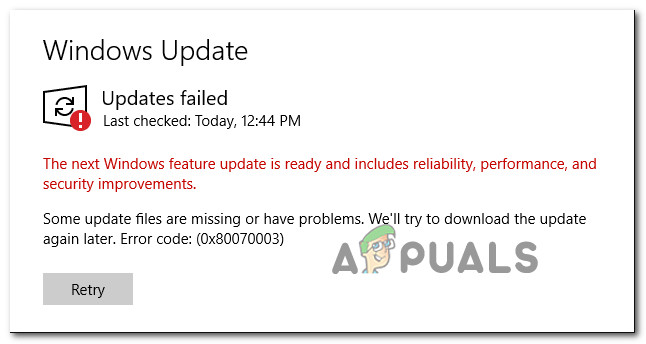
Error code 0x80070003 occurs when Windows is trying to install a system update. Deconstructing this error code, the initial four digits (0x800) belong to the system error code range, and the subsequent four digits (0x70003) pertain to a precise error known as (ERR_PATH_NOT_FOUND). This error code has a singular interpretation, which applies specifically when faced with challenges during the update installation process.
Main cause of this error:
As confirmed by Microsoft, The BITS (Background Intelligent Transfer Service), a service that is responsible for configuring and installing Windows update causes this error code when it fails to start properly.
Basically, error 0x80070003 during update installation indicates that Windows is encountering difficulties in locating the necessary files to properly apply the update, potentially due to issues with file paths or references.
Other reported causes of this error:
After we’ve investigated this particular issue thoroughly, it turns out that there are actually several different underlying causes that might end up causing this error code. Here’s a shortlist of culprits:
- Common WU inconsistency: Running the Windows Update Troubleshooter and applying recommended fixes can resolve issues caused by common update inconsistencies.
- Corrupted DataStore logs: Deleting the DataStore.edb file can help if corrupted references in the Windows log file are causing the problem.
- Stuck Windows Update service: Sometimes, essential services get stuck in a limbo state, obstructing update installation. Restarting necessary services through the Services screen can resolve this.
- Corrupted WU dependencies: The error might be due to corrupted Windows Update dependencies. Resetting the entire Windows Update component can address this.
- Broken Windows Update component: If the Windows Update component is malfunctioning, quick fixes include using Microsoft Update Catalog, the Media Creation Tool, or the Windows Update Assistant.
- System File corruption: Corruption affecting WU system files or associated dependencies can lead to the error. Running SFC and DISM scans or utilizing System Restore snapshots can help. In extreme cases, a clean install or repair install might be necessary.
Now that we went over every potential scenario that might end up causing the 0x80070003 error in your case, let’s go over each verified fix in order until you find the method that’s effective in your case.
1. Reset the BITS Service Configuration
As this issue is mainly caused by BITS service failing to start, it indicates that the BITS service is misconfigured. To resolve this issue, we are going to reset the BITS service and it’s configurations to default by following the instructions provided by Microsoft. Follow these steps:
- Right-click on the Start Menu and Press ‘Command Prompt (Admin)‘
- Then put these commands in one-by-one and press enter:
sc config bits binpath= "%systemroot%\system32\svchost.exe –k netsvcs"
sc config bits depend= RpcSs/EventSystem
sc config bits start= delayed-auto
sc config bits type= interact type=own
sc config bits error= normal
sc config bits obj= LocalSystem
sc privs bits privileges= SeCreateGlobalPrivilege/SeImpersonatePrivilege/SeTcbPrivilege/SeAssignPrimaryTokenPrivilege/SeIncreateQuotaPrivilege
sc sidtype bits unrestricted
sc failure bits reset= 86400 actions=restart/60000/restart/120000?
- Now restart your computer and try updating Windows again.
2. Run the Windows Update Troubleshooter
Windows Update Troubleshooter, is designed to automatically identify and fix common Windows Update problems.
If you haven’t tried this method yet, follow the instructions below to run the Windows Update Troubleshooter and apply the recommended fix automatically:
- Open a Run dialog box by pressing the Windows key + R.
- Type ‘control’ inside the text box and press Enter to open up the Control Panel interface.

Accessing the Control Panel Menu Note: You may be prompted by the User Account Control – if so, click Yes to grant admin access.
- Once you’re inside the Control Panel window, use the search function to look for ‘troubleshoot’.
- From the list of results, click on all the different categories Troubleshooting.

Accessing the Troubleshooting tab - Go under System and Security and click on Fix problems with Windows Updates.

Fix Problems with Windows Update - After you get to the first Windows Update Troubleshooter prompt, click Next and wait for the initial scan to finish.
- If a viable fix is found, click on Apply this fix to apply it to the recognizable scenario.

Apply the recommended fix Note: Keep in mind that with some types of recommended fixes, you might be required to do a series of manual steps.
- After applying the fix successfully, restart your PC and attempt to install the failing update once again.
If the Windows Update still fails to install with the same 0x80070003, move down to the next method below.
3. Clear the DataStore Folder
- First things first, open up File Explorer by pressing the Windows key + E or by clicking on the appropriate icon inside the taskbar.
- Once you’re inside File Explorer, navigate to the following location:
C:\Windows\SoftwareDistribution
- Once you’re inside the SoftwareDistribution folder, double-click on DataStore.

Accessing the DataStore menu - From the SoftwareDistribution folder, double-click on Download from the list of subfolders.
- Once you’re inside the Download folder, press Ctrl + A to select everything inside, then right-click on a selected item and click on Delete from the context menu.
- After the Download folder of DataStore is completely empty, restart your PC and wait for the next startup to complete.
- After your PC boots back up, attempt to install the pending update once again and see if the problem is now fixed.
In case the same issue is still occurring, move down to the next method below.
4. Restart the main Windows Update Service
- Press Windows key + R to open up a Run dialog box.
- Next, type ‘cmd’ inside the text box.
- Press Ctrl + Shift + Enter to open up an elevated Command Prompt window with admin access.

Open up a CMD prompt - At the User Account Control prompt, click Yes to grant admin access to the CMD Prompt.
- Type the following commands in the same order and press Enter after each one to effectively restart and re-register the main Windows Update service:
net stop wuauserv
regsvr32 %windir%\system32\wups2.dll
net start wuauserv
- Once every command has been processed successfully, close the elevated Command Prompt and attempt to install the failing update once again.
If the same kind of error is still occurring, move down to the next method below.
5. Reset the Windows Update component
- The first step is to open a Run dialog box by pressing the Windows key and R simultaneously.
- After that, type “cmd” into the text box and press Ctrl + Shift + Enter to open an elevated Command Prompt with admin access.
- Keep in mind that you will need to click ‘Yes’ when the User Account Control prompt appears in order to grant administrative privileges.
- Once you’re in the elevated Command Prompt, use the following commands (in order) to stop all Windows Update-related services:
net stop wuauserv

net stop cryptSvc

net stop bits

net stop msiserver
Note: These commands will effectively stop the Windows Update Services, MSI Installer, Cryptographic services, and BITS services.
- After every relevant service has been stopped, you can clear and rename the SoftwareDistribution and Catroot2 folders by using these commands:
ren C:\Windows\SoftwareDistribution SoftwareDistribution.old
ren C:\Windows\System32\catroot2 Catroot2.old
Note: These two very important folders store updated files used by the WU component. Renaming these folders will force your OS to create new healthy equivalents that will not be affected by corruption.
- Now that the folders have been cleared, run the following commands to re-enable the services we disabled earlier:
net start wuauserv
net start cryptSvc
net start bits
- Restart your PC one final time and see if the 0x80070003 error has been eliminated.
If the same kind of issue is still occurring, move down to the next method below.
6. Install the pending update manually
- Start by visiting the home page of the Microsoft Update Catalog (MUC) directory in your preferred browser.
- In the MUC root directory, use the search function to look for the update that’s failing in your particular case (for example KB5005188).

Install the failing update - When the results come up, go through them and choose the appropriate update versions that you need to install, taking into account your current OS architecture and the Windows versions you’re using.

Download and install the correct update via MUC - Once you know which update is compatible with your machine, click on the Download button next to the correct driver.
- After the download is finally done, open File Explorer and navigate to the folder where the update was downloaded (most likely in the Download folder).
- After you’re inside the right folder, find the .ini file and right-click it before clicking Install from the context menu.

Install the update from the ini file - Follow the remaining directions on the screen to finish installing the Windows Update that was failing to install previously.
- Restart your PC one final time and see if the problem is now fixed.
If the issue is still not fixed as you’re seeing the 0x80070003 even when attempting to install the pending update using the Microsoft Update Catalog, move down to the next method below.
7. Bring Your Windows up to date using Windows Update Assistant
- Start by opening up any browser and visit the official download page of Windows.
- Once you get to the correct page, click on the Update now button under (Windows 10).

Update Now - Wait until the download is complete, then right-click on the executable that you’ve just downloaded and click on Run as Administrator.
- At the confirmation prompt, click on Yes to grant admin privileges.
- Once you’ve successfully opened the Windows Update Assistant, click on the Update Now button and wait until the update is downloaded.

Install the latest update available via Windows Update - Once the download is complete, you will be asked to restart your PC in order to allow the update to install.
- Once your PC restarts you will see a “Finishing Up’ window as the installation of the pending update is complete.
If the steps above we’re interrupted at some point by the 0x80070003 error (or a different one), try the next method below.
8. Bring Your Windows up to date using Media Creation Tool
- Open any browser and visit the official download page of Windows.
- Once you arrive at the correct page, click on the Download button (under Create Windows 10 installation media).

Downloading the latest version of the media creation tool - Once the executable of the tool is downloaded locally, double-click on it and click Yes at the UAC (User Account Control) prompt.
- Accept the Terms of Service, then select the Upgrade this PC now toggle before clicking on Next.

Upgrading this PC - Wait for all the downloads to finish, then choose to Keep everything in order to ensure that you aren’t clean installing.
- Follow the remaining instructions to complete the upgrade operation, then restart your PC and see if the problem is now fixed.
If you’re still experiencing the 0x80070003 error during the updating process or something else interrupts the upgrading, move down to the next method below.
9. Deploy SFC and DISM Scans

Note: Keep in mind that this tool only works locally and won’t require an internet connection.
After the SFC scan is complete, reboot your computer and check if the issue has been fixed once the startup is finished.
If you’re still seeing the 0x80070003 error when trying to run the Windows Update Troubleshooter, try running a DISM scan next and follow the on-screen prompts to finish up.

Important: One key difference between SFC and DISM is that DISM uses a sub-component of Windows Update to download healthy equivalents of any corrupted system files it finds. Because of this, you need to make sure you have a stable internet connection before beginning this operation.
After the DISM scan is successful, restart your computer once again and see if that has fixed the 0x80070003 error. If not, move on to the next potential fix below.”
10. Deploy a Clean Install or Repair install
If you haven’t had any success so far, it’s likely because you’re dealing with some kind of inconsistency that can’t be fixed in a conventional way.
There are two available options:
- Repair install (in-place repair) – This procedure only touches your system files and leaves everything else intact. This should be your first approach if you have essential personal data that you can’t afford to lose. But keep in mind that you’ll need compatible installation media.
- Clean install – This is the easiest procedure out of the bunch. You can deploy this operation without compatible installation media, but keep in mind that you’ll lose any personal files, documents, and media present on the operating system partition.
Reviewed by Muhammad Zubyan


