Resolve Windows Update Error 80240025
Steps to Fix Windows Update Error 80240025
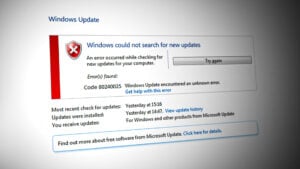
Some Windows users are unable to install pending updates as they end up seeing the error code 80240025 right after an update fails to install. This issue occurs on Windows 7, Windows 8.1, and Windows 10.

After investigating this particular issue, it turns out that there are several underlying causes that might trigger this error code when attempting to install a pending Windows Update. Here’s a list of potential culprits:
- Registry value denying the installation of the pending update – As it turns out, one of the most common instances that will cause this error code is a registry key that is effectively preventing the installation of new pending Windows Update. If this scenario is applicable, you can fix the issue by finding the problematic key and modifying it or deleting it completely.
- Windows Update Component Glitch – The Windows Update component is prone to become affected by some type of temporary file corruption that might end up interfering with the installation of new updates. In this case, you can resolve the issue by resetting every relevant Windows Update component.
Now that you are familiar with every scenario that might cause the Windows Update error 80240025, here are a couple of fixes that other affected users have successfully used to get to the bottom of this issue:
1. Disable a Registry Key (if applicable)
If your computer is connected to a public/work server or network, there’s a chance that you’re seeing this error code because a rule (imposed at the Registry Level) is denying new pending Windows Updates from getting installed.
A rule of this kind is common in those situations where the network administrator tries to limit the bandwidth usage whenever a new update is pushed by Microsoft.
In case you suspect that this scenario is applicable, you can fix the issue by identifying the Group Policy setting causing this issue (most likely DisableWindowsUpdateAccess key) and setting its value to 0 in order to prevent it from interfering with the Windows Update component.
For step by step instructions on how to do this, follow the instructions below:
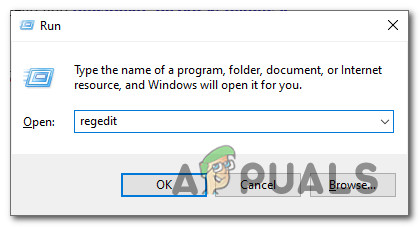
- Press Windows key + R to open up a Run dialog box. Next, type ‘regedit’ inside the text box and press Enter to open up the Registry Editor. When you see the User Account Control prompt, click Yes to grant administrative privileges.

Opening an elevated Registry Editor window - Once you’re inside the Registry Editor, use the left-hand pane to navigate to the following location:
HKEY_USERS\S-1-5-18\Software\Microsoft\Windows\CurrentVersion\Policies\WindowsUpdateNote: You can either navigate to this location manually or you can paste the location directly into the navigation bar and press Enter to get there instantly.
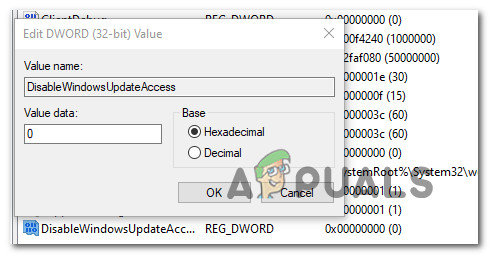
- Once you arrive inside the correct location, look for a Registry value named DisableWindowsUpdateAccess.
- If you see it, double-click on it, set the Base to Hexadecimal, and the Value data to 0.

Configuring the DisableWindowsUpdateAccess key Note: Instead of changing the value of DisableWindowsUpdateAccess, you can also delete it completely if you don’t plan on using it ever again to limit the installation of new opening Windows Updates.
- Once this modification is successfully enforced, reboot your computer and see if the issue is now fixed.
If this method was not successful in resolving the Windows Update Error 80240025 or the DisableWindowsUpdateAccess was not present on your computer, move down to the next potential fix below.
2. Reset Windows Update Components
If the first fix above was not applicable in your particular situation, you should start troubleshooting a potential issue that is affecting the Windows Update component.
Most users dealing with this particular Windows Update Error code (80240025) have confirmed that they finally managed to fix the issue after using an elevated Command prompt to effectively reset every relevant WU (Windows Update) dependency.
More often than not, this type of issue occurs because of one or more WU (Windows Update) components that are currently stuck in a limbo state (they’re neither open nor closed). In this case, you will be able to fix the problem by resetting all WU components that are involved in the updating process.
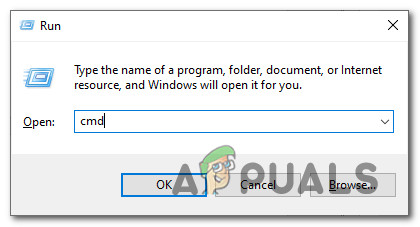
- Start by pressing Windows key + R on your keyboard to open up a Run dialog box. Then, type “cmd” inside the text box and press Ctrl + Shift + Enter to open up an elevated Command Prompt.

Opening a CMD prompt Note: When you see the UAC (User Account Control) prompt, click Yes to grant administrative privileges.
- Once you’re inside the elevated Command Prompt, type the following commands in order and press Enter after each one to stop all WU related services:
net stop wuauserv
net stop cryptSvc
net stop bits
net stop msiserver
Note: These commands will stop the Windows Update Services, MSI Installer, Cryptographic services, and BITS services.
- After every relevant service has been stopped, run the following commands to clear and rename SoftwareDistribution and Catroot2 folders:
ren C:\Windows\SoftwareDistribution SoftwareDistribution.old
ren C:\Windows\System32\catroot2 Catroot2.old
Note: These two folders are holding updated files use by the WU component. Renaming these folders will force your OS to create new healthy equivalents that will be free of any temporary data that might currently be causing the issue.
- Now that the folders have been cleared, run the following commands to re-enable the services that we’re previously disabled:
net start wuauserv
net start cryptSvc
net start bits
net start msiserver
- Reboot your computer once again and see if the issue has been resolved at the next computer startup by attempting to install the pending updates once again.


