Fix: Turn windows features on and off is blank or empty in Windows 11
There might be many instances where the user has to enable or disable certain features on their windows system which can be done using turn-windows-features-on-or-off window.
Many Windows users have reported that when they tried to access the features list in the turn windows features on or off window, it was all blank/empty even after waiting for several minutes.
So we have analyzed this problem keeping in mind all the factors that might be responsible for this and compiled a few solutions that might help the users in resolving this issue with ease.
Let’s have a look at them one by one!
Choose Windows Modules Installer Service Startup type as Automatic
If the Windows Modules Installer Service startup type is manual, then it needs to be started manually when the system is turned on. This service is actually responsible for the installation of the recent windows update release and other optional components.
Therefore, the turn windows features on or off is empty problem can be solved by setting the windows modules installer startup type as automatic.
Let’s see how to do it in a few easy steps given below.
- Open the Run command box by pressing Windows + R keys simultaneously.
- Type services.msc and click OK.
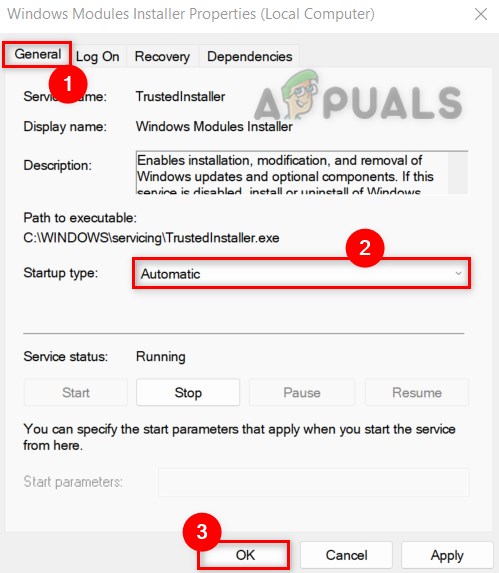
- In the Services window, scroll down and double-click on Windows Modules Installer.
- Select Automatic from the list of Startup type options under the General tab.
- Click OK to close the window.
- Finally, close the Services window.
Now check if this solution worked for you. If it did not work, then try our other fixes given below.
Disable Hide “Windows Features” option in Local Group Policy Editor
If you are using a Windows Pro version, then you can access the local group policy editor on your system. This gpedit allows users to change the settings for modifying the policy that applies to all the users of the computer. Using gpedit, you can disable the hide Windows Features option that should solve this problem by allowing access to the list of optional features on your Windows 11 system.
Please follow these steps given below:
- Press win + R keys together on your keyboard to launch the Run dialog box.
- Then, type gpedit.msc in the run box and hit the Enter key to open Local Group Policy Editor on your system.
- On the left side panel, Navigate using the path given below:
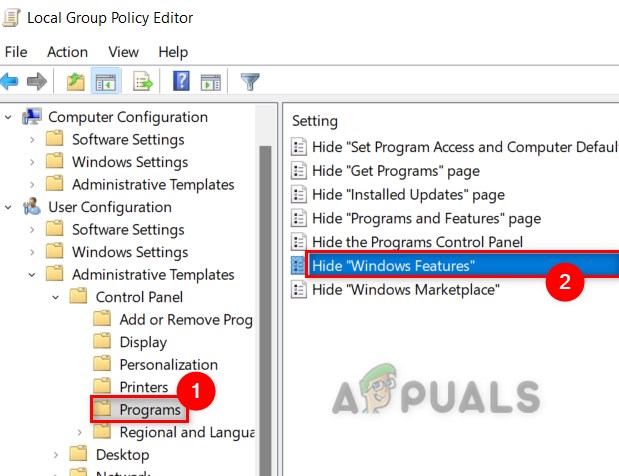
User Configuration > Administrative Templates > Control Panel > Programs - Make sure Programs is selected on the left panel and double-click on Hide “Windows Features” option present on the right side of the editor as shown below.
Double-click Hide “Windows Features” option - In the Hide Windows Features window, Select the Disabled radio button and click Apply and OK.
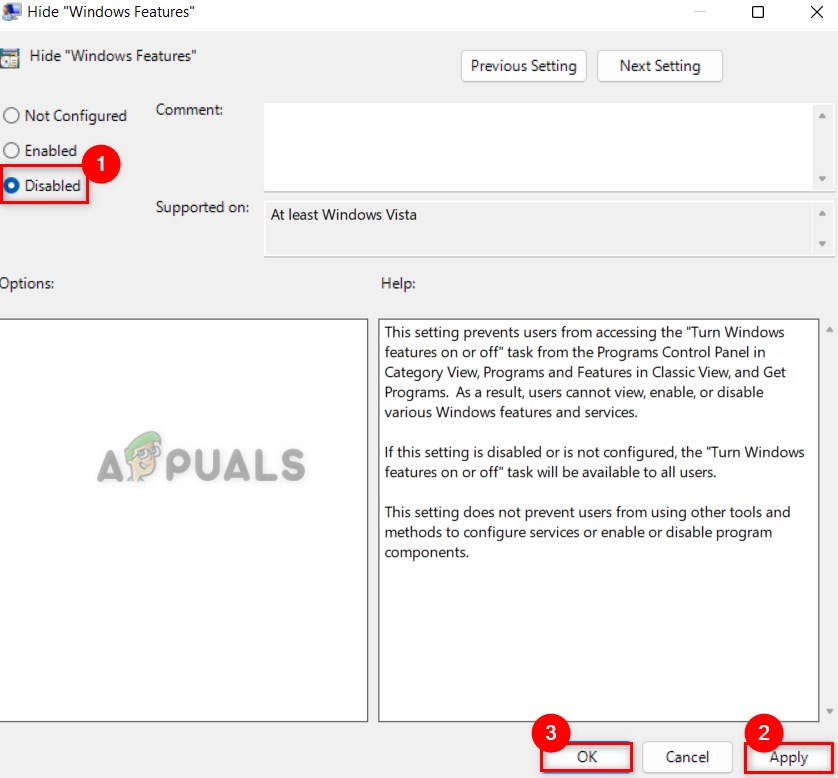
Disable Hide”Windows Features” - Kindly close the Local group policy editor on your system.
Hope this solved your problem.
Perform System File Checker scan and DISM Scans
Sometimes, the real culprit can be the corrupted files/system files on your system which act silently in the background without coming into the picture. Corrupted system files cause severe damage to the system either while system startup or cannot delete a file or cannot access certain features on the system.
Therefore, scanning the system for corrupted files using SFC and DISM scan is the best possible way. We recommend the users perform the SFC and DISM scan on their system. If any corrupted files are detected, then please replace or delete them and check if the problem got solved.
Try creating a new Administrator account
While certain users are still wondering about the issue, a few of the users have tried creating a new administrator account. When they logged in with it, they found that they are able to access the turn windows features on or off window with the list of optional features installed on their system.
Therefore, we recommend our users try creating a new administrator account on their system and check if the problem gets resolved after logging in with the new account.
Hope this solves your issue.
Restore your system using System Restore
If any user is reading this, that means none of the above methods worked for them. Therefore, this seems to be the last option but yet it is an effective and ultimate solution that solves this problem and that is restoring the system.
The system restore manages and takes back to the last saved point where the system was working very much fine without any errors or problems. So, we recommend the users restore their system using system restore by clicking here to see the reference article.


