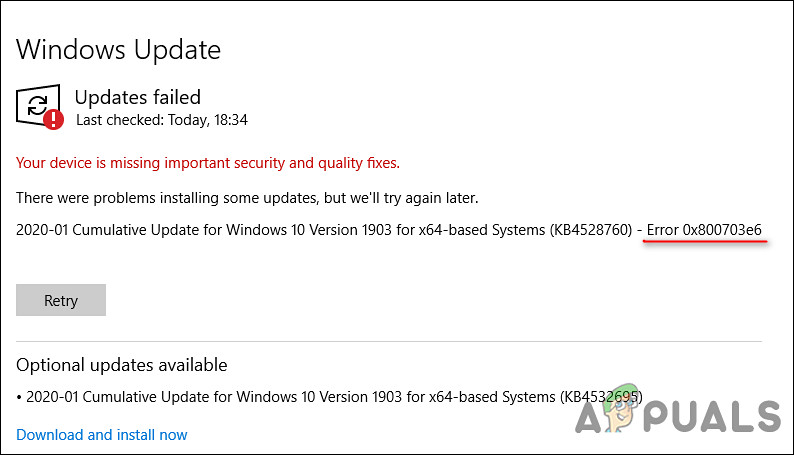
Fix: Windows Update Error Code 0x800703E6
Recently, there have been reports of several users facing the error code 0x800703e6 upon their attempt to install Windows updates. The said error specifically seems to occur while attempting to install the KB4023057, KB5003214, KB5003173 updates on Windows 10 versions 1903, 1909, 2004, and 20H2. Some users also experienced it while attempting to install the KB5005033 update for Windows 10 version 21H1.
We had a look into the issue and discovered that it is typically caused by the following factors:
- Antivirus interruption – Third-party security suites are known to interfere with Windows Update’s ability to install certain updates. In this case, you can either disable Real-Time Protection or uninstall the 3rd party security suite to solve the problem.
- Corrupt Window Update Components – The issue could also be a result of some level of file corruption preventing the WU component from working. The issue can be resolved by using the Windows Update troubleshooter or by resetting all of the WU components from an elevated Command Prompt.
- System File corruption – There is also a possibility that a generic corruption error within your operating system is preventing you from performing the task at hand. There are several ways to fix it, from performing SFC and DISM scans to performing repair installs and clean installs.
Now that we know about the potential causes, let’s see how we can fix the issue.
Run Windows Update Troubleshooter
You should start by using the Windows Update troubleshooter to see if it’s able to fix the issue automatically before moving on to more advanced troubleshooting guides.
As there are many possible causes for Windows updates to fail, you should run the Windows Update Troubleshooter to see if it can identify any problems that may compromise the functionality of the update. When the troubleshooter identifies a situation that applies to one of the repair schemes, it will automatically apply the appropriate repair strategy.
Here is what you need to do:
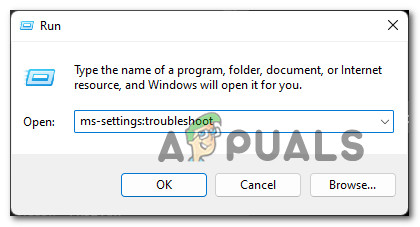
- Open a Run dialog box by pressing Windows + R keys simultaneously on your PC.
- In the text field of the dialog box, type ms-settings:troubleshoot and hit Enter.
Accessing the Other Troubleshooters - From the Troubleshooting tab, select Windows Update under Get up and running.
- Now click on Run the Troubleshooter button and wait for the scan to complete.

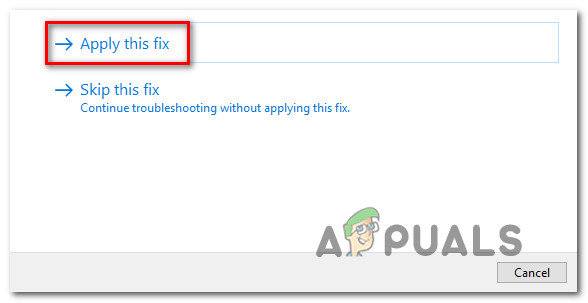
Running the Windows Update troubleshooter - When a problem is found that can be resolved by one of the repair strategies, you will be able to click the Apply this fix button.
Applying the recommended fix - Once the recommended fix has been successfully applied, reboot your PC and attempt to upgrade Windows again.
Run SFC and DISM scans
As mentioned earlier, corruption errors within the operating system can result in issues like the error code 0x800703e6. Fortunately, Windows comes with several built-in troubleshooting utilities that can scan the system and its files for errors, as well as fix the issues identified.
Two such utilities are SFC (System File Checker)and DISM (Deployment Image Servicing and Management), which can replace corrupted system files with healthy counterparts and replace failing storage sectors with unused equivalents.
With System File Checker you do not need to access the internet. This tool uses a locally cached archive with backup system files and replaces the corrupted file with its healthy counterpart. DISM requires stable Internet access. It is necessary since DISM uses WU to replace corrupt files with healthy equivalents.
Here is how you can run SFC and DISM scans on your Windows operating system:
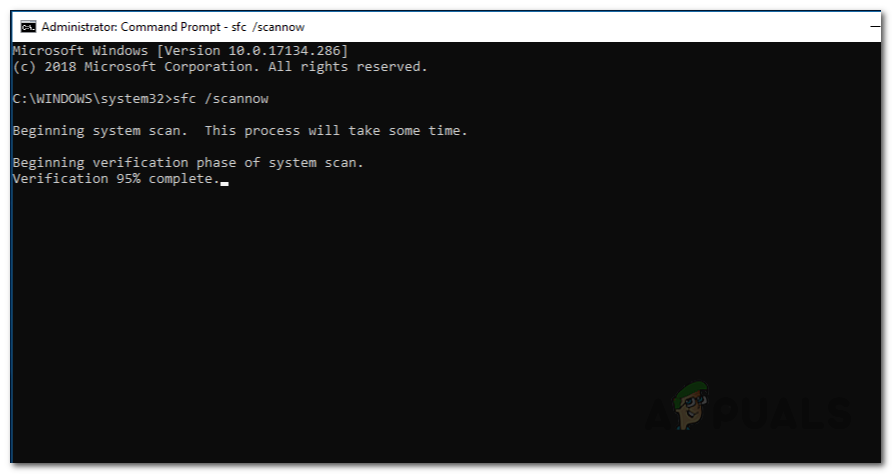
- Type cmd in the search area of your taskbar and click on Run as administrator to launch Command Prompt with administrative privileges.
- Inside the Command Prompt window, type the command mentioned below and hit Enter.
sfc /scannow
Deploying an SFC scan - From the same elevated CMD window, do a DISM scan after the SFC scan (regardless of the results).
DISM /Online /Cleanup-Image /RestoreHealth
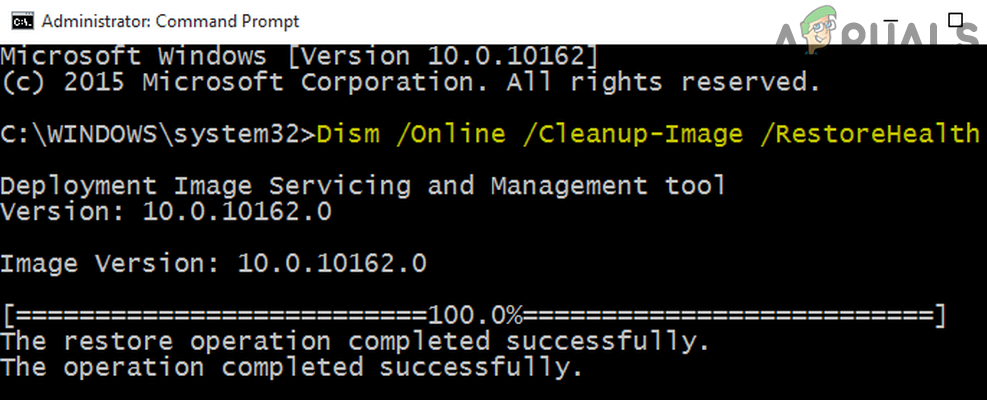
Use the DISM Command to RestoreHealth - Finally, restart your PC and upon reboot, check if you can install the required update.
Disable Antivirus Temporarily
This problem is apparently also caused by an interfering 3rd party program that prevents users from installing Windows updates. This is why, if you are using a third-party antivirus service, we encourage you to disable it and then try installing the updates.
In addition, you might consider uninstalling the 3rd-party suite altogether and use Windows Defender Firewall instead.
Modify Windows Registry
Another workaround that fixed the issue for several users was deleting the entries from Windows Registry for WUServer and WStatusServer, which is why we recommend giving it a shot.
However, since Windows Registry is an administrative-level tool, we recommend creating a backup before you proceed with the troubleshooting steps listed below, just in case anything goes wrong.
Once you do that, follow these steps to fix the error code 0x800703e6:
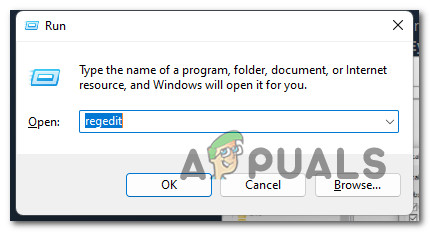
- Press Windows + R keys simultaneously on your keyboard to open a Run dialog box.
- In the text field of the dialog box, type regedit and hit Enter to launch Windows Registry.
Open up the Regedit Editor - Once you are inside the Registry Editor, navigate to the location mentioned below.
HKEY_LOCAL_MACHINE\SOFTWARE\Policies\Microsoft\Windows\WindowsUpdate - Now locate the WUServer and WStatusServer entries in the right pane and delete them by right-clicking on them one by one and selecting Delete.
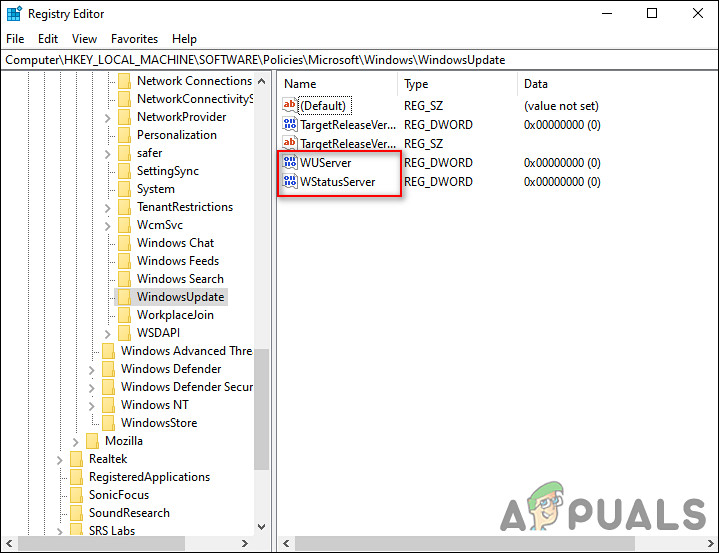
Delete the Registry keys
In case you cannot locate the entries, jump to the next method below.
Reset Windows Update Components
Windows uses a variety of services for downloading and installing Windows updates on your computer. So, in the event that even one of these components responsible for updating your system fails to function properly, updates will not be installed and an error will be generated like the error code 0x800703e6.
Your best option in such a case will be to reset the update components on your system. This will restart all the components, thus resolving the error in the process.
Here is how you can reset the update components on your PC:
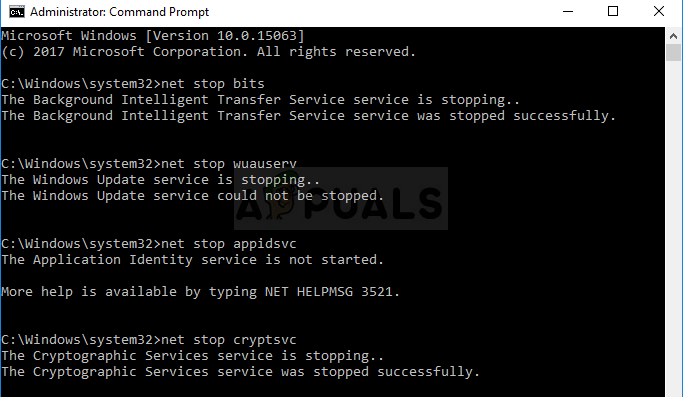
- Type cmd in the search area of your taskbar and click on Run as administrator to launch Command Prompt with administrative privileges.
- Inside the Command Prompt window, type the command mentioned below and hit Enter.
net stop bits
net stop wuauserv
net stop appidsvc
net stop cryptsvc
- You must then delete the qmgr*.dat files created by the BITS service. Run the following command to do so:
Del "%ALLUSERSPROFILE%\Application Data\Microsoft\Network\Downloader\*.*"
- Then, type Y and hit Enter.
- Following that, we will rename some folders in which the downloaded updates are stored. To do so, execute the following command:
Ren C:\Windows\SoftwareDistribution SoftwareDistribution.old Ren C:\Windows\System32\catroot2 Catroot2.old
- Finally, execute the following commands one by one:
net start wuauserv

net start cryptSvc

net start bits

net start msiserver
- Once done, restart your PC and check if you still encounter the error code 0x800703e6.
Perform Disk Cleanup
Installing the latest updates requires a well-optimized storage drive. If your device is running low on disk space, you are likely to experience errors like the error code 0x800703e6.
Here is how you can perform a disk cleanup on your Windows device:
- Type Disk Cleanup in the search area of the taskbar and click on Open.
- This will allow the utility to scan your computer for unnecessary files. Once it’s done, checkmark the files that you want to delete in the Disk Cleanup dialog and hit OK.
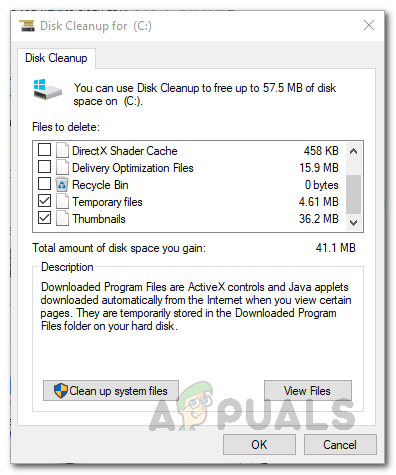
Disk Cleanup Scan Results - Finally, click on the Delete files button again and once you remove the files, check if you can install the updates without any issues.
Perform In-Place Upgrade
If you have come this far without a solution, then this implies that the error code 0x800703e6 cannot be resolved using conventional troubleshooting methods. If this scenario is applicable, performing an in-place upgrade can help you get rid of the error code 0x800703e6 once and for all.
Alternatively, you can also try resetting your PC to the defaults to fix the issue.


