Fix: Windows Backup Error 0x8078012D
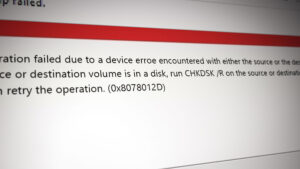
Some Windows users are reporting that they always end up seeing an error pop-up with the 0x8078012D error code when attempting to create a backup of their Windows installation via Windows Backup. This issue is reported to occur on Windows 7, Windows 8.1, and Windows 10.
After investigating this particular issue thoroughly, it turns out that there are several different underlying instances that might cause the 0x8078012D error. Here’s a short list of methods that might be causing this error code:
- The Windows Backup service is Disabled – According to a lot of affected users, you can expect to see this issue occurring because the main service that is supposed to be handling this task is disabled (Windows Backup). In this case, you can resolve the issue by accessing the Services screen and enabling the Windows Backup service.
- Corrupted storage sectors – Under certain circumstances, you can expect to see this error code popping up if your HDD / SSD contains some failing storage sectors that are no longer readable. In this case, you might be able to resolve the issue by running a CHKDSK scan and applying the recommended repairs.
- System file corruption – In some cases, system file corruption affecting certain OS dependencies used when Windows has to create backup can trigger this error code. In this case, you can deploy SFC and DISM scans in an attempt to resolve the corrupted instances and go for a clean install or repair install if the 2 scans don’t produce the required results.
- Conflict with the Shark007 Codec Pack – If you have previously installed the 3rd party codec suite (Shark007), keep in mind that Shark007 is in conflict with a series of built-in Windows 10 utilities including Windows Backup. If you find yourself in this particular scenario, you should be able to fix this problem by deleting the Shark007 suite before repeating the backup process.
- 3rd party AV conflict – As it turns out, this particular error code can also occur due to a conflict between Windows Backup and a 3rd party suite that is viewing the newly created backup file as a potential security threat. In this case, you can resolve the issue by disabling the 3rd party suite while or by uninstalling the conflicting software altogether.
Now that you are familiar with every potential fix that might be causing this error code, here’s a list of verified methods that other affected users have successfully used to get to the bottom of this issue:
Method 1: Enabling the Windows Backup service
Before you try any of the other fixes below, you should start this troubleshooting guide by investigating the number 1 cause of the 0x8078012D error – an instance of the Windows Backup service that is currently disabled.
Several affected users that were also encountering this error code have reported that the issue was finally resolved after they used the Services utility to enable the Windows Backup service and restarting their computer.
If you’re looking for step by step instructions on how to do this, follow the instructions below:
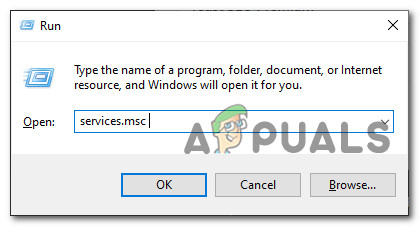
- Press Windows key + R to open up a Run dialog box. Inside the text box, type ‘services.msc’ inside the text box and press Enter to open the Services screen. If you see the UAC (User Account Control), click Yes to grant admin access.
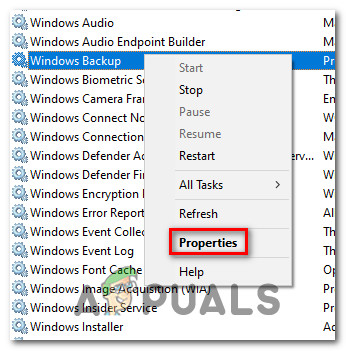
Opening the Services screen - Once you’re inside the Sevices screen, move over to the right-hand side and scroll down through the list of services until you see the entry associated with Windows Backup.
- When you see it, right-click on the Windows Backup entry and choose Properties from the context menu that just appeared.
Accessing the Properties screen of Windows Backup - Once you’re inside the Properties screen of Windows Backup, access the General tab and change the Startup type to Automatic, then click on Start to launch the service if it’s currently closed.
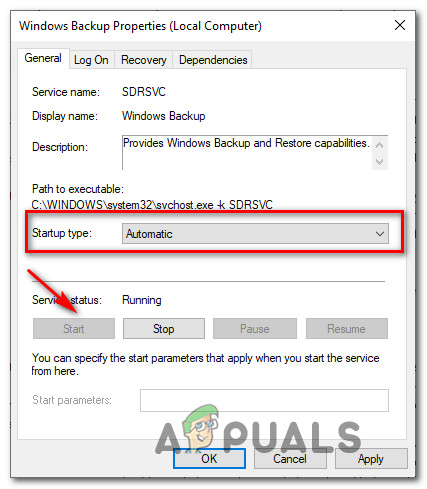
Enabling the Windows Backup Screen - Finally, click Apply to save the changes, then restart your computer and repeat the action that was causing the 0x8078012D error once the next startup is complete.
In case you already ensured that the Windows Backup service is enabled and you’re still encountering the same kind of error, move down to the next potential fix below.
Method 2: Running a CHKDSK scan
If the first method was not effective in your case, the next thing you should do is to investigate an HDD/SSD storage-related problem.
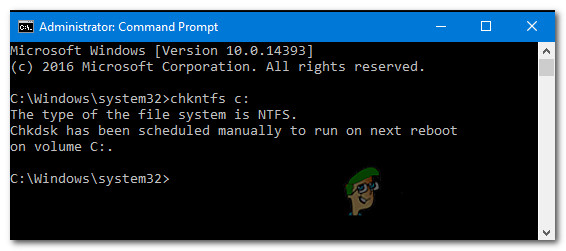
If the 0x8078012D is occurring due to some kind of corrupted storage sectors, a CHKDSK (Check Disk Scan) scan should allow you to identify any malfunctioning logical sectors and replace them with unused equivalents.
Note: CHKDSK is present on every recent Windows version including Windows 7 and Windows 8.1, so you will be able to initiate a Check Disk scan regardless of your windows version. This has the potential to fix the majority of corruption instances of logical errors that might contribute to status codes related to Windows Backup.
In order to maximize your chances of running an effective CHKDSK scan, you need to do it from an elevated Command prompt. In case you haven’t done this before following these instructions on running a CHKDSK scan from an elevated CMD.
If you already deployed a CHKDSK scan and you’re still seeing the same error code, move down to the next potential fix below.
Method 3: Running SFC and DISM Scans
If the Check Disk utility didn’t fix the issue in your case, the next thing you should do is utilize a couple of utilities (SFC and DISM) that are capable of fixing system file corruption that might be affecting the Windows Backup utility.
System File Checker and Deployment Image Servicing and Management are 2 sister built-in tools that are equipped to fix the most common corruption instances that might trigger the 0x8078012D with Windows Backup.
If you haven’t deployed this utility yet, start by going for a System File Checker scan since you can do it without requiring an active internet connection.
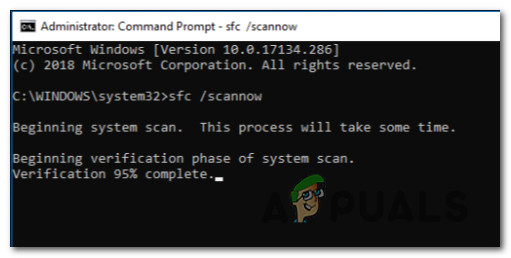
Note: Keep in mind that SFC is an entirely local tool that works by using a locally stored cache to replace corrupted system file items with healthy equivalents. Once you deploy this method, it’s important not to interrupt this type of scan since causing an interruption has the potential of creating additional logical errors.
IMPORTANT: In case you’re using a traditional HDD instead of a more modern SSD, you can expect this operation to take up a couple of hours. This utility has a tendency to freeze temporarily – If this happens, don’t close the window and wait for the real-time tracking to return.
When the SFC scan is finally complete, reboot your computer and see if the 0x8078012D error code is finally fixed.
In case it isn’t, proceed by initiating a DISM scan.
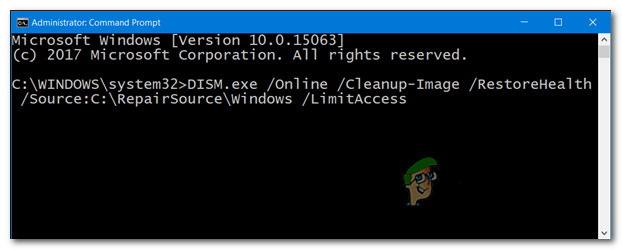
Note: Keep in mind that DISM uses a component of Windows Update to replace corrupted Windows file instances with healthy copies downloaded over the internet. Due to the fact that it relies on an internet connection, you need to ensure that your Internet connection is stable before starting this operation.
Once the operation is complete, reboot your computer and use your computer normally to see if you still end up seeing the 0x8078012D error code when running a Windows 10 backup.
In case the problem persists, move down to Method 4 below.
Method 4: Uninstalling Shark007 Codec (If applicable)
According to some affected users, you can also expect to encounter the 0x8078012D error due to a conflict between Windows Backup and a 3rd party codec pack (Shark007).
Note: Shark007 is a popular bundle of portable codec solutions that has the potential of conflicting with several built-in tools (especially on Windows 10).
If this scenario is applicable and you have Shark007 codec installed on your computer, the only solution that will allow you to resolve the 0x8078012D error is to uninstall the 3rd party codec and replace it with a less intrusive equivalent.
To uninstall the Shark007 codec from your computer, follow the instructions below to uninstall the 3rd party codec suite from your Windows computer:
Note: The instructions below will work regardless of the Windows version that you’re currently using.
- Press Windows key + R to open up a Run dialog box. Next, type ‘appwiz.cpl’ inside the text box and press Enter to open up the Programs and Features menu. If you are prompted by the (User Account Control), click Yes to grant admin access.
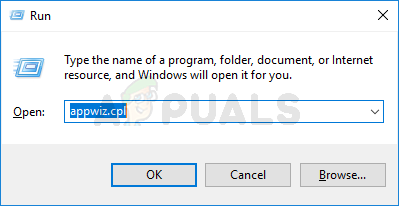
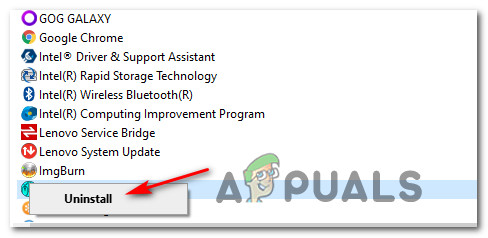
Accessing the Programs and Features menu - Inside the Programs and Features menu, scroll down through the list of installed items and locate the entry associated with Shark007.
- Once you see it, right-click on the entry associated with Shark007 and choose Uninstall from the context menu that just appeared.
Uninstalling SHark007 - Inside the uninstallation screen, follow the on-screen prompts to complete the uninstallation process, then restart your computer and see if the issue is now fixed.
In case the same 0x8078012D error is still occurring, move down to the next potential fix below.
Method 5: Disable or Uninstall the 3rd party security suite
If you’re using a 3rd party security suite or firewall, it’s possible then a false positive is actually affecting the backup operation and triggering the 0x8078012D error.
This problem is confirmed to occur by affected users with both 3rd party firewalls and 3rd party security suites.
Note: If you’re using Windows Defender, skip this method altogether as there is no evidence that Windows Defender can conflict with Windows Backup.
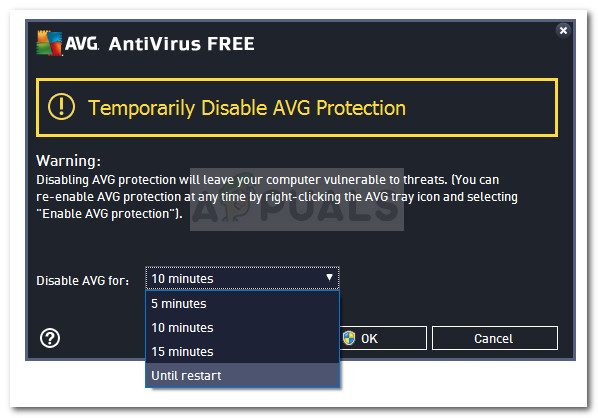
In case you’re using a 3rd party security option, you can probably avoid the apparition of the error code when creating a backup with Windows Backup by disabling the security suite prior to opening Windows Backup -Most 3rd party suites will allow you to do this directly from the tray-icon of the security suite.
Simply right-click on the tray-bar icon of your 3rd party antivirus suite and look for an option that allows you to disable the real-time protection.
Note: Keep in mind that if you’re using a 3rd party firewall, disabling the 3rd party suite will likely not be enough since the same security suite will remain in place even after you disable the security measure.
If you’re using a firewall or simply disabling the real-time protection was not enough to fix the issue, follow the instructions below to uninstall the 3rd party firewall and see if this fixes the problem in your case:
- Start by pressing Windows key + R to open up a Run dialog box. Next, type ‘appwiz.cpl’ and press Enter to open up the Programs and Features menu. If you’re prompted by the UAC (User Account Control), click Yes to grant admin access.

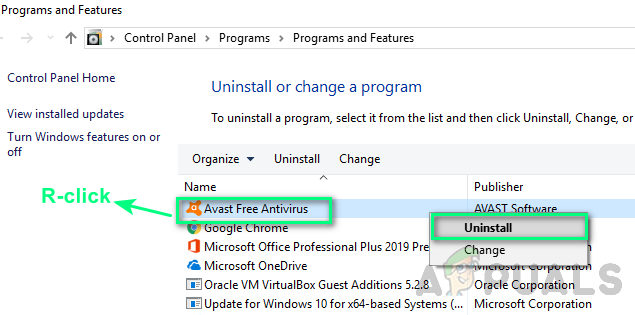
Accessing the Programs and Features screen - Inside the Programs and Files menu, scroll down through the list of installed applications and locate the 3rd party firewall suite that you want to uninstall.
- When you finally manage to locate the correct listing, right-click on the firewall listing and choose Uninstall from the newly appeared context menu.
Uninstalling 3rd party antivirus - Next, follow the on-screen prompts to complete the uninstallation, then restart your computer and see if the problem is fixed once the next startup is complete.
In case this method was not applicable or you’re still encountering the same 0x8078012D even after disabling or uninstalling the 3rd party suite, move down to the next potential fix below.
Method 6: Refreshing every OS component
If you tried every potential fix above and you’re still encountering the same kind of 0x8078012D error when running Windows Backup, chances are you’re dealing with some kind of system file corruption that is affecting a dependency used by the backup sequence.
If none of the fixes above have worked in your case, the next logical step is to reset every Windows component with a procedure like a clean install or install repair (in-place repair).
If you’re looking for the easy route, go for a clean install. But keep in mind that unless you’ll back up your data in advance, you can expect to lose all your personal data present on your OS driver.
Note: A major advantage of this method is that you will not be required to use compatible installation media.
However, if you’re looking for the focused approach that will leave your personal files stored on your OS drive alone, you’ll need compatible installation media to initiate a repair install (in-place repair procedure).
This operation is considerably more tedious than clean installing, but the main advantage is that you’ll be able to refresh every potentially corrupted component without losing data from your apps, games, documents, and personal media that’ currently stored on your OS drive.


