How to Fix Windows 10 Update Error 0x800703ee?
Windows updates are important as they contain security patches along with new features. Especially new versions as they are the big updates that contain various different changes to the operating system. Updating your Windows 10 machine is pretty simple and it requires only a few clicks – at least that’s the intended procedure. However, issues and error messages are prone to occur while updating Windows 10 and these issues are pretty common. One of the error codes that you may encounter while updating your Windows 10 is the 0x800703ee code.
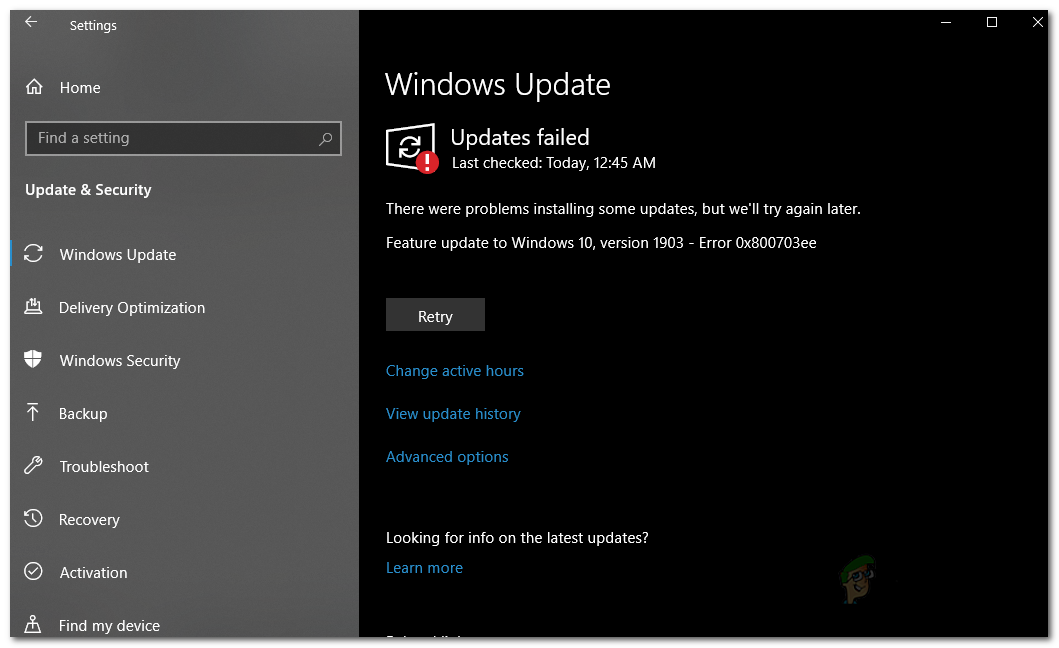
The same error code also occurs while copying files on your Windows machine but that’s not what we are going to talk about here. As it turns out, the error code often points to damaged update files due to which the update process is not able to go through normally, and thus the error code is shown. Along with that, the issue can also be caused due to some other known causes that we are going to mention down below so that you have a good understanding of the problem before we get into the different methods. With that said, let us get started by discussing the causes of the issue in detail.
- Third-Party Software — One of the reasons why the error may occur could be due to incompatible software on your machine. This happens when the third-party apps that you have installed on your system are interfering with the update process and thus, it fails as a result. Therefore, in order to circumvent the issue, you will have to install the update in safe mode.
- Corrupted Update Files — As we have mentioned above, corrupted update files can also be a trigger of the said error code. This may occur when the download process was interrupted or something similar. In such a scenario, what you will have to do is to install the update manually by downloading it from the update catalog website.
- USB Port — As it turns out, in some cases the issue can also be caused by the port that you have plugged your USB drive into. This may happen when you are trying to upgrade Windows 10 via an external USB drive. In such a scenario, changing the USB port may help in resolving the problem.
Now that we have gone through the potential causes of the error message, we will go through the different methods that you can use to get the issue resolved. So, without further ado, let us get into it.
Method 1: Change USB Port
A malfunctioning USB port may very likely cause the said error code and thus prevent you from upgrading your Windows machine. In some cases, even if the port is fine, the issue may arise. The reason as to why this may occur is not completely clear but it could be due to your BIOS as that controls all of the ports on your motherboard. Regardless, an easy fix to the said issue would be to change the port of your USB drive. This may especially be helpful if you are using a USB 3.0 port. In such a scenario, it is recommended that you use a USB 2.0 port instead to see if that resolves the issue. This has been reported by a user who was facing a similar issue so it might very well work out for you.
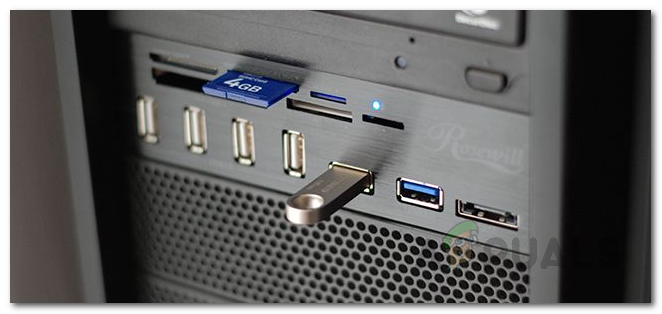
If you aren’t using a USB drive but rather just updating Windows from the Settings window, then just ignore this method and move on to the next one down below.
Method 2: Install Update Manually
As we have mentioned, in some cases the issue may be caused by damaged update files that are present on your system. The files can be damaged due to several different reasons such as interfering processes in the background as well as disconnections while downloading the update. Regardless, an easy workaround to this would be to simply download the update manually and then install it on your machine.
All of the updates pushed by Microsoft are available on their Update Catalog website. Therefore, you can simply just search for the update that you are trying to install there and then download it. Once you have downloaded the update, it can be easily installed. To do this, follow the steps given down below:
- First of all, go to the Microsoft Update Catalog website.
- There, search for the update that you are trying to install on the right-hand side.
- Download the respective update by clicking the Download button on the right-hand side of the update.
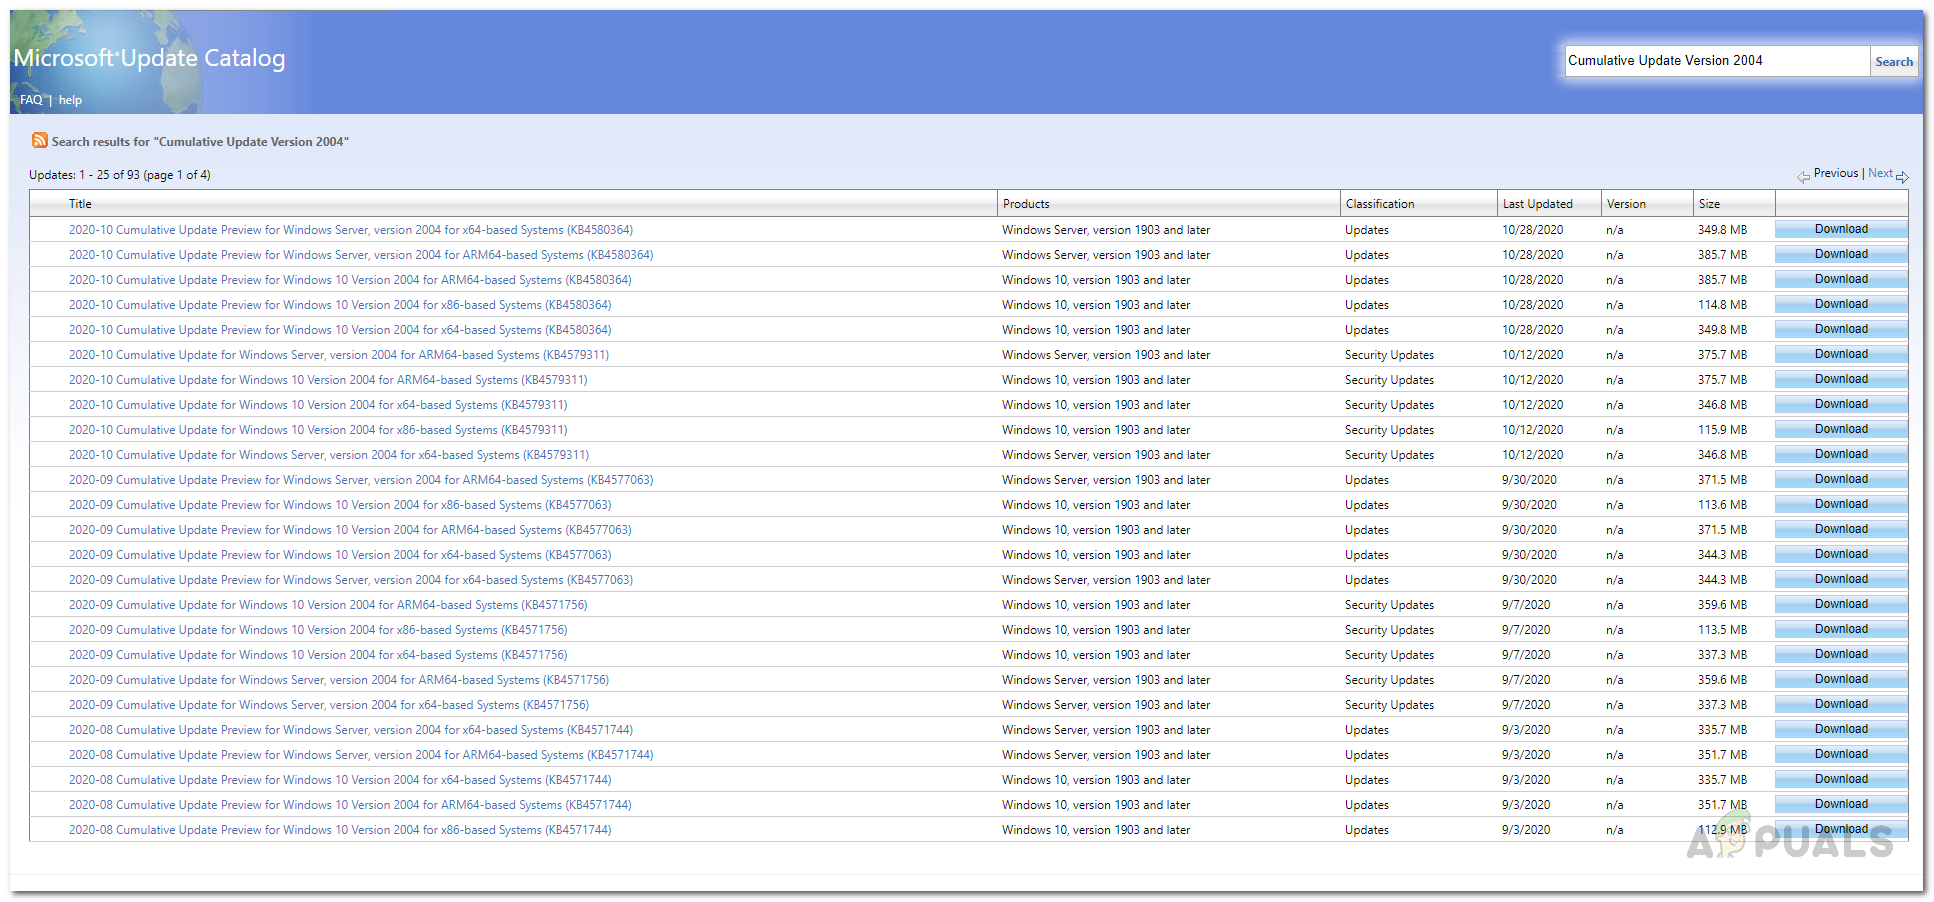
Windows Update Catalog - Wait for the update to finish downloading.
- Once it has downloaded, simply run the downloaded file to begin the update.
- Follow through the on-screen prompts and wait for it to finish.
Method 3: Update in Safe Mode
Another reason that may prevent your system from updating successfully is the interference of the third-party applications that you have installed on your machine. This is not something new and such issues are often caused by the various different third-party software. Now, the problem here is that you can’t know for sure which application in specific is causing the issue if you have multiple different apps installed. The process of removing each one and then trying the update will consume a lot of time.
Therefore, to circumvent this, we will be using the Safe Mode which essentially boots up Windows with only the required services running in the background. This means that the third-party apps won’t be started and thus they won’t be able to interfere with the update process if they are not running at all. Therefore, you can use the Safe Mode to update your Windows. To do this, follow the instructions given down below:
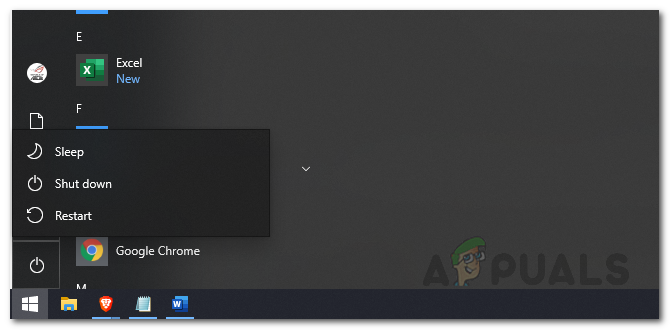
- To boot into Safe Mode, open up the Start Menu and while holding the Shift key, click the Restart button.
Restarting Windows - This will take you to the “Choose an option” screen upon boot up.
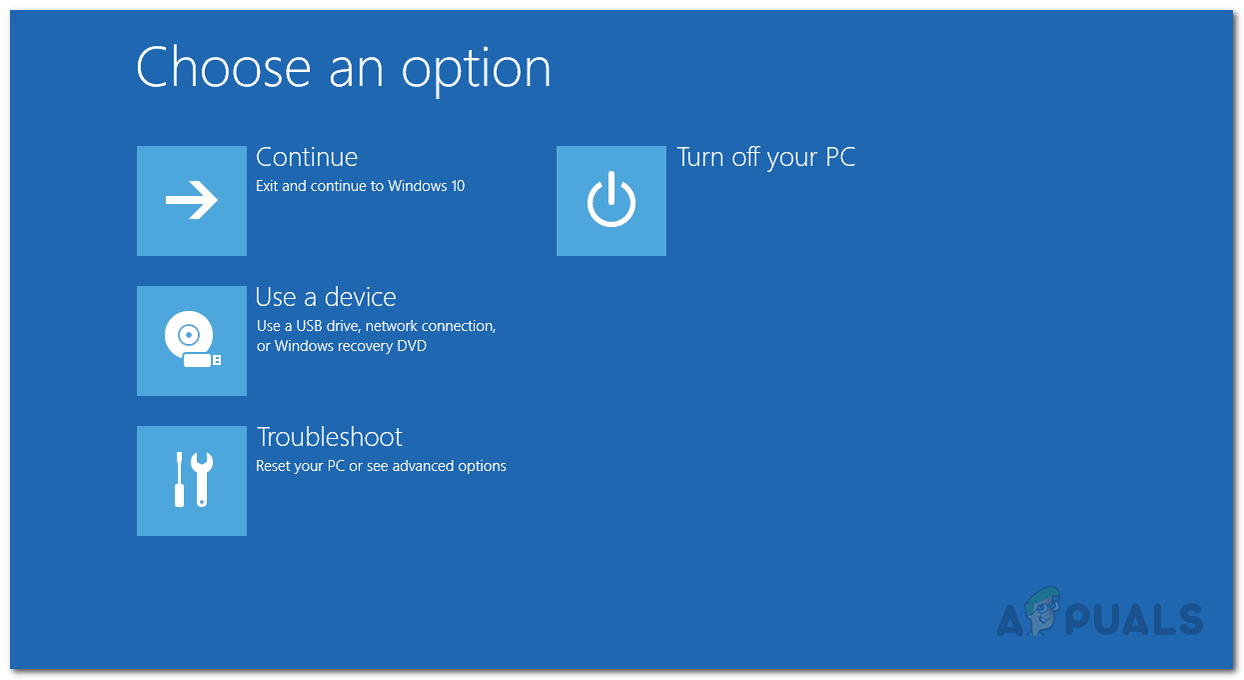
Advanced Startup Menu - There, click on the Troubleshoot option and then go to Advanced Settings.
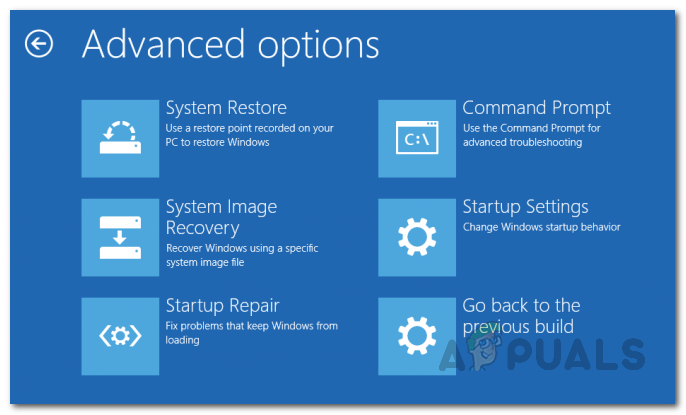
Advanced Options - On the Advanced Options screen, click on the Start-up Settings option. Here, you will be shown a list of different options.
- Now, on the Startup Settings screen, click on the Restart button.
- Once the PC restarts, you will be able to see a list of different options.
- To boot into Safe Mode, either press the 4 key or press F4.
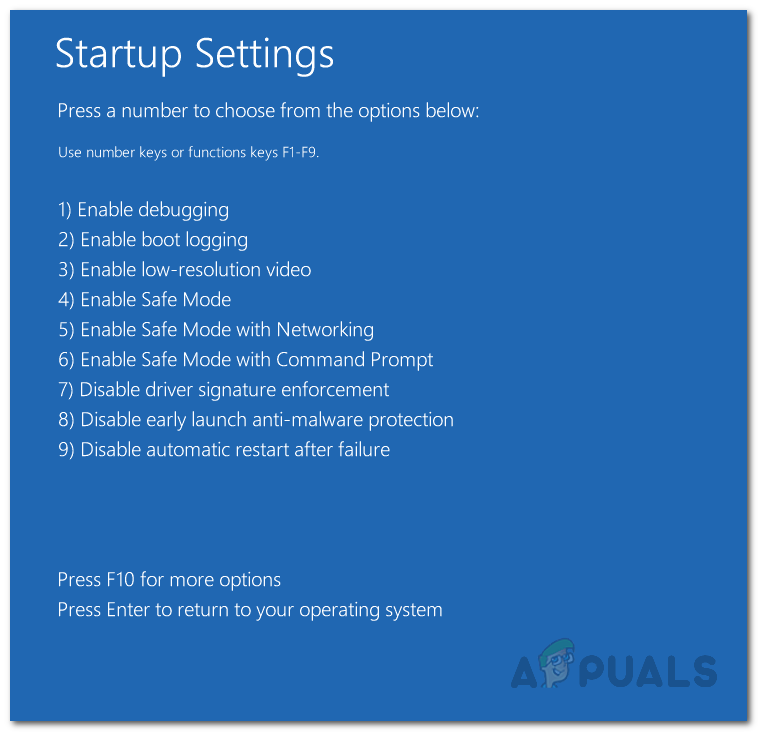
Startup Settings - Once you have done this, your system will start in Safe Mode.
- Now, go ahead and try installing the update to see if the issue persists.
Method 4: Clean Install
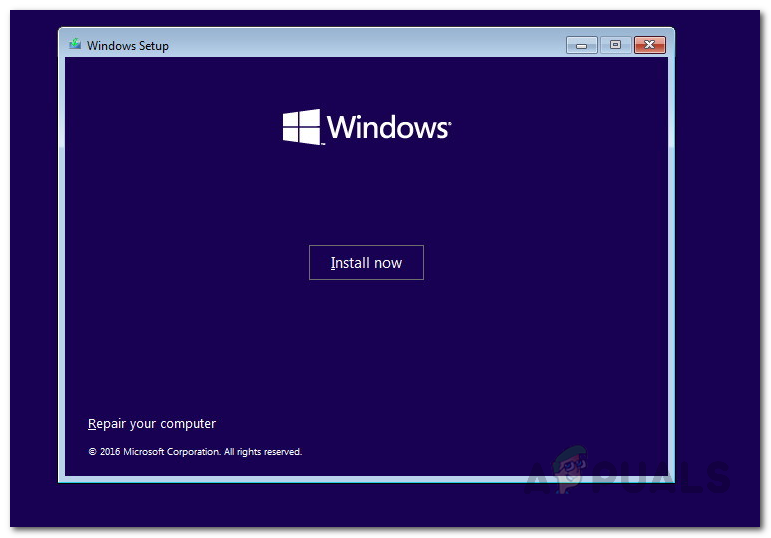
If the above solutions do not work out, chances are that your Windows installation has been corrupted. Thus, you will have to perform a clean install of Windows to get rid of the issue and have your Windows updated. Before you do this, it is recommended that you make a backup of your important files so that you do not lose any of those files. Once you have done that, go ahead and plug in your USB drive containing the Windows installation media and boot into it.
Before you perform a clean installation, you can try to repair your Windows through the USB drive. To do this, when you boot into the USB drive, instead of clicking Install Now, click on the Repair your computer at the bottom-left corner. Follow the on-screen prompts to see if that resolves the issue. In case it doesn’t, you will have to perform a clean installation.
We have a detailed guide present on our site that takes you through the process of performing a clean install. Please refer to that article for the step-by-step process.


