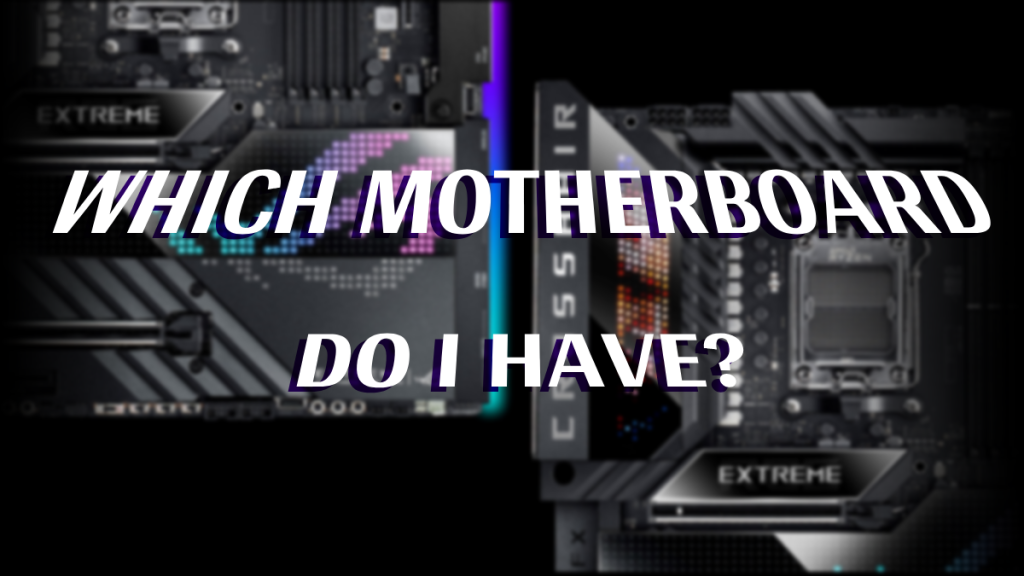
How to Find Out What Motherboard You Have in 5 Steps
 Reviewed by Huzaifa Haroon
The motherboard is a crucial component of your PC, serving as the central hub that connects all your hardware and input/output (I/O) devices. Sometimes, you may need to know your motherboard model for a CPU or RAM upgrade. Or, you might want to identify your motherboard’s chipset to check which features are available or missing.
According to Google’s definition, a motherboard is a PCB (Printed Circuit Board) onto which all other circuit boards and components are connected. For most users, a motherboard doesn’t directly impact performance. However, choosing the wrong motherboard can limit your options, such as upgradability or connectivity. For example, there are important differences between a budget A620 chipset and a high-end X670E chipset, beyond just the price.
Motherboard-Specific Features
Your motherboard dictates how many SATA and M.2 SSDs you can install in your PC. Whether your RAM supports XMP profiles or your CPU supports overclocking also depends on your motherboard model. The type and quality of VRMs (Voltage Regulator Modules) installed on your motherboard can limit overclocking capabilities, especially with unlocked CPUs.
The number and generation of PCIe lanes available also depend on your motherboard’s chipset. For example, in the AM5 platform, you’ll need a B650E or higher chipset to ensure PCIe Gen 5.0 SSD support. Similarly, on the A620 chipset, CPU overclocking is disabled by default.

Motherboard brands also offer unique RGB lighting solutions, which can vary depending on your motherboard model. Higher-end models often feature more DIMM (RAM) slots and support for more memory channels. Plus, the latest motherboards often include modern features such as Thunderbolt and USB Type-C ports.
All of this shows that a good motherboard can make your PC easier to use and provide more features. That’s why it’s important to know your exact motherboard model and chipset.
This guide will show you the easiest ways to find out which motherboard and chipset your PC has.
What Motherboard & Chipset Do I Have?
Let’s start by clearing up some basics. Your PC may be a custom build or it may have come as a pre-built system from an OEM (like Dell, HP, or Lenovo). Nowadays, most computers—even many pre-builts—use well-known motherboard models, except for a few cases. So, we can divide the methods for finding your motherboard model into three categories:
- Custom PCs:
- The motherboard model and chipset are usually printed directly on the motherboard itself.
- If you want more details or confirmation, you can use System Information or other Windows tools to get the exact motherboard name.
- Pre-Built PCs:
- These systems are typically bought in bulk from OEMs and retailers like Dell, HP, or Lenovo.
- They often use proprietary motherboards, which can make identification more difficult.
- If needed, you might have to look through the user manual or specifications document for your specific OptiPlex or ThinkCentre model.
- Laptops:
- Laptop motherboards are not upgradable, so even if you identify the model, it may not be very useful.
- If you’re planning upgrades (like RAM or storage), check the specifications sheet for your laptop model.
Now, let’s go over how to identify your PC’s motherboard and chipset:
1. Inspect the Motherboard Physically
It may sound simple, but the easiest way to find your motherboard’s model and chipset is to look at the board itself. This works well with most desktop PCs, although if you have a pre-built PC from a company like Dell or HP, you might see lots of different numbers that aren’t very clear.
- Unplug your PC from the wall and turn off the power supply.
- Remove the side panel carefully, especially if it’s made of acrylic or tempered glass. (Reference image from DeepCool)

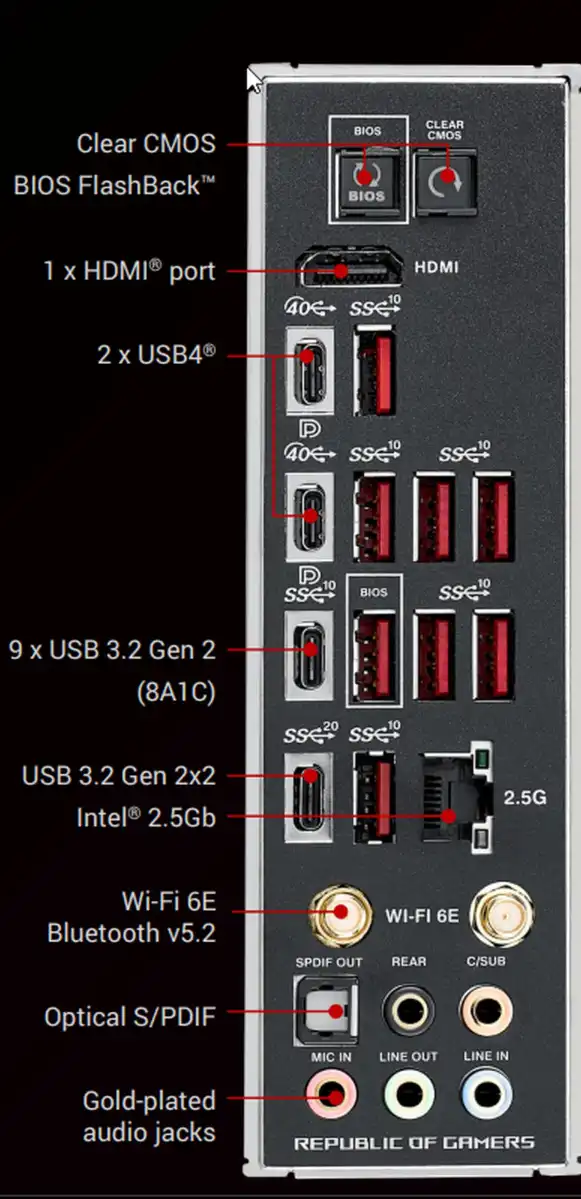
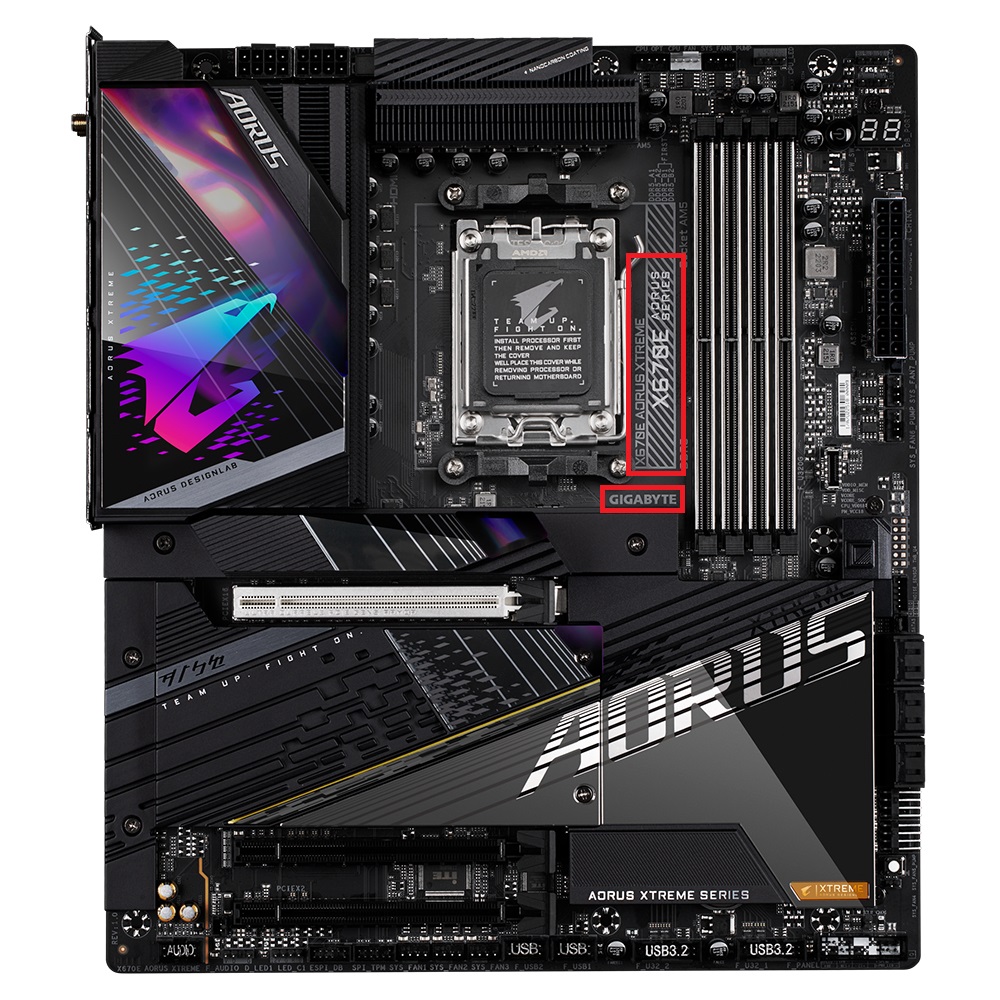
- We’re using the GIGABYTE X670E AORUS XTREME as an example. The model name is usually printed close to the CPU socket, but the position may vary. (Reference image from GIGABYTE)
2. Check the System Information
Windows comes with a tool called System Information that shows you details about your PC’s hardware and is a quick way to identify your motherboard.
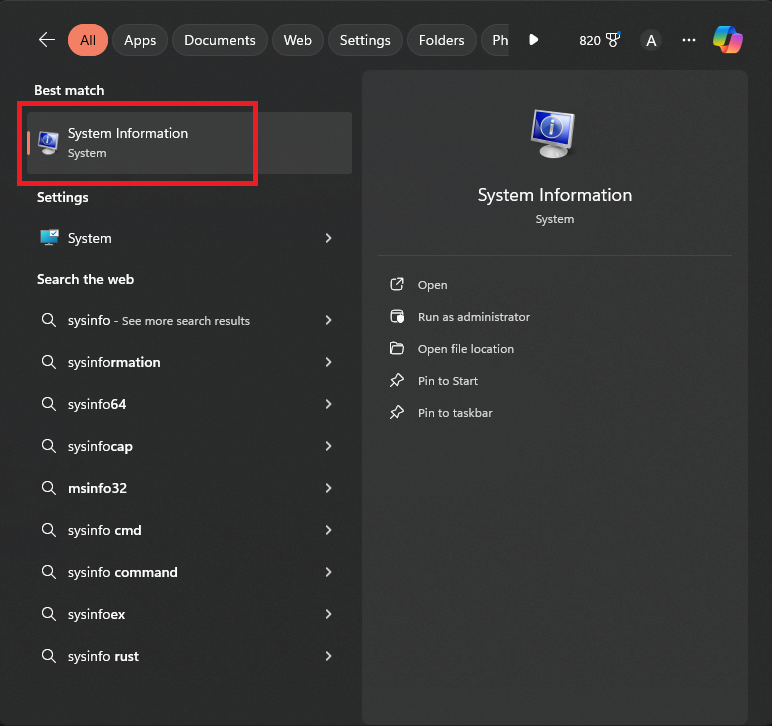
- In the Windows Search bar, type “sysinfo” or “System Information“.

- Click on the System Information app that appears.
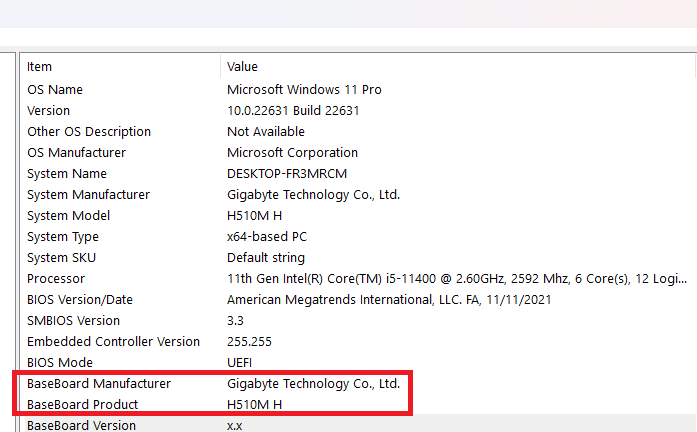
- In the System Summary section, look for the fields BaseBoard Manufacturer and BaseBoard Product. For example, if it says GIGABYTE H510M, “H510” is your chipset name.
3. Use a CMD Command
CMD stands for Command Prompt, which is a command-line tool you can use to run system commands and troubleshoot Windows issues.
- Open an elevated Command Prompt. To do this, type “cmd” in the Windows Search bar and look for Command Prompt.
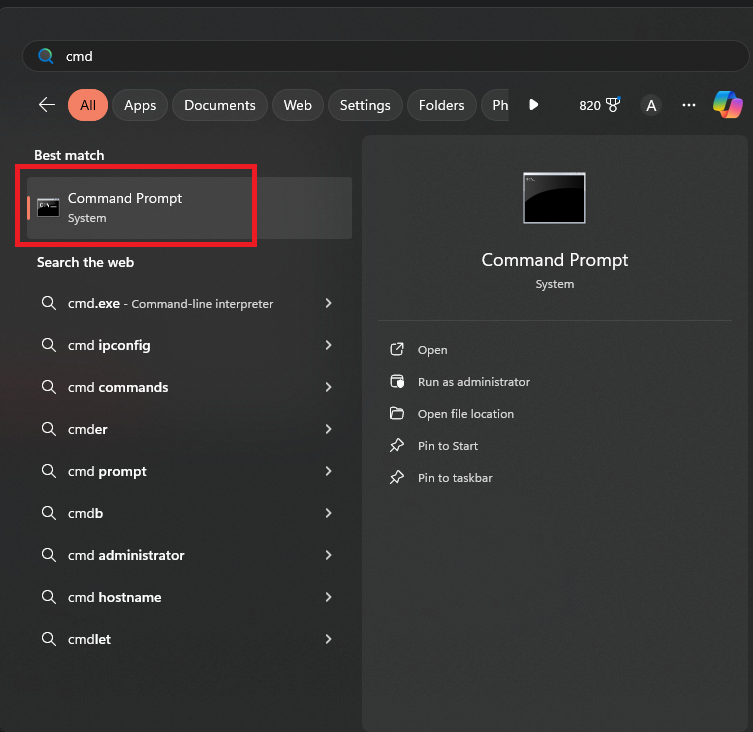
- Right-click on Command Prompt and choose “Run as administrator“. Or use the option on the right side of the menu.

- If you see a User Account Control window pop up, select “Yes“.
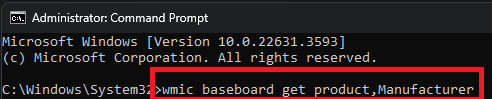
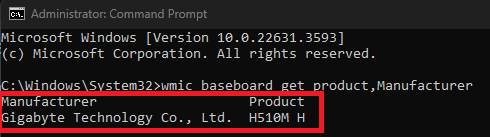
- Type this command into the terminal: wmic baseboard get product,Manufacturer. (You can use Ctrl+C to copy and Ctrl+V to paste.)
- Press “Enter“, and you’ll see two fields: “Manufacturer” and “Product.” This is the same info provided in System Information.
4. Use HWiNFO64
HWiNFO is a third-party program for detailed analysis and performance monitoring of your PC. It’s popular among PC enthusiasts and gamers because it shows all hardware details.
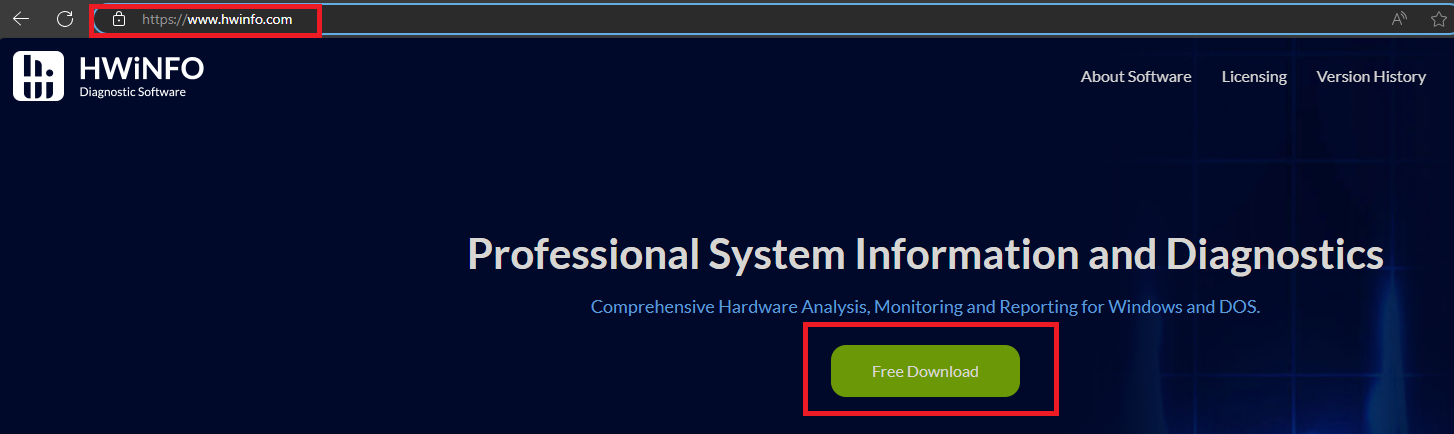
- Search “HWiNFO” on Google and visit the official HWiNFO website.
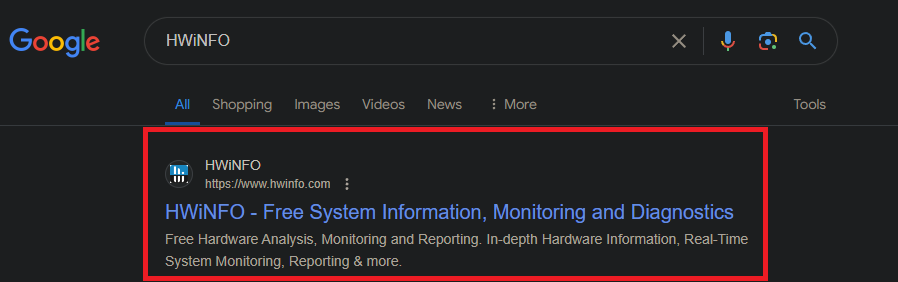
- Verify you’re on the correct URL (see image) and click “Free Download“.
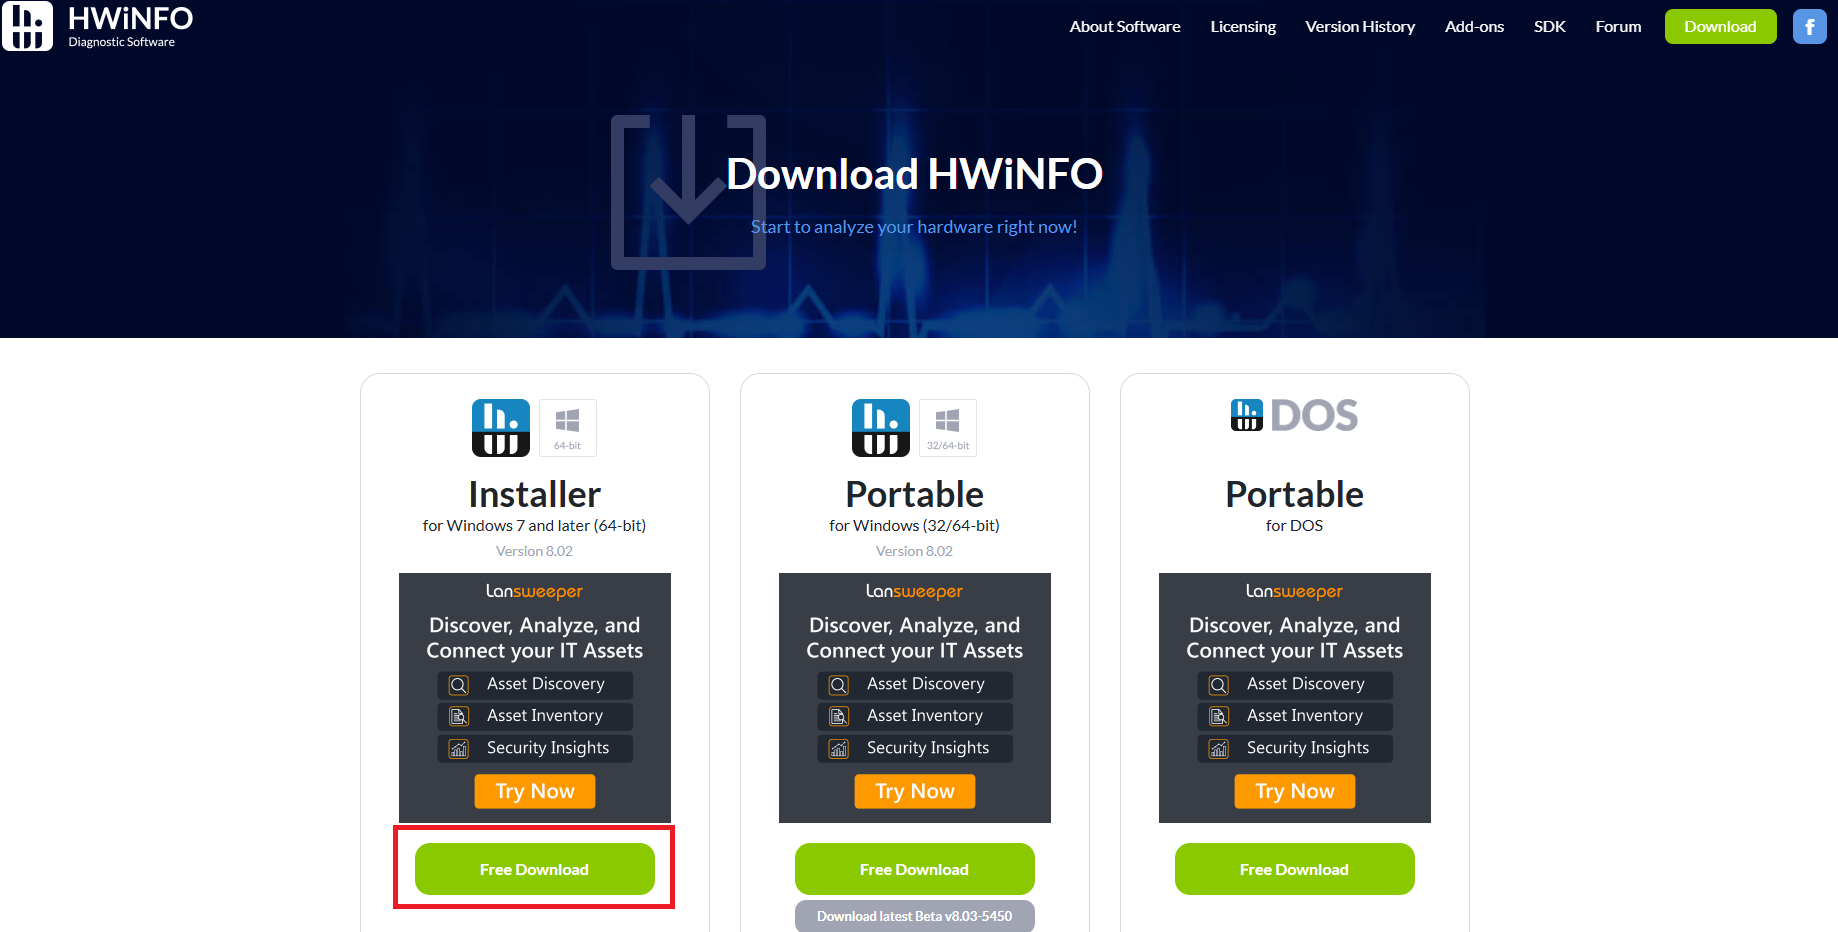
- On the download page, choose between Installer, Portable, or Portable for DOS. Selecting Installer is usually easiest.
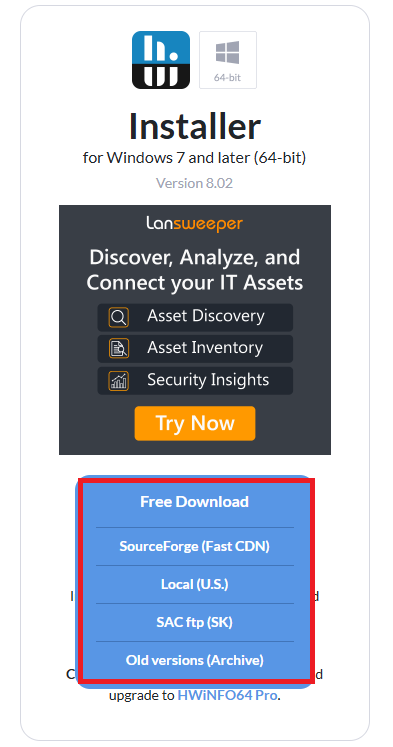
- Hover over “Free Download” and pick a server. We recommend using SourceForge; your download will start automatically.
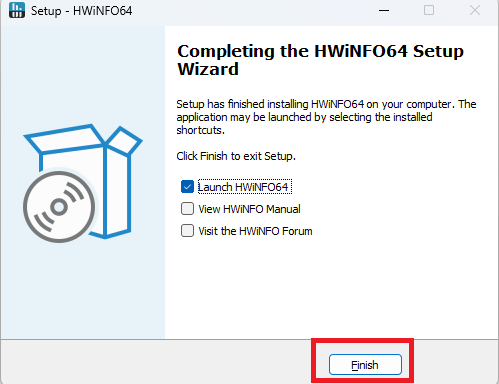
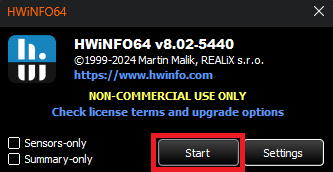
- Once the file is downloaded, run the installer and follow the prompts: “OK” → “Next” → “I accept the agreement” → “Next” → choose or confirm the install directory (default is fine) → “Next” → “Install” → “Finish“. You should see this at the end:
- After installing HWiNFO64, launch it and click “Start” to display your PC’s hardware information.
- Don’t worry if several windows open; this is normal as each has a different purpose. Look at the image below and close Windows 2 and Window 3.
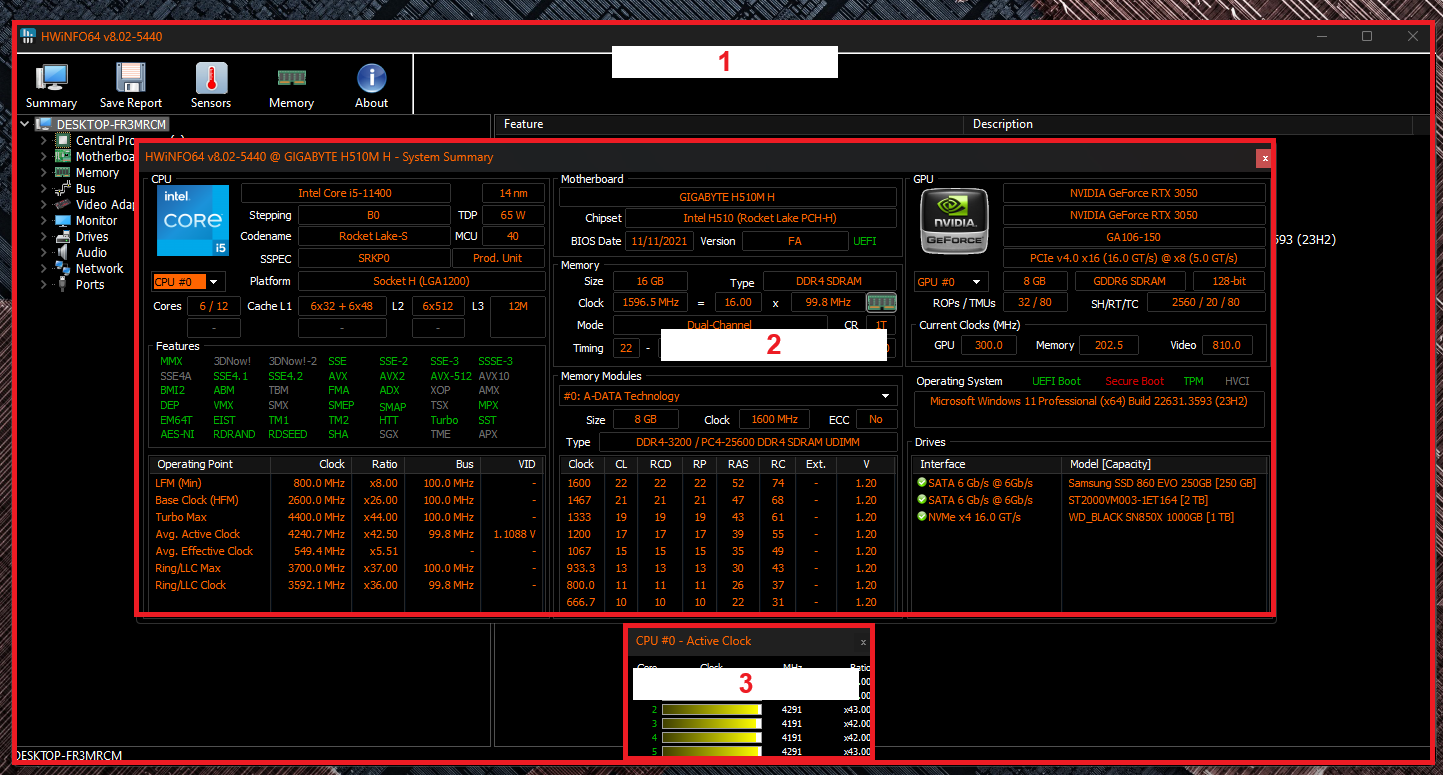
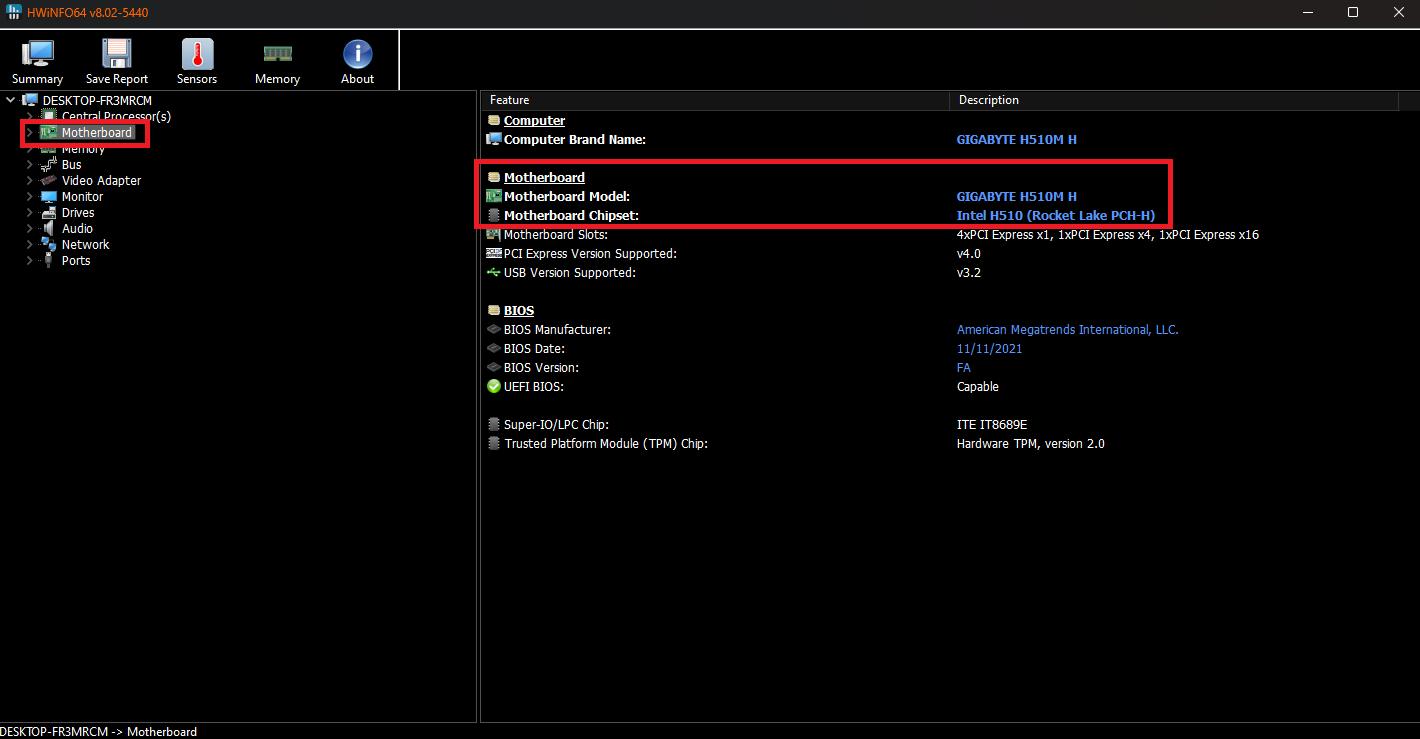
- Only Window 1 will remain. From the menu on the left, click on “Motherboard“. The right panel will show all the motherboard details.
5. Read OEM Documentation
If your PC was built by an OEM and uses a proprietary motherboard, the other steps above might not work. In this part of the guide, we’ll use a real example of a pre-built Lenovo to show you how you can find your motherboard details this way.
Keep in mind, this method requires a bit more research and depends on your specific manufacturer. Here’s a practical example:
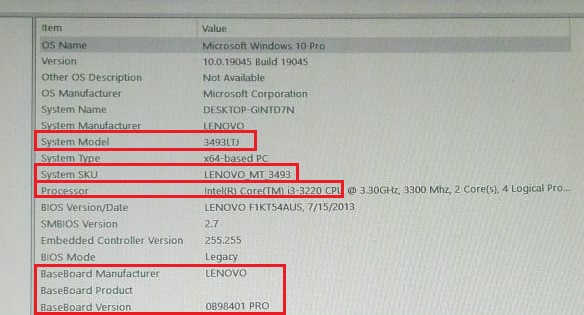
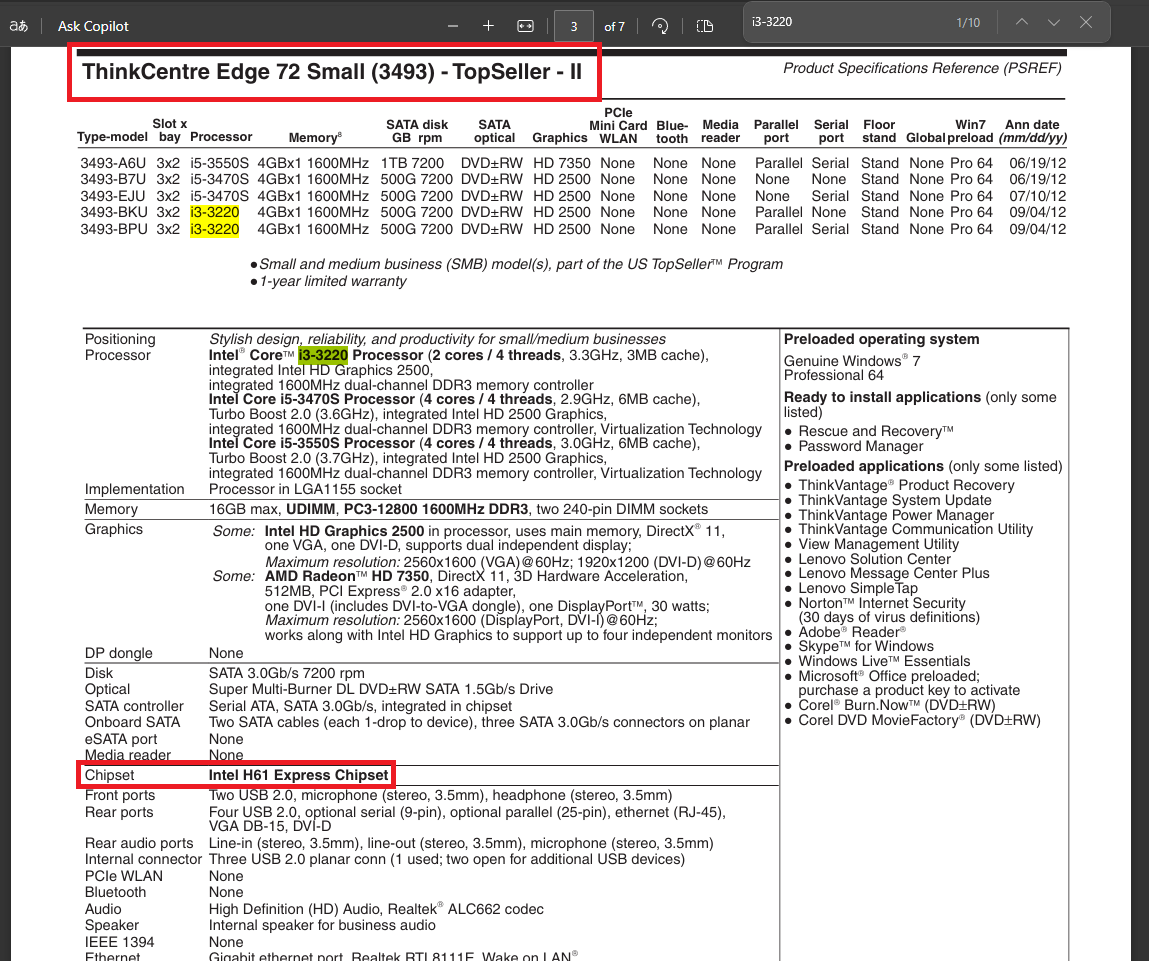
- First, use System Information to get the BaseBoard Manufacturer and BaseBoard Product/Version. In our example, the manufacturer is Lenovo and the version is “0B98401 PRO“. Take note of the System Model and SKU, as these can help.
- The manufacturer is Lenovo, but the chipset is still unclear. Many bulk OEM systems are sold to organizations before eventually making their way to regular buyers. At this point, you’ll need to look for official documentation from Lenovo.
- Try various Google searches using your motherboard version, manufacturer, model, and CPU (for example: “lenovo 0b98401 3943 i3-3220“). The first result is often a specs PDF.

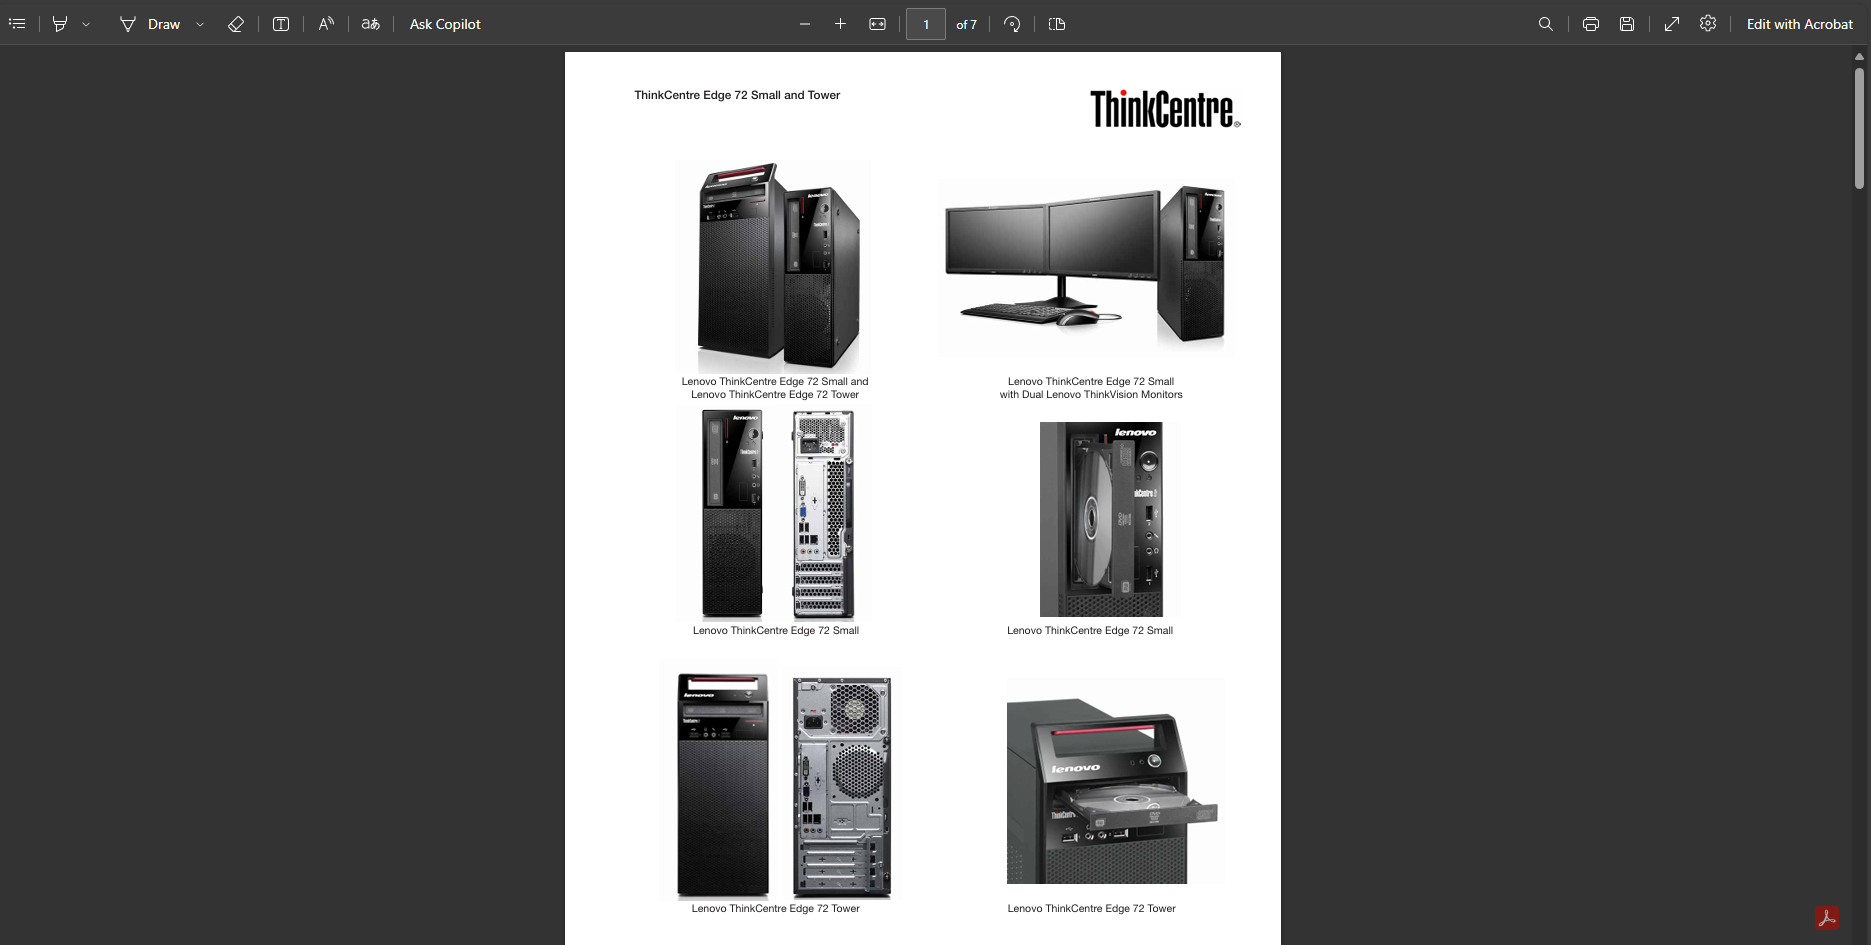
- According to the PDF, this PC is a ThinkCentre Edge 72 Small and Tower model.
- Reading the entire PDF may take time, but you can press Ctrl+F and search for the CPU model (in this example, “i3-3220“). The details show that the “0B98401 PRO” motherboard uses the Intel H61 chipset.
Reviewed by Huzaifa Haroon