What is trustedinstaller.exe? How to Fix it’s High CPU Usage?
 Reviewed by Muhammad Zubyan
TrustedInstaller.exe is a critical system process found in Microsoft Windows operating systems. It is vital for managing and enforcing file permissions and ownership, particularly for system files and folders. It is associated with the Windows Modules Installer service, which handles the installation, modification, and removal of Windows updates and optional components.

What’s the purpose of Trustedinstaller.exe?
TrustedInstaller.exe is designed to safeguard essential system files and prevent unauthorized modifications that could compromise the operating system’s stability and security. By default, TrustedInstaller.exe possesses full control over system files and directories, ensuring that only trusted and authorized system processes can make changes to them.
High CPU, Disk & Memory usage caused by TrustedInstaller.exe
Although TrustedInstaller.exe is a critical system process, it can sometimes lead to problems. One issue is high CPU or disk usage, which can result in system slowdowns or freezes. This typically happens when the process is installing or updating Windows components. However, if excessive resource usage continues for an extended period or happens frequently, it may suggest an underlying problem that needs attention.
In some instances, malware might try to mimic TrustedInstaller.exe to conceal its actions. If you observe any suspicious behavior like unanticipated network traffic or system alterations attributed to TrustedInstaller.exe, it is crucial to perform a comprehensive malware scan using trustworthy security software. This step will help safeguard the security of your system.
1. How to Determine if TrustedInstaller.exe is a Virus or Legitimate
As discussed before, malware might mimic the TrustedInstall.exe to conceal its actions, to determine if the TrustedInstaller.exe on your system is a virus or a legitimate Windows process, you can follow these below-mentioned methods:
1.1 Check File Location
The legitimate TrustedInstaller.exe file is typically located in the “C:\Windows\servicing” directory. If you find it in any other location, it could be a potential sign of malware. Here’s how to check it:
- Press the Windows + R keys simultaneously to open the Run dialogue box
- In the run dialogue box, type taskmgr in the text box and hit the enter key.
- Navigate to the details option located in the task manager as shown in the image.
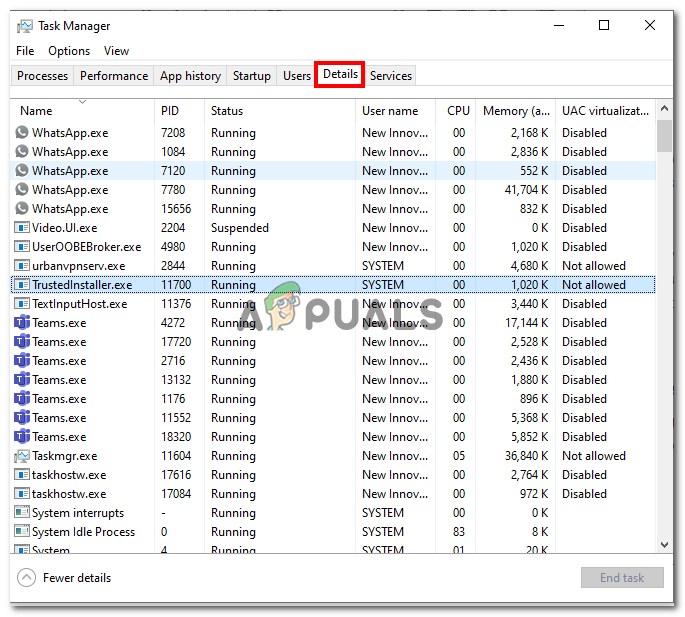
- Now, in the list of services, Locate TrustedInstaller.exe.
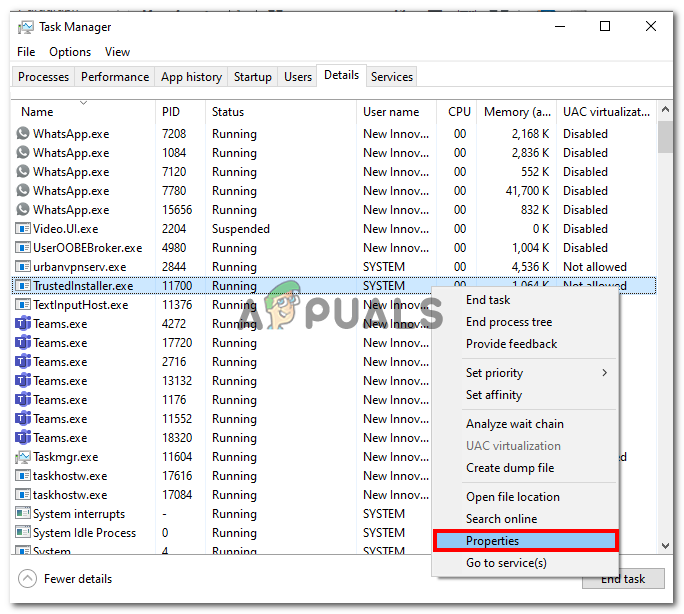
- Right-Click on TrustedInstaller.exe and click on Properties in the context menu.
- Now, in the properties window. Verify if the location is “C:\Windows\servicing”.
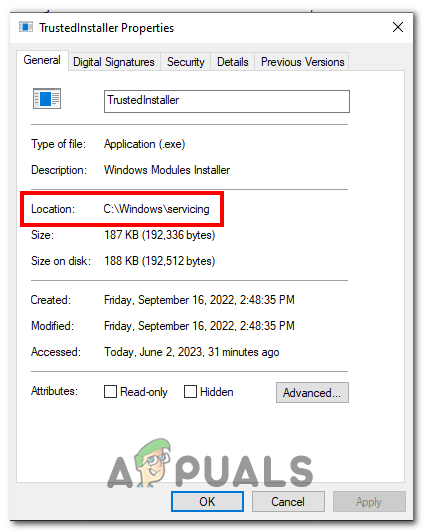
If the location is different from the one we have mentioned, the TrustedInstaller.exe installed on your computer is potentially a virus.
1.2 Check Digital Signature
The legitimate TrustedInstaller.exe file is signed by Microsoft. If there is no digital signature or the signature is from an unknown source, it might indicate a malicious file. Here’s how to check the Digital Signature:
- Open the Task Manager.
- Open the properties of the TrustedInstaller.exe.
- Now, Navigate to the Digital Signatures option.
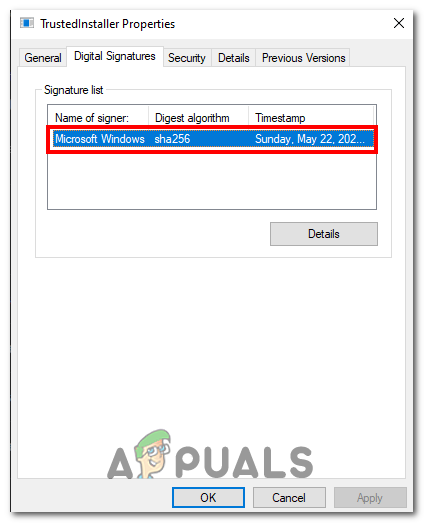
- If the file is signed by Microsoft Windows, it’s not a virus otherwise it’s possibly a virus.
1.3 Observe system behavior
Observe the behavior of TrustedInstaller.exe. Legitimate TrustedInstaller.exe runs as a background process and is responsible for managing system files and updates. If you notice suspicious activity such as high CPU or disk usage, unexpected network connections, or frequent errors related to TrustedInstaller.exe, it could be a sign of malware.
2. Remove TrustedInstaller.exe if it’s a virus
If you are certain that the TrustedInstaller.exe file on your computer is malware, it is strongly recommended to remove it. However, if you are still unsure and facing high CPU usage, you can proceed directly to method number 3. Here’s how you can remove the TrustedInstaller.exe from your computer using a Third-party Antivirus:
- Click here to download Malwarebytes.
- Proceed with the straightforward installation procedure.
- Once the installation is finished, the application will require you to restart your computer.
- Run a scan and remove any malware on your computer.
3. Fix high CPU usage without removing TrustedInstaller.exe
If you’re not sure if the TrustedInstaller.exe installed on your computer is a virus and yet you’re facing high CPU usage. There are multiple things you can do to cure this error:
3.1 Disable Windows Updates
TrustedInstaller and Windows Update are closely linked as TrustedInstaller is a Windows service responsible for managing the installation, modification, and removal of Windows system files. It plays a crucial role in maintaining the integrity of the operating system. Disabling Windows update will ensure that the service won’t be running in the background utilizing your computer’s resources, Here’s how to do so:
- Open the Settings app by pressing Win + I.
- Click on Update & Security.
- Select Windows Update from the left sidebar.
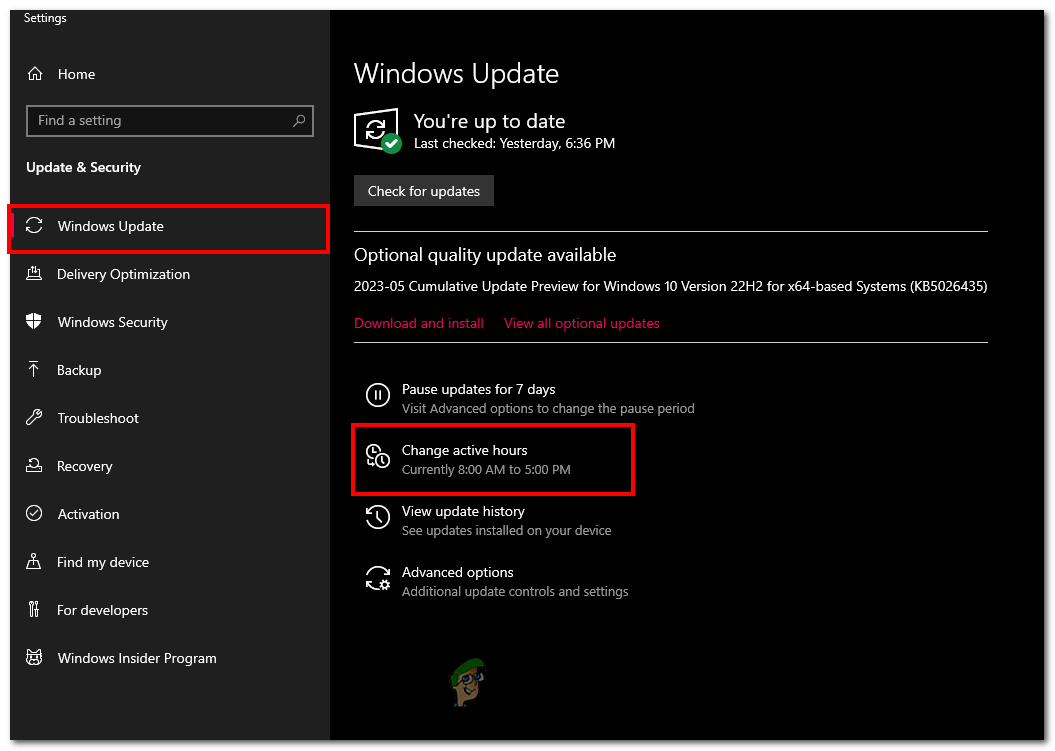
- Click on Change active hours.
- Set the active hours to a time when you won’t be using your computer.
This prevents Windows Updates from interrupting your work and causing high CPU usage during those hours.
3.2 Perform a clean boot
A clean boot is a troubleshooting technique used in Windows to start your computer with only the essential drivers and startup programs. This minimal configuration helps in identifying and isolating any software conflicts that could be causing high CPU usage or other related issues. By initiating a clean boot, you can pinpoint whether a particular program or service is responsible for the CPU usage problem.
- Press the Windows + R keys to open the run dialogue box
.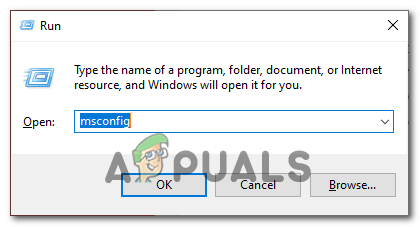
- In the Run dialogue box’s search box, type “msconfig” and hit the enter key. This’ll open the system configurations window.
- Navigate to the Services tab in the system configurations window.
- Check the box that says “Hide all Microsoft services”. This will prevent it from disabling any essential services.
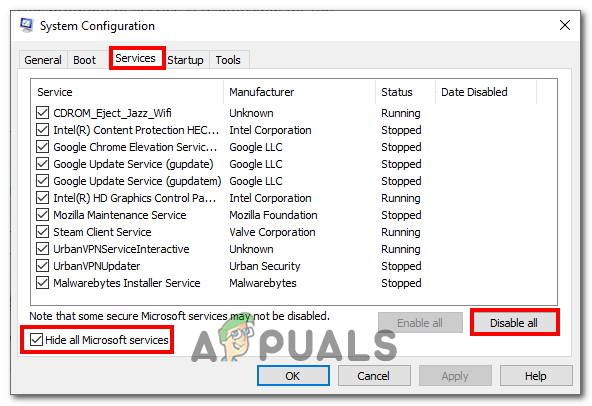
- Click the “Disable all” button to disable all non-essential services.
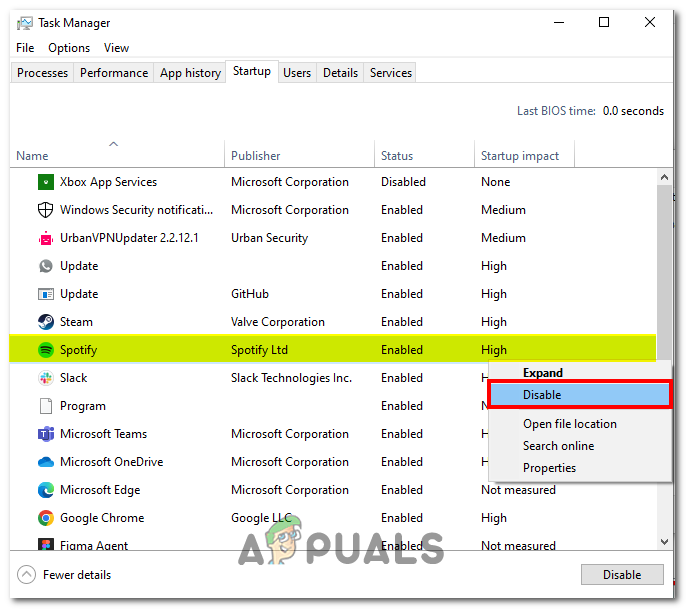
- Next, Navigate to the “Startup” tab in the system configurations window.
- Disable the startup apps by right-clicking and clicking on the Disable button.
- Save the changes and Restart your computer.
3.3 Disable the Windows module Installer service
When TrustedInstaller.exe encounters high CPU usage, it can be a result of various factors. One common issue occurs when the Windows Module Installer service gets stuck in a loop or encounters conflicts, causing it to consume excessive CPU resources.
Disabling the Windows Module Installer service is not a recommended solution because it is essential for managing updates and system components. However, there are scenarios where temporarily disabling it can help diagnose and resolve high CPU usage issues caused by the service.
- Press the Windows + R keys simultaneously on your keyboard to open the run dialogue box.
- In the search box, type “services.msc”
- In the list of services locate the Windows Module installer service.
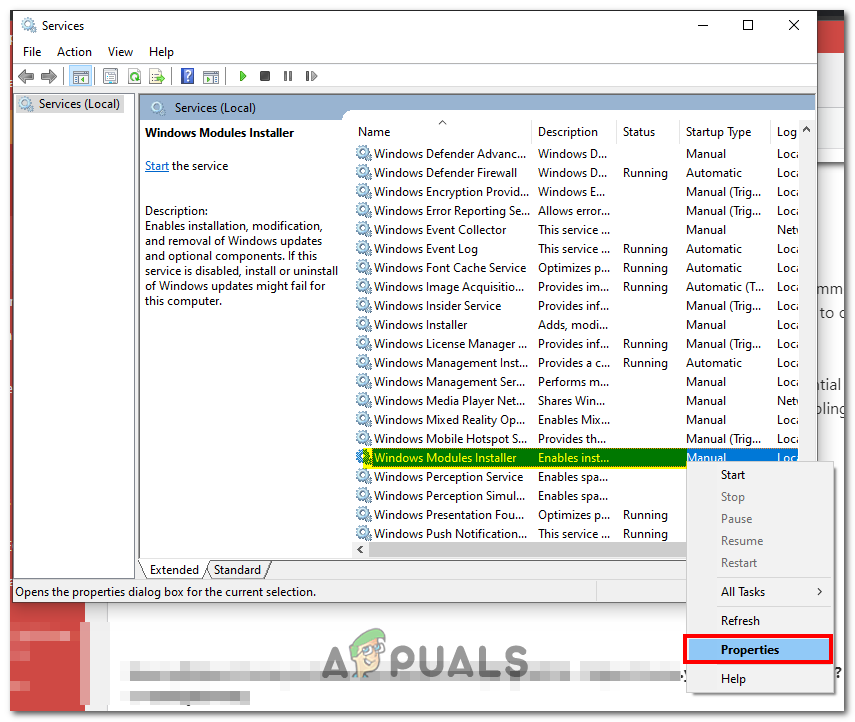
- Right-click on it and in the context menu click on Properties.
- In the properties, Change the startup type to “Disabled”.
- Save changes and restart your computer.
3.4 Allow it to update
If the TrustedInstaller.exe on your computer is legitimate and consuming resources, it is usually due to it updating your computer’s Windows to the latest version available. You can try leaving your computer turned on with an active internet connection for a few hours.
Reviewed by Muhammad Zubyan


