What is NVVSVC.EXE and Should You Delete or Disable it?
The Windows Task Manager‘s Processes tab, on all currently supported versions of the Windows Operating System, displays a list of every single process (both system and non-system) that is running on the computer at any given time. If you want to know where your computer’s resources such as network, RAM and processing power are being used, all you need to do is navigate to the Task Manager‘s Processes tab and see what process is using what amount of computer resources. When Windows users with NVIDIA GPUs navigate to the Processes tab of their computer’s Task Manager, they see three processes that are directly related to their graphics card and its functionality – two of these processes are named NVVSVC.EXE, whereas one is named NVXDSYNC.EXE.
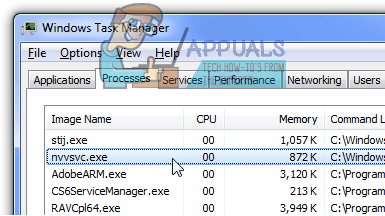
Windows users with NVIDIA graphics cards, upon seeing three processes that they know nothing about and which have nothing in their process description fields running on their computers, get understandably concerned about the security of their computers and their computers’ resources. That being the case, these users end up wondering exactly what NVVSVC.EXE is and whether or not it should be removed or at least disabled.
Well, one thing should be made clear right off the bat – NVIDIA, like almost all other corporations, doesn’t give out trade secrets, so we do not know EXACTLY what the purpose of the NVVSVC.EXE process is. Finding that out would require extensive reverse engineering of the process. However, we do have a decent idea of what the NVVSVC.EXE process does. From what consumers know at the moment, it has been deduced that the NVXDSYNC.EXE process is responsible for 3D graphics rendering, and in order for this process to run it is necessary for the NVVSVC.EXE process to be running. In addition, the NVVSVC.EXE process has also been found to be, in some way, responsible for the functioning of the NVIDIA Control Panel (the settings panel NVIDIA users use to configure their graphics card settings).
Now that you know the NVVSVC.EXE process is an actual NVIDIA process that is basically essential if you want your NVIDIA graphics card to function at its finest, you can probably infer that removing the process from your computer or otherwise disabling it and preventing it from running will do no good for your computer and will, in actuality, hurt it instead. What concerns many users when it comes to processes such as the NVVSVC.EXE process is that they use computer resources, so they might clutter up their computers. Well, the fraction of computer resources used by the NVVSVC.EXE process is quite minimal and is not enough to cause any harm or other kind of hindrance to any computer as long as the process is running like it is supposed to. The NVVSVC.EXE process, on its own and while functioning like it is supposed to, will not slow your computer down in any way.
However, unfortunately, there exists an issue faced by NVIDIA graphics card users where their graphics drivers or some other culprit causes the NVVSVC.EXE process to start using up absurdly large amounts of computer resources such as processing power and RAM. But even in such cases, disabling the NVVSVC.EXE process is not the way to go as that will cause your computer more harm than good. Instead, there are specialized solutions designed specifically to help users affected by this problem get rid of it, and the absolute most effective ones can be found in this guide.