What is Realtek? How to Fix Common Issues with Realtek
 Reviewed by Huzaifa Haroon
Realtek is a prominent player in the semiconductor industry, specializing in integrated circuits (ICs) crucial for various computing functions in laptops, desktops, and more. Based in Taiwan, Realtek has established a significant presence in the global tech market, particularly in computer and network technology.

The company is renowned for its audio and network chips, which are widely used in computers for sound output via speakers or headphones, often powered by Realtek audio codecs. Additionally, Realtek provides network chips like Ethernet controllers and wireless solutions, along with developing controllers for displays, card readers, and other accessories.
Their commitment to innovation enhances user experiences across different platforms and devices.
How Did Realtek Software End Up On Your Computer?
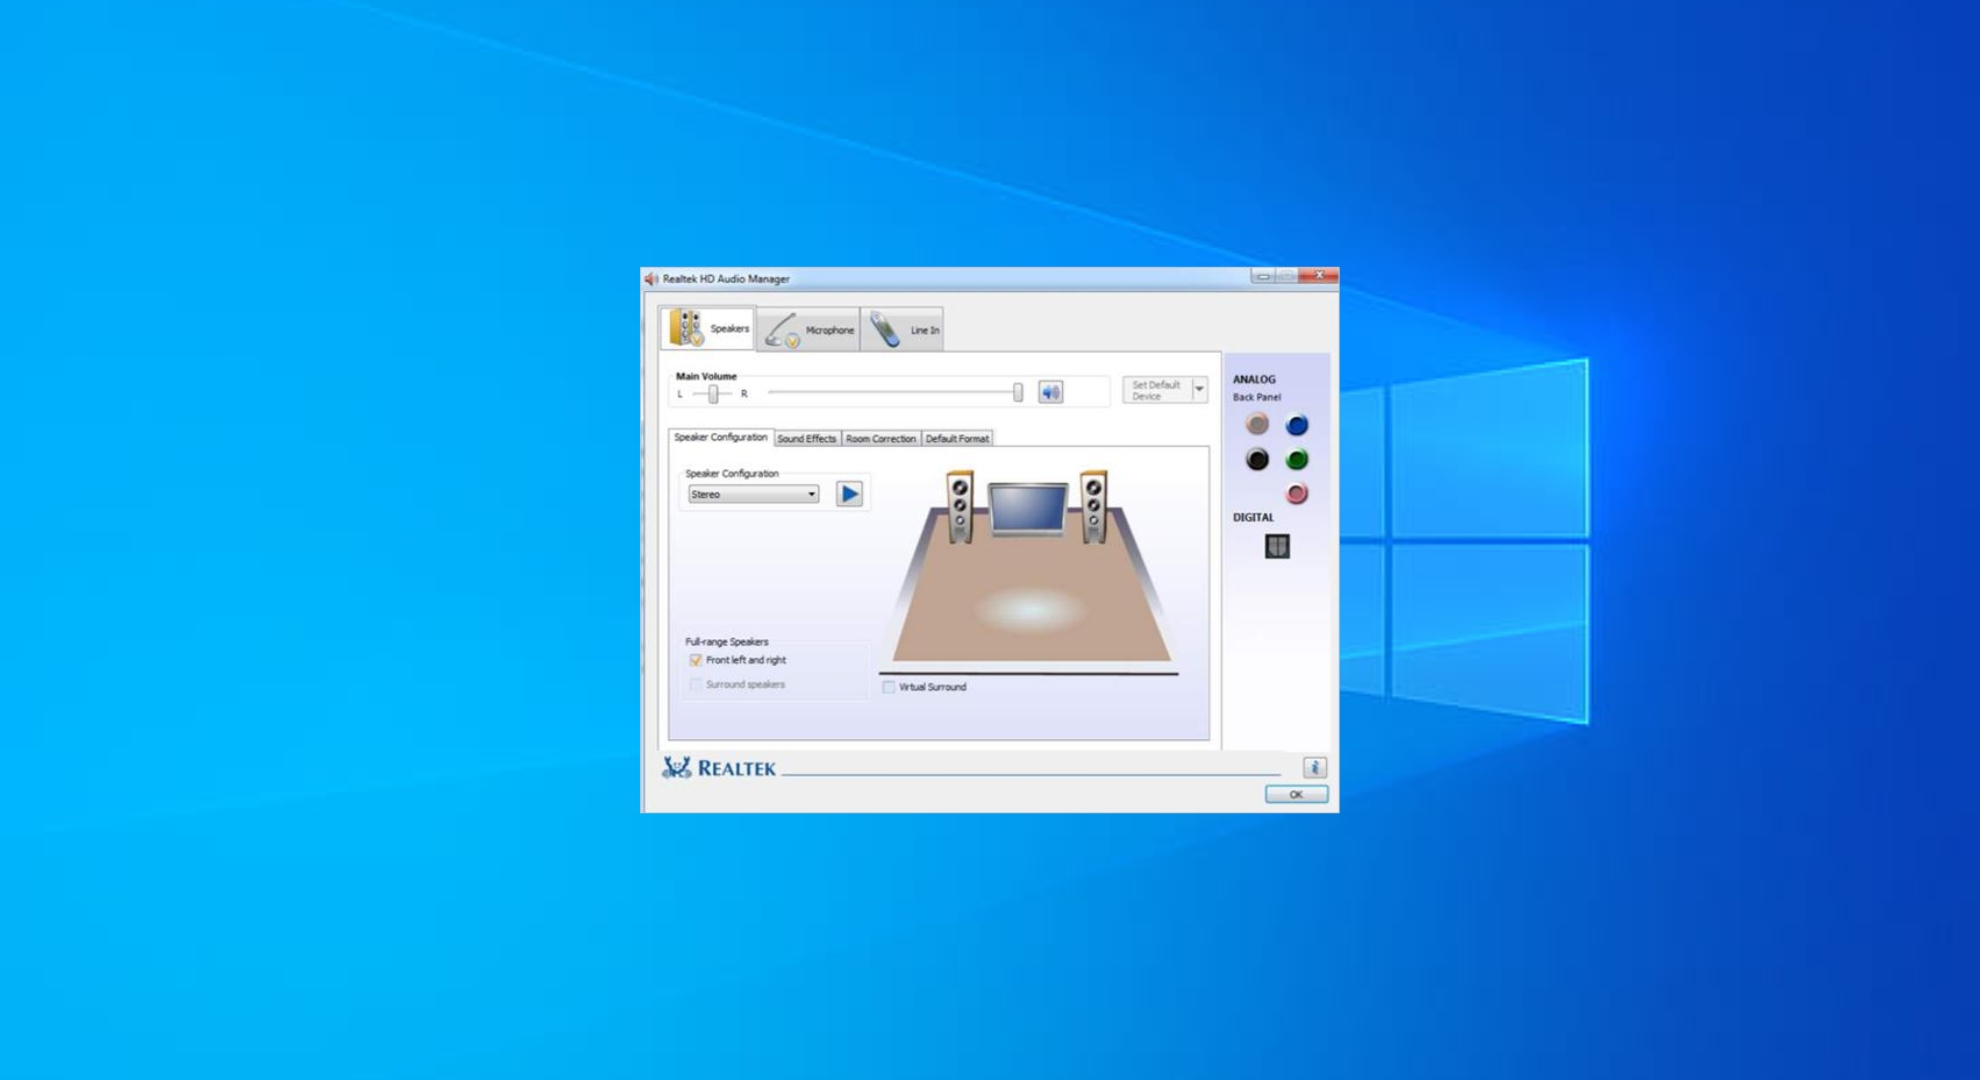
Realtek drivers, especially the Realtek HD Audio Manager, are commonly present on many computers because Realtek’s audio chips are extensively utilized in a variety of PC systems. Purchasing a new computer, particularly one with a Windows operating system, often includes pre-installed Realtek audio components.
Windows and numerous hardware manufacturers opt for Realtek for its dependable and high-quality audio solutions. When Windows is set up on a computer, it automatically detects hardware components and installs necessary drivers to ensure optimal functionality. Since Realtek’s audio chips are widely used, Windows incorporates these drivers in its installations.
This means the Realtek HD Audio Manager software is often pre-installed, ready to assist users in managing audio settings and enhancing their sound experience immediately.
Common issues with the Realtek HD audio tool
The Realtek HD Audio tool is widely used, though it can present certain issues. Many users question why their systems are pre-installed with Realtek software and what leads to the typical problems they encounter. Here are some common issues associated with the Realtek HD Audio tool:
- Audio Distortion: Users may experience crackling or distorted sound, which can disrupt the quality of audio playback.
- Driver Conflicts: Conflicts between Realtek’s drivers and Microsoft’s native drivers can lead to system instability or reduced performance.
- Automatic Installation: Realtek drivers are often automatically installed during system updates, which can be frustrating for users who prefer alternative audio solutions.
- Missing Audio Manager Icon: Updates can sometimes lead to the Realtek HD Audio Manager icon disappearing from the system tray, making it difficult for users to access audio settings easily.
- Incompatibility with Updates: Windows updates may result in incompatibilities with Realtek drivers, manifesting in audio problems or the audio device disappearing completely.
How to Fix Common Issues with Realtek Audio?
Addressing common issues with Realtek audio involves some straightforward troubleshooting steps. First, ensure your speaker connections are secure, and check that audio is not muted or at a very low volume. Here are some effective solutions you can apply:
1. Update Realtek HD Audio Drivers
Updating your Realtek audio drivers via Windows Device Manager is essential to ensure your audio hardware interacts correctly with your operating system. Here are the steps to update them:
- Press “Windows key + R“, type “devmgmt.msc“, and press “OK” to open Device Manager.
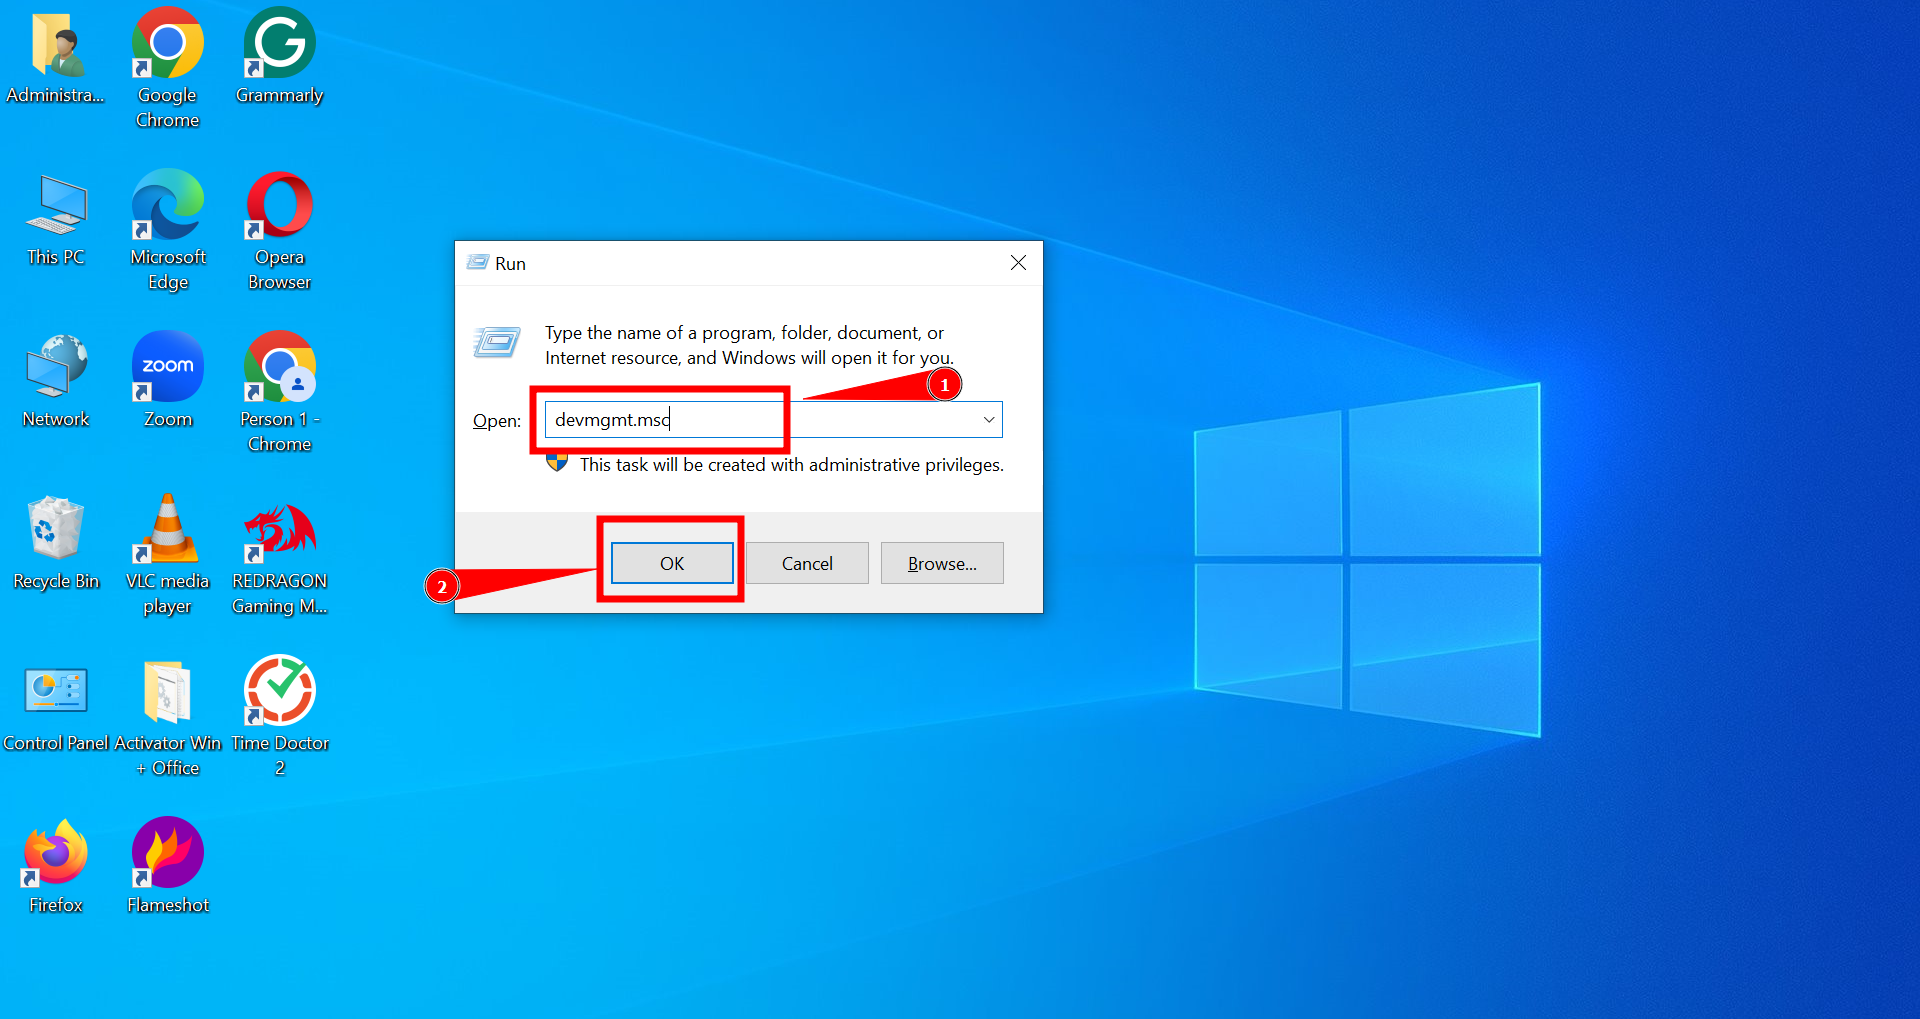
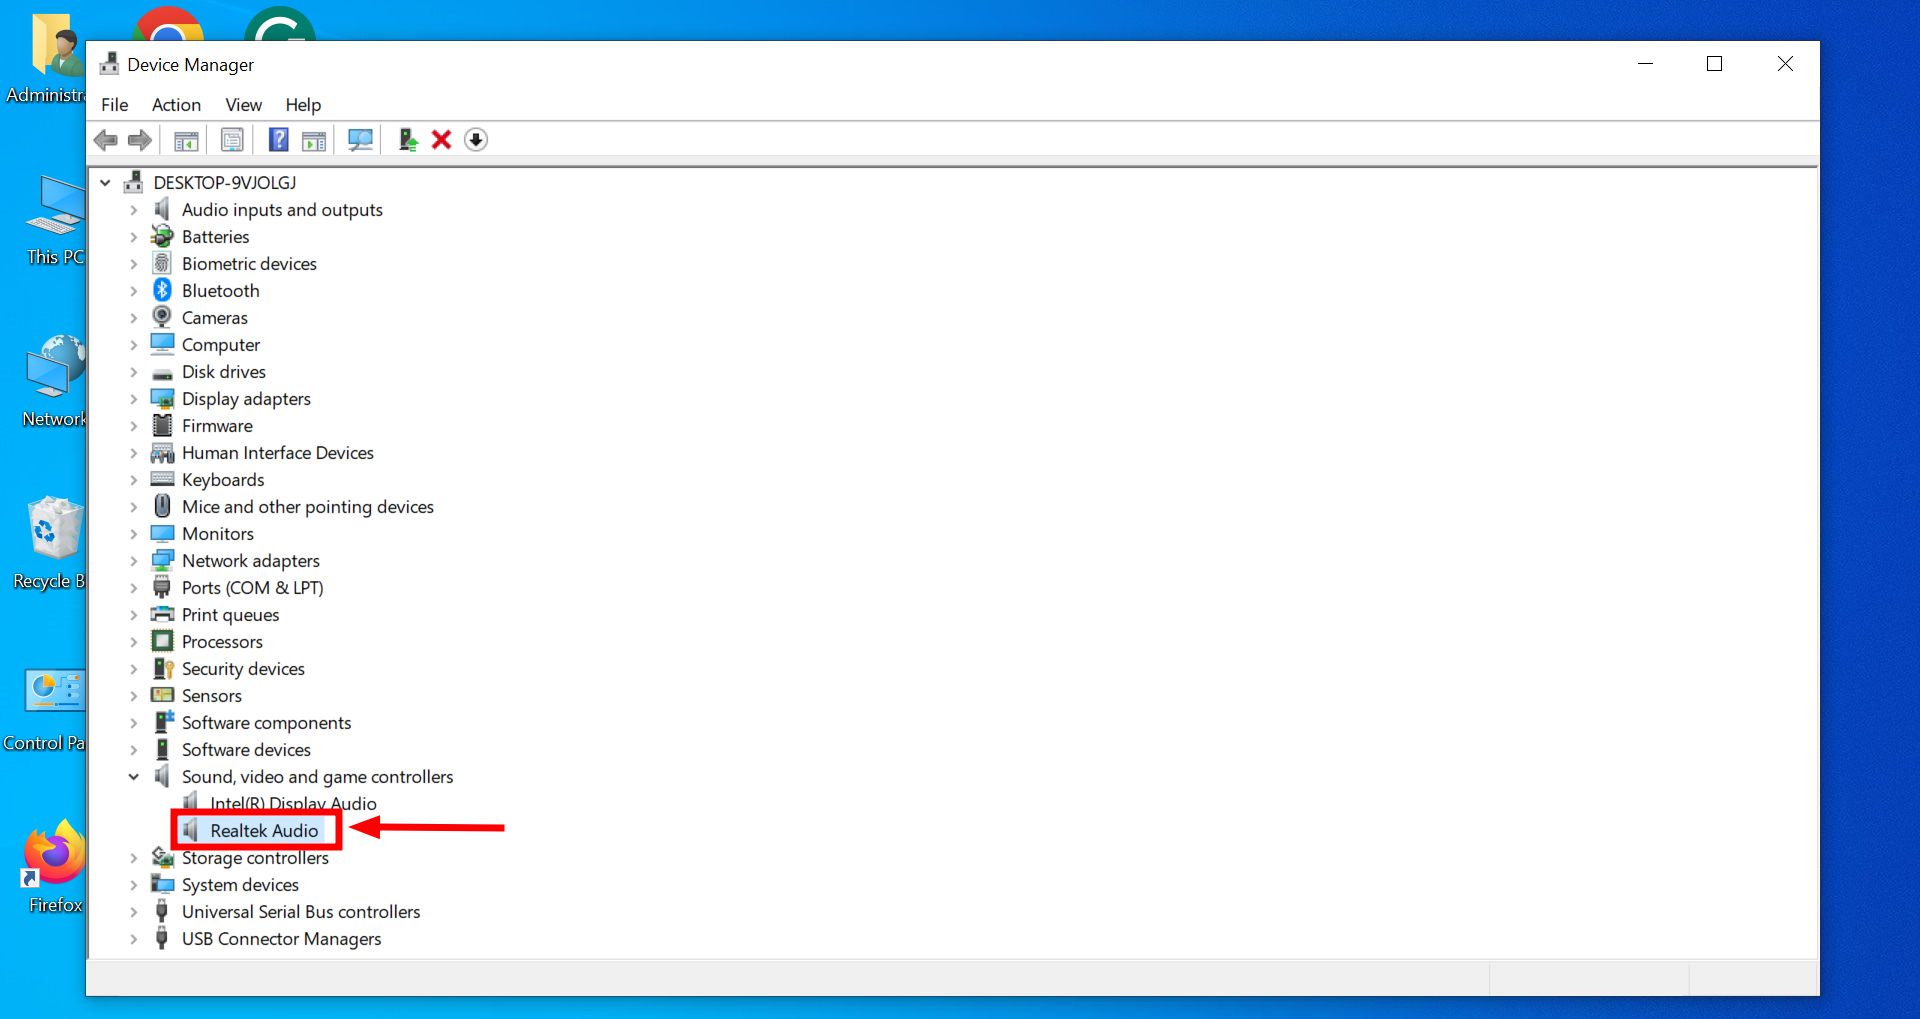
Open Device manager - Locate “Sound, Video, and Game Controllers” and expand this category.
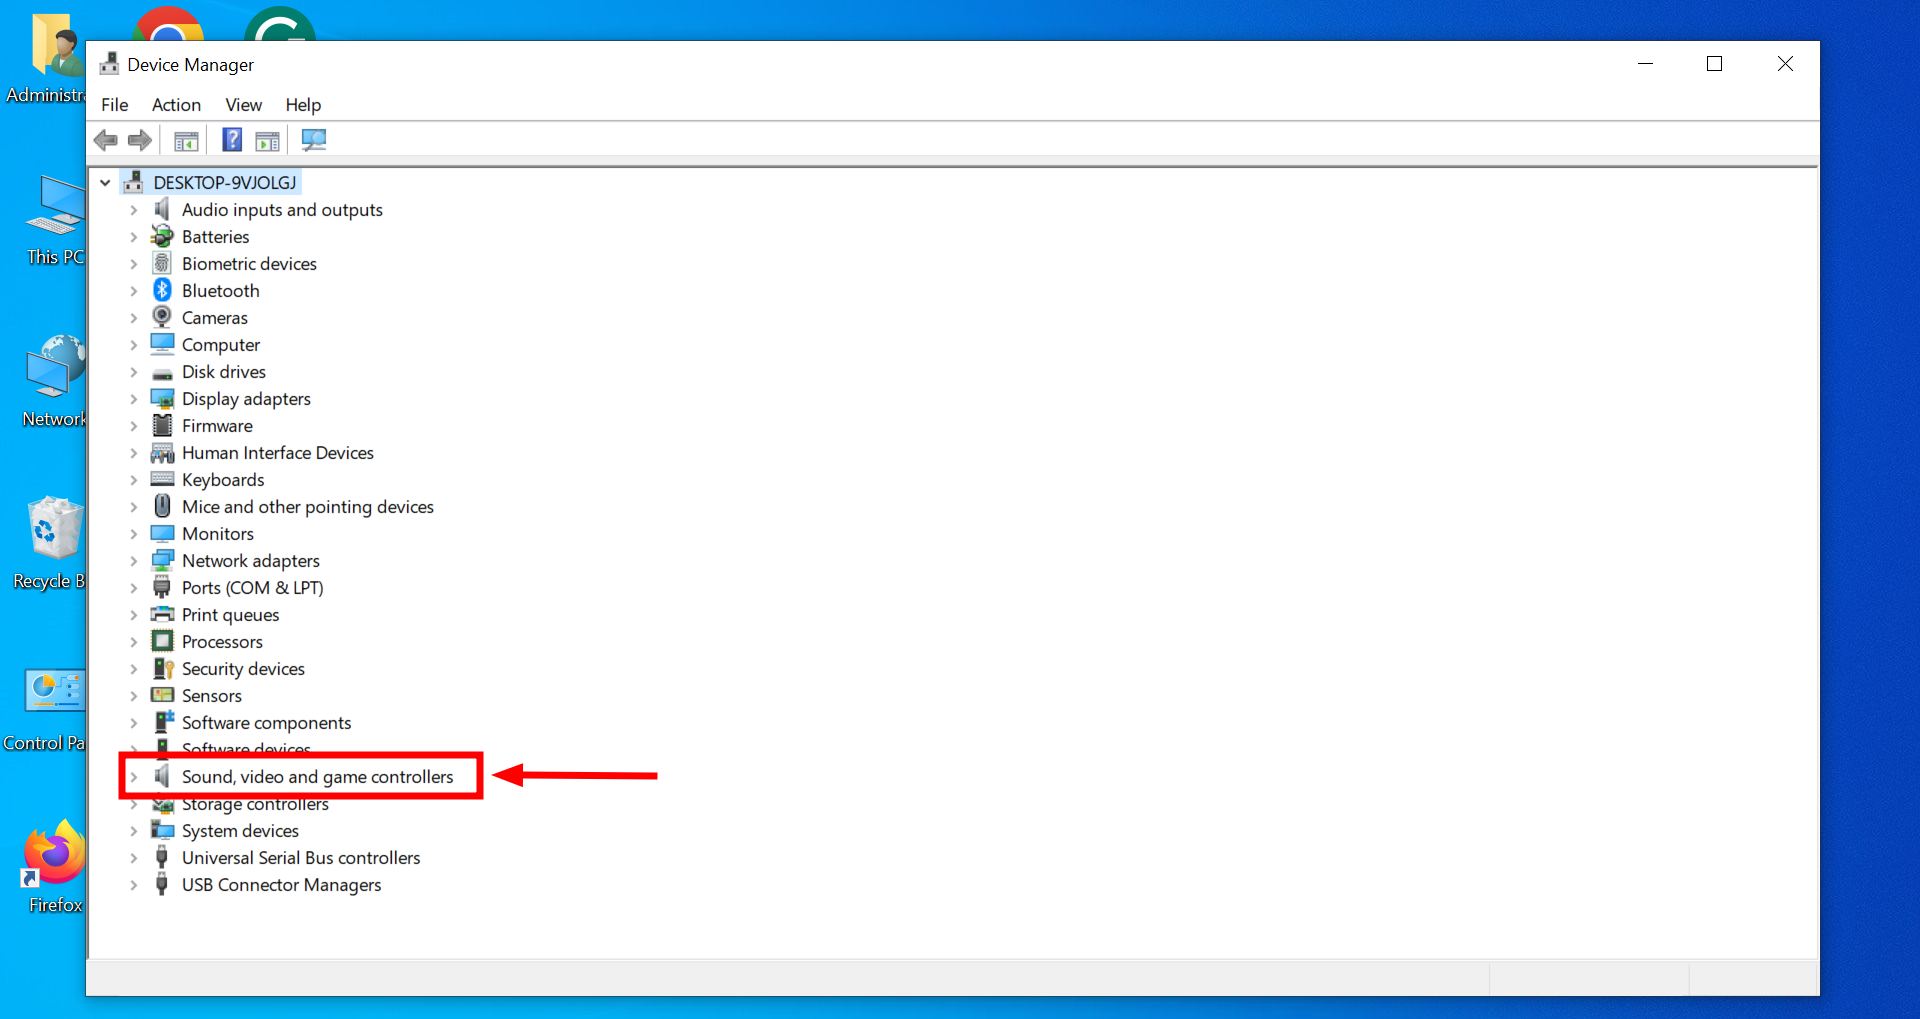
Open Sound devices tab - Right-click on “Realtek Audio” or the appropriate name for your system.
Click on Realtek Audio - Select the “Driver tab” and click “Update driver.”
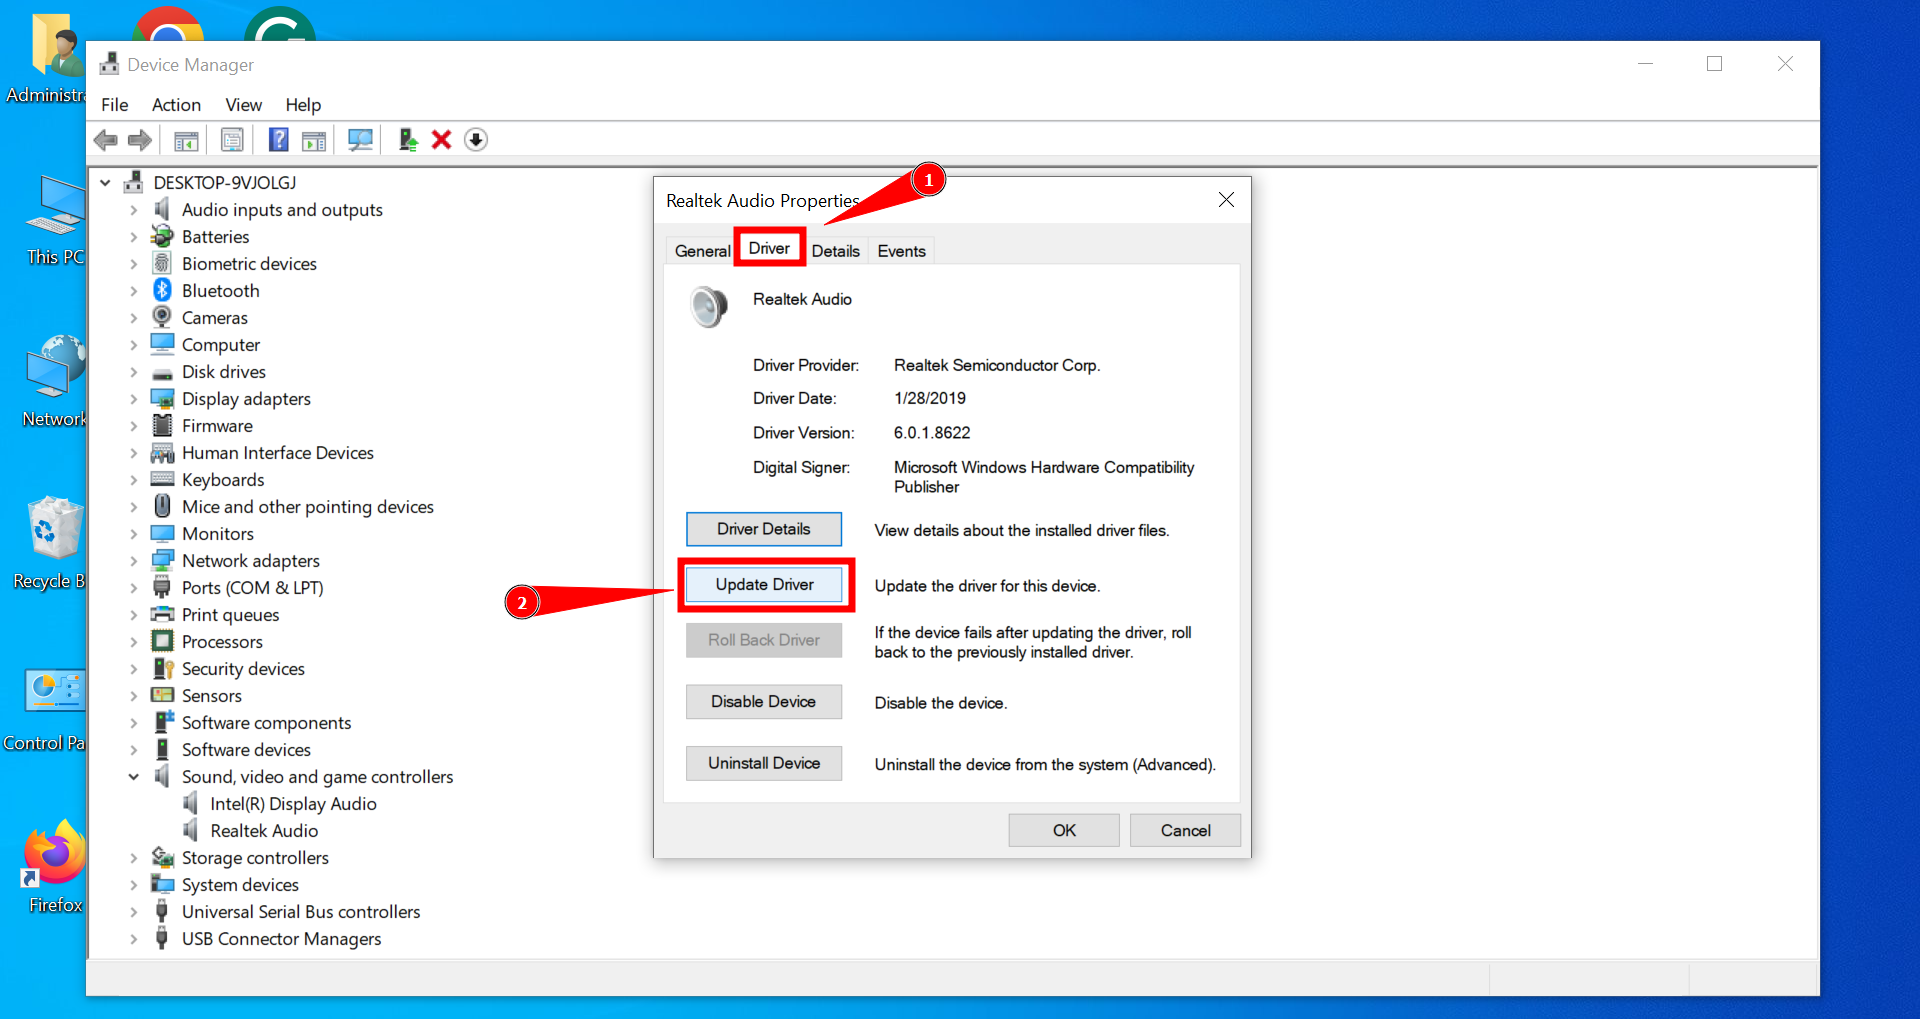
Click on Update Driver - Choose “Search automatically for drivers.” Windows will search online and install the latest drivers automatically.
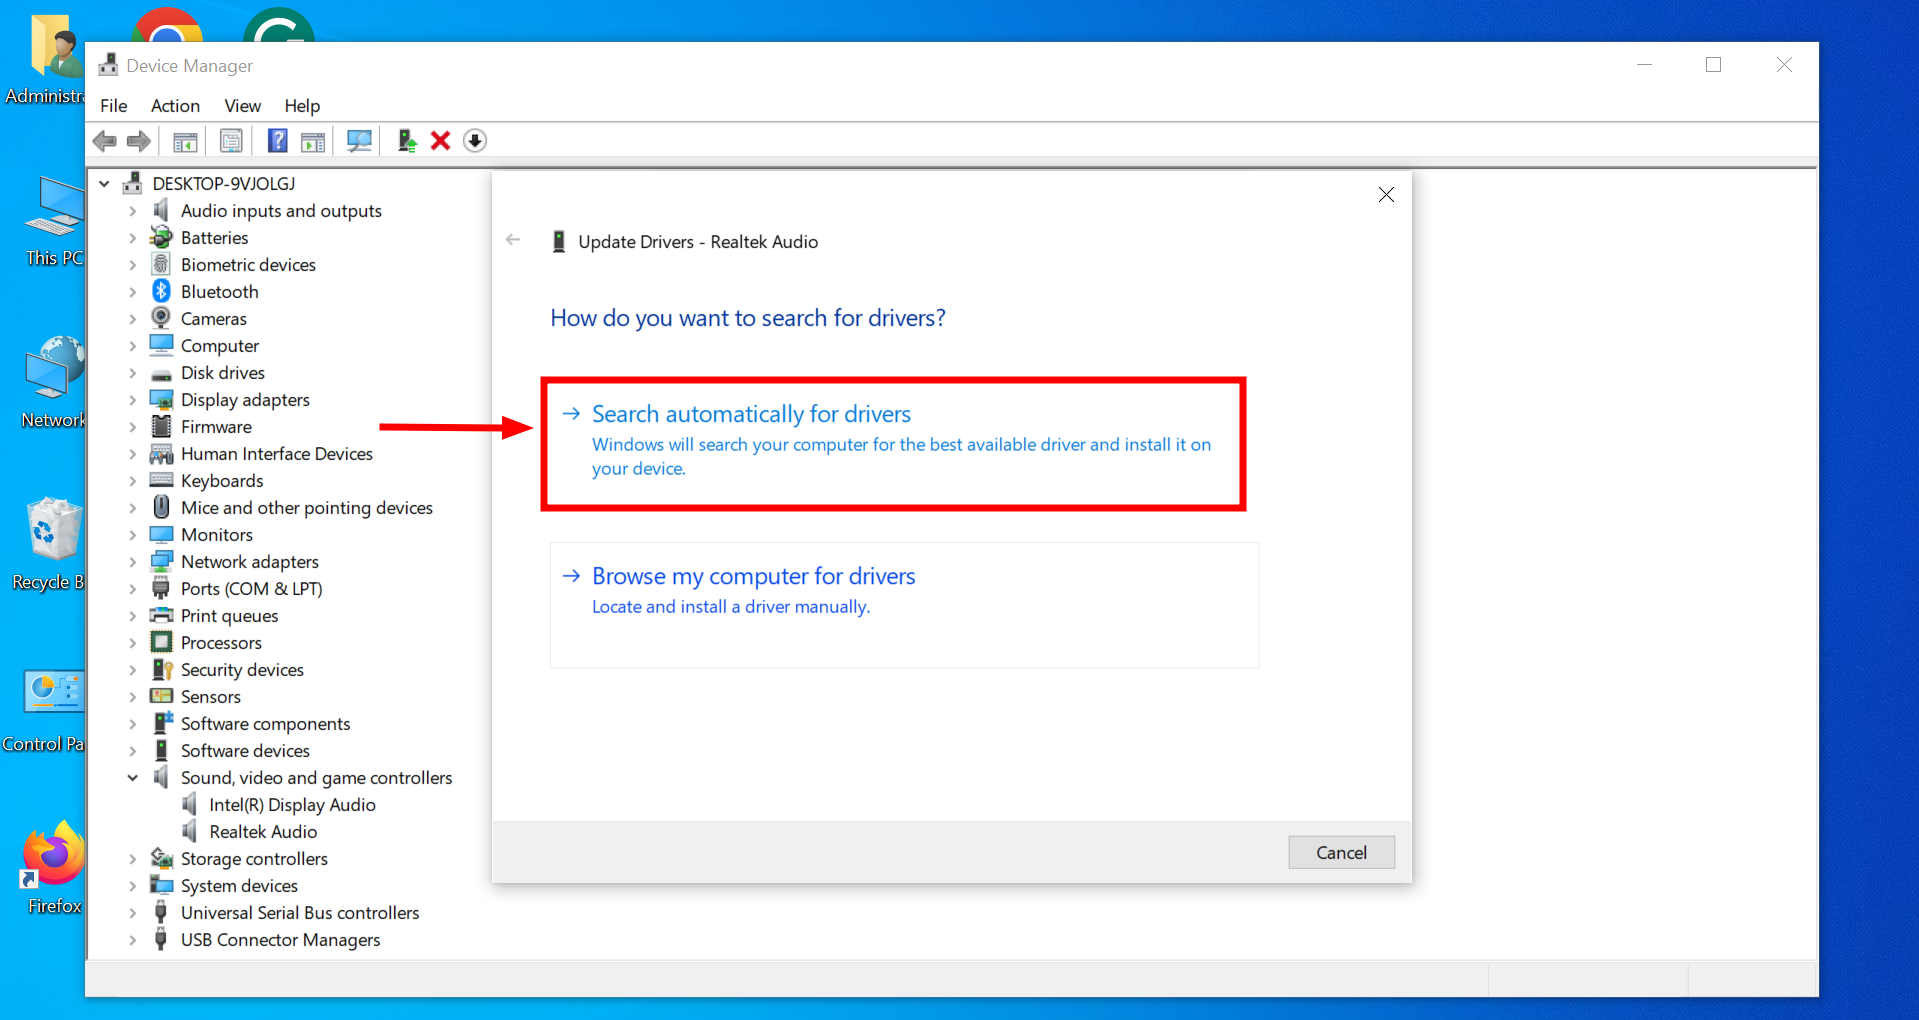
Click Search automatically for drivers
After the installation completes, restart your computer to ensure the updates are applied correctly.
2. Disable Audio Enhancements
Audio enhancements aim to optimize sound quality, but they can sometimes disrupt your system’s settings or audio hardware, leading to issues like distorted sound or no sound. Disabling these enhancements may help stabilize the audio playback and solve such problems. Here’s how to disable them:
- Right-click the sound icon in the system tray and choose “Sounds.”
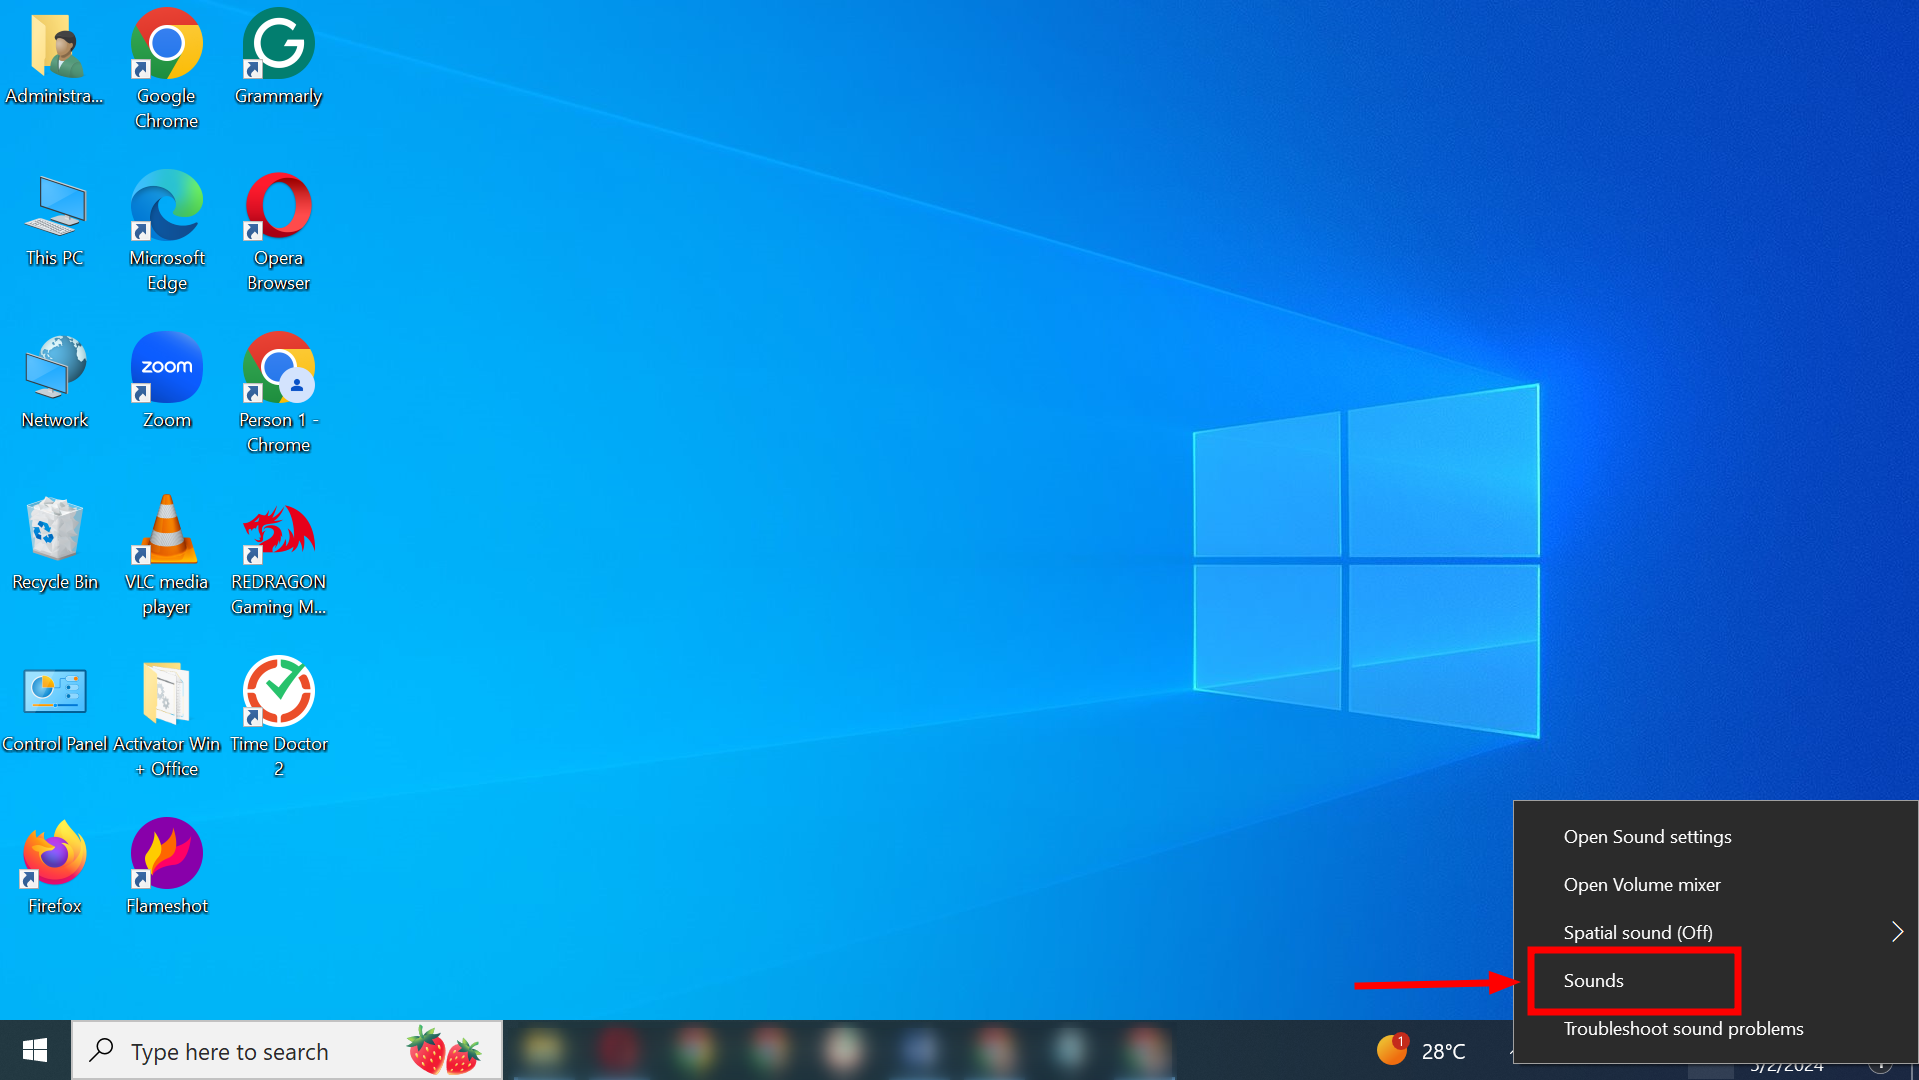
Click Sounds - Under the “Playback” tab, right-click your default device (typically Realtek High Definition Audio) and select “Properties.
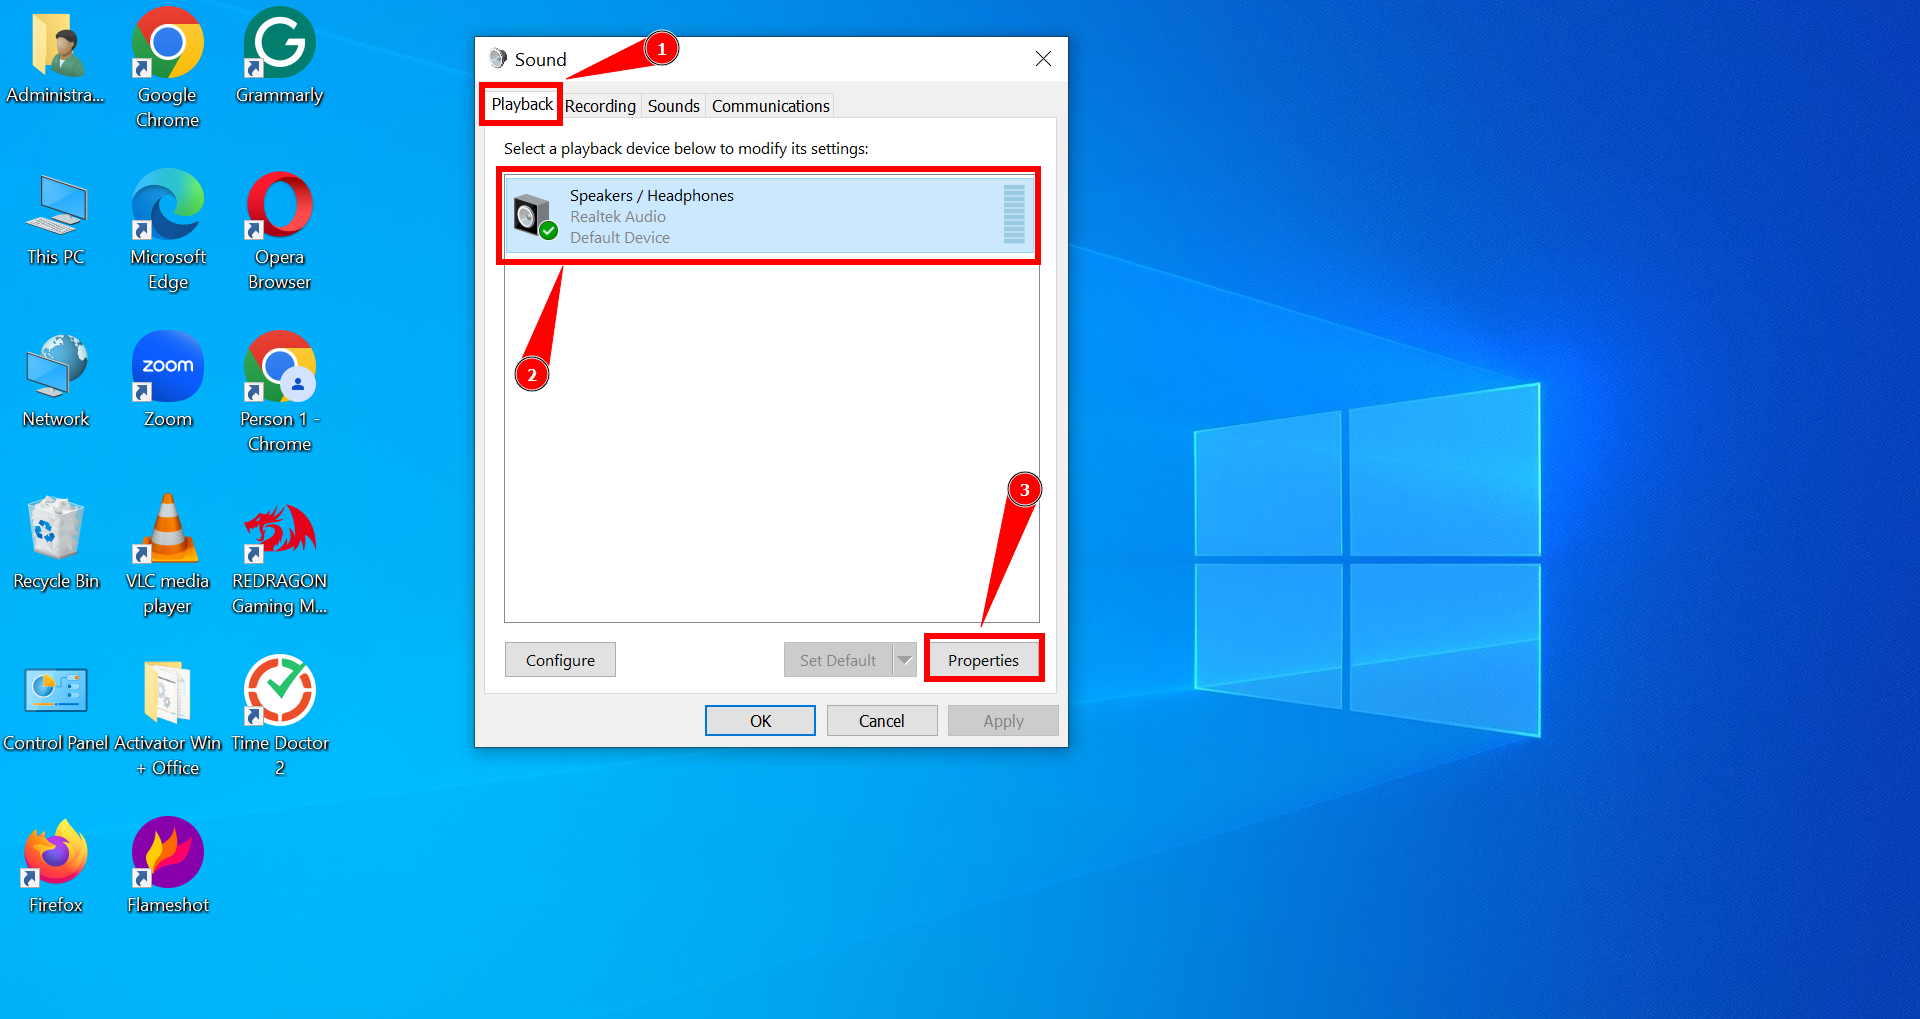
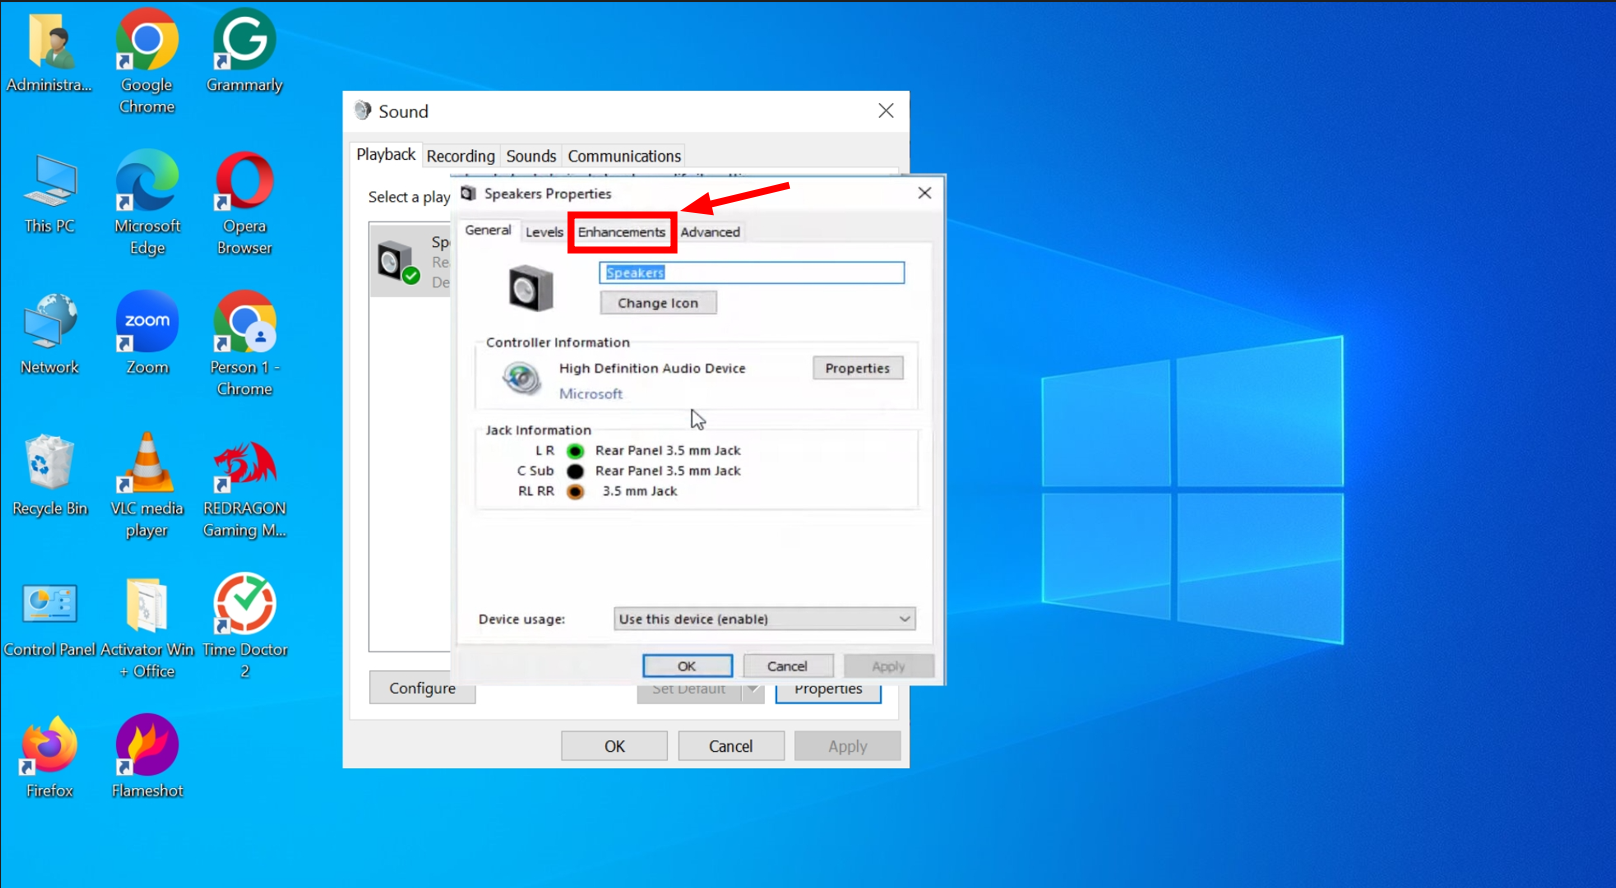
Click on Properties - Navigate to the “Enhancements” tab.
Open Enhancement Tab - Select “Disable all enhancements” or “Disable all sound effects.”
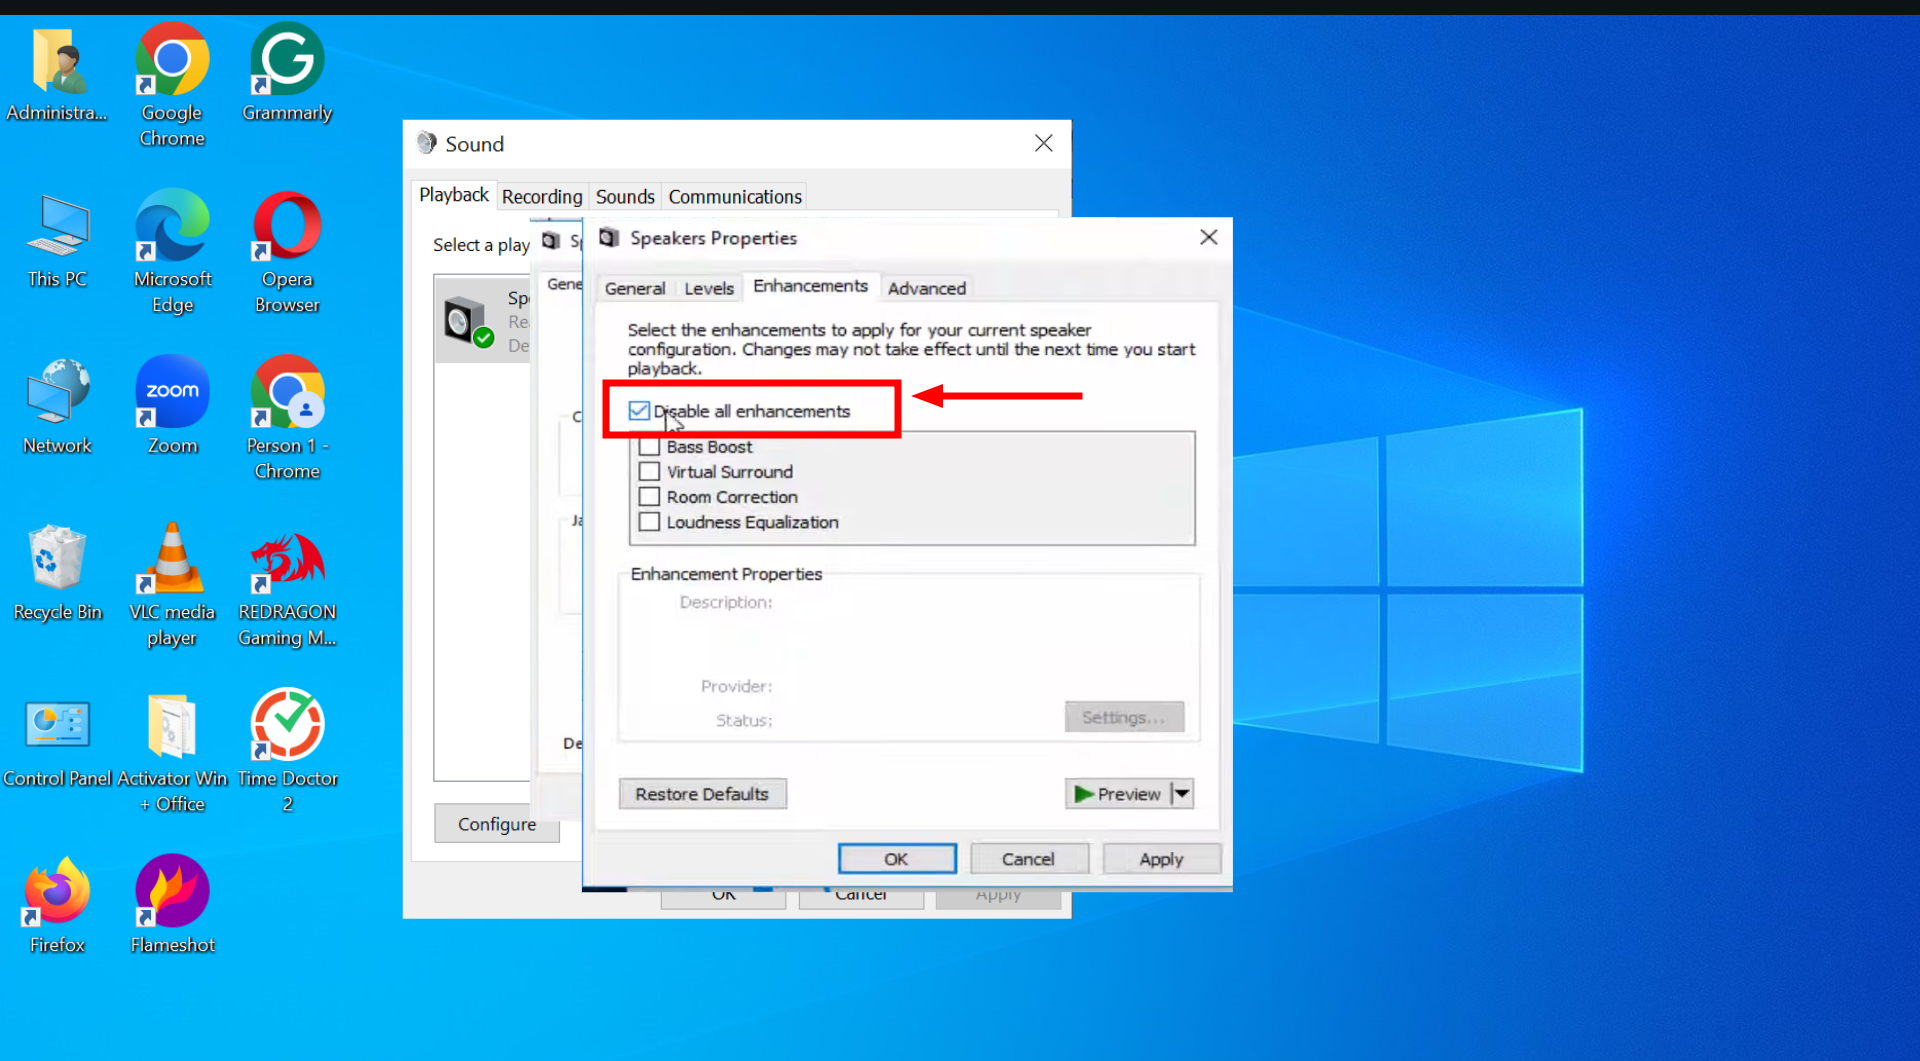
Disable all enhancements - Click “Apply” then “OK” to save and close the window.
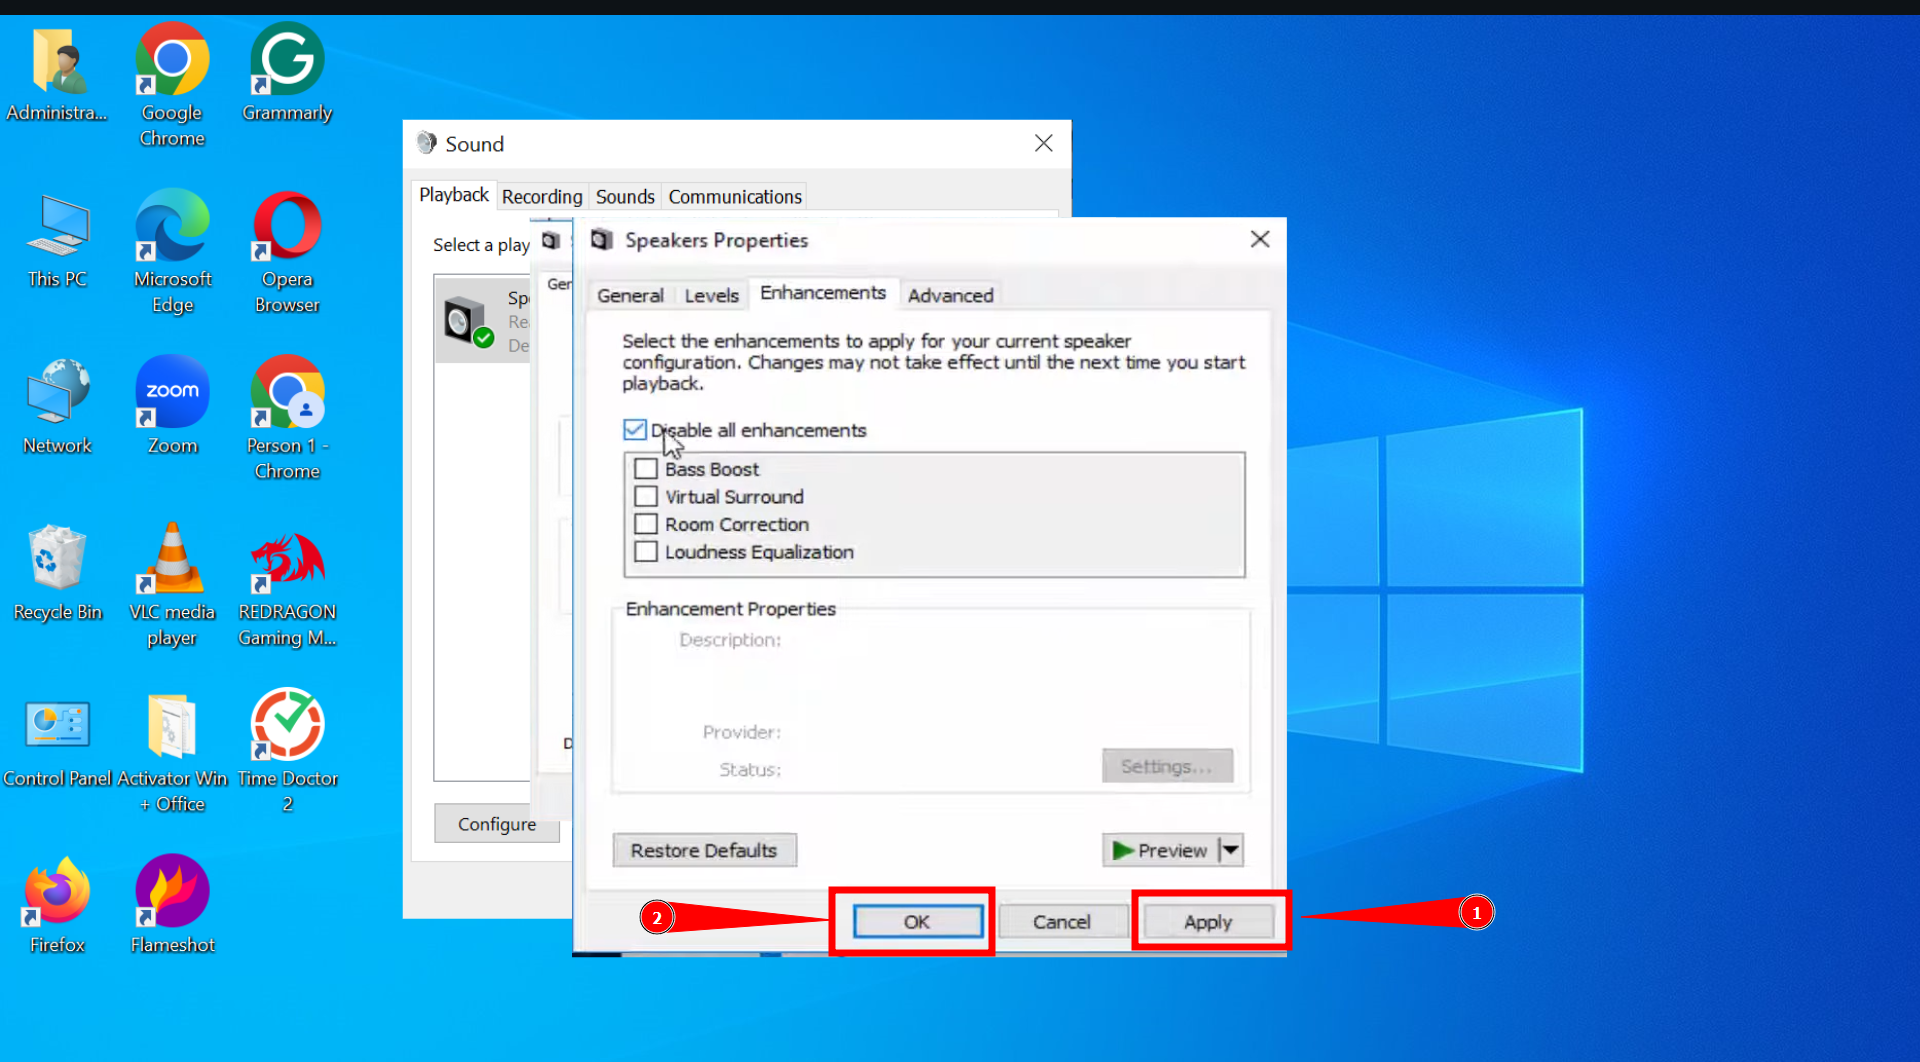
Click OK
3. Enable/Restart Windows Audio Service
The Windows Audio Service is essential for your computer’s sound output. If this service is stopped or encountering issues, it could cause sound problems. Ensuring the service is active and starts automatically can help solve these problems. Here’s how to manage the Windows Audio service:
- Press Windows + R to open the run dialog, type “services.msc“, and click “OK” to access the Services window.
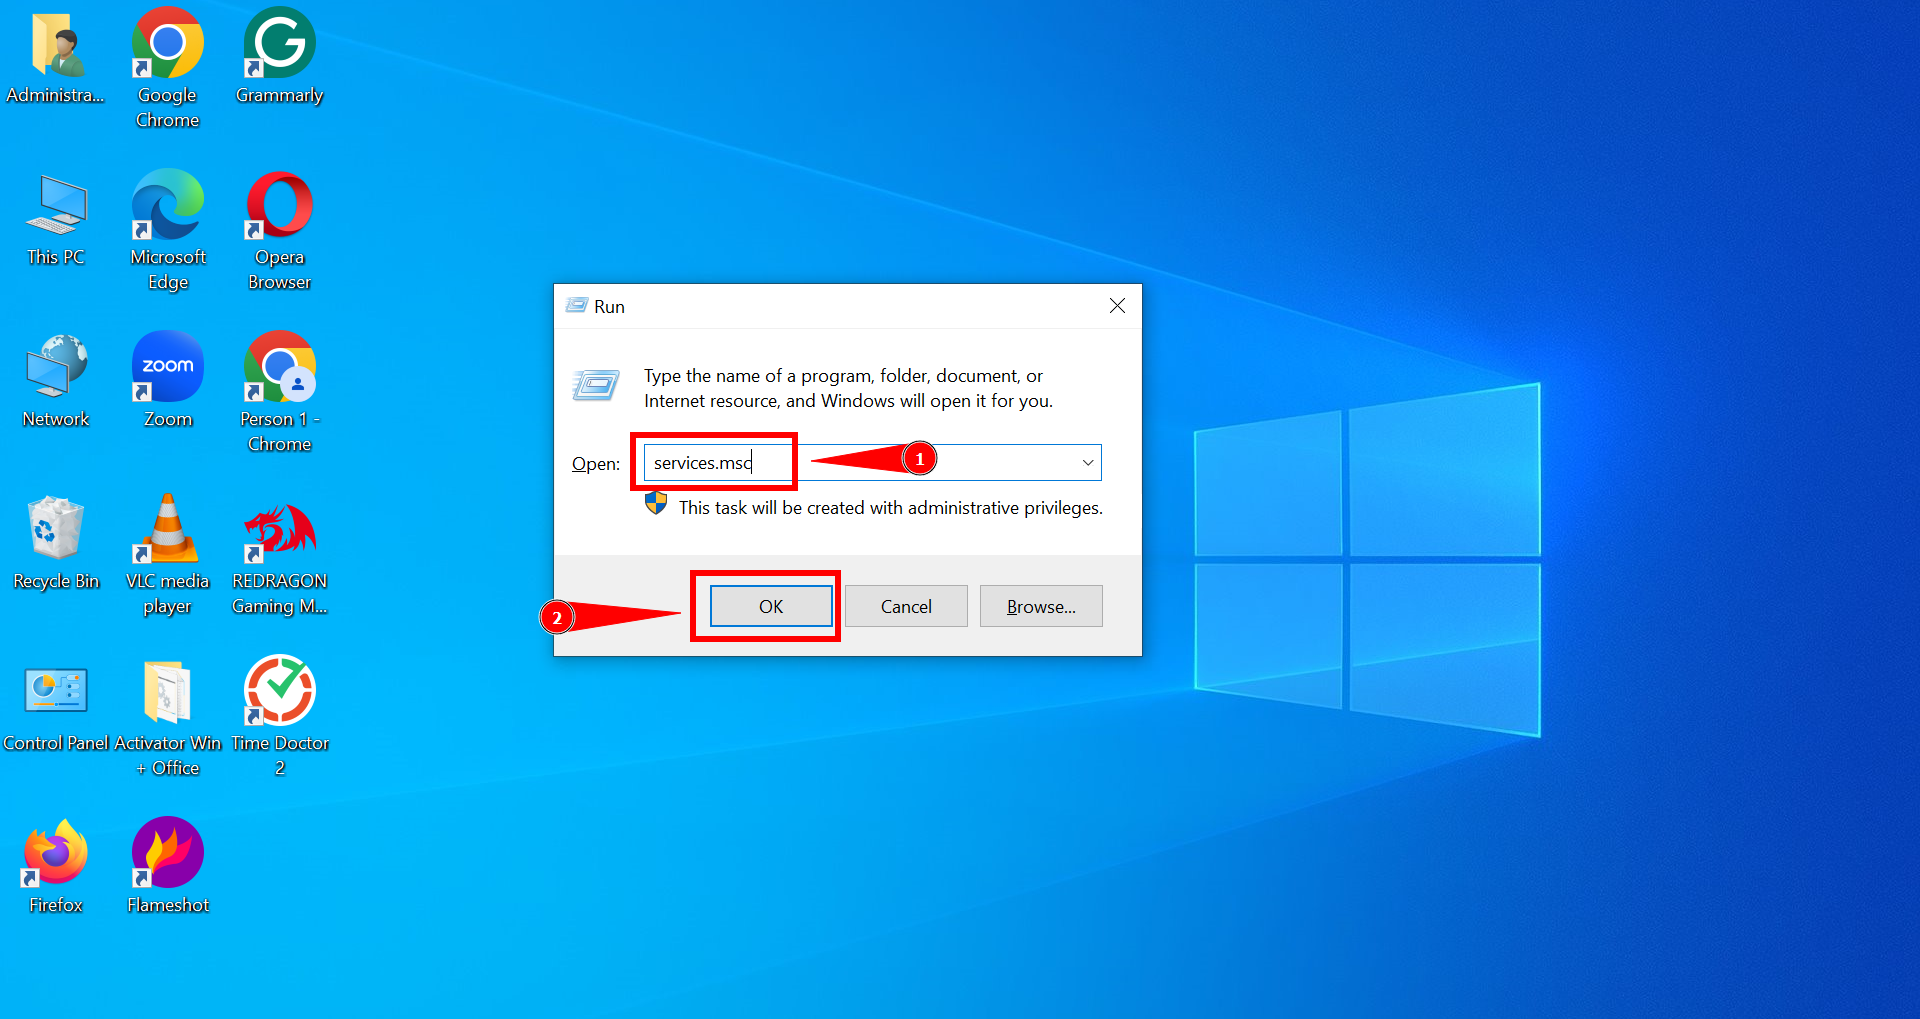
Click OK to open Services - Find “Windows Audio” in the list.
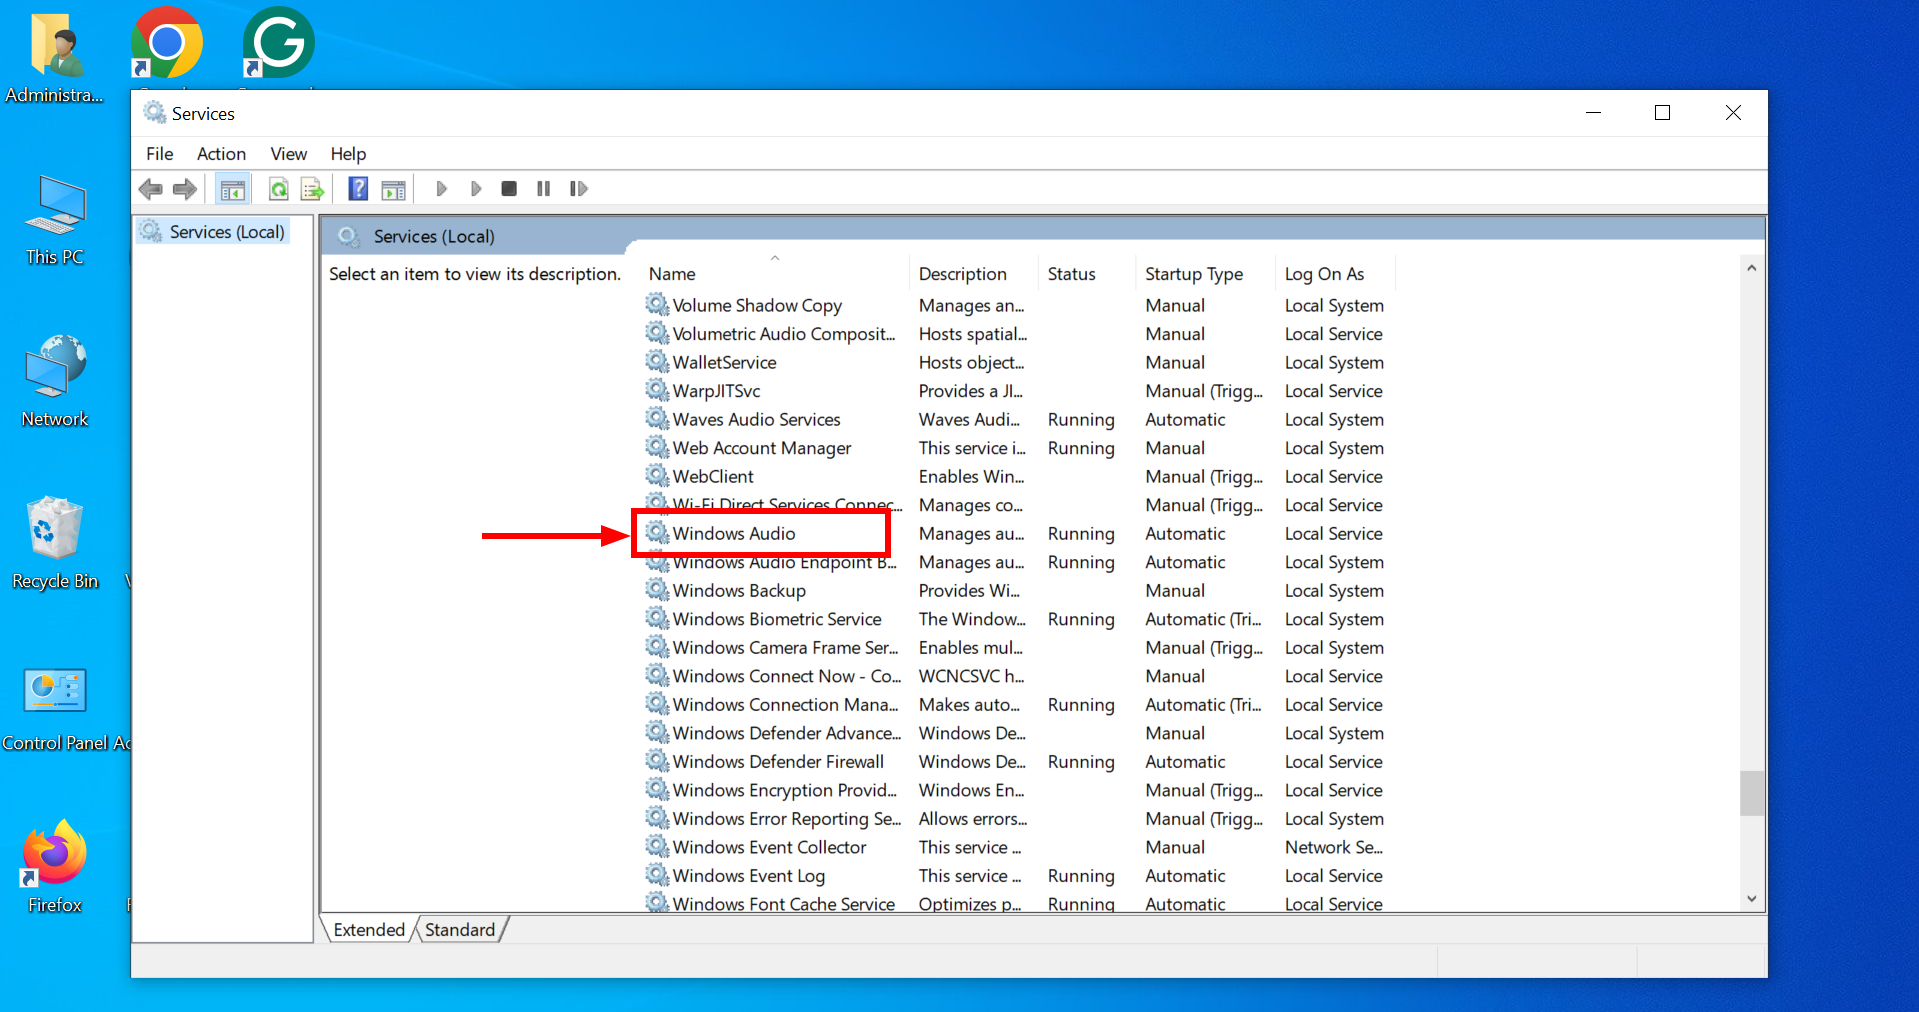
Find Windows Audio - Right-click “Windows Audio” and select “Properties“.
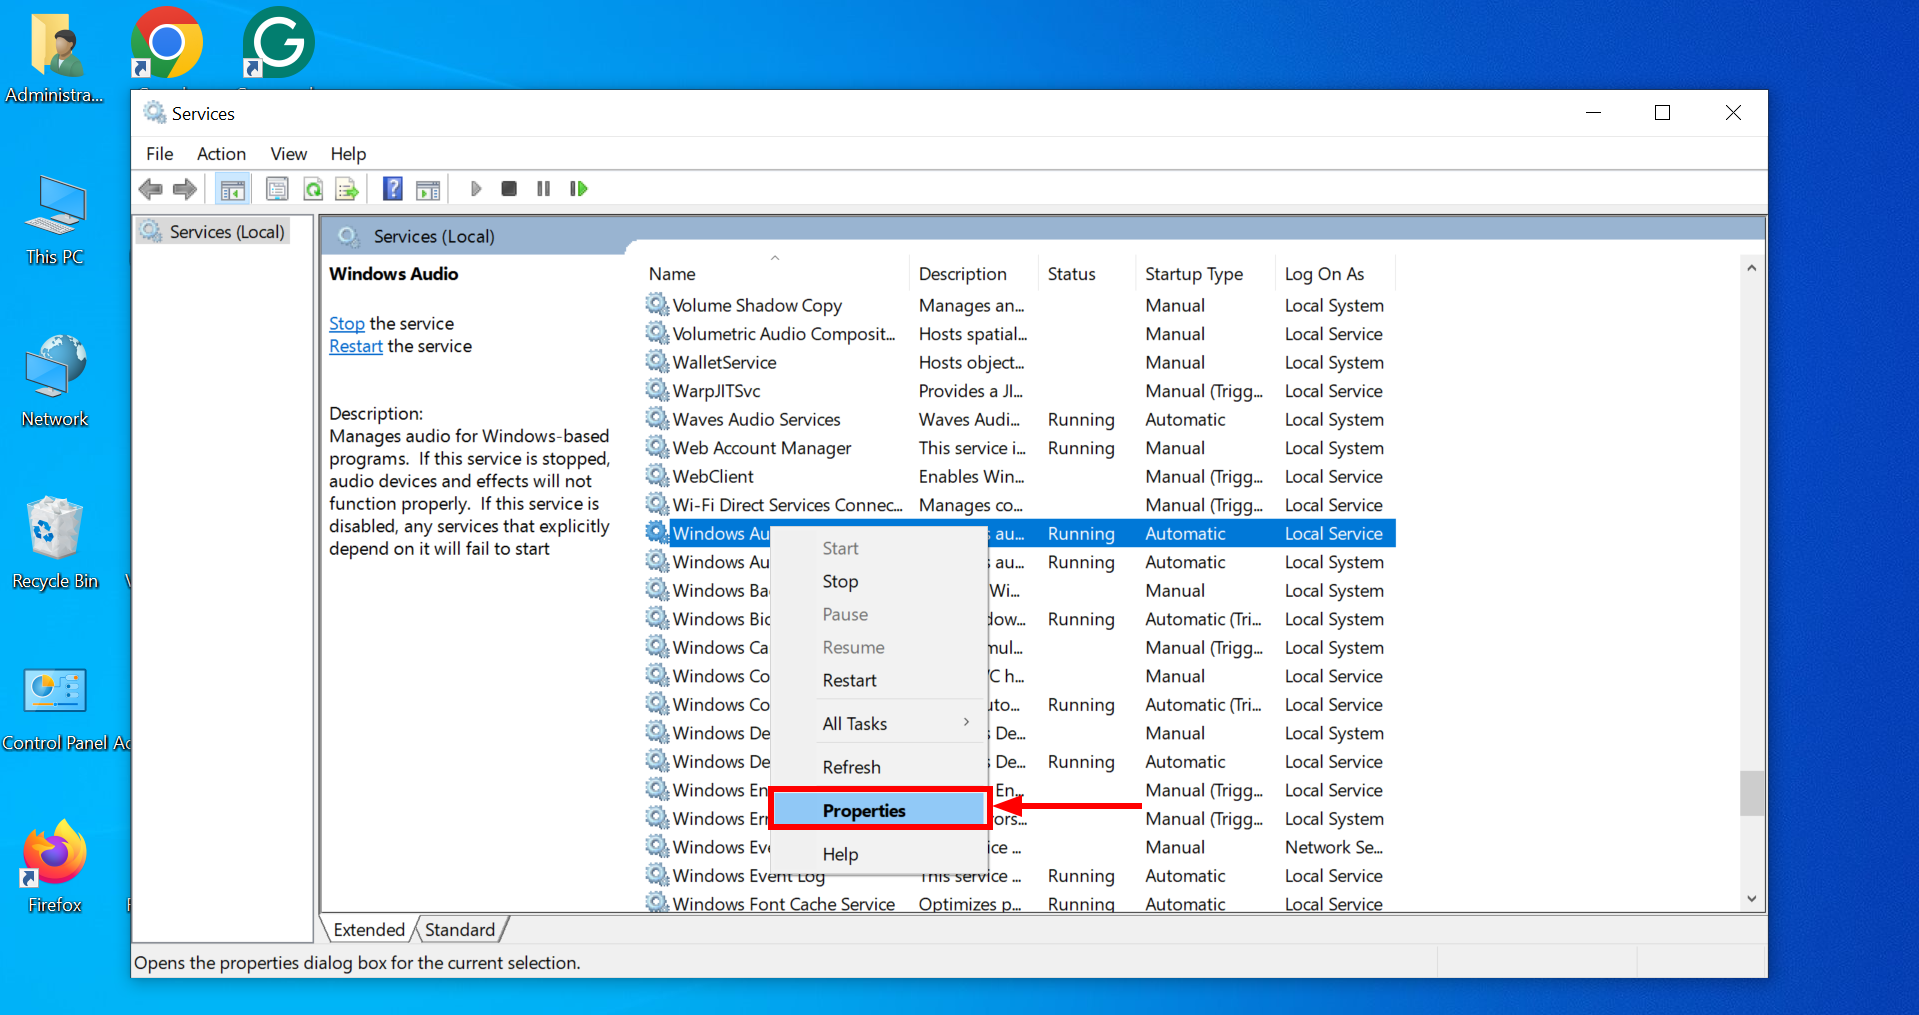
Click on Properties - In the “Properties” window, set the Startup type to “Automatic.”
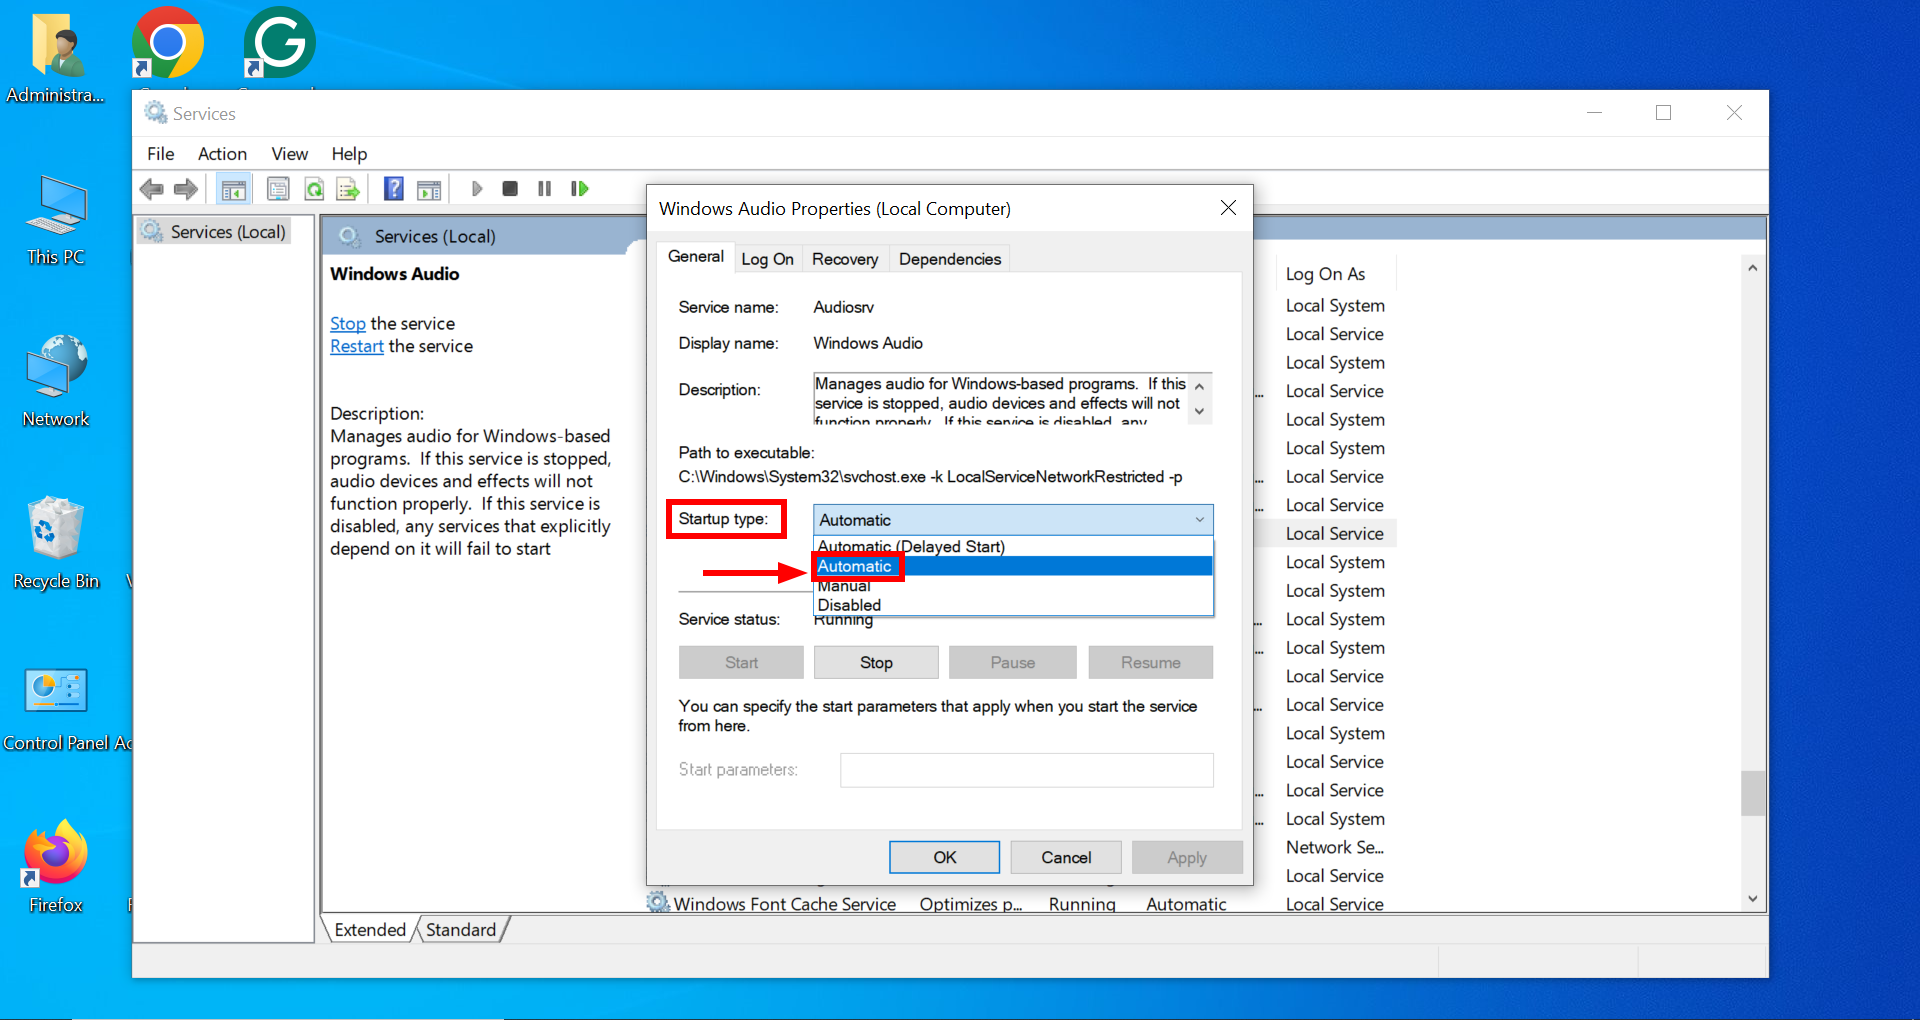
Click on Automatic - If the service is not running, click “Start” to initiate it. If it is already running, click “Stop” and then “Start” to restart it.
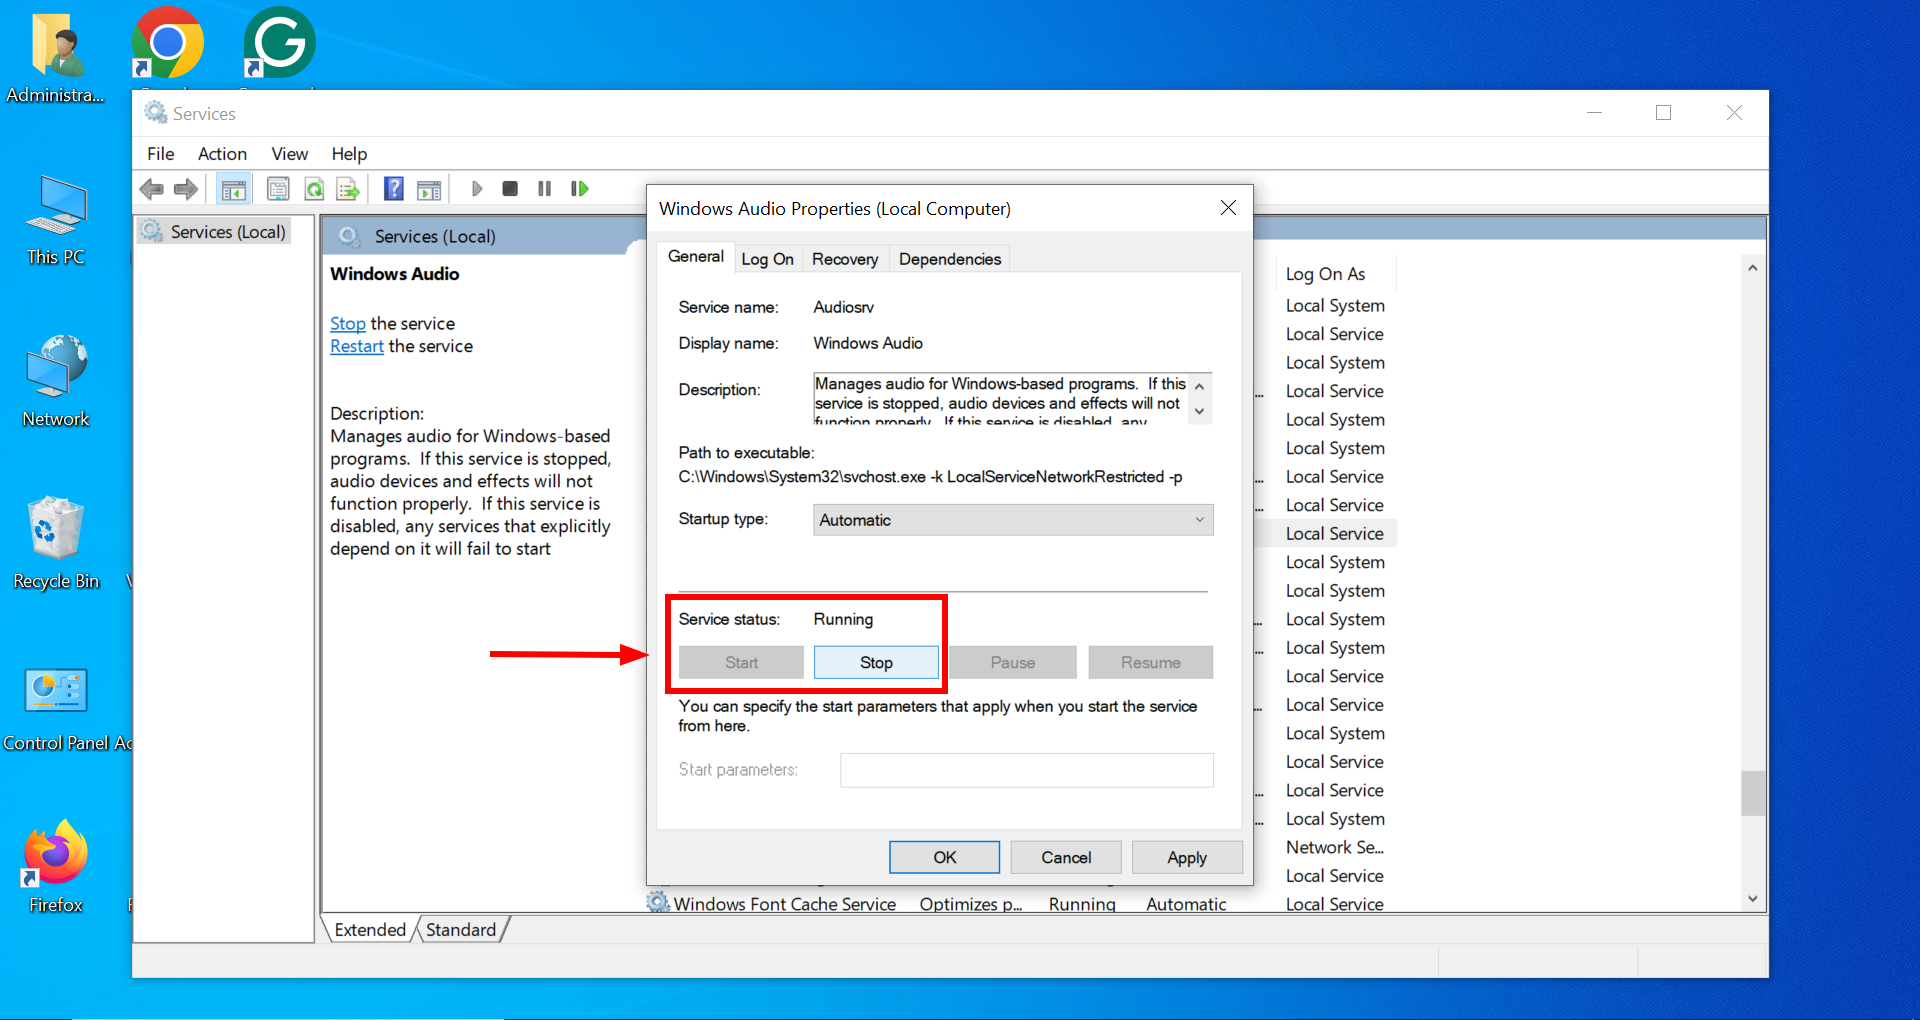
Click Start - Click “Apply” and then “OK” to finalize your settings.

Click OK
4. Change the Default Sound Format
Incorrect sound format settings can result in poor audio quality or even no sound. Adapting the sound format to match your speaker configuration can enhance audio performance.
- Right-click the “Sound” icon in the system tray and select “Sounds“.

Click on Sounds - Under the “Playback” tab, right-click your default playback device and choose “Properties.

Click on Properties - In the “Properties” window, navigate to the “Advanced” tab.
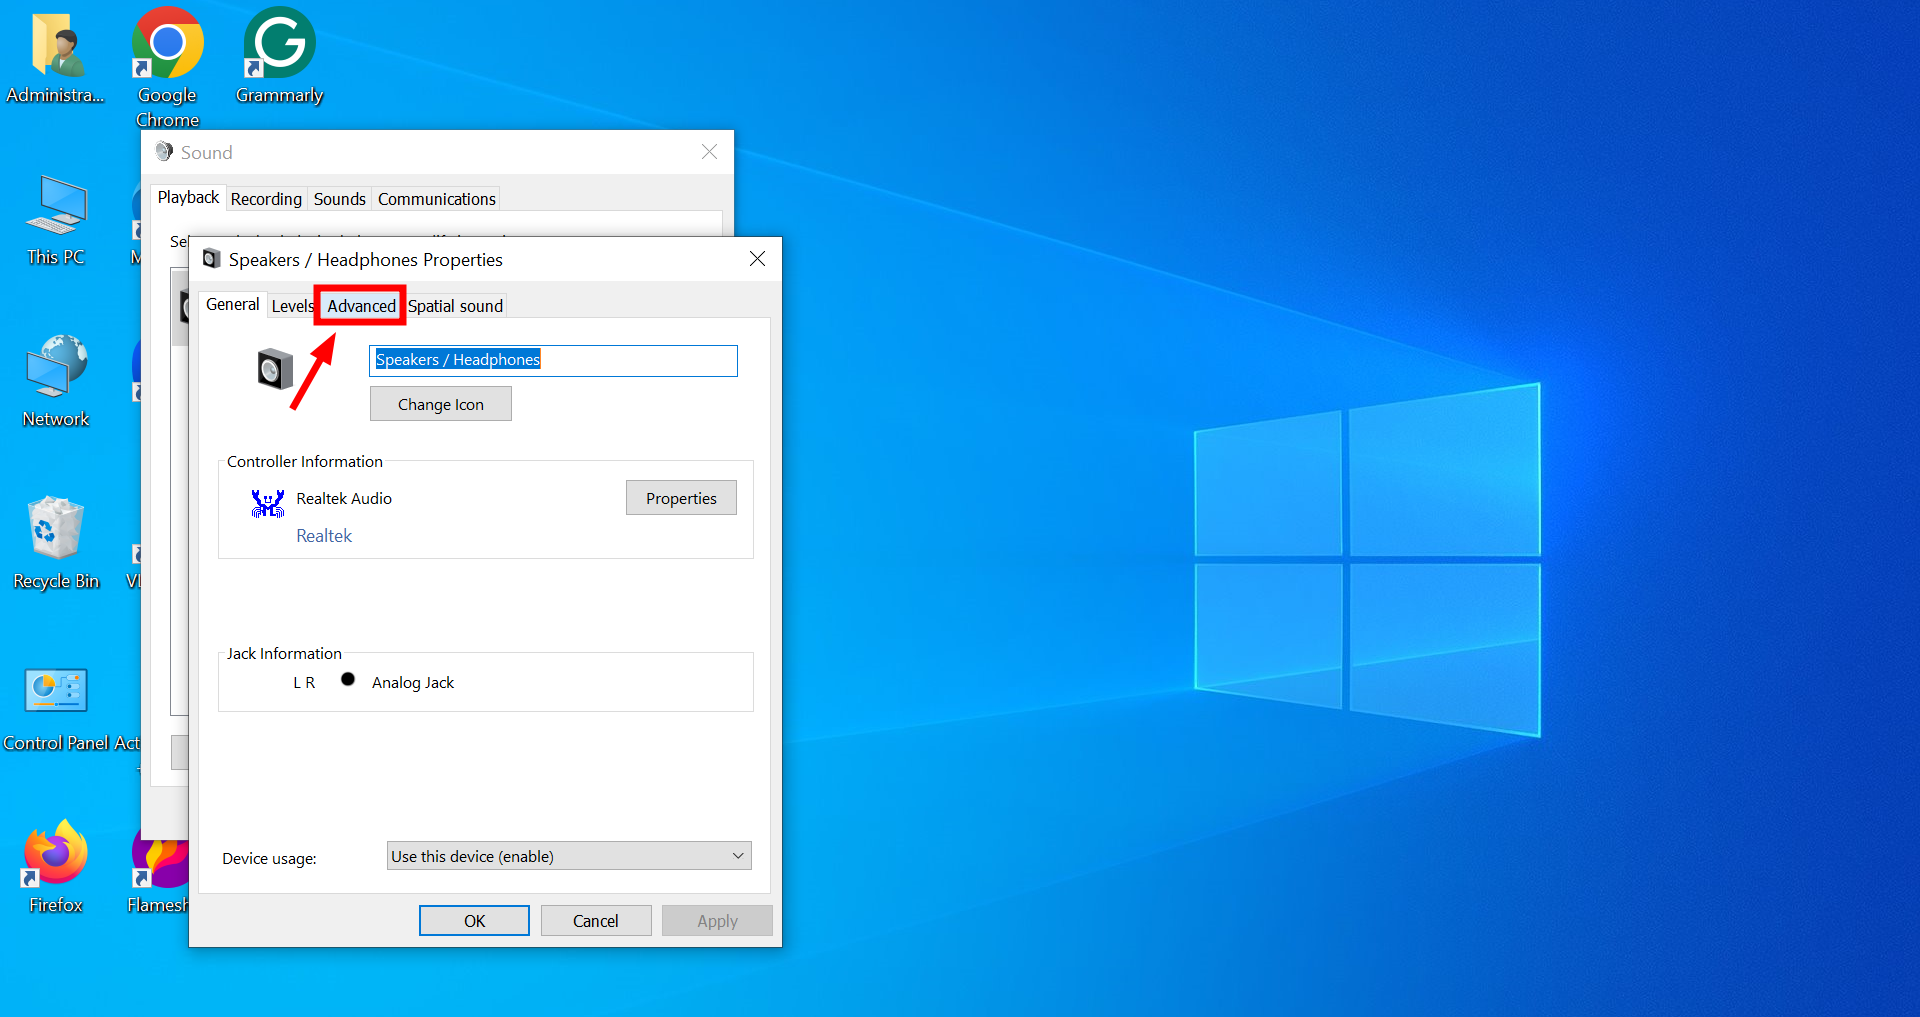
Click Advanced - Under “Default Format“, select a different sample rate and bit depth from the dropdown menu. For instance, choose 24-bit, 44100 Hz (Studio Quality) for improved audio output.
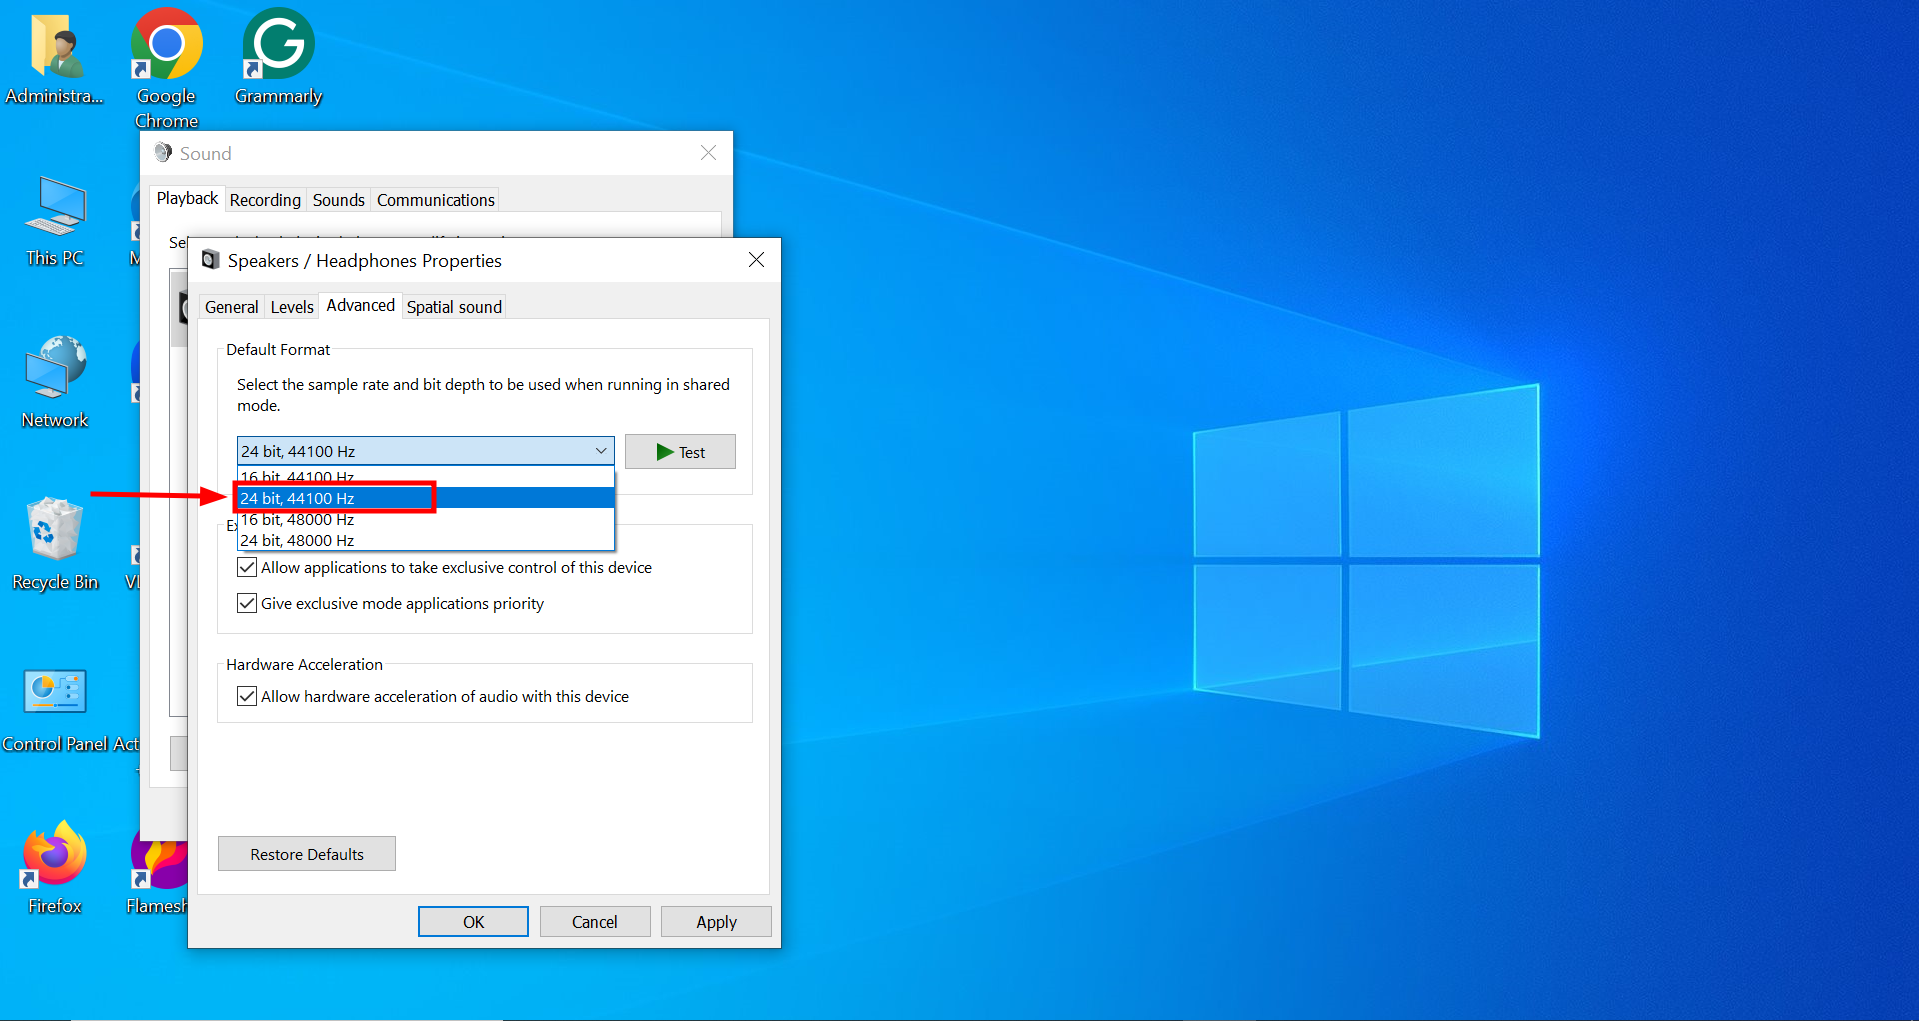
Change the default format - Click “Apply” then “OK” to save your changes and exit.

Click OK
5. Check for Windows Updates
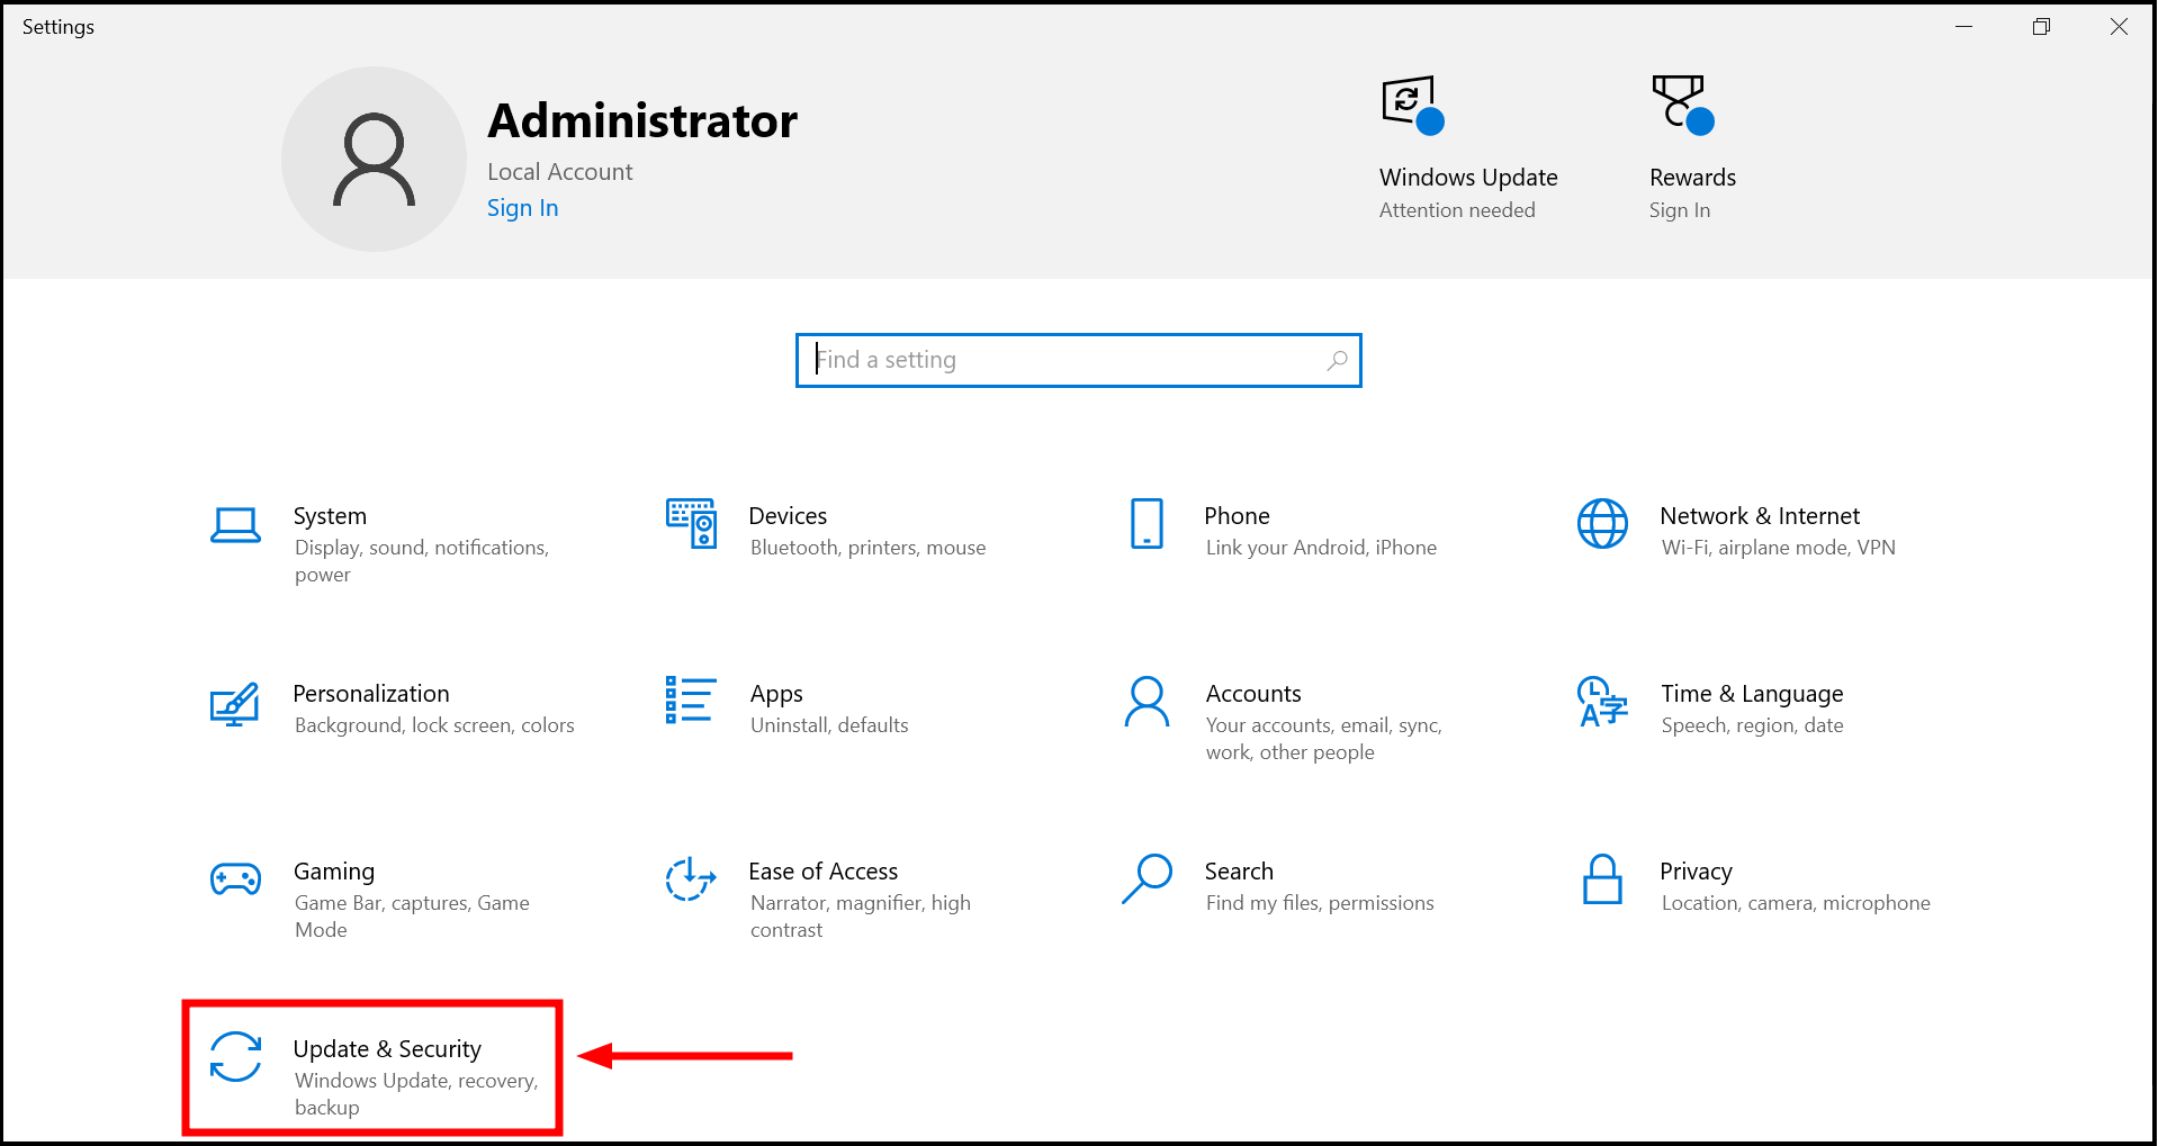
Updating Windows can address driver compatibility issues, as updates might include new drivers or bug fixes that improve system performance and stability.
- Press Windows + I to open “Settings” and go to “Update & Security.”
Open Update & Security section - Click “Windows Update“, then select “Check for updates.”
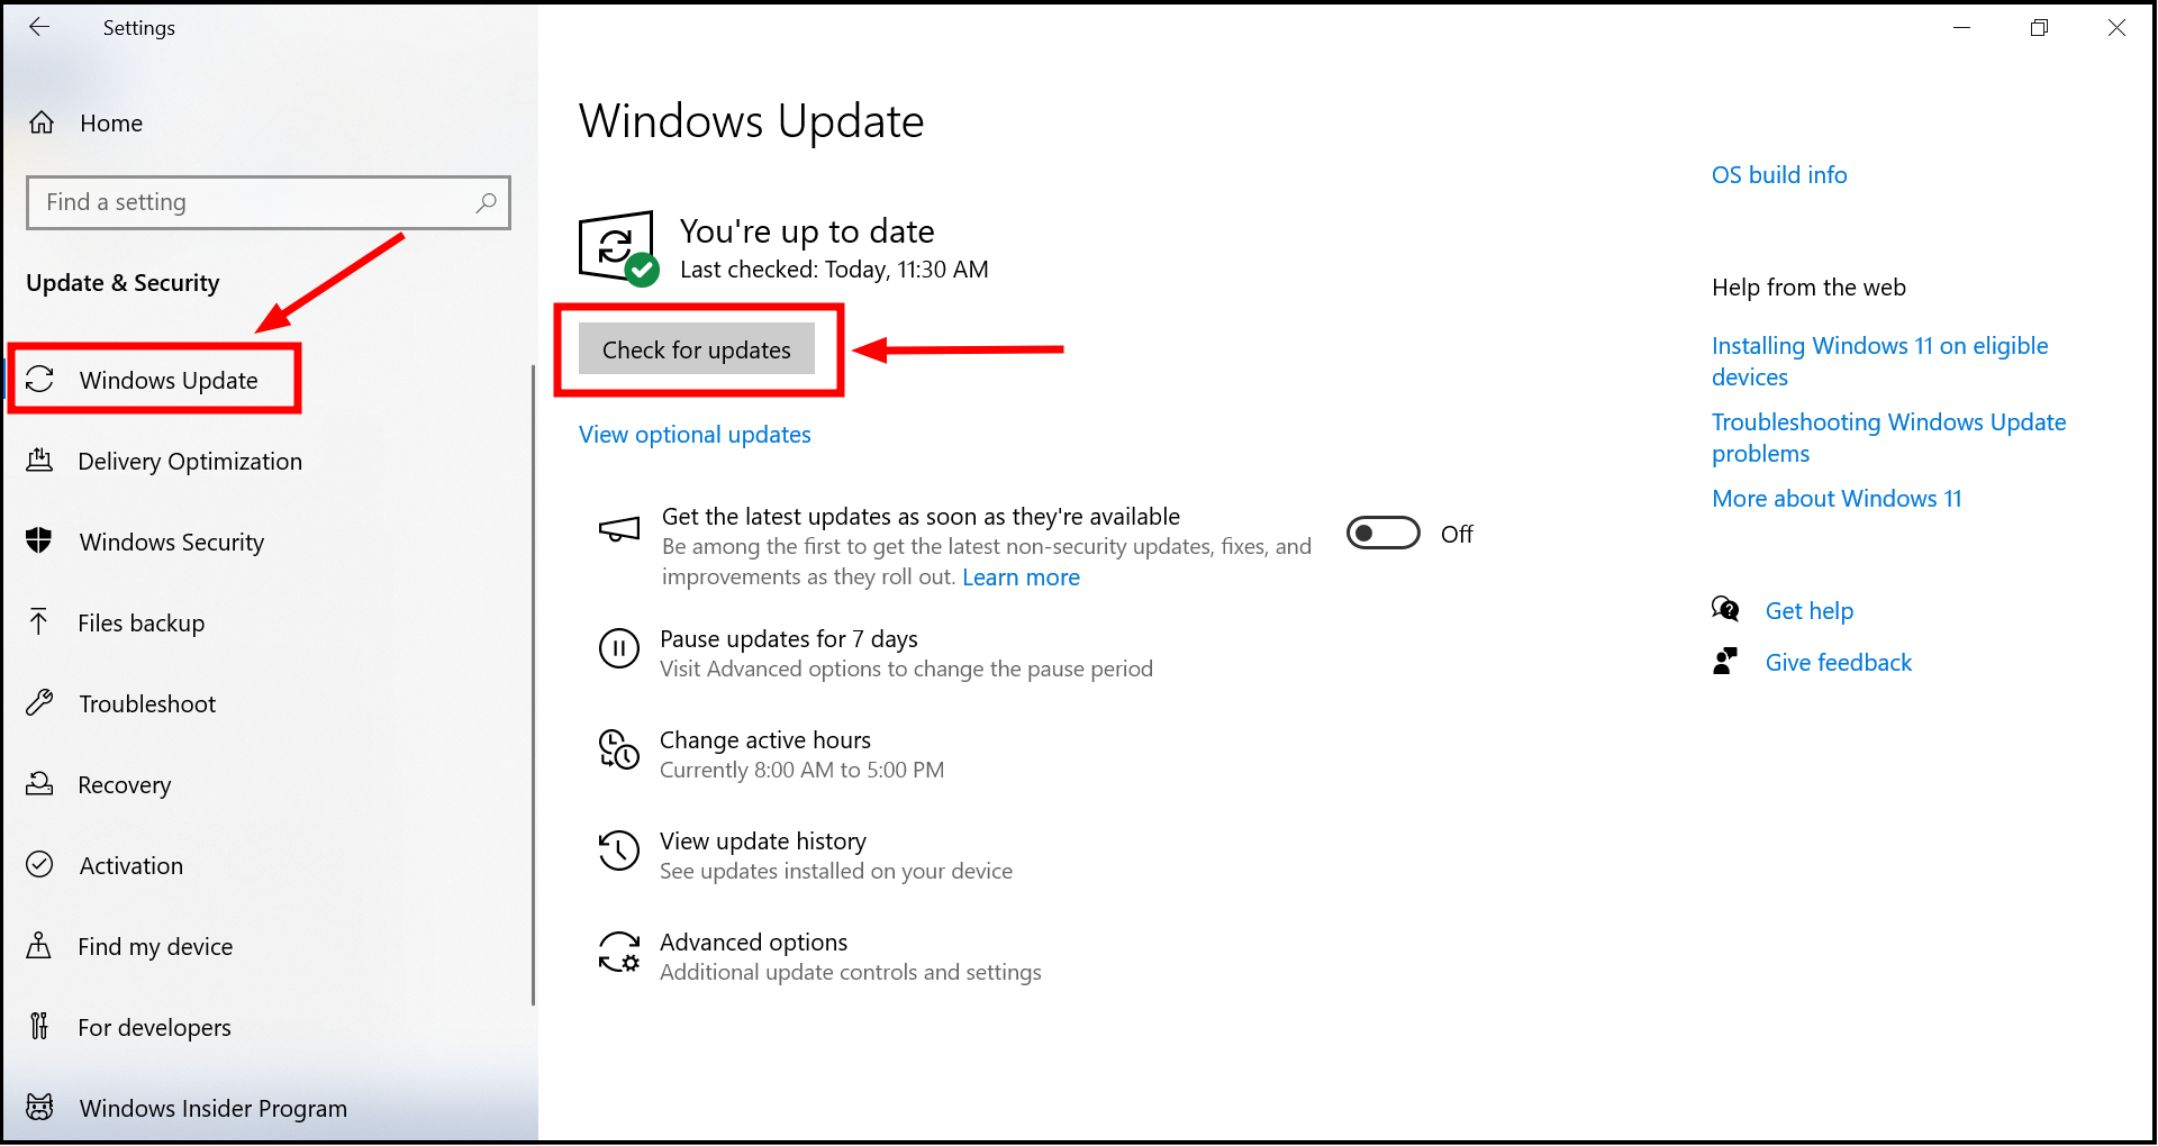
Click on Check for Updates - If updates are available, click “Download and Install.” This could include updates for Realtek audio or other system elements.
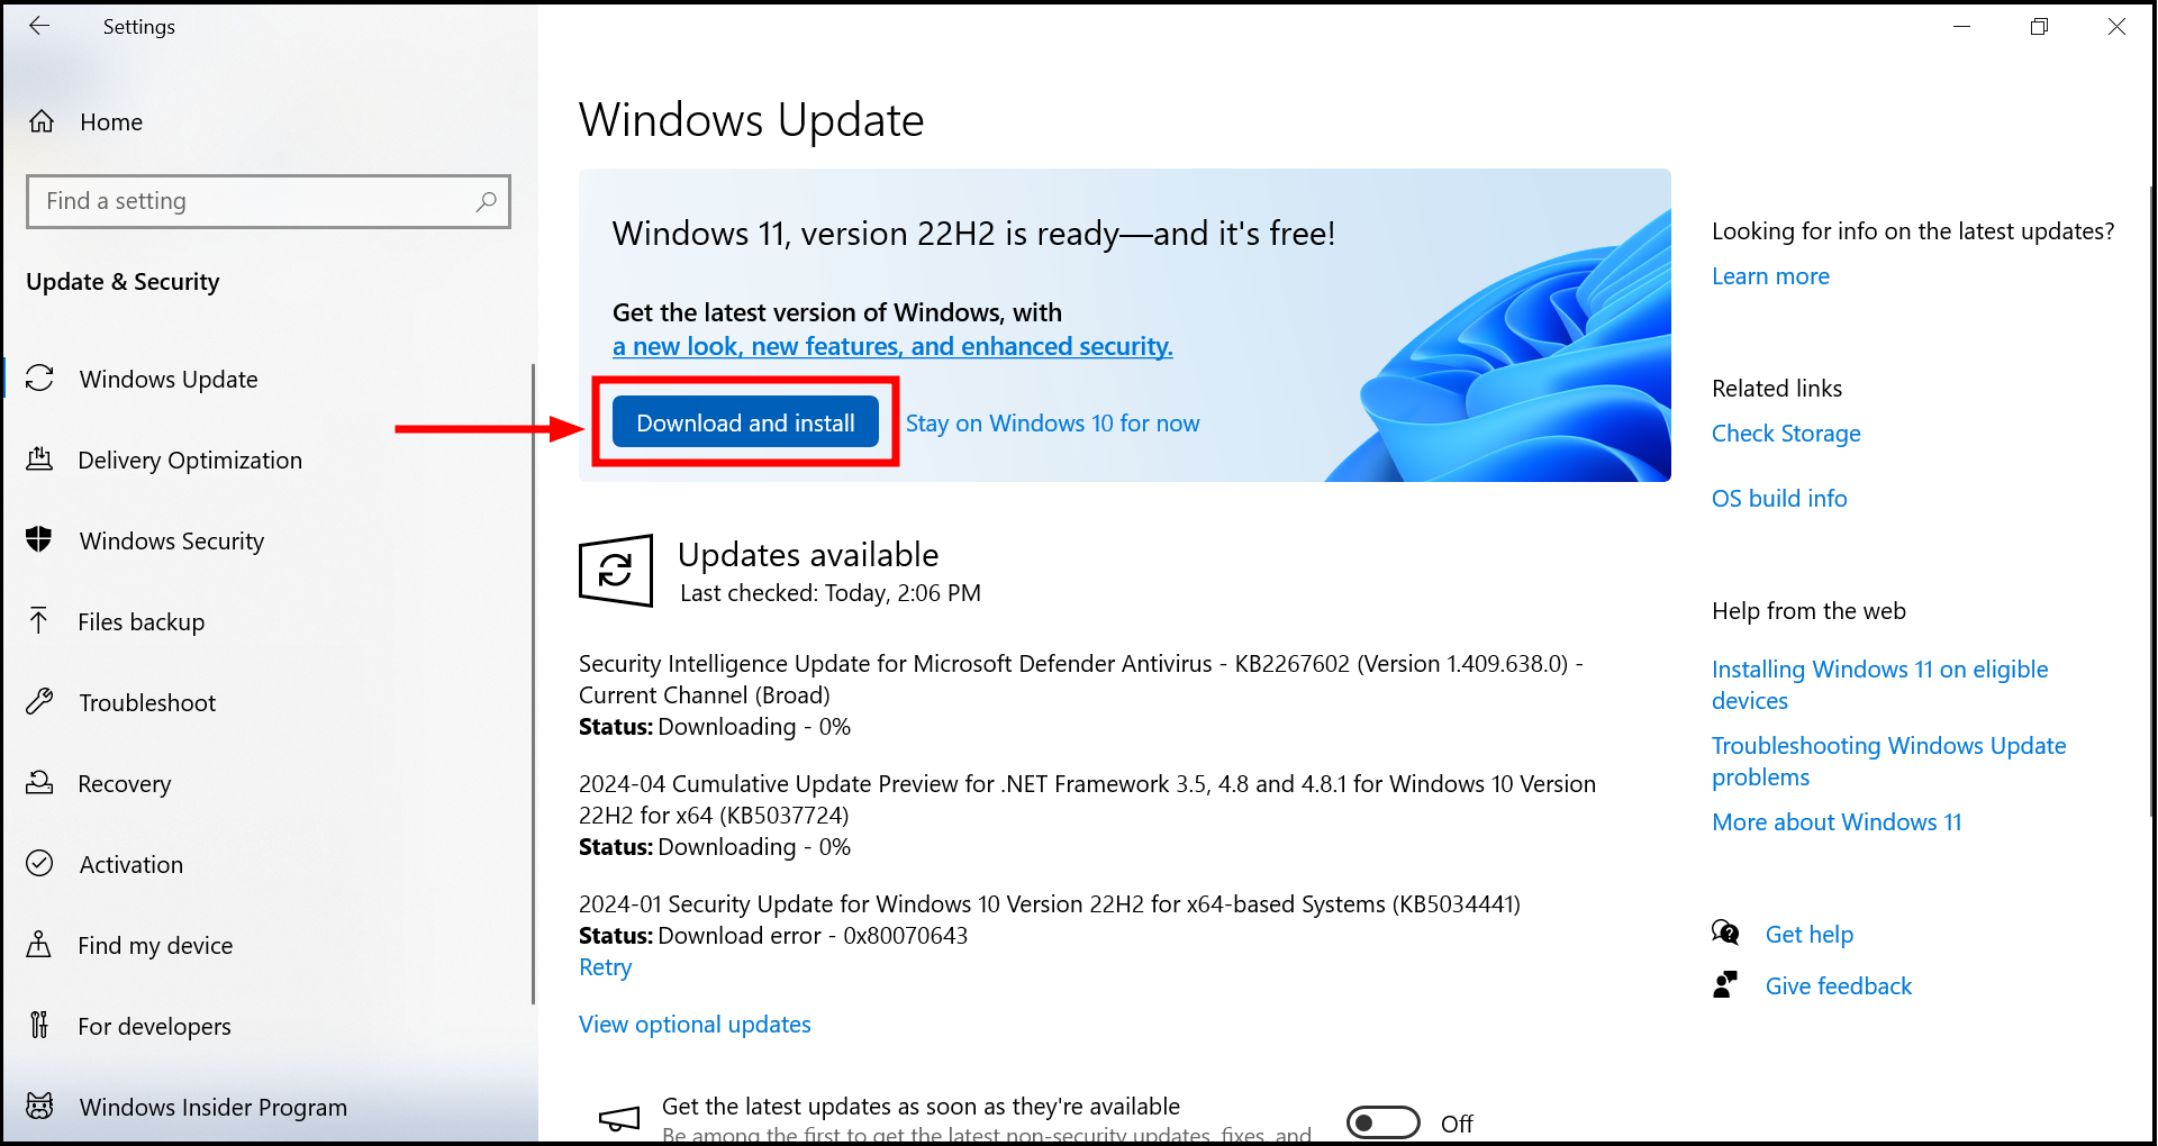
Install if any update is available
Restart your computer once the updates are installed to ensure all changes are properly applied.
Reviewed by Huzaifa Haroon