What is iumsvc.exe and Should I Remove It?
Several users have been reaching us with questions after noticing a process (iumsvc.exe) that is constantly consuming a lot of systems resources and slows down the Internet connection while it’s running. The majority of users suspect that they’re dealing with malware after seeing the executable re-appear inside Task Manager even after they disabled it forcefully. As it turns out, the executable can be encountered on Windows 7, Windows 8.1 and Windows 10.
What is iumsvc.exe?
The genuine iumsvc.exe file is a software component belonging to the Intel Service Manager application, which is signed by Intel Corporation. The acronym, IUMSvc.exe stands for Intel Update Manager Service.
Its main purpose is to notify the user whenever there’s a new software update available on Intel’s servers. Since the Windows Task Scheduler will set up an auto-start taskthat will run the Intel Update Manager Service at every startup, it’s normal to spot the genuine iumsvc.exe inside Task Manager during the startup sequence.
Although the background service of this utility will have a spike in resource usage while a new update is downloaded, you should not see a consistent resource consumption while in idle mode.
Is iumsvc.exe safe?
As explained above, the genuine Iumsvc executable should not be considered a security threat. However, there is certain malware with cloaking capabilities that are known to disguise themselves as executables with enhanced permissions to avoid getting picked up by security scanners.
To make sure that’s not the case, we urge you to perform a series of investigations to help you determine whether the executable you’re dealing with is genuine or not.
First, you should investigate for evidence of the parent application. If you’re using Intel drivers (E.G. Intel Update Manager, or similar utility signed by Intel), then chances are you’re dealing with the genuine iumsvc.exe file.
But if you don’t use any Intel software, there’s no reason why you should spot an active iumsvc.exe service (unless it’s a remnant file).
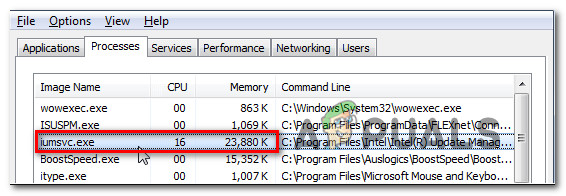
If this first investigation triggered some suspicions you should start looking into the location of the iumsvc.exe file that you’re seeing inside Task Manager. To do this, press Ctrl + Shift + Esc to open up a Task Manager window.
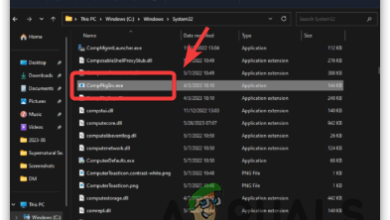
Once you get there, select the Processes tab from the horizontal menu, then scroll down to the list of Background processes and locate the iumsvc.exe. Once you see it, right-click on it and choose Open File Location from the newly appeared context menu.
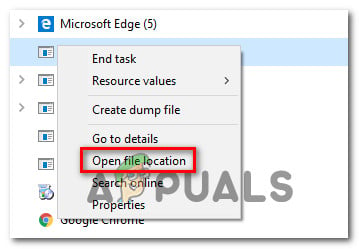
If the revealed location is different than C:\Program Files (x86)\Intel\Intel(R) Update Manager\bin\ or C:\Program Files\Intel\Intel(R) Update Manager\bin\ and you didn’t install the Intel utility in a custom location, there’s a high chance that you’re dealing with a malicious executable.
If the file is located in a suspicious location, the best course of action now is to upload the suspicious file to a Virus database to figure out if the file is infected or not. There are a lot of ways of doing this, but one of the most convenable ways is to use VirusTotal. To do this, access this link (here), upload the file and wait for the analysis to complete.
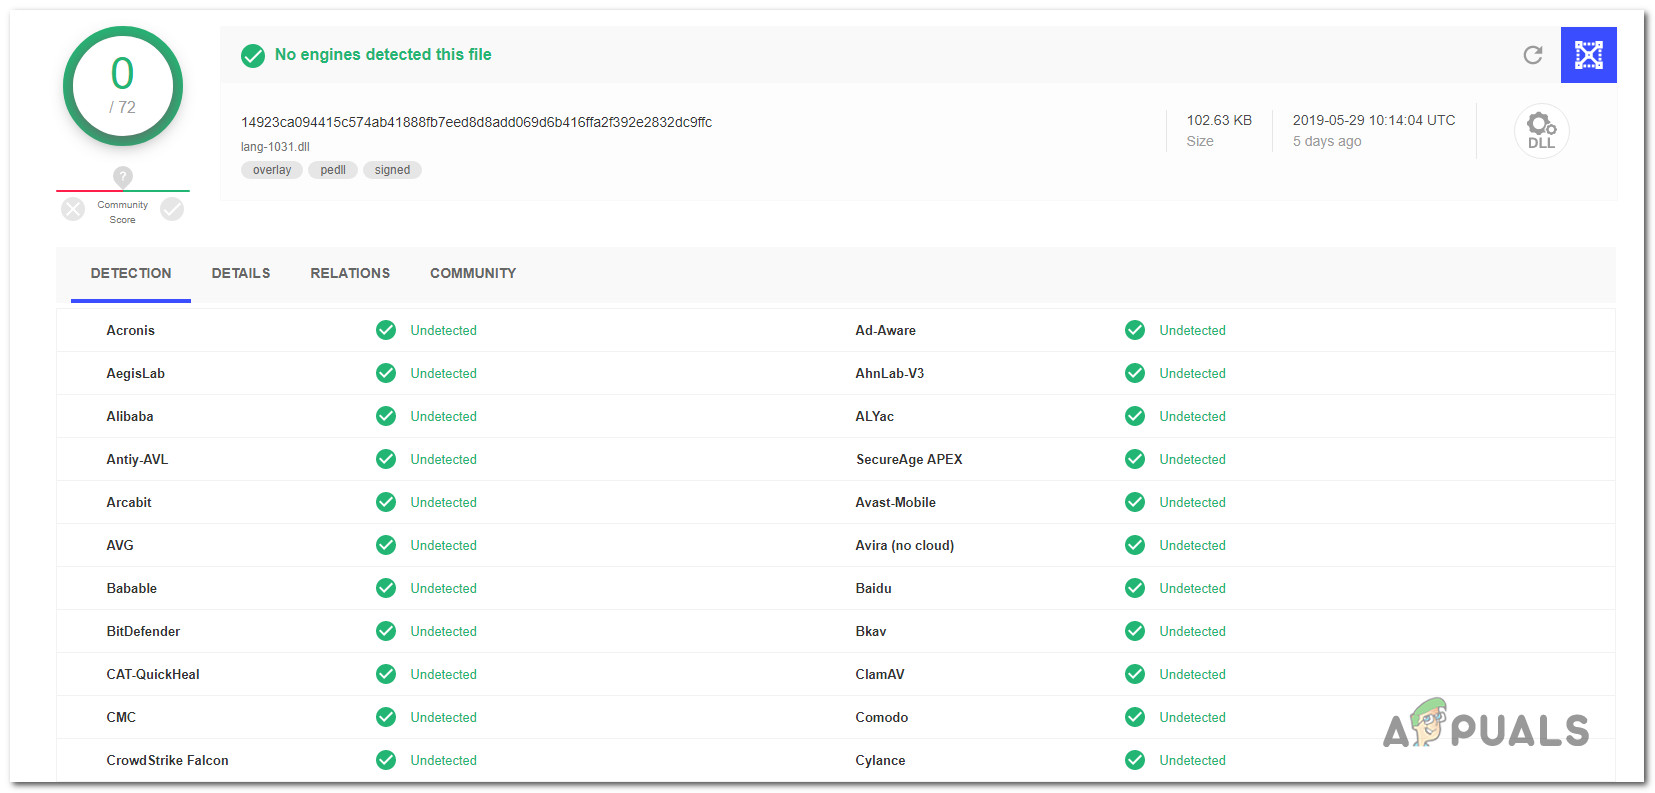
If the analysis you just did with VirusTotal didn’t reveal any inconsistencies, skip the next section below and move directly to the ‘Should I remove SBAMSvc.exe?’ section.
However, if the analysis above has raised some red flags, continue with the next section below for step by step instructions on dealing with the virus infection.
Dealing with the security threat
If the investigations above revealed that the file is not in a legitimate location and the VirusTotal analysis has raised suspicions of a virus infection, we highly recommend that you deploy a security scanner capable of identifying every infected file and dealing with it.
Keep in mind that there’s a high chance you’re dealing with malware with cloaking-capabilities – these things are notoriously harder to detect, as not all security suites are efficient as identifying and quarantining them. If you already pay for a premium security scanner, you can go ahead and initiate a scan with it.
But if you’re looking for a free alternative, we recommend using Malwarebytes. A deep scan with Malwarebytes is free and will allow you to remove the vast majority of malware that are avoiding detection by posing as processes with enhanced privileges. If you’re unsure on how to do this, follow this article (here).

If the scan managed to identify and quarantine infected items, restart your computer, then move down to the next section below and see if the iumsvc.exe is still appearing inside Task Managed with high resource consumption.
Should I Remove iumsvc.exe?
If the investigations in the section above didn’t reveal any security issues, you can conclude that the executable you’re dealing with is genuine. See if the executable is still consuming a lot of system resources by using Task Manager (Ctrl + Shift + Esc).
If the resource consumption is still high and you are determined to get rid of the executable, you can do so without affecting the day-to-day operations of your operating system.
However, keep in mind that with the removal of the Iumsvc executable, your computer will lose the ability to update Intel components, so you can expect certain Intel drivers and software version to become outdated with time if iumsvc.exe along with the parent application is removed.
If you are determined to remove iumsvc.exe along with the parent application, move down to the next method below.
How to Remove iumsvc.exe
If you performed all the verifications above to confirm that the file is genuine and you still want to get rid of the iumsvc.exe, the only wait to do it is by uninstalling the parent application. Even if you were to delete the iumsvc.exe manually, Intel Update Manager will regenerate the executable at the next system startup.
Several affected users that we’re also encountering this issue have reported that the high resource consumption of iumsvc.exe has stopped completely after they uninstalled the parent application.
Keep in mind that in case you’re experiencing high-resource consumption but you’re don’t plan on losing Intel’s updating ability, you can follow the instructions below to uninstall Intel Update Manager, then download & install the latest version from this link (here).
Here’s a quick guide on uninstalling iumsvc.exe along with the parent application (Intel Update Manager):
- Open up a Run dialog box by pressing Windows key + R. Next, type “appwiz.cpl” and press Enter to open up the Programs and Features window.
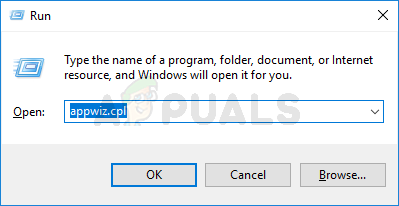
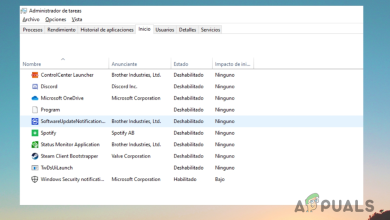
Type appwiz.cpl and Press Enter To Open Installed Programs Page - Once you’re inside the Programs and Features window, scroll down through the list of applications and locate Intel Update Manager.
- When you see it, right-click on it and choose Uninstall from the newly appeared context menu.
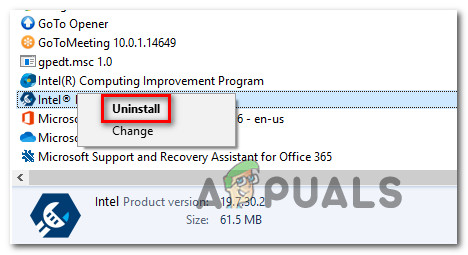
Uninstalling the Intel Update Manager application - Follow the on-screen prompts to complete the operation, then restart your computer and see if the resource consumption has gone down at the next system startup.