What is igfxEM.exe? Should it be deleted?
Some users have been reaching us with questions about the validity of the igfxEM.exe process. Their suspicions regarding igfxEM.exe usually appear after seeing that the executable prevents them from accessing certain files on the C drive or to perform certain 3rd application updates.

What is igfxem.exe?
The genuine igfxem.exe process belongs to the Intel graphics suite. Igfxem.exe is part of Intel(R) Common User Interface and is referred to as the Graphics Executable Main Module.
This particular process is often used by Nvidia and AMD graphic cards drivers. What this executable does is enable the display resolution settings to persist and remain saved even when the monitor is turned off or disconnected from the cable.
Although this might not seem like a big deal, most laptops, and notebooks rely on this service and will schedule it to run at startup.
Potential security threat?
Although we haven’t managed to identify any particular malware that uses the igfxEM process as camouflage, most malware writers specifically target executable with enhanced privileges in order to avoid getting detected by security scanners.
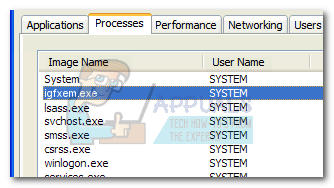
One way to distinguish the genuine process from a malware in disguise is to view its location. To do this, open Task Manager (Ctrl + Shift + Esc), go to the processes tab and locate the igfxem.exe process. Next, right-click on it and click on Open File Location.
If the revealed location is different than C:\ Windows \ System32 \ igfxem.exe, you’re probably dealing with a malicious executable. If that’s the case, we recommend scanning your system with a powerful anti-malware scanner like Malwarebytes or Safety Scanner. If you’re unsure of how to do this, follow our in-depth guide (here) on scanning and removing malware from your system with Malwarebytes.
Should I disable igfxem.exe?
If you established that the igfxem.exe executable is legitimate, it’s time to decide what to do with the legitimate executable. Although some laptops and notebooks still rely on igfxem.exe, the process is by no means essential for the well functioning of your computer. On desktops, this process can be considered useless and can be removed without any consequences.
If you’re struggling with an issue caused by the igfxEM.exe process, see if the following two fixes will help. If you’re looking for a way to permanently disable the igfxEM.exe process, follow the very last guide.
Fixing the “cannot find igfxEM.exe” error on startup
If you’re seeing the “cannot find igfxEM.exe” error at every startup following a Windows 10 update, it’s very likely that the executable has been altered once the new update files have been installed.
In this case, the solution is to reinstall the needed Intel drivers from official download center (here). If the installation kit refuses to re-apply the latest drivers, try temporarily disabling the real-time protection of your external antivirus suite (if you have one).
Fixing the “missing file privileges” error
If you find that the igfxem.exe process prevents you from performing a Steam / Origin update with the “missing file privileges” error, you can quickly resolve the issue by closing the process via Task Manager. To do this, open Task Manager (Ctrl + Shift + Esc) and locate igfxem.exe in the Processes tab. Once you manage to find the process, right-click on it and choose End Task to temporarily disable it.
Keep in mind that while this will instantly resolve the issue and allow the updates to go through, the igfxem.exe process will get automatically opened at the next system startup or when you open the Intel(R) Common User Interface.
If you want a more permanent solution, follow the steps below to disable the igfxem.exe process indefinitely.
Disabling the igfxem.exe process from msconfig
If you got a serious grudge on igfxem.exe, you can easily prevent the process from being called without the fear of unforeseen consequences. You can do this easily by stopping the process via msconfig and prevent it from ever opening again. To do this, follow the steps below:
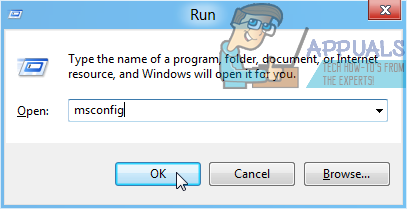
- Press Windows key + R to open up a Run command. Type “msconfig” and hit Enter to open the System Configuration menu.

- In the System Configuration menu, go to the Services tab and locate the igfxEM module.
- Uncheck the box next to the igfxEM module and hit Apply to save your changes.
Now, the igfxem.exe process should be prevented from running on your system again. If you decide to use it again in the future, reverse engineer the steps above to schedule it back on your system.


