What Is Cscript.exe and Should I Disable It?
Several Windows users have been reaching us with questions after noticing that Cscript.exe seems to run at every system startup without any apparent reason. Some users are concerned about the possibility of dealing with a malware threat. This recurring problem is not exclusive to a certain Windows version since it’s confirmed to occur on Windows 7, Windows 8.1 and Windows 10.
What is Cscript.exe?
Script.exe is the main executable for Windows Scripting Host – A built-in feature Windows feature responsible for running script files. As long as the executable is genuine, it should not be considered a security threat to your PC.
Cscript.exe is essentially the command-line version of the Windows Script Host service and facilitates command-line options for setting up script properties. With Cscript.exe, scripts can be run automatically or by simply typing the name of the script file inside the command prompt.
Since there is a lot of malware that is programmed to camouflage themselves as system processes in order to avoid getting picked up by security scanners, you should verify the location of the executable.
To do this, press Ctrl + Shift + Enter as soon as you see Cscript.exe running to open up a Windows Task Manager window. Then, move over to the Processes tab and look for the cscript.exe service. When you see it, investigate the location. On Windows 10, right-click on it and choose Open File Location.
If the location is different than C:\Windows\System32, the chances of dealing with malware in disguise are very high. In this case, move over to the next section below and follow the steps to remove the malware threat.
Is Cscript.exe safe?
While the genuine Cscript.exe is undoubtedly a genuine Windows component present in all the recent Windows versions, you should take the necessary precautions to ensure that you’re not actually dealing with malware.
But the fact that you see a Cscript.exe window running at every system startup is not normal behavior. It’s either that some legitimate application, service or process is calling it or some type of malware/adware is.
Because of this, we strongly encourage you to do the following investigations in order to ensure that you’re not actually dealing with a virus infection. The most efficient way of doing this is to run a Deep Malwarebytes scan to confirm that you’re not dealing with some kind of malware.
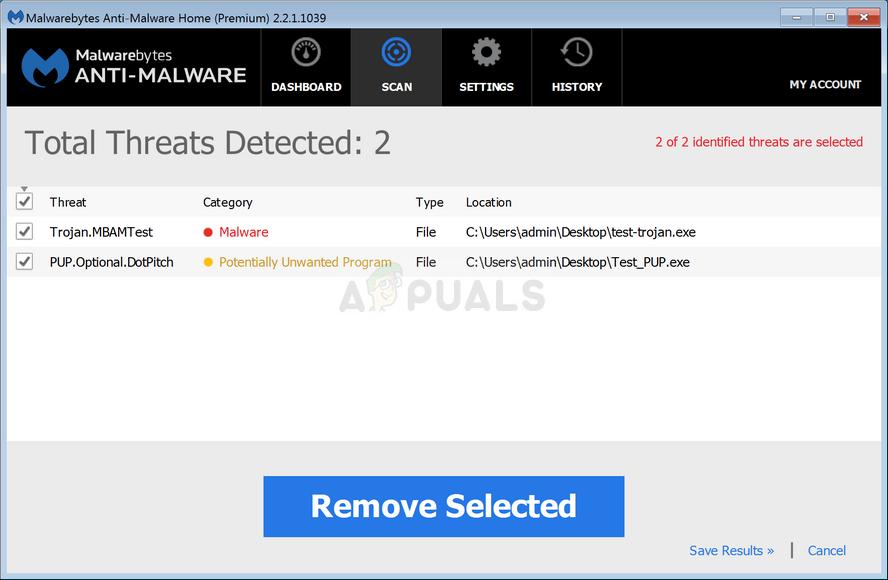
To make it easier for yourself, you can follow this article (here) on using the free version of Malwarebytes security scanner to perform a deep security scan.
If the scan doesn’t reveal any evidence of malware infection, move down to the next section below.
Should I disable Cscript.exe?
If you’re previously determined that you’re not actually dealing with a virus infection, it’s time to get to the bottom of finding out which application and why it’s calling Cscript.exe at every system startup.
The most common type of script that is ran using Cscript.exe that is not actually legitimate is a browser redirect triggered by a hijacked browser.
But unless you’re actually bothered by the prompts (slowed system performance, ad redirects, or something else), you should not take the steps appropriate to disabling the Cscript.exe.
But if you are determined to do it, follow the steps below to ensure that the constant Cscript.exe prompts stop appearing.
How to Disable constant Cscript.exe prompts
Based on several different user reports, there are several different ways of identifying the culprit behind the constant Cscript.exe prompts. Below you’ll find 3 different ways of dealing with this kind of problem.
The first two approaches are focusing on organic ways on identifying the culprit that’s causing the issue, while the latest will show you a way of effectively disabling Cscript.exe along with the entire Windows Scripting Host component.
But unless you really know what you’re doing and you are prepared to use your computer without the use of Windows Scripting Host, we advise you to try and fix the issue with the first to methods only.
Let’s begin!
Method 1: Using Autoruns to identify the culprit
The most efficient way of identifying the culprit that’s causing the constant Cscript.exe prompts is to use a 3rd party utility called Autoruns. Several affected users have reported that they managed to pinpoint the culprit and preventing it from opening another Cscript.exe prompt by following the procedure below.
Here’s what you need to do:
- Visit this link (here) and download the latest version of the Autoruns utility by clicking on the Download Autoruns and Autorunsc hyperlink.
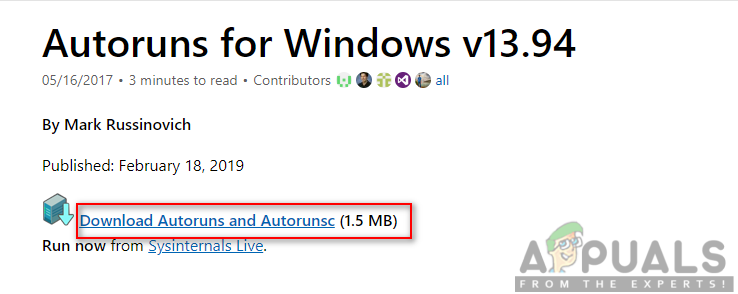
Downloading Autoruns utility - Once the download is complete, extract the .zip file and double-click on the Autoruns executable to open up the utility.
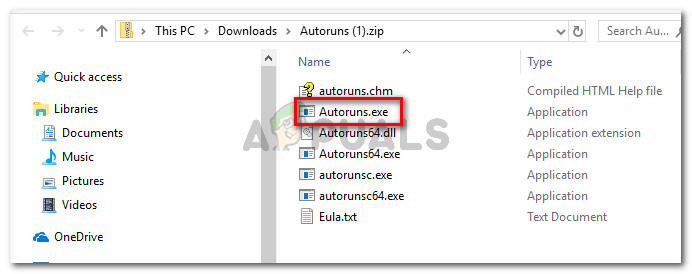
Opening the Autoruns executable - Once Autoruns is opened, wait until the Everything list is populated. Once it is fully loaded, scroll down through the list of available Autorun entries and locate Cscript.exe (look at the Image Path). When you see it, right-click on it and choose Delete from the context menu to prevent the executable from being called at the next system startup.
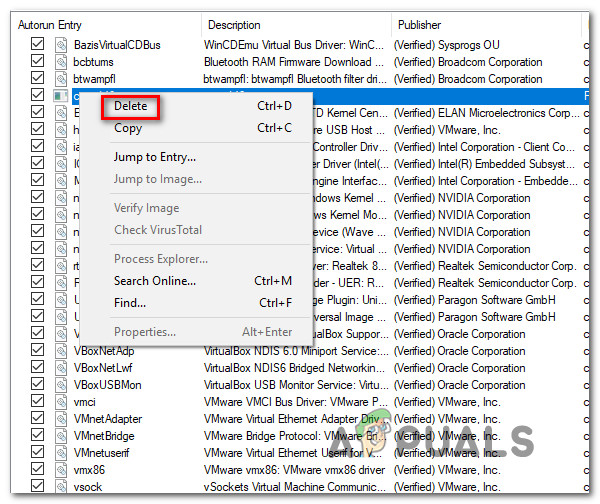
Deleting the Autorun key - Restart your computer and see if you see the Cscript.exe prompt at the next system startup.
If this method didn’t resolve the issue or you’re looking for a fix that dosen’t involve any 3rd party utilities, move down to the next method below.
Method 2: Performing a clean boot
A more lengthy but just as efficient method of identifying and stopping the culprit from opening other similar prompts is to start your system in Clean Boot and systematically re-enable the disabled services and autostart keys until you manage to identify the file calling Cscript.exe.
Here’s a quick guide on booting your computer in a Clean boot state on a Windows 10 computer:
- Press Windows key + R to open up a Run dialog box. Then, type ‘msconfig” and press Enter to open up the System Configuration window.
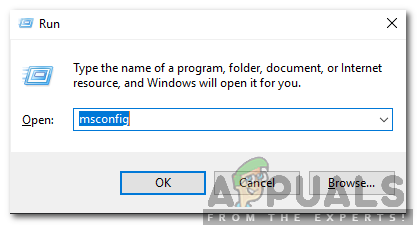
Typing in msconfig and pressing enter Note: If you’re prompted by the UAC (User Account Control), choose Yes to grant admin access.
- Once you’re inside the System Configuration window, select the Services tab and check the box associated with Hide all Microsoft Services. After you do this, all essential Windows services will be excluded from the list.
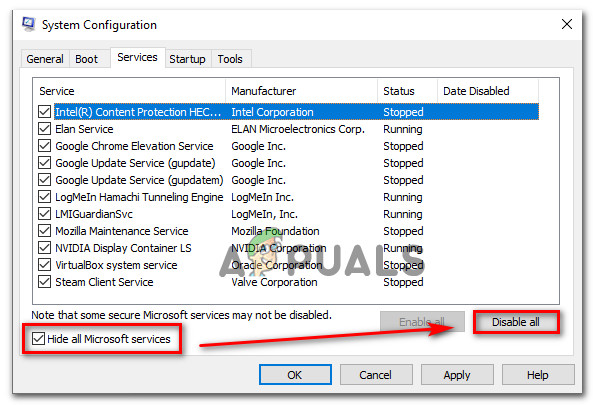
Disabling all non-Microsoft startup items - Now that you see only the 3rd party services, click the Disable all button in order to prevent any 3rd party services from calling the Cscript.exe.Then, click Apply to save the current configuration.
- Next, move over to the Startup tab and click on Open Task Manager.
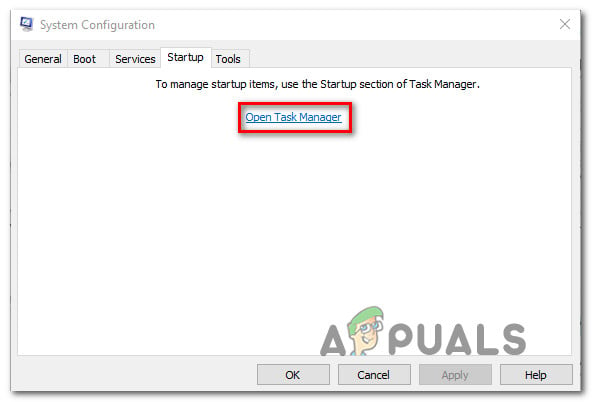
Opening the Task Manager via System Configuration - Inside the Startup tab of Task Manager, select each startup service individually and click the Disable button associated with it to prevent each service from running at the next system startup.
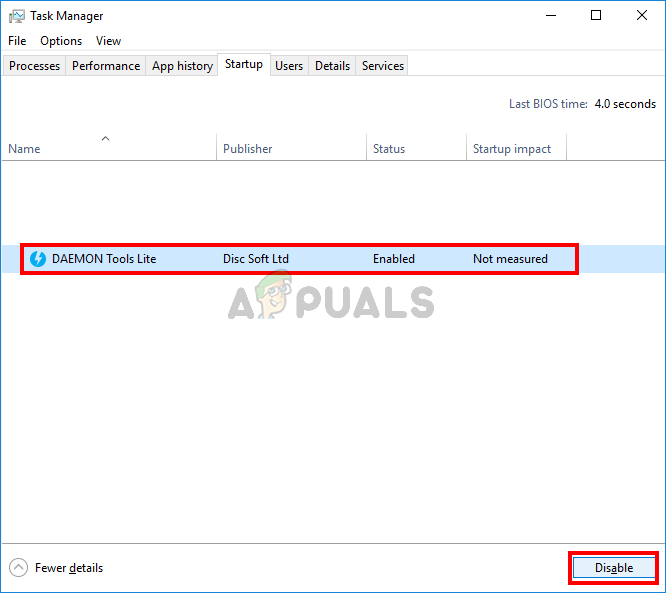
Disabling Apps from Startup - Once every startup service is disabled, you have achieved a clean boot state. To take advantage of it, restart your computer and wait until the next startup sequence is complete.
- If the Cscript.exe is no longer occurring, systematically re-enable each item you previously disabled (by reverse engineering the steps above) couple with random restarts until you manage to identify the culprit. It will take you some time, but this is certainly the clean approach to solving the issue.
If you’re still encountering the issue, or you’re looking for a way to effectively disable all Cscript.exe prompts, move down to the next method below.
Method 3: Disabling Cscript.exe via Registry Editor
A surefire way of resolving the issue is to effectively disable the Windows Scripting Host using a Registry Editor tweak. This will undoubtedly stop any further Cscript.exe prompts in the future, but it might also stop any automated scripts from running.
This has the potential of affecting a lot of applications, including some very important Windows components. So unless you really know the full extent of items that will be affected by this Registry tweak, we advise against implementing this.
But if you are ready to disable Cscript.exe using the Registry editor, here’s a quick guide on doing this:
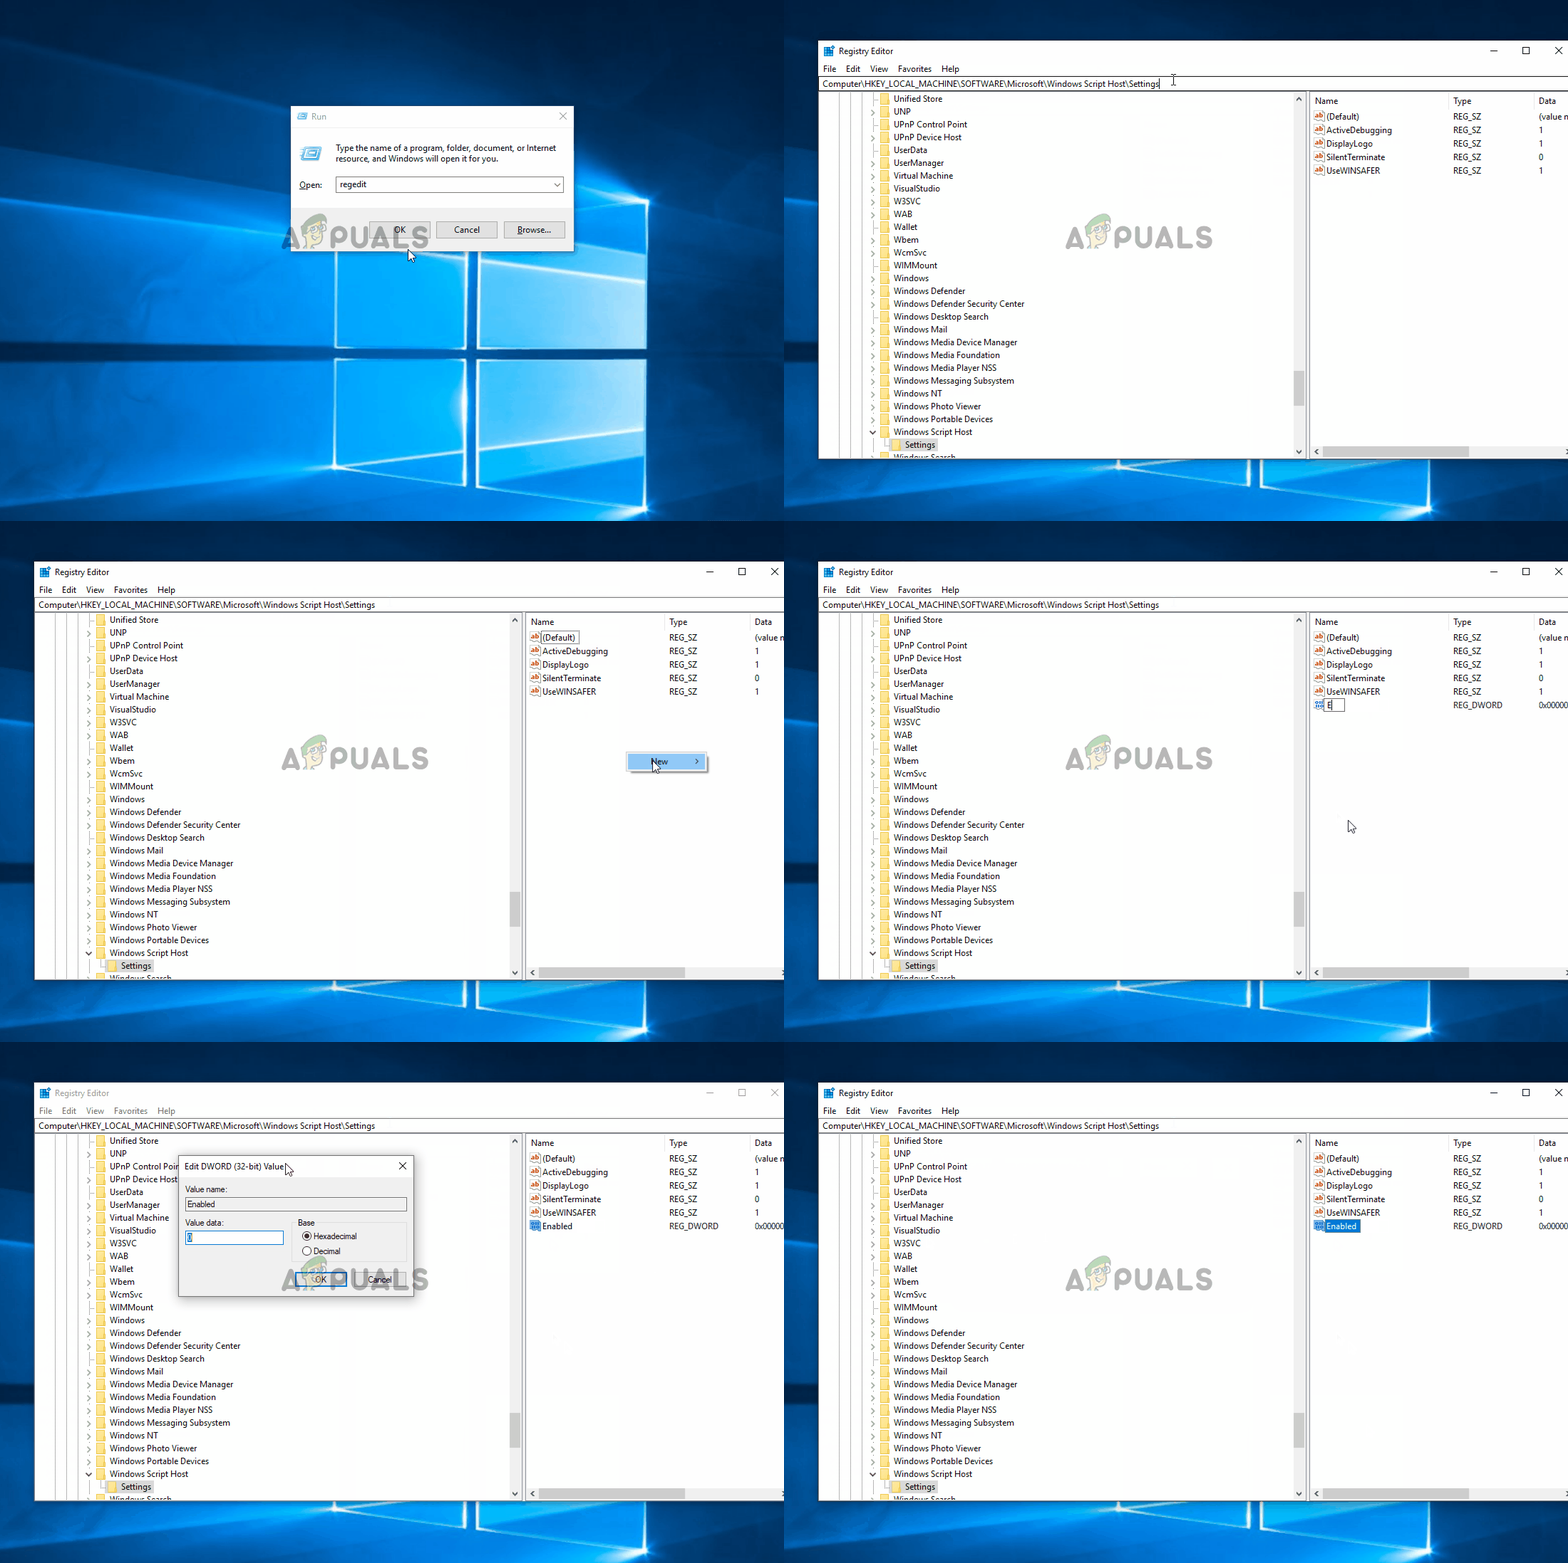
- Press Windows key + R to open up a Run dialog box. Then, type “regedit” and press Enter to open up Registry Editor. When you see the User Account Control screen, click on Yes to grant admin access.
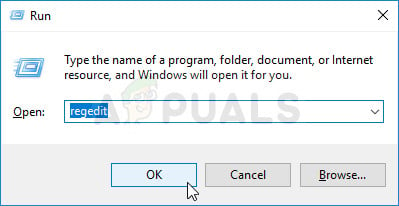
Running the Registry Editor - Once you’re inside the Registry Editor, use the left-hand pane to navigate to the following location:
Computer\HKEY_LOCAL_MACHINE\SOFTWARE\Microsoft\Windows Script Host\Settings
Note: You can also paste the location directly into the navigation bar and press Enter for easy access.
- When you get to the correct location, move over to the right-hand pane and choose New > Dword (32-bit) value.
- Name the newly created value Enabled, then double-click on it and set the Base to Hexadecimal and the Value data to 1.
- Save the changes, restart your computer and see if the issue is resolved once the next startup sequence is complete.
