What is Backgroundtransferhost.exe and Should I Block It?
Some Windows 10 users are reporting that they found a process called Backgroundtransferhost.exe using excessive-high network bandwidth most of the time. In some cases, affected users have reported that RAM and & CPU resources are also clogged by this Backgroundtransferhost.exe process even when the computer is in Idle mode. This might not be an issue in areas with high-broadband connections, but users that are still forced to used 3G Modems to connect to a model will have no choice but to look for ways to reduce the network usage of Backgroundtransferhost.exe. The issue seems to be exclusive to Windows 10 computers.
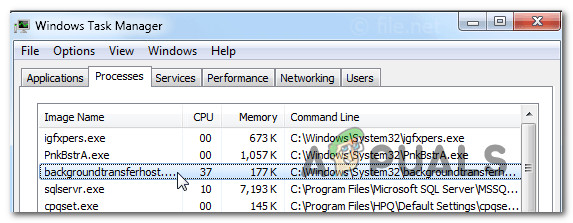
Note: Some affected users have reported that if they try to disable the task from TaskManager, the computer immediately restarts.
What is Backgroundtransferhost.exe?
The Backgroundtransferhost.exe service is responsible for synchronizing the vast majority of your Windows settings and user preferences if you are using the Windows account on multiple devices.
The BackgroundTranferHost process is also used by various built-in Apps to download & upload data in the background even when the computer is in standby or hibernation. In most cases, the high-resource usage happens because the default antivirus is insisting on scanning the files that get downloaded through Backgroundtransferhost.exe as soon as the download is complete.
Is Backgroundtransferhost.exe safe?
The genuine Backgroundtransferhost.exe is safe and doesn’t pose any security threat to your system. However, to determine that this is the case, you need to make the necessary verifications to ensure that you’re not dealing with malware in disguise.
Nowadays, most malware applications are designed to camouflage themselves as system processes to avoid getting detected by security suites. The quickest way to ensure that you’re dealing with a genuine file is to verify the location.
To do this, press Ctrl + Shift + Enter when you suspect that Backgroundtransferhost.exe is consuming system resources. Once you’re inside the Task Manager window, select the processes tab and scroll down through the list of processes until you locate Backgroundtransferhost.exe. Once you see it, right-click on it and choose Open File Location.
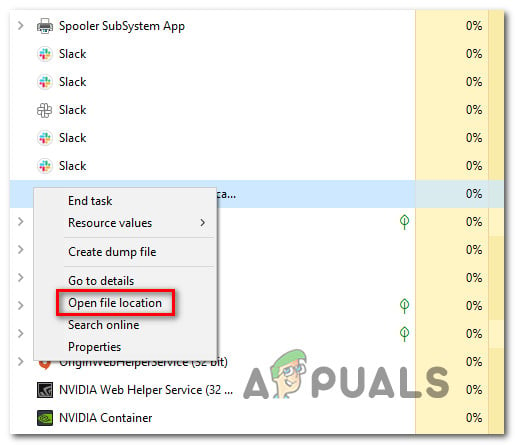
If the location is different than C:\Windows\System32, it’s very likely that you’re dealing with malware in disguise. In this case, you need to take the appropriate steps to remove the virus infection from your system. Doing so should automatically resolve the high-resource usage issue on your computer.
Should I Disable Backgroundtransferhost.exe?
We’ve already established that the genuine Backgroundtransferhost.exe file should be trusted and poses no security threat whatsoever. This component is present in all recent Windows versions but is most active on Windows 10, where there’s a heightened emphasis of multi-device connectivity.
If the investigation above revealed that you’re potentially dealing with malware in disguise, we highly recommend that you perform the investigations below to ensure that you remove any virus infection that could potentially be causing this behavior.
Based on various user reports, the most efficient way of doing this is to make use of a deep Malwarebytes scan to identify and remove any kind of malware that is capable of triggering this issue.
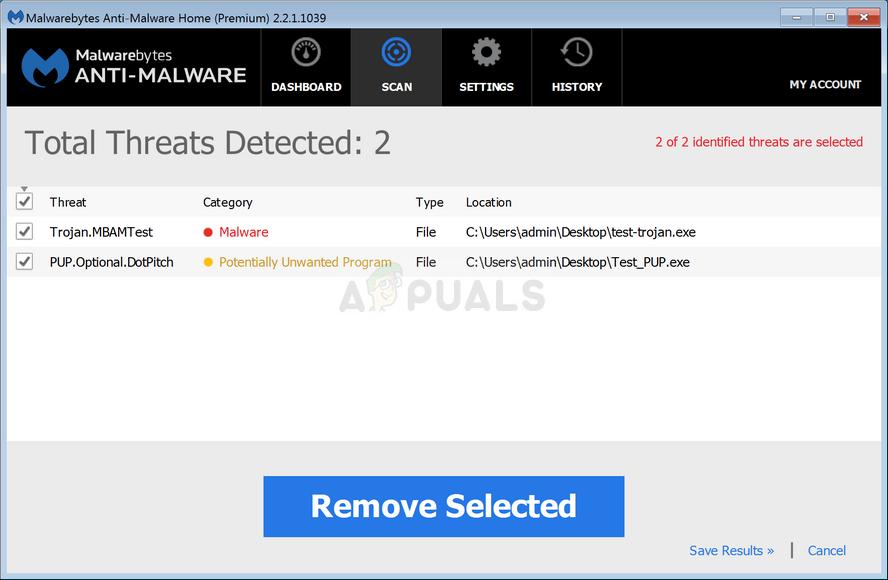
If you’re not that comfortable with Malwarebytes, you can follow this article (here) to run a free deep security scan. If you run the scan and it doesn’t find any malware infection, you can safely proceed to the next section where we cover disabling the Backgroundtransferhost.exe process.
How to Disable Backgroundtransferhost.exe?
In case you’ve previously determined that you’re not dealing with a virus infection, you can proceed with one of the methods below to ensure that your system resources are not being overused by the Backgroundtransferhost.exe process.
Down below you have a couple of different ways that other affected users have successfully followed to prevent or limit Backgroundtransferhost.exe ability to use system resources. We encourage you to follow the potential fixes in order as we ordered them by efficiency and severity.
Let’s begin!
Method 1: Disabling Settings sync
The most effective fix for this particular issue is to dive into your account settings and disable the auto-syncing feature. While this ends up resolving the issue in the vast majority of cases, it will also limit your Windows account’s ability to sync your user preferences and other types of settings across multiple devices.
However, if you’re only using this Windows account on this device, then the steps below will not affect the functionality of your user account in any other way.
Here’s a quick guide on disabling the Sync setting that is most likely to call and keep the Backgroundtransferhost.exe process busy:
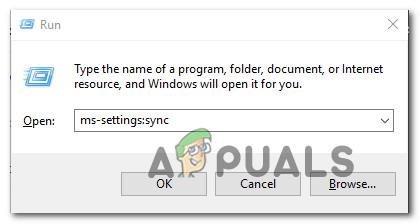
- Press Windows key + R to open up a Run dialog box. Then, type “ms-settings:sync” inside the text box and press Enter to open up the Sync your settings tab of the Settings app.
settings sync - Once you’re inside the Sync your settings tab, move over to the right-hand pane and scroll down to the Sync settings screen.
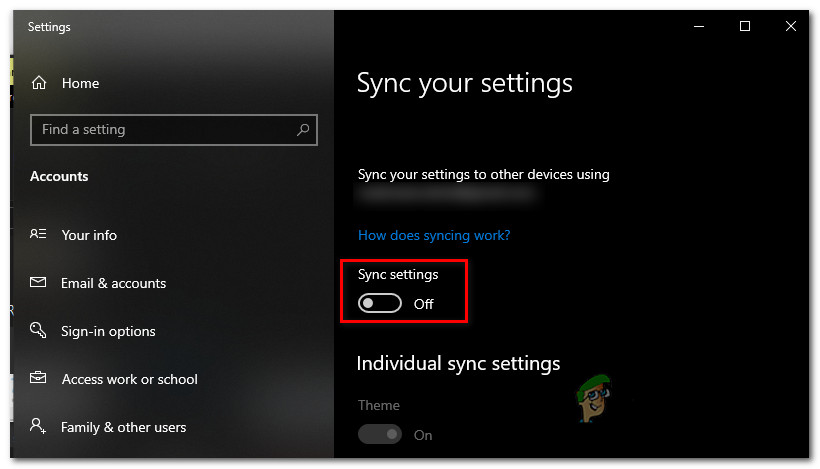
Disabling the Sync settings option - Disable the toggle associated with Sync settings, then restart your computer and see if the issue is still occurring once the next system startup is complete.
If the issue is still not resolved once the next startup sequence is complete and you’re still seeing high resource usage associated with the Backgroundtransferhost.exe process, move down to the next method below.
Method 2: Disabling the Time Broker service
Ase reported by several different affected users, this particular issue can also be caused by a corrupted or glitched instance of the Time Broker Service. Several users that we’re also encountering this problem have reported that they were finally able to stop the excessive usage of Backgroundtransferhost.exe process by ensuring that the Time Broker service stays off even in instances where it’s actively being called by a built-in service.
This should end up resolving any system-resource issues associated with the Backgroundtransferhost.exe process. But in case you run into other unexpected problems after you do this, you can simply reverse engineer the steps below to revert all the changes.
Here’s a quick guide on disabling the Time Broker service using the Registry Editor utility:
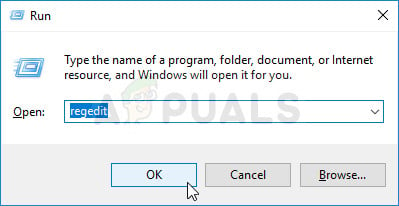
- Press Windows key + R to open up a Run dialog box. Then, inside the text box, type “regedit” and press Enter to open up the Registry Editor. When prompted by the UAC (User Account Control), click Yes to grant administrative privileges.
Running the Registry Editor - Once you’re inside Registry Editor, use the left-hand pane to navigate to the following location:
HKEY_LOCAL_MACHINE\SYSTEM\CurrentControlSet\Services\TimeBroker
Note: You can also paste the location directly into the navigation bar to get there instantly.
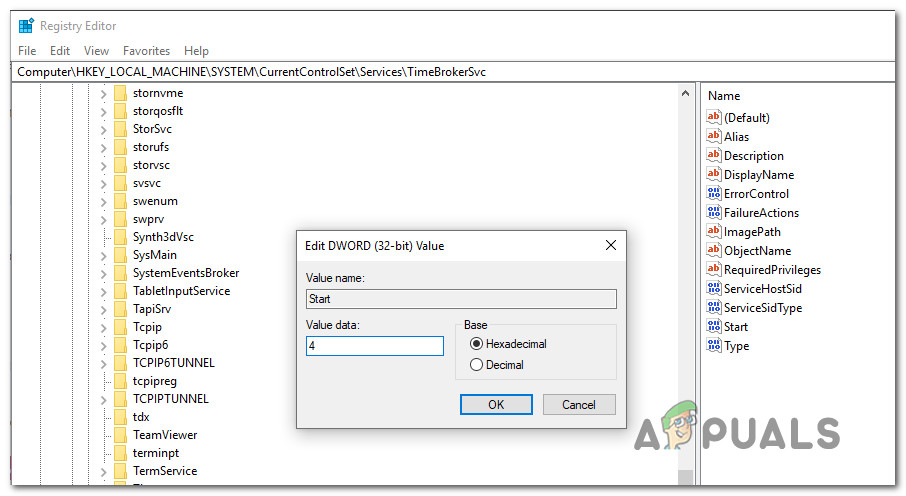
- When you arrive at the correct location, move down to the right-hand pane and double-click on the Start value.
- Inside the Edit Dword (32-bit) Value window, set the Base to Hexadecimal and the Value data to 4 and click Ok to effectively disable the Time Broker service.
Disabling the Time Broker service - Once this change has been enforced, restart your computer and see if the issue has been resolved once the next startup sequence is complete.


