Web Browsers keeps opening to MSN by default
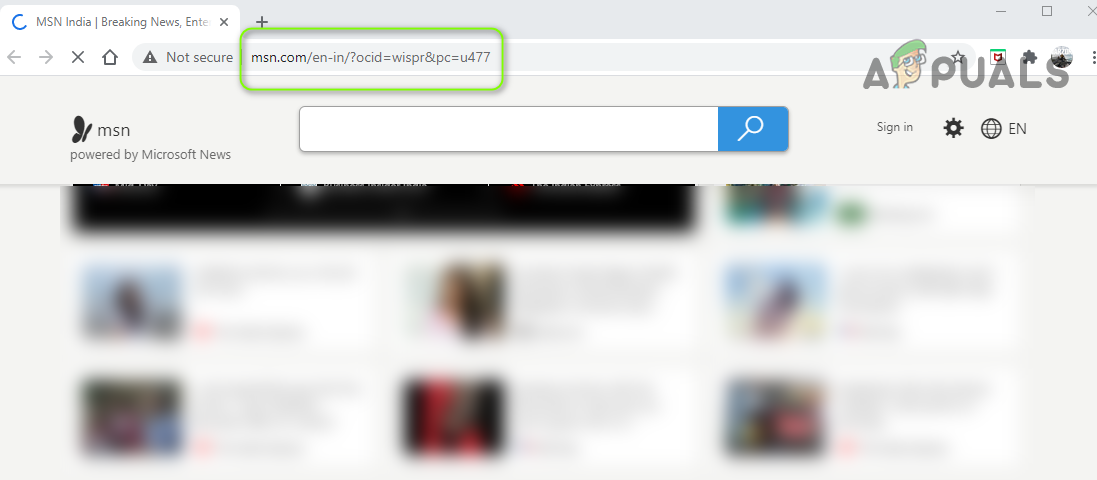
You may see the MSN page in a randomly launch web browser if the Windows of your system fails to verify the availability of the internet due to misconfiguration of the network or blocking of the URLs by another application/device.
The user sees the behavior when the default system browser launches randomly (without any user intervention) and shows the MSN website page. The issue keeps on reappearing on the default system browser (either it is Edge, Chrome, or Firefox, etc.). For some users, the issue only appeared when logging into the system.
You may try the undermentioned solutions to stop MSN from opening automatically but before that, check if the keyboard (an assigned shortcut key on the keyboard may be triggering the behavior), laptop touchpads (touchpad may have touch gesture defined to open the default browser), or a multifunctional mouse is not triggering the default browser issue (you can check with another simple keyboard/mouse pair). Also, make sure your system is updated to the latest version of Windows. Additionally, make sure all the browsers have their home page set to default (not MSN).
Solution 1: Disable the VPN Client of Your PC
If you are using a VPN client and not in the habit of not properly disconnecting or closing it before shutting down the PC (or putting the PC to sleep), then it may cause the issue at hand as it can make Windows think the network (in this case, VPN) is not available. In this case, properly disconnecting and closing your VPN client before shutting down the PC (or putting it to sleep) may solve the problem.
- Disconnect your VPN client (if connected) and exit it from the system’s tray. Then make sure no process related to the VPN is operating in the Task Manager of your system.
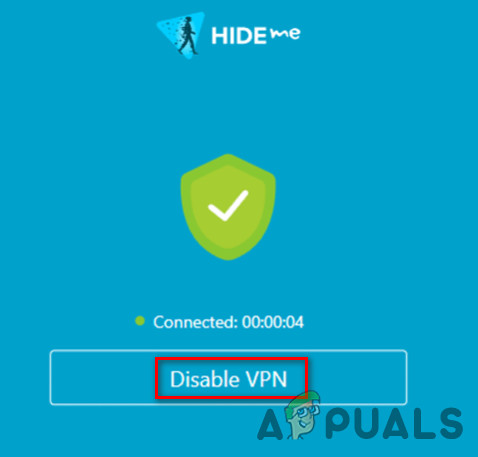
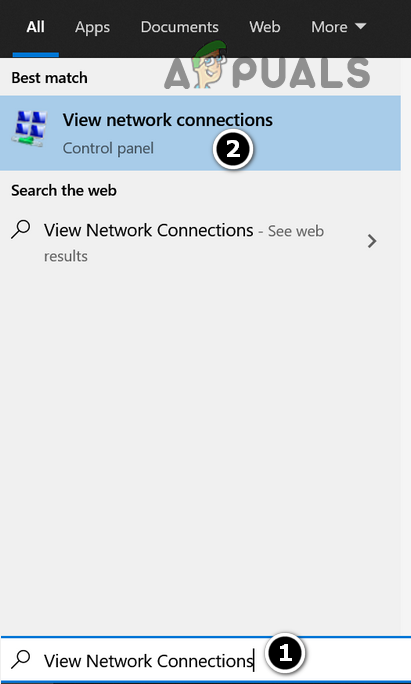
Disable the VPN Client - Now press the Windows key and type View Network Connections. Then open View Network Connections.
View Network Connections - Then right-click on the VPN network connection and select Disable.
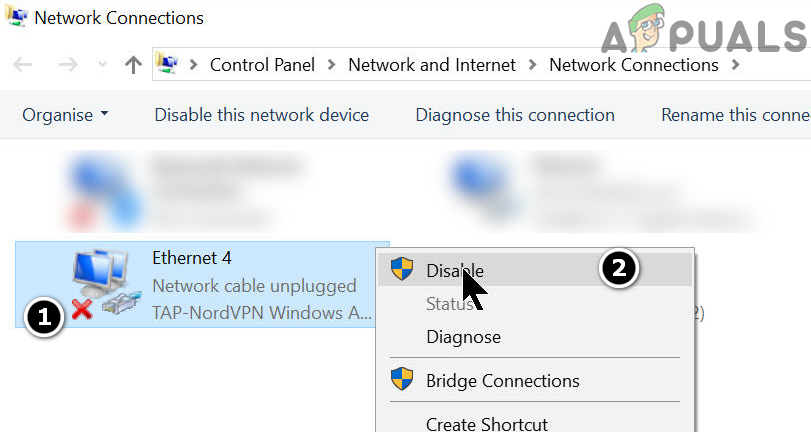
Disable VPN in the Network Connections - Now reboot your PC and check if the default browser is clear of the error.
If so, then you may have to enable the VPN in the network settings (steps 1 to 3) when you want to use the VPN client.
Solution 2: Perform a Malware Scan
The awkward browser behavior could be triggered by malware on your system. To rule that out, it will be a good idea to perform a thorough malware scan of your system. Before proceeding, make sure to uninstall any suspected malware (Conduit is reported to cause the issue at hand) in the system’s Apps. Also, many malware applications tend to install the extensions/plugins, or MSN toolbar to all the available web browsers, so, it will be a good idea to remove any suspicious browser extensions.
- Perform a malware scan of your system by using ADWCleaner of Malwarebytes.
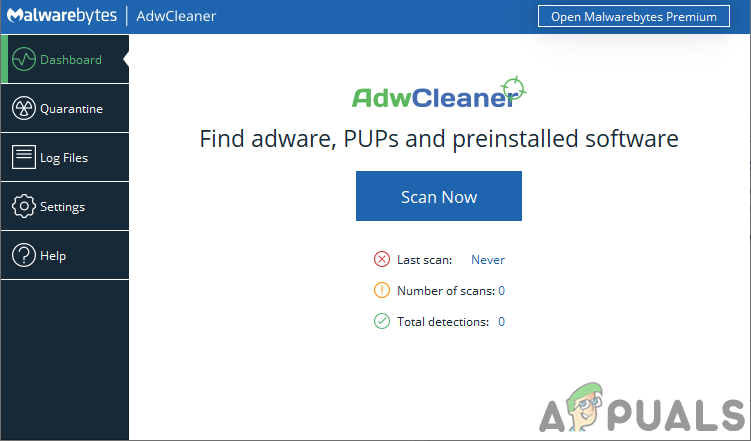
Click on Scan Now of Malwarebytes AdWCleaner - After removing the malware identified in the scan, reboot your PC and check if the browser issue is resolved.
Solution 3: Change the Startup Configuration of Windows
You may encounter the issue at hand if any of the startup items of your system is hindering the resources essential for the system’s network (which may trigger the current behavior). In this case, editing the system’s startup configuration may solve the problem.
- Clean boot your PC and check if the browser issue is resolved.
- If not, hit the Windows key, and in the Windows search box, type System Configuration. Then select System Configuration.
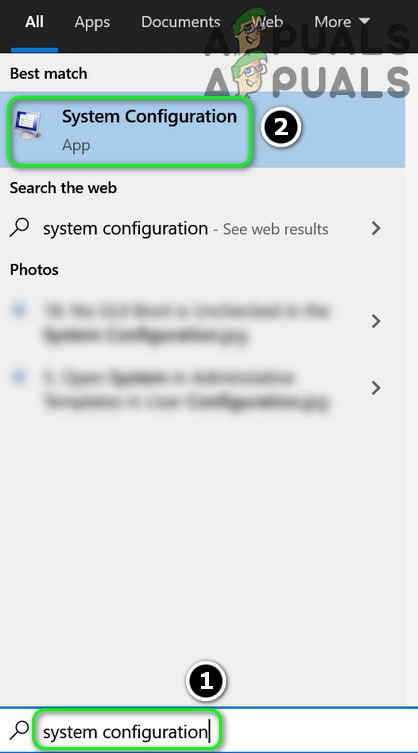
Open the System Configuration from the Start Menu - Now, in the General tab, select Normal Startup and steer to the Boot tab.
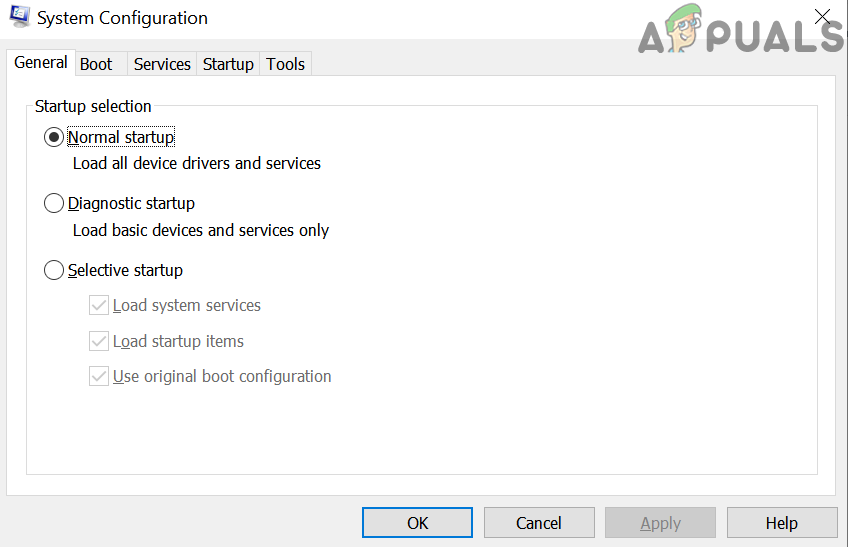
Select Normal Startup in the System Configuration - Then make sure nothing in Boot Options and Advanced Options is enabled.
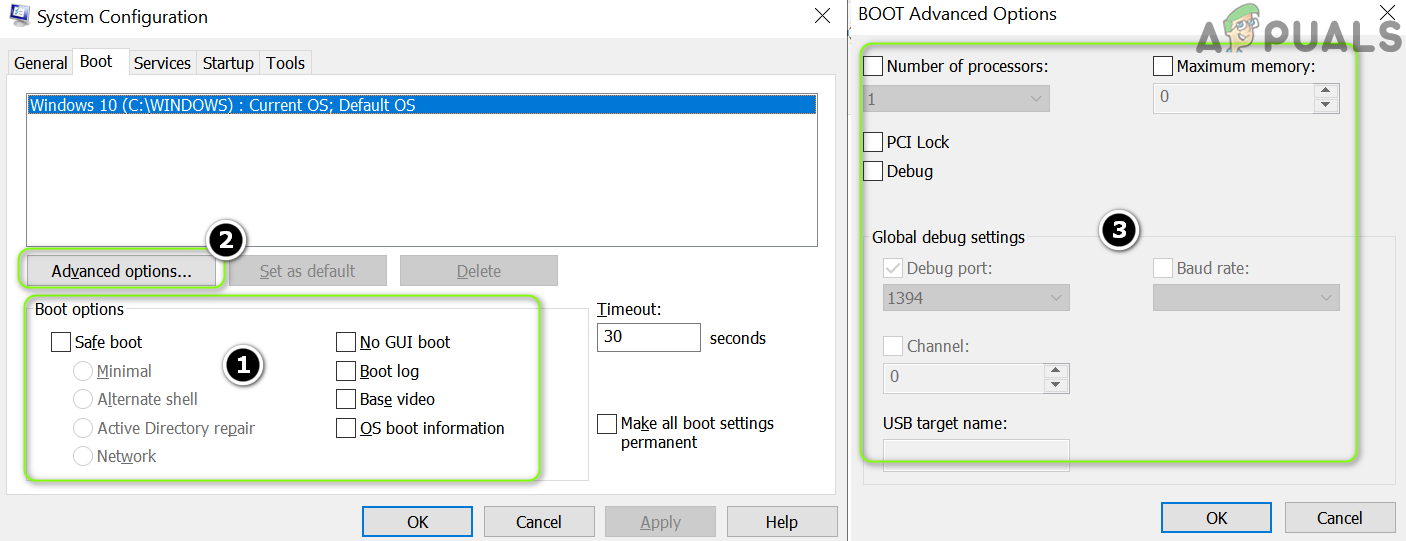
Nothing is Enabled in the Boot Options and Advanced Options - Now steer to the Services tab and enable every service (either Microsoft or others) there.
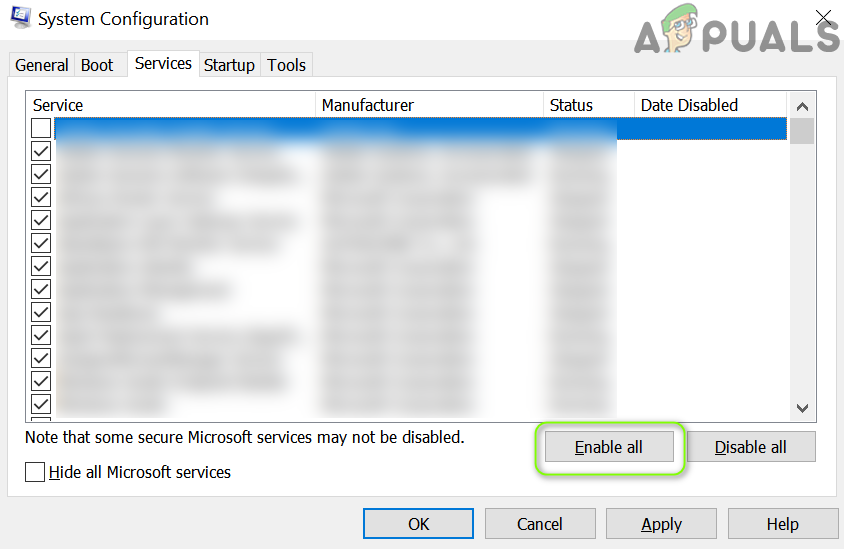
Enable All Services in the System Configuration - Then head to the Startup tab and click on Open Task Manager.
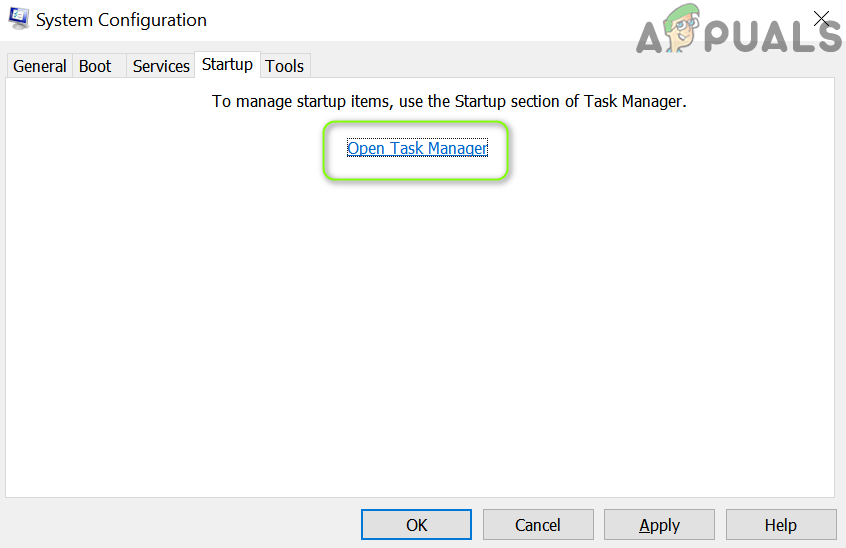
Click on Open Task Manager in the System Configuration - Now, in the Startup tab, enable every process/application and close the Task Manager.
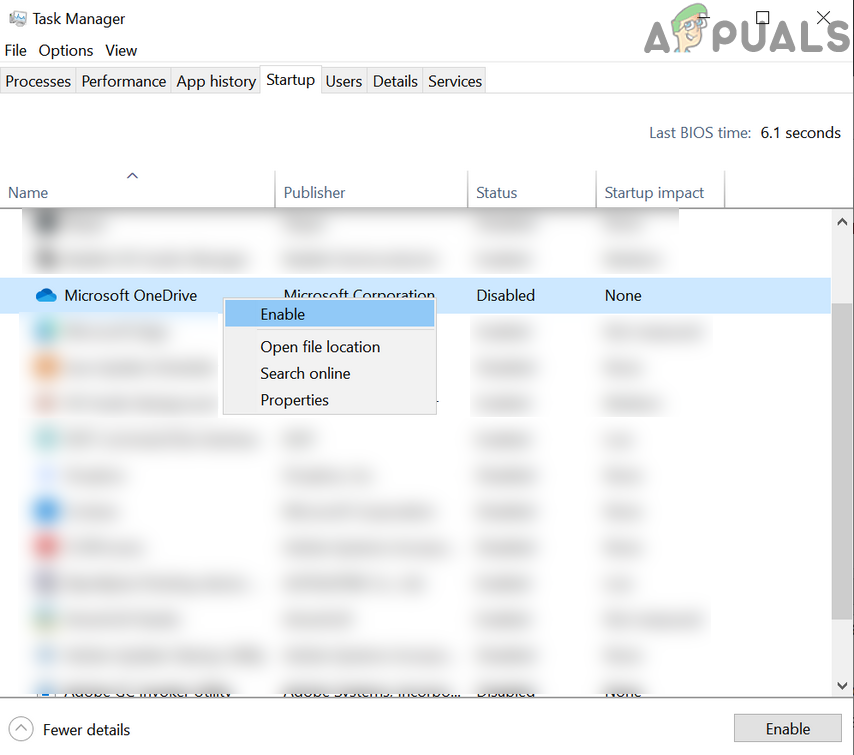
Enable All the Items in the Startup tab of the Task Manager - Then, in the System Configuration window, click on Apply/OK and reboot your PC.
- Upon reboot (the system may take longer than normal to boot), check if the system is clear of the browser issue.
If so, then you may have to disable/uninstall unnecessary processes/applications (some users reported that the desktop version of the OneDrive application and Intel wireless software was triggering the issue.) one by one till you find the problematic one. Once found, keep it enabled to stop the browser issue from reoccurring.
Solution 4: Edit the Settings of Your Content Filtering Applications/Devices
The current behavior may be triggered when Windows fails to check for the availability of the network as a content filtering application/device is blocking access to the MSN site. In this case, disabling/removing, or editing the settings of the content filtering application/device may solve the problem. But before proceeding, check if rebooting the PC, router, and any other network-attached device (like PiHole) resolves the issue (but make sure the network devices are powered on and stable before powering on the PC).
- Firstly, temporarily disable the antivirus and firewall of your system (be very careful, this step can be harmful) and check if the browser issue is resolved. If so, then, in the settings of your antivirus/firewall, add exceptions for the following:
www.msftncsi.com

microsoftconnecttest.com
(keep in mind that the MSN URL you are seeing in the random browser launch is a redirect of the said URLs).
- If that did not do the trick, then check your installed applications to find out any content filtering application (for example K9 Web Protection is reported to cause the issue), and if one is present, either uninstall it or whitelisting (e.g., in the Cloudware software) the URLs mentioned in step 1 to check if that resolves the issue.
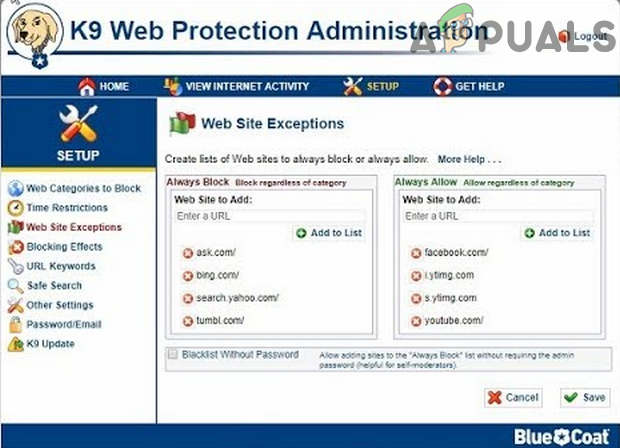
Whitelist Microsoft URL in the K9 Web Protection - If the issue persists, then check for any Wi-Fi extenders attached to your PC/network. If present, then check if removing the extender resolves the issue (as it may trigger the behavior whenever it switches its band).
- If you are using a network protecting device, like PiHole, then remove it and check if the issue disappears. If so, then you may edit the PiHole settings to allow communication to the URLs mentioned in step 1. If no external device is attached, then check if the built-in firewall of your router or any of the router’s settings is causing the issue.
If your system is a part of an enterprise/domain network, then check if any of the organization’s startup scripts, captive portal, or group policy is blocking access to the Microsoft URLs. If so, then rectify and check if the browser issue is resolved.
Solution 4: Edit the Network Options
Your system may show the random browser launches if the network settings of your system are not properly configured (e.g., Windows 10 prefers wired connection over wireless and you are using both, then the wireless portal traffic routed through the wired connection may trigger the behavior). In this context, make certain network-related changes may solve the problem.
- Firstly, connect your system to a single network (preferably wired) and make sure to disable/disconnect your system from all network connections i.e., LAN (if part of a domain/enterprise network), wireless/Wi-Fi, proxies, VPNs, and virtual network adapters (except the one in the use). Now check if the issue is resolved.
- If so, then one of the other network connections is using a captive portal (a page where a user has to sign-in or accepts the Ts & Cs). You can find the problematic network by enabling these network connections one by one (but disabling others), then either log in to that portal or sort out its issue. If the issue is caused by using wired and wireless connections at the same time, then disconnect from the wireless but make sure to uncheck “Connect Automatically”.
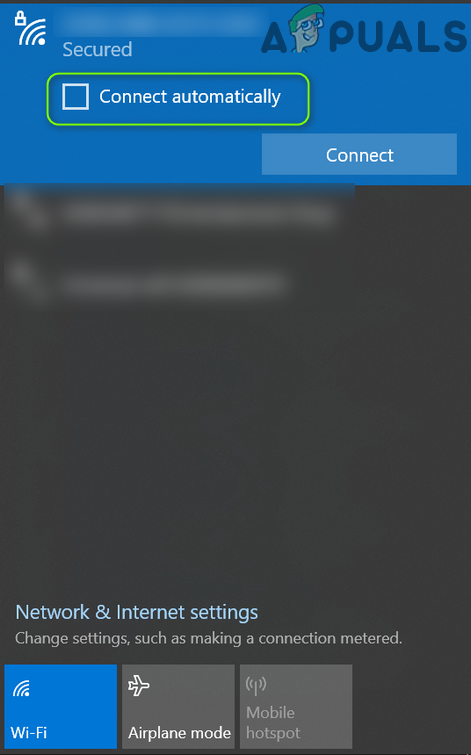
Uncheck Connect Automatically
Solution 5: Change the Startup Type of Network Location Awareness Service
You may encounter the issue under discussion if the system’s Windows tries to perform the internet availability check even before the connection is made or the Network Location Awareness (NLA) service is in the error state. In this case, setting the startup type of Network Location Awareness (NLA) service to Delayed Start may solve the problem.
- Press the Windows key and in the Windows search, type Services. Then, in the results shown, right-click on Services and choose Run as Administrator.

Open Services as Administrator - Now double-click on the Network Location Awareness service (you may have to scroll a bit to find it) and expand the Startup Type dropdown.
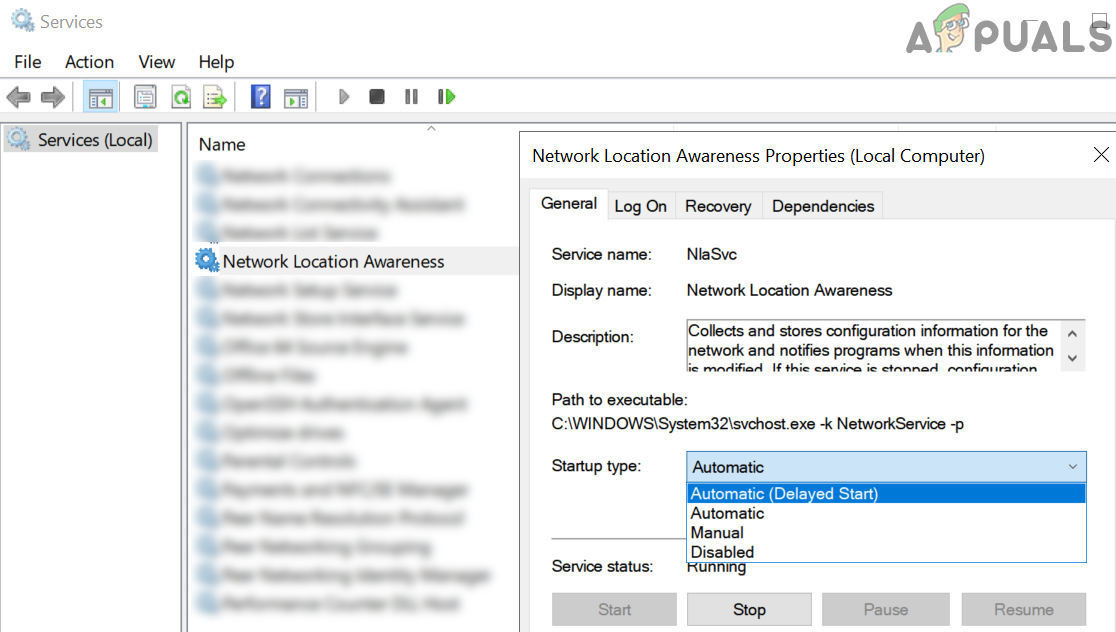
Change Startup Type of Network Location Awareness Service to Automatic (Delayed Start) - Now select Automatic (Delayed Start) and then click on Apply/OK.
- Then reboot your PC and check if the browser issue is resolved.
- If not, repeat steps 1 to 2 to launch the Network Location Service properties.
- Now expand the dropdown of Startup Type and select Disabled.
- Then reboot your PC and check if that resolves the issue.
If disabling the Network Location Awareness resolves the issue, you may see a yellow exclamation mark on the network connection in the system’s tray (although you could use the network resources without any issue). Some applications like Skype may fail to connect to their servers if NLA is disabled.
Solution 6: Edit the System’s Registry
If the issue is still there, then the issue could be caused by the wrong configuration of your system’s registry. In this case, editing the relevant system registry keys may solve the problem.
Warning: Advance at your own risk as editing the system’s registry is a task that requires a certain level of expertise and if done wrong, you may cause everlasting damage to your PC/data (that is why we kept this option at last).
Disable EnableActiveProbing
- Create a backup of your system’s registry.
- Hit the Windows key and in the search box, type Registry Editor. Then, in the results shown, right-click on the Registry Editor and select Run as Administrator.
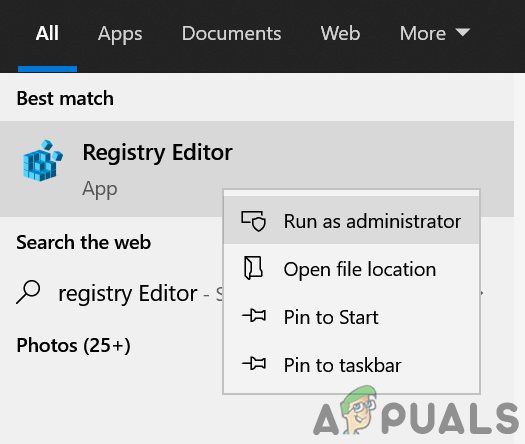
Change Startup Type of Network Location Awareness Service to Automatic (Delayed Start) - Now navigate to the following path:
Computer\HKEY_LOCAL_MACHINE\SYSTEM\CurrentControlSet\Services\NlaSvc\Parameters\Internet
- Then in the right pane, double click on EnableActiveProbing and set its value to 0.
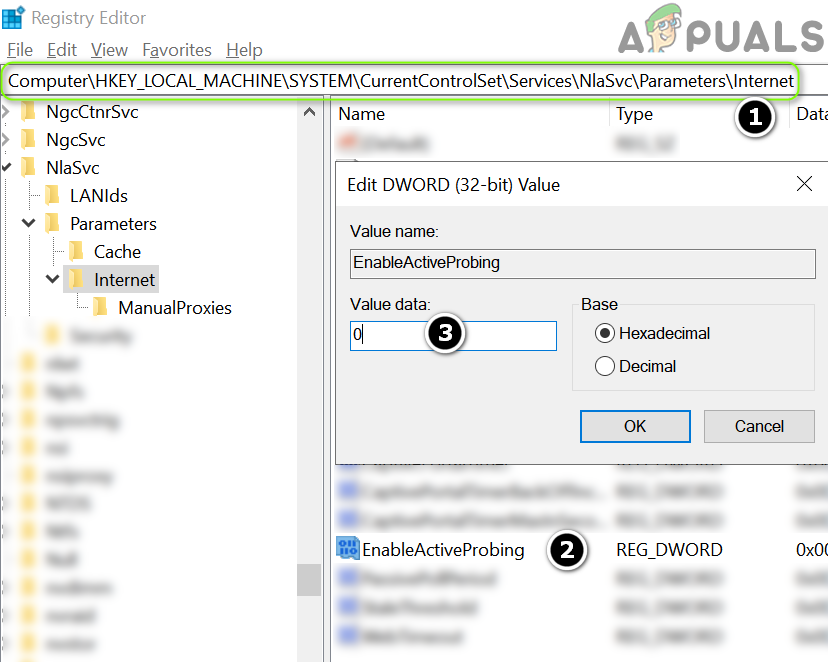
Disable EnableActiveProbing in the System’s Registry - Now close the Editor and reboot your PC.
- Upon reboot, check if the browser issue is resolved.
- If you cannot find the EnableActiveProbing value at step 4, then make sure you launched the Registry Editor as administrator. Also, some users reported that they found the EnableActiveProbing value at the following location (if so, then follow the steps 4 to 6 and check if the issue is resolved):
Computer\HKEY_LOCAL_MACHINE\SYSTEM\CurrentControlSet\Services\NlaSvc\Parameters\
- If you do not feel safe while editing the registry or cannot find the key, then you may execute the following in an elevated command prompt (do not forget to reboot your PC afterward):
reg add "HKEY_LOCAL_MACHINE\SYSTEM\CurrentControlSet\Services\NlaSvc\Parameters\Internet" /v EnableActiveProbing /t REG_DWORD /d 0 /f
Keep in mind that, after disabling EnableActiveProbing, you may see a yellow exclamation mark on the network connection in the system’s tray but the websites may load normally. Some applications (as applications use this setting to test the internet availability) may not work or work very slowly (especially, applications by Microsoft). Also, your system may fail to connect to some of the Wi-Fi connections especially hotspots from mobile phones.
Change ActiveWebProbeHost
If disabling EnableActiveProbing did not solve the issue or the yellow mark on the network connection is creating an issue for you, then you may try the following:
- Launch the Registry Editor as administrator (as discussed above) and steer to the following path (you may copy-paste it in the address bar of the Registry Editor):
Computer\HKEY_LOCAL_MACHINE\SYSTEM\CurrentControlSet\Services\NlaSvc\Parameters\Internet
- Now double-click on ActiveWebProbeHost and change its value from msftconnecttest.com to www.google.com.
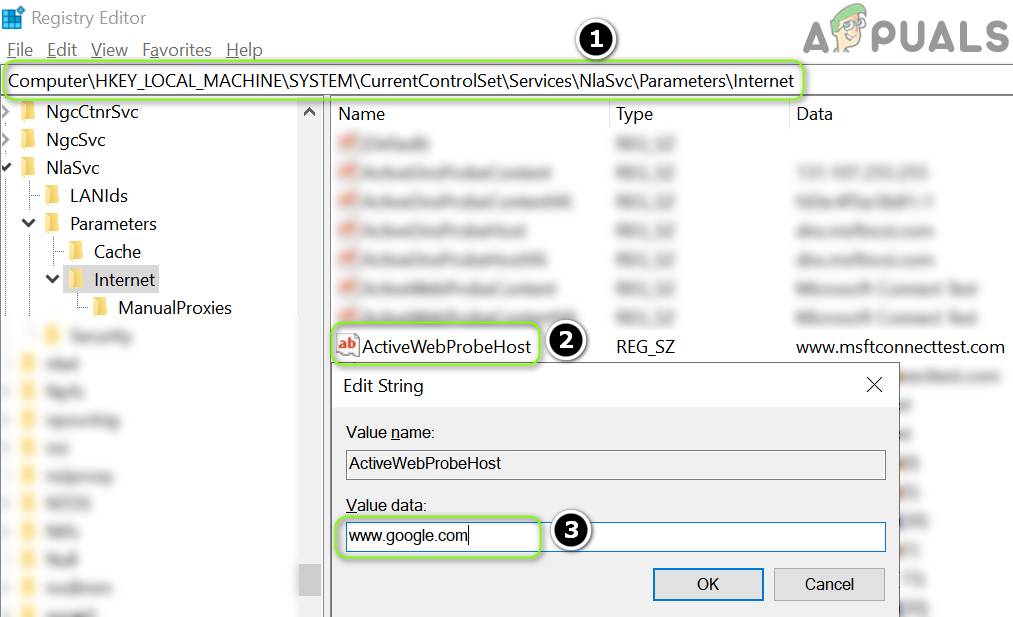
Change the ActiveWebProbeHost Value to Google - Then close the Editor and reboot your PC.
- Upon reboot, hopefully, the browser issue is resolved.


