Vmwp.exe: What is it & Should you remove it?
The vmwp.exe file is an essential component of the Windows operating system, specifically tied to the Hyper-V virtualization platform. It stands for Virtual Machine Worker Process, which manages and executes tasks for virtual machines on your PC.

Typically located in the C:\ProgramData\Microsoft\Windows\Hyper-V\Virtual Machines directory, this executable is an official Microsoft creation, ensuring the smooth operation of virtual environments within Hyper-V.
In this article we will talk about all matters vmwp.exe; what is it, should you remove it, is it legit, and explore errors surrounding this file on a Windows PC. So, let us get started now.
Is vmwp.exe a virus, malware, or safe?
The original vmwp.exe file is not a virus or malware; it’s a genuine, safe, and crucial process for Hyper-V or a Virtual Machine on your PC. However, viruses and malware can disguise as this executable file.
If you suspect vmwp.exe to be a virus or malware, first verify its location. The genuine file is typically stored in C:\ProgramData\Microsoft\Windows\Hyper-V\Virtual Machines. If the file isn’t there, scan your system for malware or viruses.
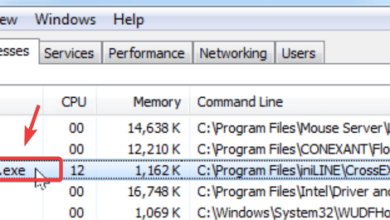
To locate the vmwp.exe file, open the Windows Task Manager and navigate to the View tab. Find the vmwp.exe process, right-click, and choose Open File Location. If the location doesn’t match the official one, further investigation is needed. Delete the file and scan your computer.
Should I delete, disable, or remove vmwp.exe?
The decision to disable the vmwp.exe file from your computer depends on whether you need it, if it has errors, or if there is a virus attack. However, we recommend that you keep the genuine and safe vmwp.exe running because it’s a crucial file for Windows; don’t disable it.
Make sure the automatic updates feature is enabled on Windows 11 and Windows 10 to receive the latest program versions. This can help avoid errors related to the vmwp.exe process or file.
How can I disable vmwp.exe?
1. Use PowerShell
- Search PowerShell in the Windows search box and then select Run as administrator.
- Once the Windows PowerShell is open, type the following command line and then press Enter on your computer keyboard.
Disable-WindowsOptionalFeature -Online -FeatureName Microsoft-Hyper-V-Hypervisor
- Finally, restart your PC and check if the feature has been disabled.
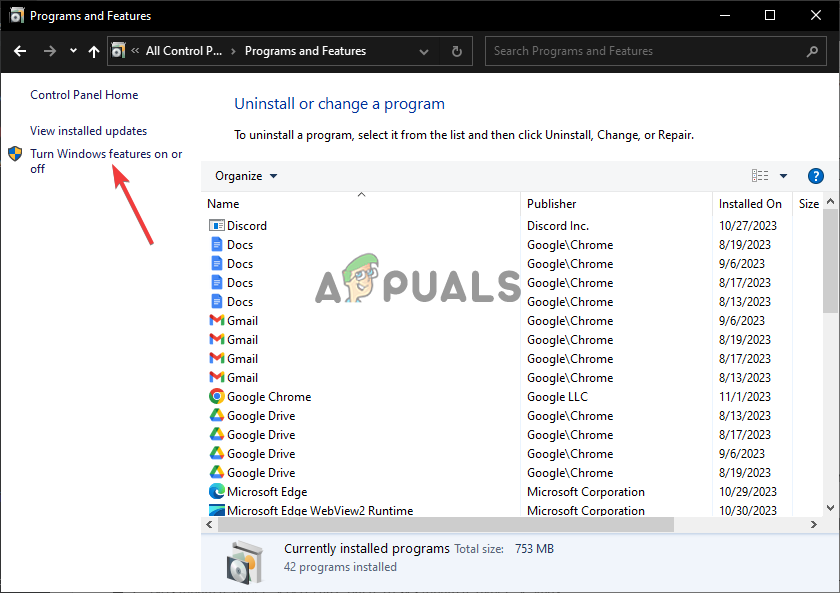
2. Use Control Panel
- Type Control Panel in the Windows search bar, and then select Open.

Use Control Panel - Go to Programs and Features > Turn Windows features on or off.
- Next, untick the box next to Hyper V.
- Finally, select OK and restart your Windows computer.
3. Use Process Explorer
- If you don’t have the Process Explorer app on your PC, you need to download and install it from here first.
- Next, open the Hyper-V Manager and select the settings for the VM with an issue.

Use Process Explorer - Click on the virtual hard drive options, and then copy the file for the virtual hard disk. It should be like the following example:
C:\VMs\Ubuntu Hyper-V\Virtual Hard Disks\Ubuntu Hyper-V.vhdx
- Now, open Process Explorer you installed.
- Next, hit Ctrl + F, paste the file path, and click the search icon.
- You will see a list of processes used by the VHDX. Locate the Vmwp.exe file. Right-click the file, and then click Kill Process.
What are the common vmwp.exe error messages?
The vmwp.exe errors can occur while using a virtual machine or your PC. Below are some common errors reported by users:
- vmwp.exe has encountered a problem and needs to close. We are sorry for the inconvenience
- vmwp.exe is not running
- Cannot find vmwp.exe
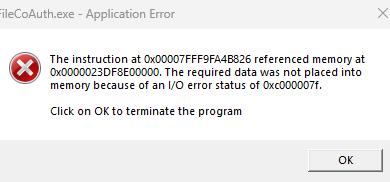
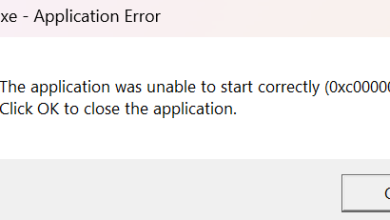
- vmwp.exe Application Error
- Error starting program: vmwp.exe
- vmwp.exe is not a valid Win32 application
- vmwp.exe failed
- There could be other vmwp.exe error messages. Let us now see how we can fix them.
How do I fix the vmwp.exe application errors?
If a vmwp.exe application error occurs while using a virtual machine, restart your application and computer. If the issue persists, follow these solutions to fix the vmwp.exe error.
- Run SFC and DISM scans: Corrupted, missing, or outdated system files may cause vmwp.exe errors on your computer. To fix this, you need to run the System File Checker (SFC) and Deployment Image Servicing and Management (DISM) tools. These tools scan your system, repair problematic files, and assess system health.
- Clean your disk using cleanmgr: Use cleanmgr to clean your disk and address memory issues that may cause the vmwp.exe error. This tool eliminates unwanted and unused files, freeing up your system’s disk space.
- Perform virus and malware scans: As we saw earlier, a virus can pretend to be a genuine file, such as the vmwp.exe file. If this is the case, run your antivirus or anti-malware software to eliminate any threats.
- Uninstall programs you don’t need: Some apps may cause vmwp.exe errors due to incompatibilities and conflicts. If you no longer use these programs and your system doesn’t rely on them, the optimal solution is to remove them.
- Enable automatic Windows updates: Enable automatic Windows updates to keep your system and programs updated,
1. Perform SFC and DISM scans
- Search for ‘Command Prompt’ in the Windows search box and open it with administrator privileges.
- Type the sfc /scannow command and press Enter to initiate the system file scan.
- Wait for the process to complete. If the error still appears, run the following DISM commands one by one.
Dism /Online /Cleanup-Image /CheckHealth
Dism /Online /Cleanup-Image /ScanHealth
DISM.exe /Online /Cleanup-image /Restorehealth
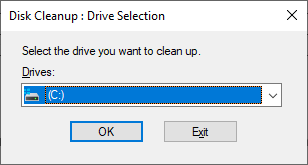
2. Clean your disk using cleanmgr
- Press the Windows button + R, type cleanmgr in the Run box, and then hit Enter on your computer keyboard.

Clean your disk using cleanmgr - Next, choose the drive you want to clean and hit OK.
Clean your disk using cleanmgr - Tick the boxes next to the items you want to clear, and then hit OK.
- You can also click Clean up system files to create more space on your disk. Select Delete files when you get a prompt.

Clean your disk using cleanmgr
3. Perform virus and malware scans
- Open the Windows Settings app and go to Update & Security.
- Locate and click on Windows Security and then go to Virus & threat protection.

Perform virus and malware scans - Select the option you want (we recommend a Full scan) and select Scan now.

Perform virus and malware scans
NOTE: You can use any other legitimate antimalware or antivirus software to scan your system. The steps depend on each respective app.
4. Uninstall programs you don’t need
- Open your Settings app and go to Apps.
- Click Apps & features.

Uninstall programs you don’t need - Choose the app or program you want to uninstall, click it, and select Uninstall.

Uninstall programs you don’t need
5. Enable automatic Windows updates
- Search for Windows Update settings on the Windows search bar and open the option.
- Click on Advanced options.

Enable automatic Windows updates - Under the Pause updates option, ensure there is no date selected.
Vmwp.exe - FAQs
To stop the vmwp.exe process, open Windows Task Manager, and under Processes, locate vmwp.exe. Right-click it and select End task. This will temporarily stop vmwp.exe, and it will relaunch again when you open the app again or restart your PC.
The vmwp.exe file is located in the Windows folder of the C drive. For example, it can be stored in C:\ProgramData\Microsoft\Windows\Hyper-V\VirtualMachines. You can find it in another location, depending on your PC and your storage organization.