(Solved) Video Thumbnails Not Showing up on Windows
Many users face the problem of video thumbnails not showing up in Windows Explorer. This can be a headache, especially for those who have a lot of videos on their computer. In case the videos have random names, you won’t be able to identify which one you’re opening.

Usually, the problem is that your thumbnail cache has gone faulty or corrupted. So what you can do now is rebuild the thumbnail cache using the command prompt and they will start showing up again.
If the problem persists, there will be some settings that you need to tweak in order for the issue to be fixed.
Be carefree as we’ll be highlighting all the tried and tested methods to restore the video thumbnails to working order.
1. Uncheck the Always show icons, never thumbnails option
The first step is to make sure you’ve all the right options in place for the thumbnails to appear. Now there’s an option “Always show icons, never thumbnails” in Windows Explorer. You need to keep it unchecked. If the option is ticked, the thumbnails won’t be visible.
Here’s how you can uncheck the option:
- Press Win + S and type File Explorer Options. Press Enter to open it.
- Next, move to the View tab and uncheck the Always show icons, never thumbnails option.
- Save the changes by clicking on Apply and then OK.
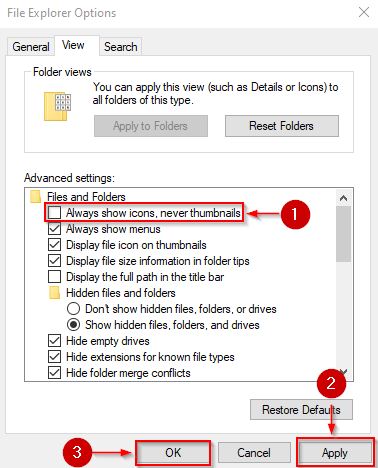
File Explorer Options
- Now see if the thumbnails are appearing or not.
2. Change Thumbnail Options in Advanced System Settings
There are two options related to thumbnails in the advanced system settings. Both of them need to be checked for the thumbnails to display. If you have gone through the first method and still thumbnails aren’t showing up, then it’s more than likely the options in advanced settings are turned off.
Follow the steps below to enable the thumbnail preview option.
- Type Advanced system settings in the Windows search bar and press Enter.
- Now navigate to Advanced > Performance > Settings.
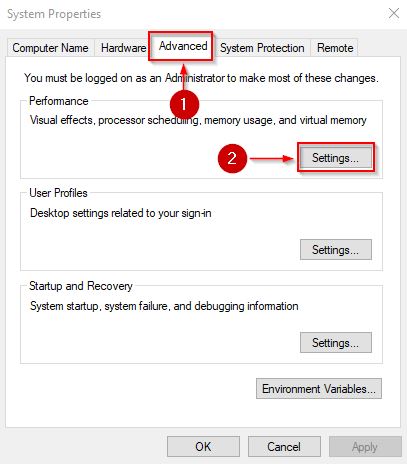
Performance Settings under the Advanced tab
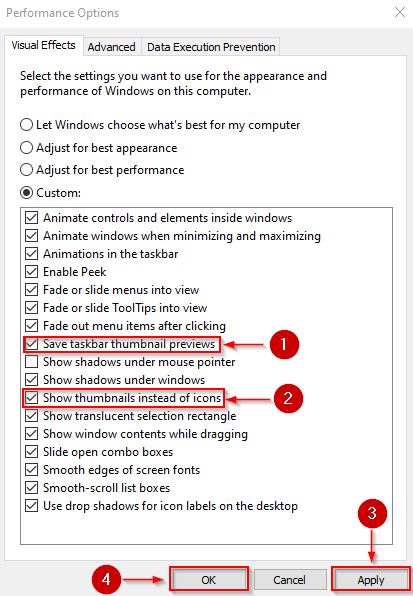
- Tick mark Save taskbar thumbnail previews and then Show thumbnails instead of icons option below it.
- Finally, click on Apply and OK for saving the settings.
Provided that Windows is still not showing video thumbnails, move to the next process.
3. Enable Thumbnails in K-Lite Codec Pack
The K-Lite Codec Pack contains the vast majority of codecs to empower the operating system to play almost every format of audio and video files. Now there’s also an option where you can enable all the formats for thumbnails so none of them disappears.
Sometimes the problem can be with a specific format, for instance, the thumbnails for .mov files are not showing up. Now if you allow the codec pack to show thumbnails for every format, it’ll also include .mov files and similarly, others.
Download the K-Lite Codec Pack if you haven’t already.
Here’s how to change the settings.
- Access K-Lite Codec Pack from the Windows Start menu.
- Go to the Codec tweak tool.
- Go to Thumbnails and enable all the formats.
4. Rebuild Thumbnail Cache
There’s a database of cache on Windows where it stores thumbnails for all videos and images. However, it can get corrupted over a period of time as the number of videos, images, or folders on your system increase.
Now there’s an option in Windows to rebuild the thumbnail cache to fix video thumbnails not showing up.
Follow the steps below for this procedure.
- Type CMD after pressing the Windows + S keys.
- Select Run as administrator to open the command prompt.
- Type in the following commands in sequence and press Enter:
taskkill /f /im explorer.exe
del /f /s /q /a %LocalAppData%\Microsoft\Windows\Explorer\thumbcache_*.db
start explorer.exe
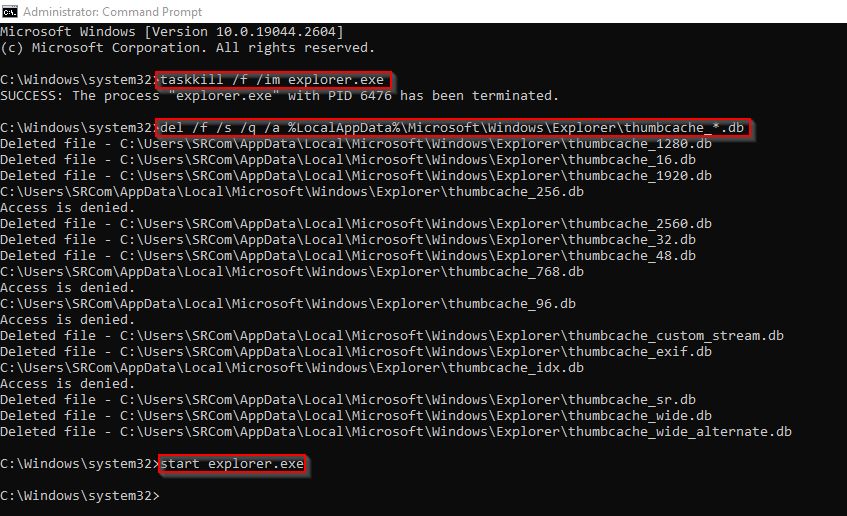
Rebuilding Thumbnail Cache
Once these commands are executed, the video thumbnails should appear in Windows Explorer.
5. Use Group Policy Editor
There’s one more option you can disable to try and fix the problem. If that option is enabled, the thumbnails will never show up in Windows Explorer. For this purpose, we’ll use the group policy editor. Once you disable the option that will be mentioned in the steps below, the thumbnails will start appearing.
- Start Run with Win + R keys and click OK after entering the following: gpedit.msc
- Expand the User Configuration menu in the left pane.
- Now expand the Administrative Templates menu and click on Windows components.
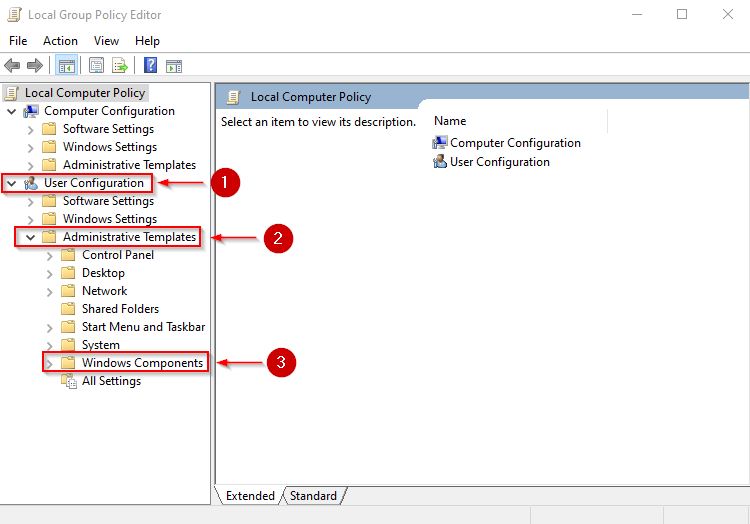
Local Group Policy Editor Window - Next, scroll down in the left pane and select File Explorer.
- Now move to the right menus and double-click on the Turn off the display of thumbnails and only display icons option.
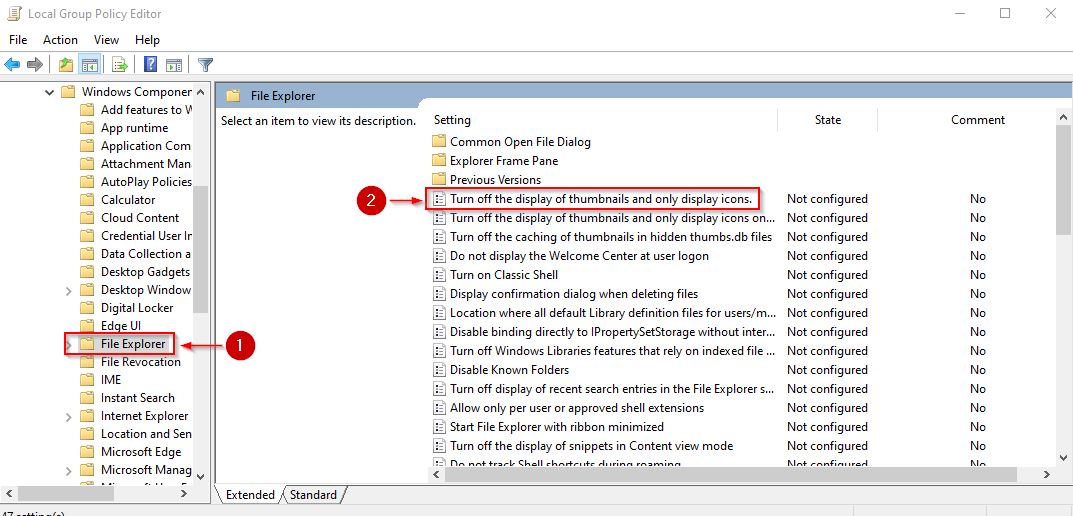
File Explorer Settings
- Select Disabled and save the preferences by clicking on Apply and OK.
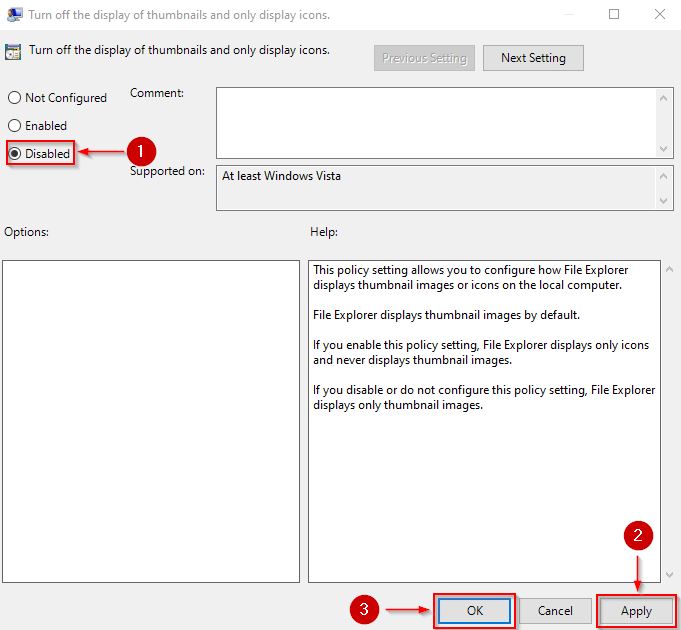
Go to your videos folder and see if the thumbnails appear now or not.
6. Run the SFC Scan
SFC scan will look for faulty files in the system and replace them automatically. In case the thumbnails are not showing on Windows, it can very well be due to a corrupted file. Therefore, simply running the SFC scan can help rectify the issue.
- Type CMD in the Windows search bar and run the command prompt as administrator.
- Type in the following command and press Enter:
sfc /scannow
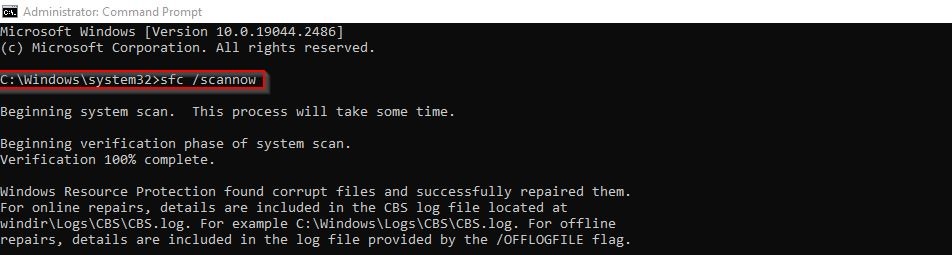
Now, wait while the scan completes and repairs the defective files.
7. Free up Drive Storage
Deleting unnecessary files and freeing up the drive storage can also help in fixing the problem. If your drive is over-spaced, there could be a chance that thumbnails are not visible because of that.
Follow the steps below to free up the system space.
- Press Win + I and navigate to System > Storage.
- Click on Configure Storage Sense or run it now.
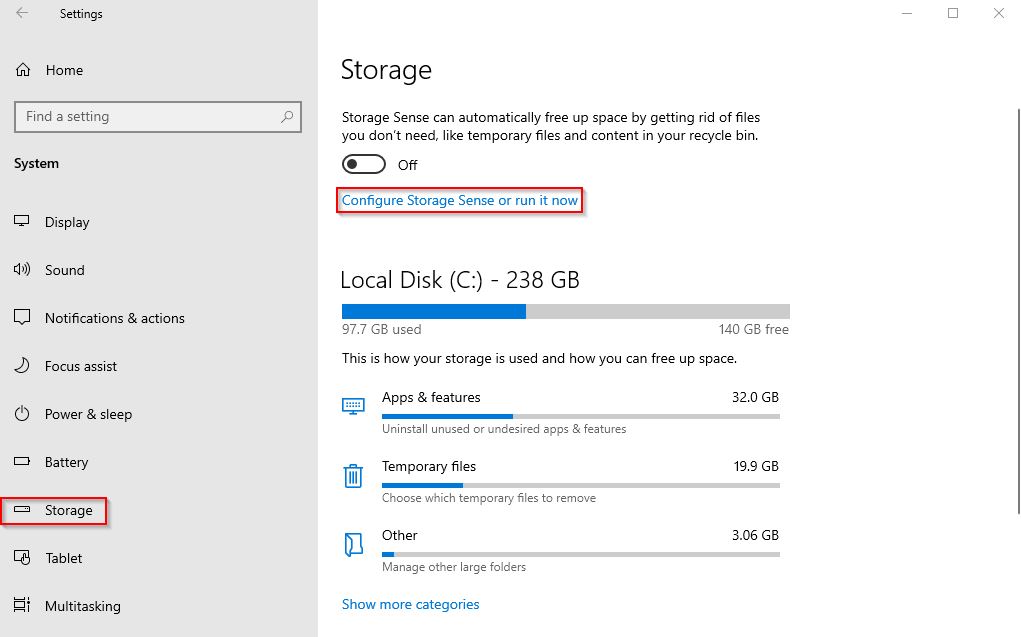
Windows Storage settings - Now scroll down and select Clean now under Free Up Space Now.
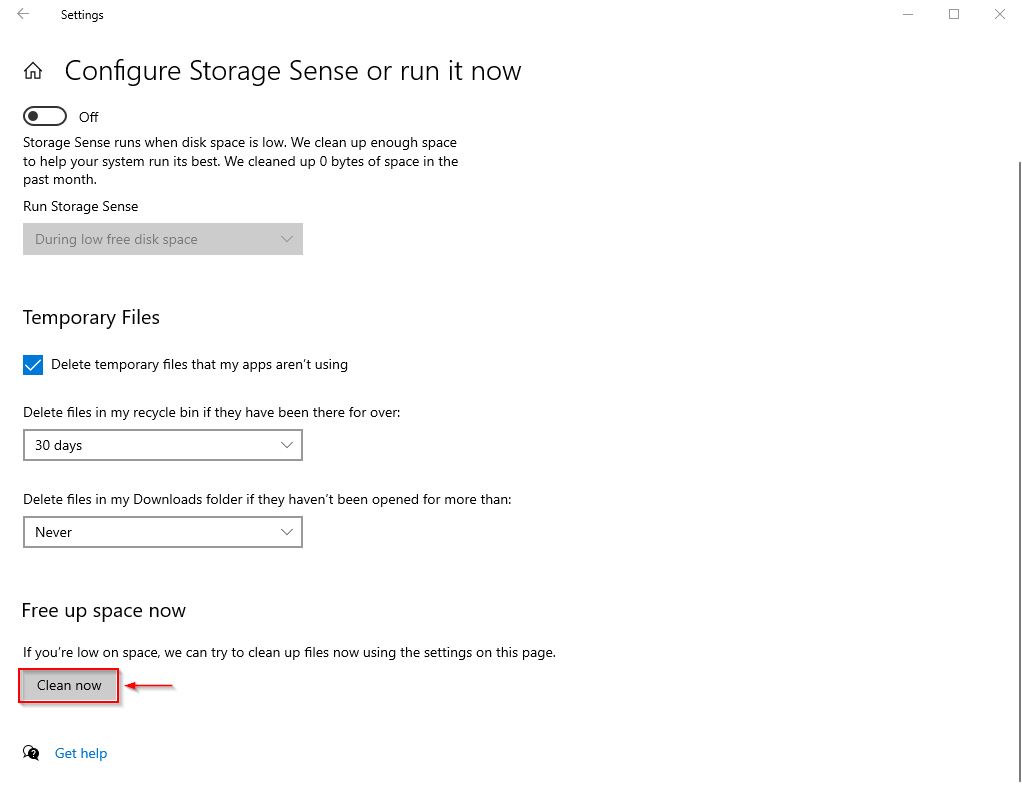
Clean Now option - Manually select the files that you want to delete.
- Once done, close the settings and see if the thumbnails show up now.


Thank you so much!