How to Fix Valorant Error Code VAL 43?
The error code VAL 43 or the valorant error 43 appears when players are trying to open up the game client. It tends out to be one of the most annoying errors that you might experience while playing Valorant as it is often related to connectivity issues. In addition to that, it may also be due to the Valorant servers being unreachable. The error code is accompanied by the “There was an error connecting to the platform. Please restart your game client” error message.
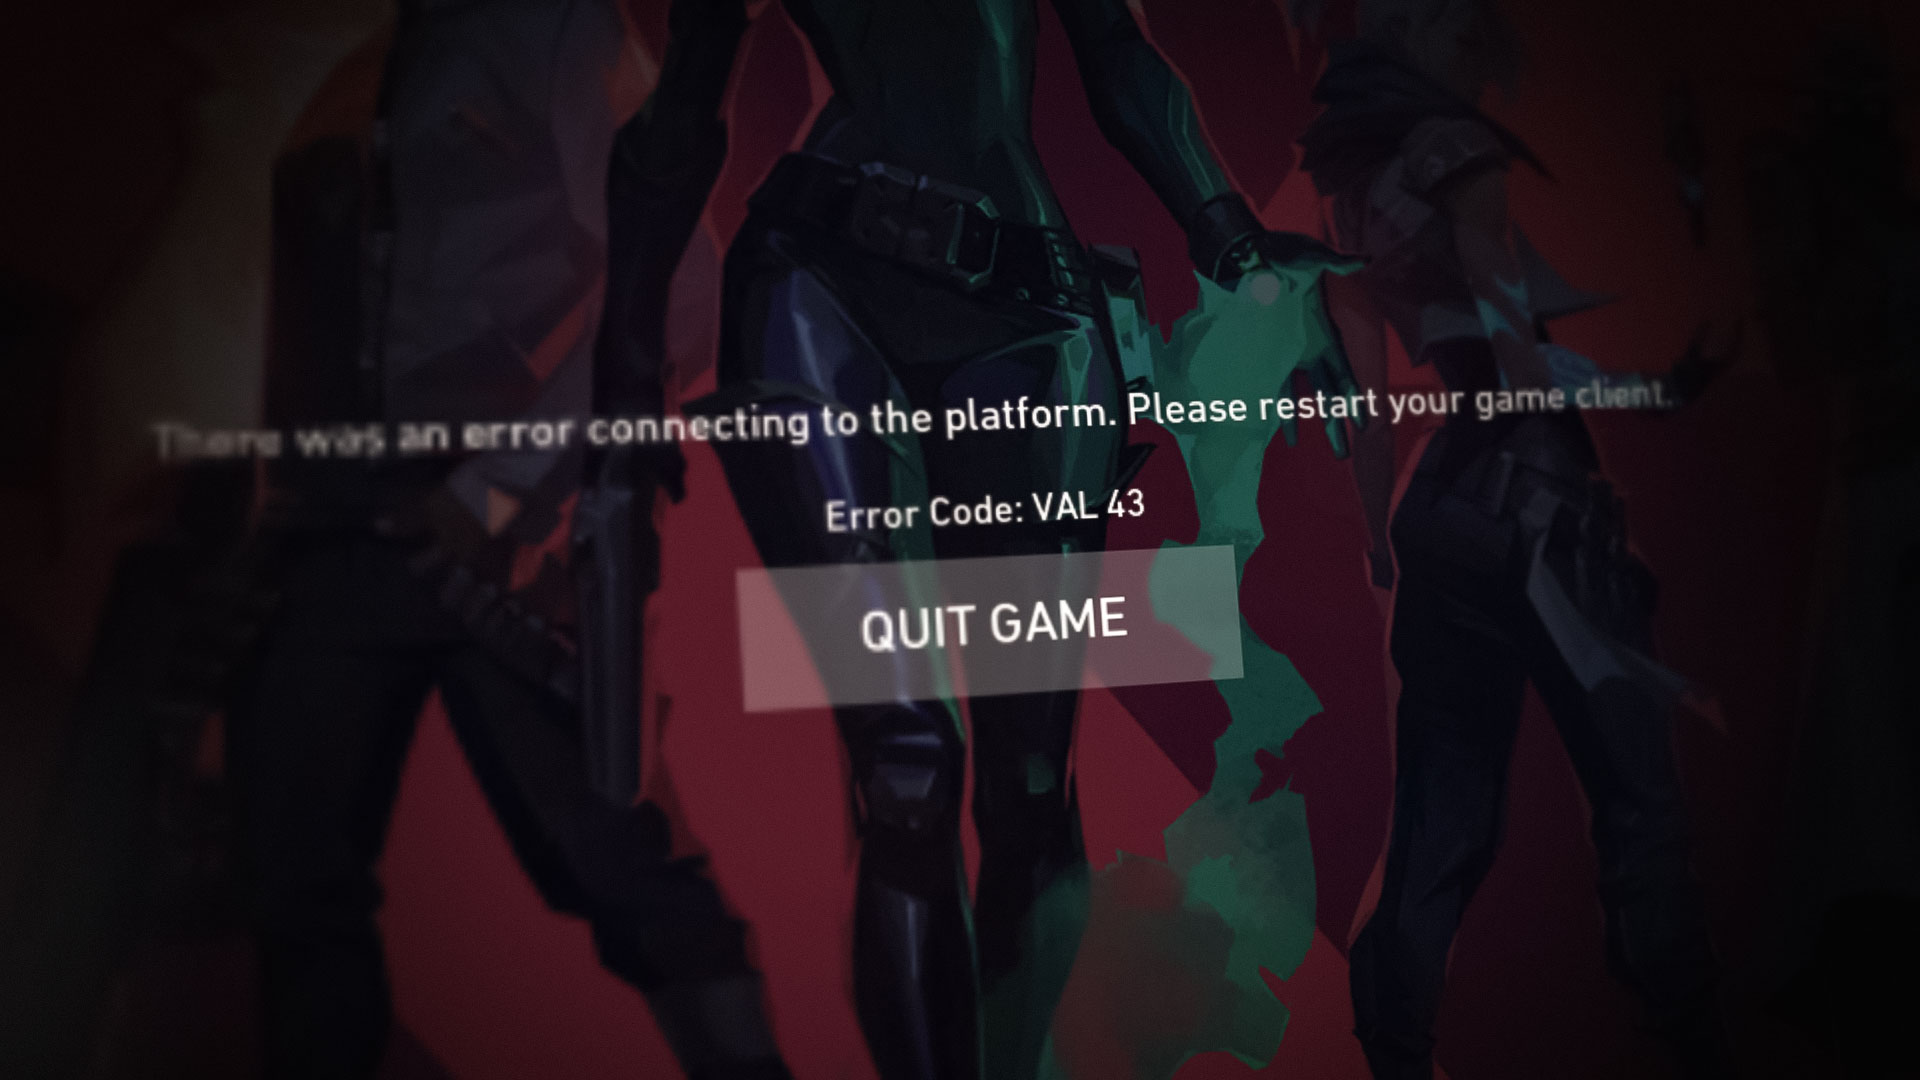
The error message basically means that your Valorant game client was not able to reach Riot servers. Now, this could be due to your connectivity issues or at times an issue with the Riot servers in which case you should check out their Twitter handle or head to the Riot Games Service Status website. Following are some of the reasons which may result in the said issue:
- Riot Client Settings — As it turns out, in some cases the issue can be triggered by your Riot client game settings that are stored in the AppData directory. In such a scenario, you will have to delete the file, which is automatically created again after a restart, and then run the client as an administrator.
- Vanguard Service — Riot uses the Vanguard service to ensure that the anti-cheat is running before you run the game. If the service is not running in the background, you will not be able to launch the client and maybe prompted with the mentioned error message.
- Riot Connectivity Issues — As we have mentioned above, the error code can also sometimes appear due to the Riot servers being down. In such cases, you have no choice but to wait for the Riot tech team to resolve the issue.
Now that we have gone through the possible causes of the issue, let us get into the different solutions that you can implement to get it fixed.
1. Restart your PC
As it turns out, the first thing that you should do when you face the said error message is to restart your system. Before you restart your PC, however, try restarting the game client as the error message states to see if that bears any fruits. In case that does not work out, just go ahead and restart your PC to see if that resolves the issue. There have been users who tried everything from deleting the settings file and more just to find out that the issue simply required a simple reboot. Therefore, rebooting should be your first priority. If that does not work out, then move on to the next solutions.
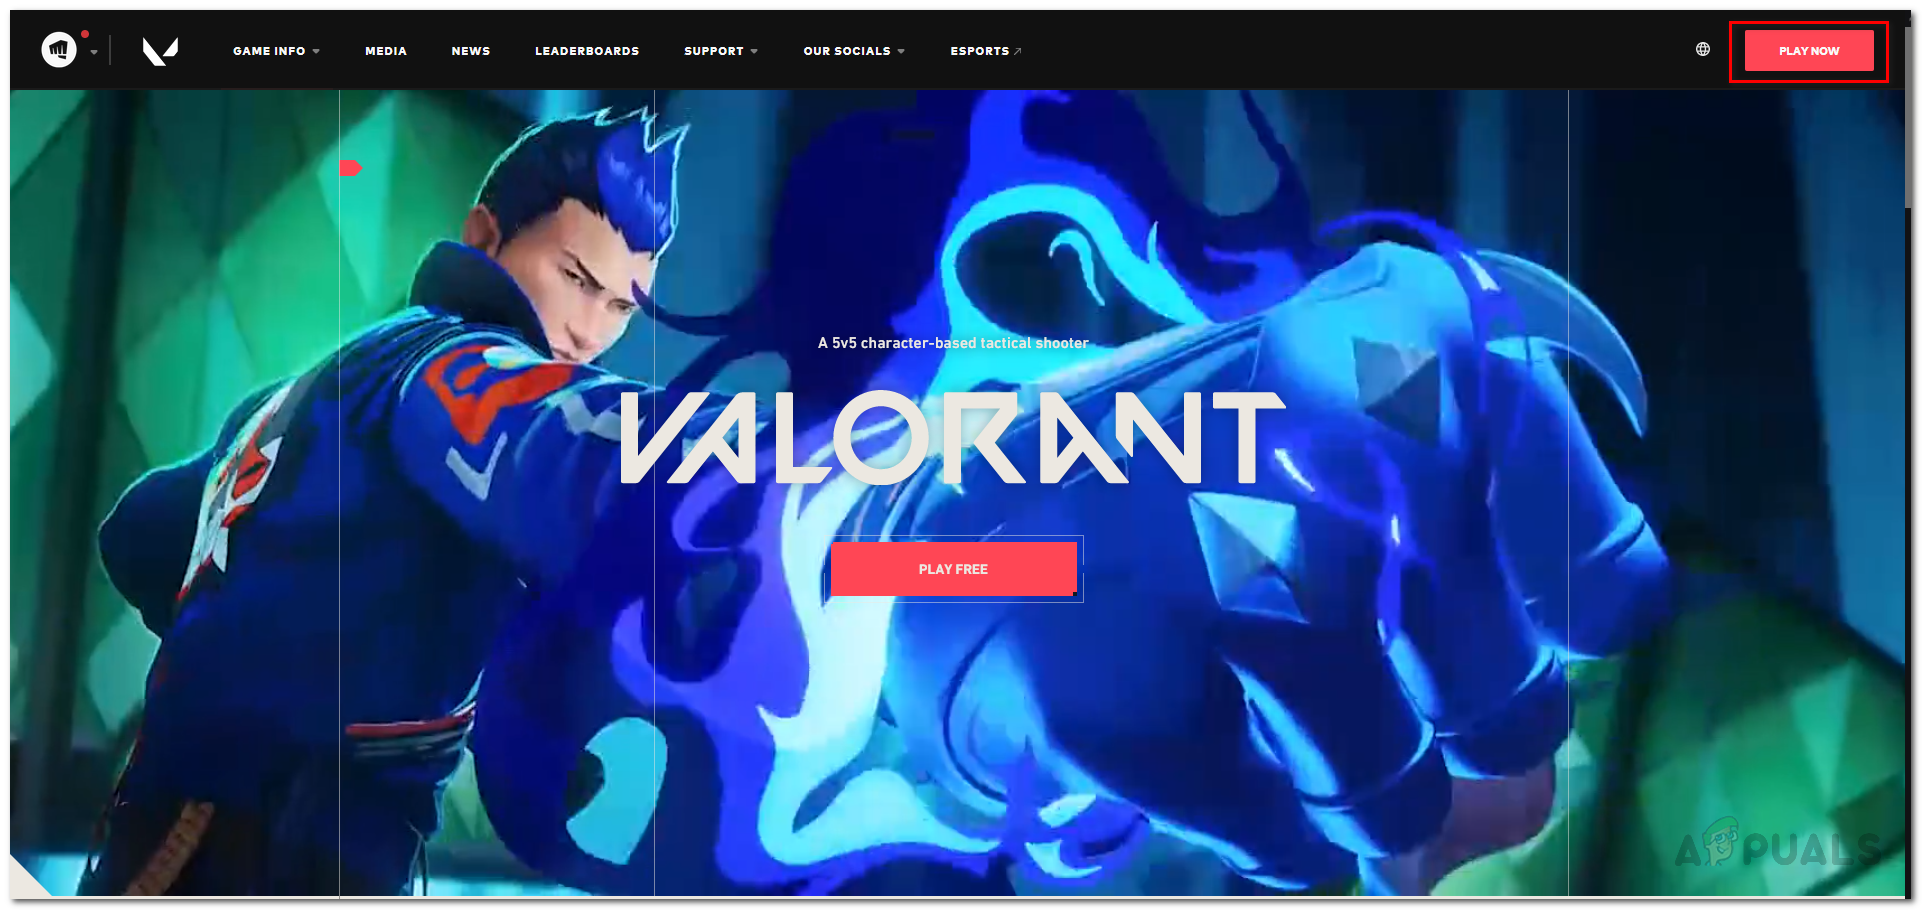
2. Log In to the Play Valorant Website
In some cases, you can resolve the mentioned error message by simply logging into the dedicated Valorant website created by Riot. This has reportedly fixed the issue for several players who were stuck on the error code. To do this, follow the below instructions:
- In your browser window, head to the Play Valorant website by clicking here.
- Once there, click on the red Play Now button in the top-right corner.
Play Valorant Website - This will prompt you to either create an account or sign in. Click on the Sign In button and then provide your login credentials.
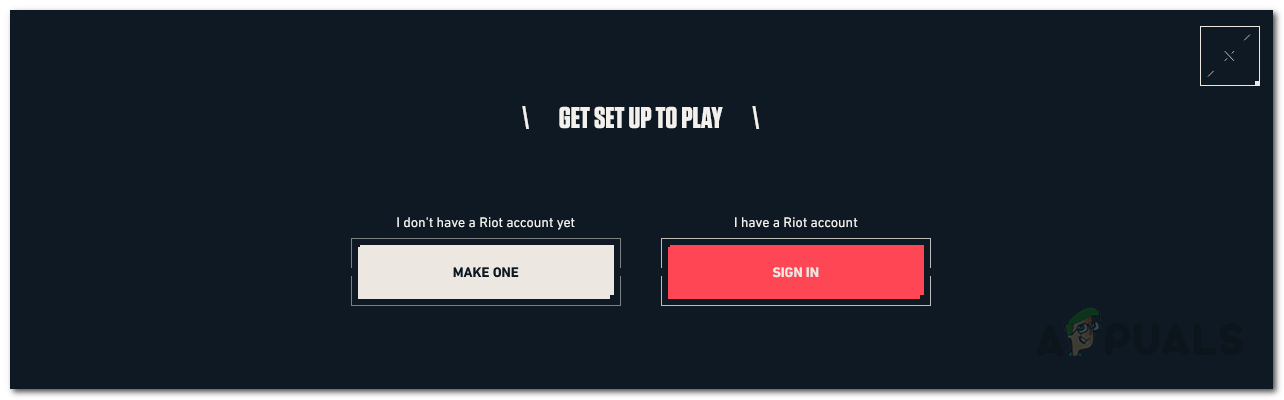
Signing in to Play Valorant - Once you have successfully signed in, close the browser window and then try opening up the game. See if that resolves the issue.
3. Delete Riot Client Settings File in the AppData Directory
As we have mentioned above, the error message in some cases can appear due to your Riot Client private settings that are stored in the AppData directory of your Windows operating system. In such a case, what you have to do is simply delete the file. This is completely safe as it is automatically created again when you launch the client again. However, you may lose your saved settings so be aware of that. Follow the instructions down below to do this:
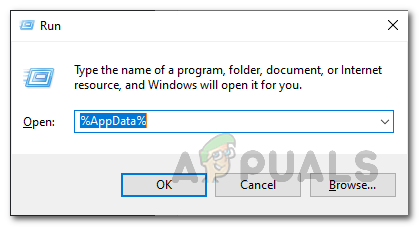
- First of all, open up the Run dialog box by pressing the Windows key + R.
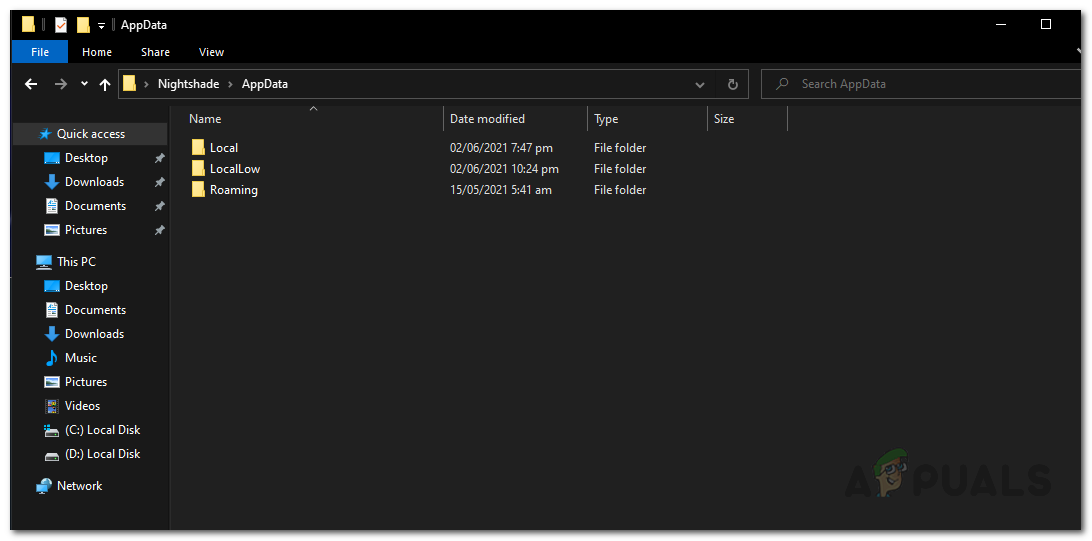
- Then, in the Run dialog box, type %AppData% and press Enter. This will open up Windows Explorer and take you to the Roaming folder inside the AppData directory automatically which is hidden by default.
Run Dialog Box - You will have to one directory back using the arrow keys in the top-left corner or backspace to actually be in the AppData folder.
AppData Directory - There, navigate to Local > Riot Games > Riot Client > Data.
- In the Data folder, delete the RiotClientPrivateSettings.yaml file.
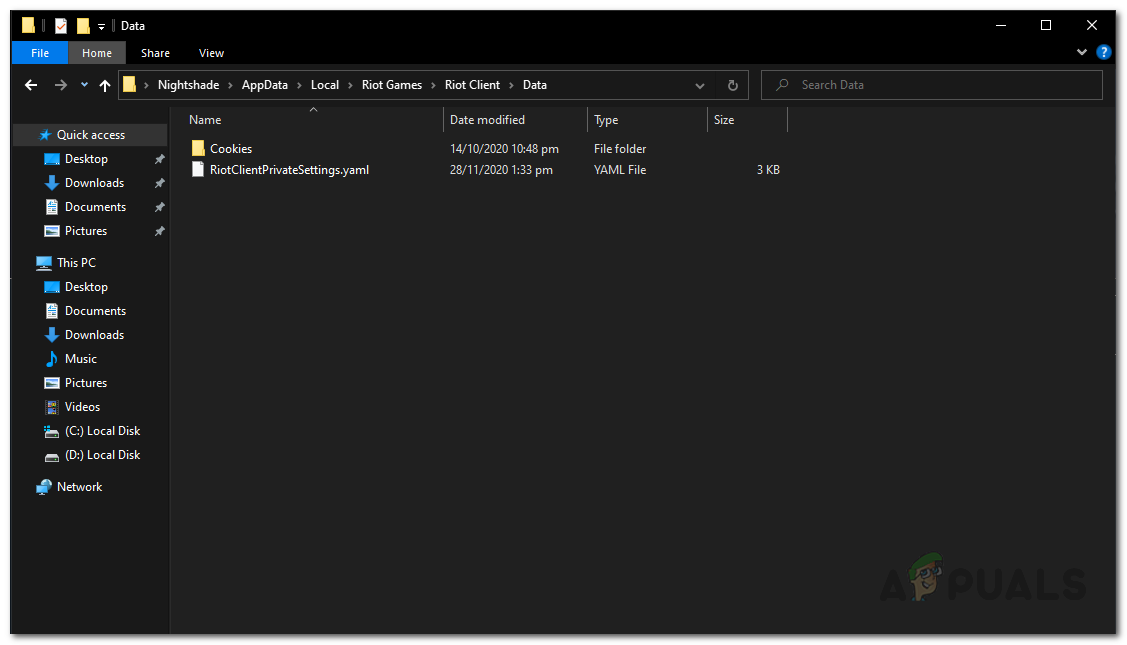
Riot Client Data Directory - Once you have done that, close the Windows Explorer window and run Valorant as an administrator. To do this, just right-click on it and choose the Run as an administrator option from the drop-down menu.
- See if that resolves the issue.
4. Make sure the VGC Service is Running
Riot makes use of its own game security software that ensures the highest integrity of competitive gameplay in its game. This security software or anti-cheat, if you will, is called Vanguard. When you install Valorant or any other Riot game, this is automatically installed alongside. The service responsible for making sure that the software is running is called VGC.
Thus, you have to make sure that the service is running when you face the Valorant error code 43. To do this, follow the instructions down below:
- Make sure that your Valorant and Riot Client is closed. To ensure this, open up the Task Manager and look for any Valorant or Riot processes and end them.
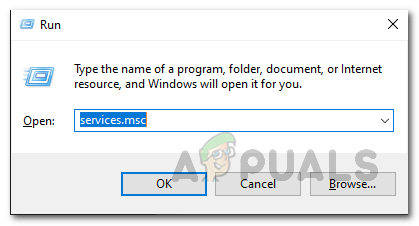
- Then, open up the Run dialog box by hitting the Windows key + R keys together.
- When the Run dialog box opens up, type in services.msc and press the Enter key. This shall bring up the Windows Services window.
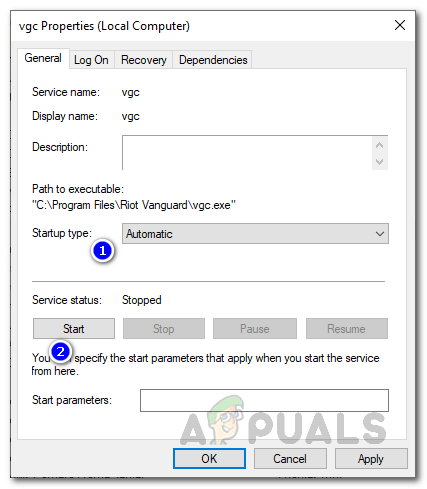
Run Dialog Box - From the list of the services, look for vgc. To make this search easier, press the V key inside the Services window as it will take you down to the services starting from the letter V.
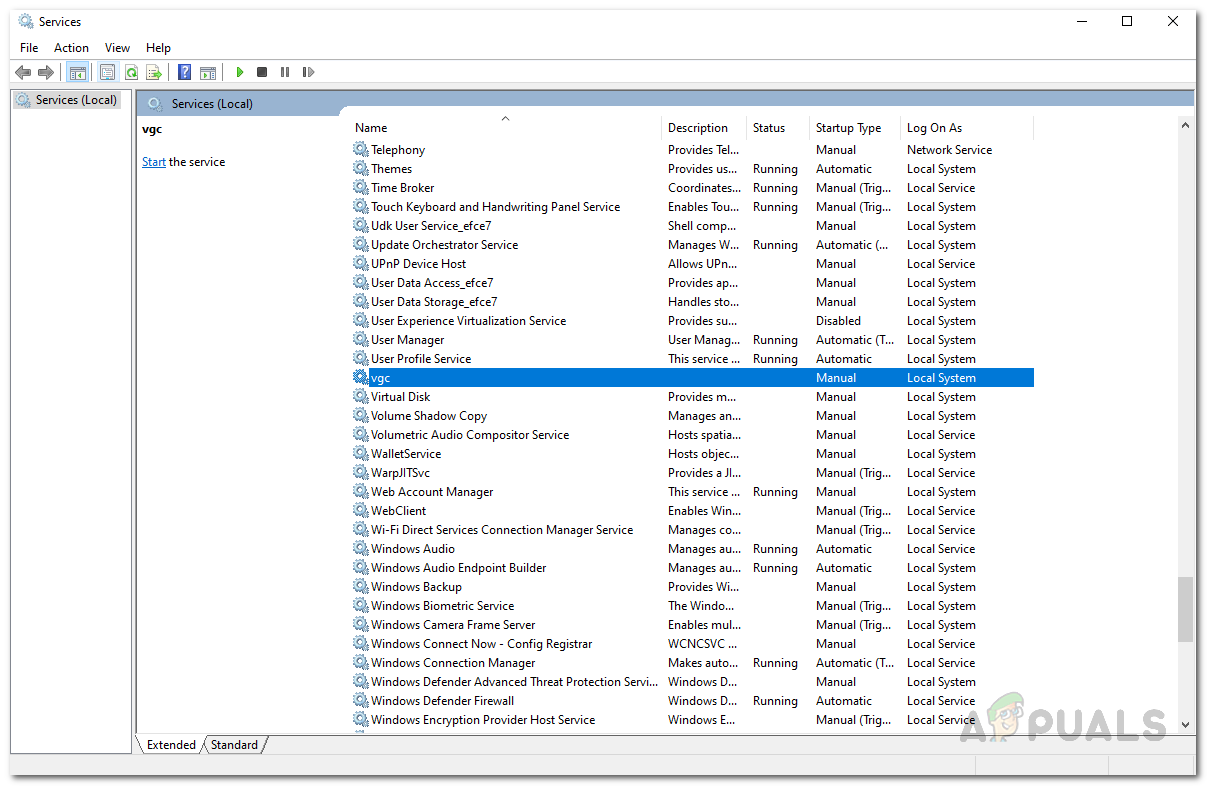
Windows Services - Double-click on the service once found to open up the Properties window. Change the Startup type to Automatic and then start the service by clicking the Start button.
VGC Service Properties - Once you have done that and the service is running, run your game again to see if the issue persists.


unfortunately none of these works for me 🙁