Resolve Twitch Profile Picture Upload Error
Some Twitch users are reporting that they end up seeing an ‘Upload error‘ message whenever they try to change their profile picture or the banner image. This issue is dated as far back as 2016.
 If you’re want to troubleshoot this issue away, you should start by re-trying the uploading operation in an incognito / private window and see if the upload is successful. In case this doesn’t work, consider migrating your Twitch account management chores to Chrome (if you haven’t already) since this is the only browser with very few Twitch related issues.
You should also troubleshoot the image to ensure that you’re not dealing with a corrupted or badly encoded file. Size can also be a problem, especially with the profile picture – Try to bring the image size down and see if that fixes the issue.
However, as a lot of affected users have reported, the “Update Error’ can also be caused by an Adblocker that ends up blocking communications with the Twitch web server. If you’re not using an Ad-blocking solution, consider clearing your browser cache and cookies to eliminate any temp files or corrupted cookies that might facilitate this error.
Method 1: Using Incognito Mode
As it turns out, one of the most common fixes for users dealing with the Twitch ‘Upload Error‘ is to repeat the operation in incognito/private mode. Every major browser has a private mode nowadays, and it’s usually accessible straight from the action menu.
- Chrome: Click on the action button (3-dot icon) in the top-right corner and click on New Incognito Window.
- On Firefox: Click on the action button (3-line icon) in the top-right corner and then click New Private Window.
- On Opera: Click on the action button (top-right or left section, depending on your settings), then click on Private mode.
- On Safari: Open Safari and go to Files > New Private Window.
Once you have successfully opened a private window on your browser, log in with your Twitch account again and attempt to change your profile image and banner.
In case you still end up seeing the same ‘Upload error’, move down to the next potential fix below.
Method 2: Uploading the image from Chrome
As it turns out, this problem is most commonly reported to occur with Firefox, but there are virtually no reports of the ‘Upload error’ occurring on Chrome.
So in case you are using a different browser than Chrome, you should probably try moving your Twitch account management chores to Chrome and see if this workaround allows avoiding the issue.
In case you were already using Chrome, move down to the next potential fix below.
Method 3: Disabling the Ad-blocker temporarily (if applicable)
As it turns out, the ‘Upload error’ error in Twitch can also be caused by an Ad-blocking solution that is implemented at a browser level – either installed as an extension or at a system level.
Several affected users that previously dealt with the same problem have confirmed that they managed to get the issue resolved by temporarily disabling the Ad-blocking solution while they made the changes to their Twitch profile.
If your ad-blocker is installed as a browser extension/add-on, you can disable it quickly from it’s dedicated menu. On chrome, you can do this easily by accessing ‘chrome://extensions/’ in your navigation bar and then disabling the toggle associated with Adblock.
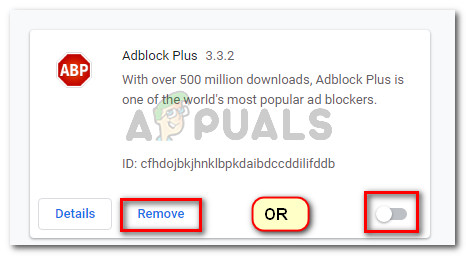
Note: You can either disable it or removing it altogether.
In case this method does not apply to your particular scenario, move down to the next potential fix below.
Method 4: Clearing the browser Cache
As it turns out, this problem can also occur due to a badly cached cookie belonging to a Twitch service. If you are dealing with a corrupted Twitch cookie/temporary file, the only way to fix the issue is to clear your browser cache & cookies.
Of course, this operation will be different depending on the 3rd party browser that you’re using. Due to this, will we’ve compiled several sub-guides for the top three 3rd-party browsers with the most market share.
Follow the guide applicable to the browser you’re using:
Clearing Cache & Cookies on Chrome
- Open Google Chrome and ensure that every tab is closed (aside from the one that you’re actively using).
- Click on the action button (three-dot icon) at the top-right section of the windows.
- From the insides of the Settings menu, scroll down and click on the Advanced button to bring up the invisible menu to reveal the hidden items.
- Once the hidden menu is visible, scroll down to the Privacy and Security tab.
- Click on Clear browsing data and select the Basic tab, then ensure that the boxes associated with Cached images and files and Cookies and other side data are enabled.
- Next, set the time range to All time using the drop-down menu, then start the process by clicking on Clear data.
- After the operation is complete, return to the Twitch account page and see if you can change the profile picture or the banner without seeing the “Update Error’.
Clearing Cache & Cookies on Firefox
- Close any other Firefox tab aside for the one that you’re actively using.
- Next, click on the action button (top-right corner) and click on Options from the newly appeared context menu.
- Once you’re inside the Settings menu, click on Privacy and Security. Next, click on Cookies and Site data and access the Clear data menu.
- From the Clear data menu, check the boxes associated with Cookies and Site Data and Cached Web Content.
- As the utility is ready to go, click on the Clear button to begin the process of cleaning the cookies and cache from Firefox.
- Once the operation is complete, return to Twitch and see if the issue is now resolved.
Clearing Cache & Cookies on Opera
- Open Opera and click on the browser icon in the top-right corner of the screen.
- From the newly appeared context menu, click on Settings.
- Once you’re inside the Settings window, click on Advanced, then access the Privacy & security tab from the vertical menu on the right.
- From the Privacy & security menu, move to the right-hand menu and scroll down to the Privacy tab. Once you’re inside, click on Clear browsing data.
- Next, select the mode to Basic, then set the Time range to All time. Then, ensure that the boxes associated with Cookies and other site data and Cached images and files.
- Now that the utility is successfully configured, click on Clear browsing data and see if the issue is resolved.
- Once the operation is complete, return to Twitch and see if the “Update Error’ is fixed.
In case you’ve already cleaned the browser cache with no success, move down to the next potential fix below.
Method 5: Troubleshooting the image
If none of the methods have worked for you, it’s very likely that the issue you’re having is somehow related to the image you’re trying to upload to Twitch.
To ensure that you’re not dealing with a corrupted or badly encoded image, try to upload a different one for once and see if you still end up seeing the ‘Upload error’.
Also, keep in mind that the image needs to be of .png or .jpg format. So if you’re trying to upload an image of a different format, you will need to use a converter first.
Twitch says that the maximum image size you can upload is 10 MB, but a lot of users are reporting that this is not the case. A decent number of users encountering this problem have reported that the issue was fixed after they reduced the size of their profile picture to under 1 MB.
You can do this easily with a free service like Tiny PNG. Simply drag the image to the Tiny Png box and drop it to make it smaller.