Touchpad not Working after Windows 11 Update? Try these fixes
Windows 11 is still in its early days and is already on the road to becoming one of the most powerful Windows ever. But the road is a bit bumpy, full of different bugs. One such issue is where the touchpad of a user’s PC stops working, usually, after a Windows 11 update. The issue is not limited to a particular OEM or touchpad manufacturer.
There can be many factors due to which a touchpad may not work on a Windows 11 machine but the following can be categorized as the main:
- Outdated PC’s Windows: If the PC’s Windows 11 is not updated to the latest build, then its incompatibility with the other OS modules may cause the issue at hand; especially, with the touchpad driver.
- Interference from Another Application: If another application (like Logitech G HUB) on the system is hindering the touchpad operation, then that may result in the touchpad problem under discussion.
- Corrupt, Incompatible, Outdated Touchpad Driver: If the touchpad driver is corrupt, outdated, or incompatible with the system, then that may cause non-working of the touchpad.
- Incompatible Windows 11 Update: The touchpad might not work if the last Windows 11 update is not compatible with the system or touchpad.
Enable the Touchpad Through the Designated Keyboard Key
Many manufacturers add a shortcut key on the system’s keyboard to quickly disable the system’s touchpad. If the keyboard shortcut to disable the touchpad was accidentally pressed, then a user may fail to use the touchpad on his system. In this case, enabling the touchpad through the keyboard shortcut may solve the problem.
- Firstly, find the keyboard shortcut to enable/disable the touchpad on the keyboard (the Internet is your best friend to find the shortcut). For example, F5 or Fn+F5.
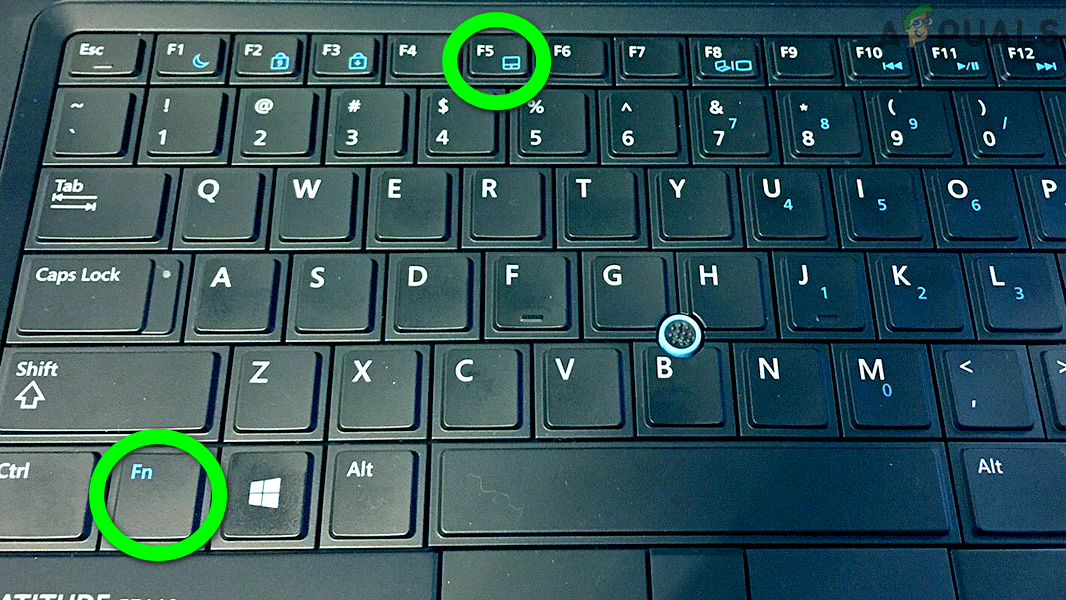
Enable Touchpad Through the Keyboard Shortcut Key - Once the shortcut is found, press it (like pressing F10 or Fn+F10), and afterward, check if the touchpad has started to work.
Enable Touchpad in the System’s Settings
If the touchpad is disabled in the system’s settings when a USB pointing device is connected to the PC, then that may result in the touchpad issue at hand. In this case, enabling the touchpad in the system’s settings may solve the problem.
As the touchpad is not working, you may try the below steps (and the following solutions) by using a mouse, touchscreen (if supported), or keyboard shortcuts. Also, it will be a good idea to create a system restore point or a system’s snapshot (if you need to revert the system to this state).
- Right-click Windows and open Settings.
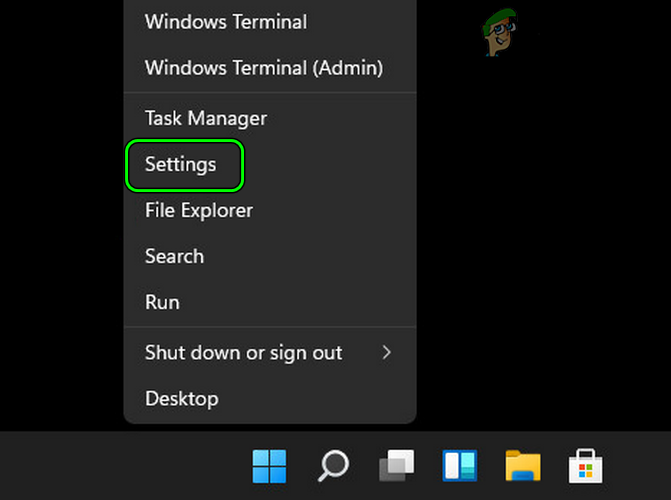
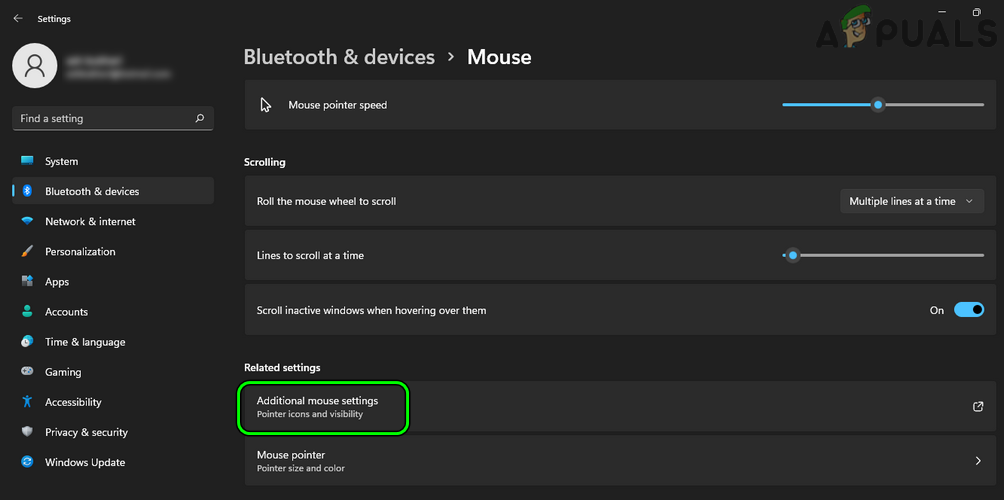
Open Windows 11 Settings from the Quick Access Menu - Now, in the left pane, select Bluetooth and Devices, and in the right pane, open the Mouse option.
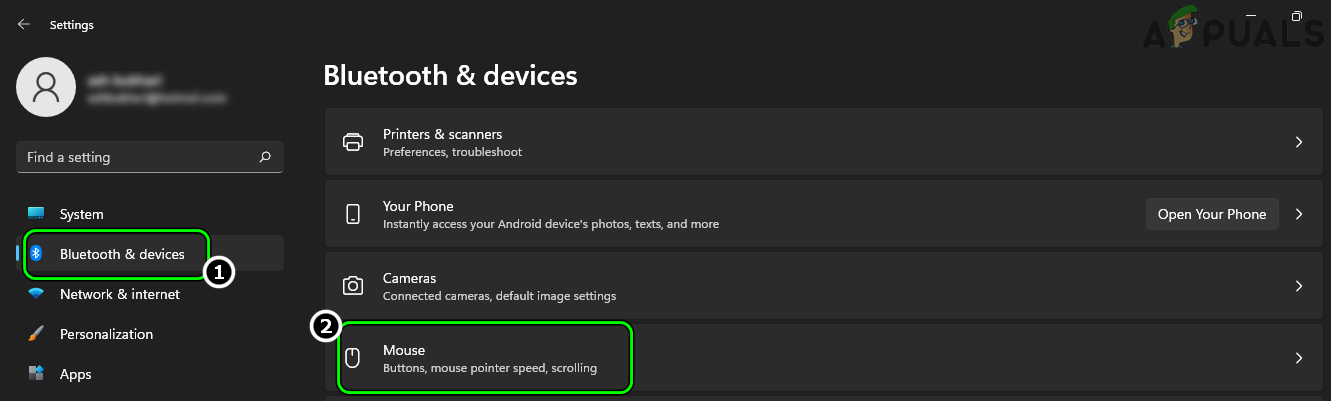
Open Mouse in Bluetooth & Devices Tab of Windows Settings - Then click on Additional Mouse Settings to open touchpad settings for Windows 11 and in the resulting Mouse Properties menu, switch to the Touchpad tab (usually, the last one).
Open Additional Mouse Settings - Now uncheck the option of Disable Internal Pointing Device When External USB Pointing Device is Attached.
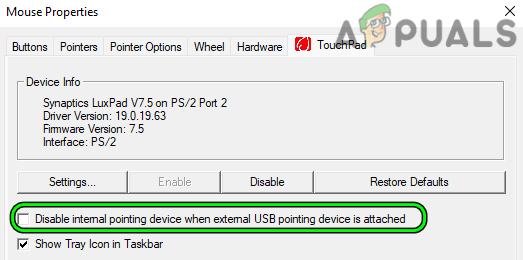
Disable Internal Pointing Device When External USB Pointing Device is Attached - Then apply the changes and restart your system.
- Upon restart, check if the system’s touchpad is working fine.
Update the PC’s Windows to The Latest Build
You may encounter the touchpad driver issue at hand due to the incompatibility between Windows 11 and the touchpad driver. Here, updating the PC’s Windows 11 to the latest build may clear the incompatibility and thus solve the problem.
- Right-click Windows and open Settings.
- Now, in the left pane, head to the Windows Update tab, and in the right pane, click on Check for Updates.
- If some updates are available, download and install the Windows update. Make sure you do this for all the available updates.
- Afterward, open Advanced Options and click on Optional Updates.
- Then make sure to install these updates as well and afterward, restart your PC.
- Upon restart, check if the touchpad is working fine.
Enable the System’s Services Relevant to the Input Devices
If the services related to input devices are not running or stuck in the operation, then that may cause the touchpad issue at hand. Here, enabling relevant services of the system may enable the touchpad in Windows 11.
- Click Windows, search for Services, right-click on it, and select Run as Administrator.
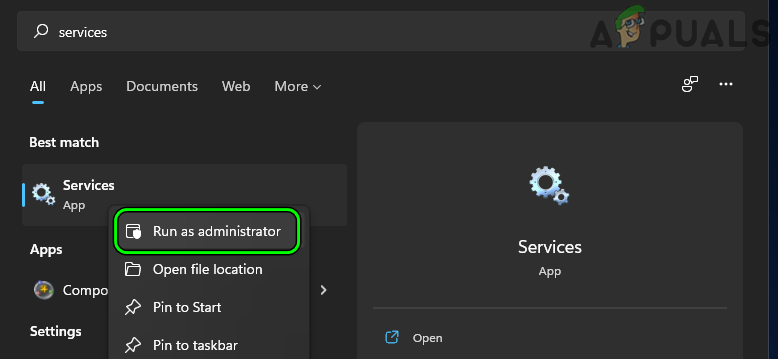
Open Services as Administrator - Now find and right-click on the Microsoft Keyboard Filter service.
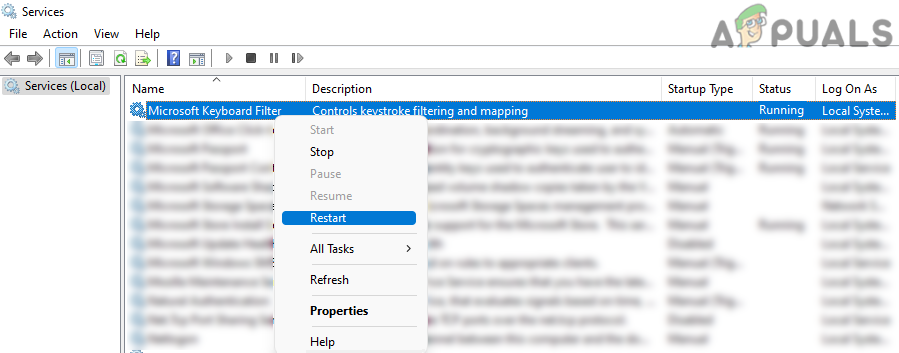
Restart the Microsoft Keyboard Filter Service - Then select Restart and upon restart of the service, check if the touchpad issue is resolved. If the Restart option is greyed out, follow the next step.
- If the issue persists, again launch the Services Manager as administrator and right-click on the Microsoft Keyboard Filter service.
- Now select Properties and set the Startup Type of the service to Automatic.
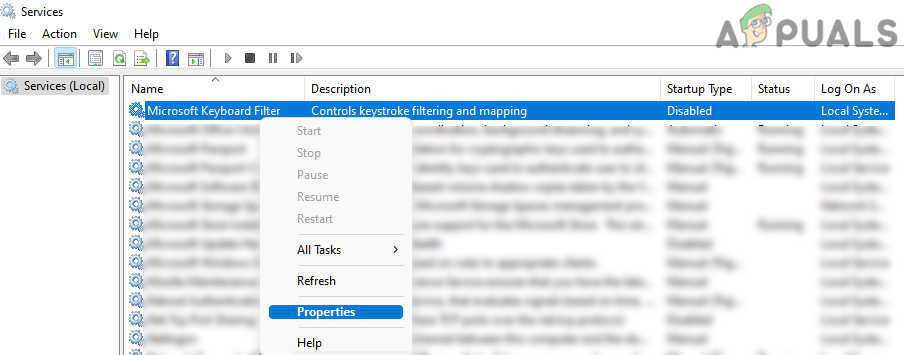
Open Properties of the Microsoft Keyboard Filter Service - Then click on the Start button and afterward, check if the touchpad is working fine.
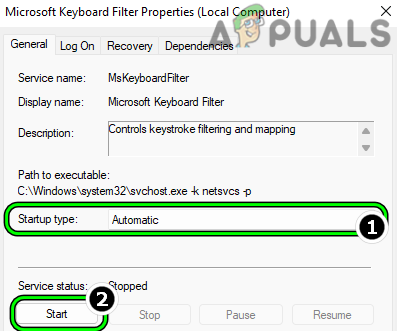
Set the Startup Type of the Keyboard Filtering Services to Automatic and Start it - If not, click Windows, search and open System Configuration.
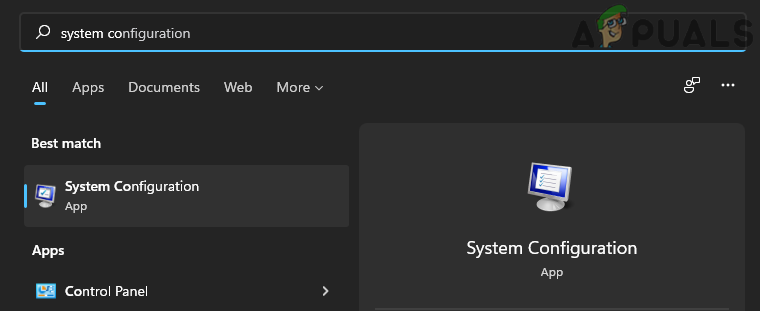
Open System Configuration - Now, head to the Services tab and click on Enable All.
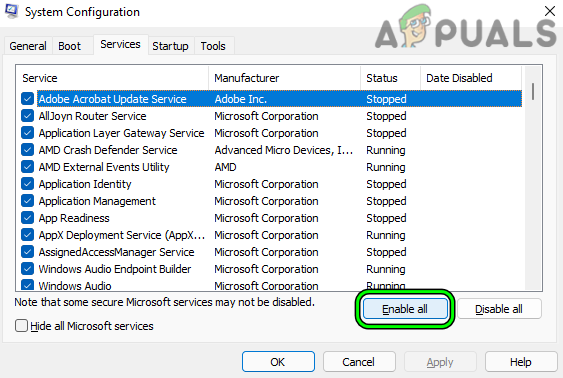
Enable All Services in the Services Tab of the System Configuration - Then apply the changes and when asked to, click on Restart and upon restart, check if the touchpad driver is working fine.
Disable or Uninstall the Conflicting Applications
If there is an application that conflicts with the touchpad driver, then that may cause the touchpad issue at hand. In this context, you may fix the touchpad on Windows 11 by disabling or uninstalling the conflicting applications on the system.
- Firstly, perform a clean boot of the system and check if the touchpad is working fine.
- If so, then you may enable the services/processes one by one (disabled during the clean boot process) till the problematic one is found. Once found, either you may keep the problematic process disabled on the system’s startup or uninstall it (if not essential).
Logitech G HUB is a known application to cause the touchpad issue on a Windows 11 PC. If Logitech G HUB or any other such application is present in the system, then you may uninstall it to solve the touchpad issue.
- Right-click Windows and select Apps & Features.
Open Apps & Features - Now click on three vertical ellipses in front of the Logitech G HUB (or any similar application) and click on Uninstall.
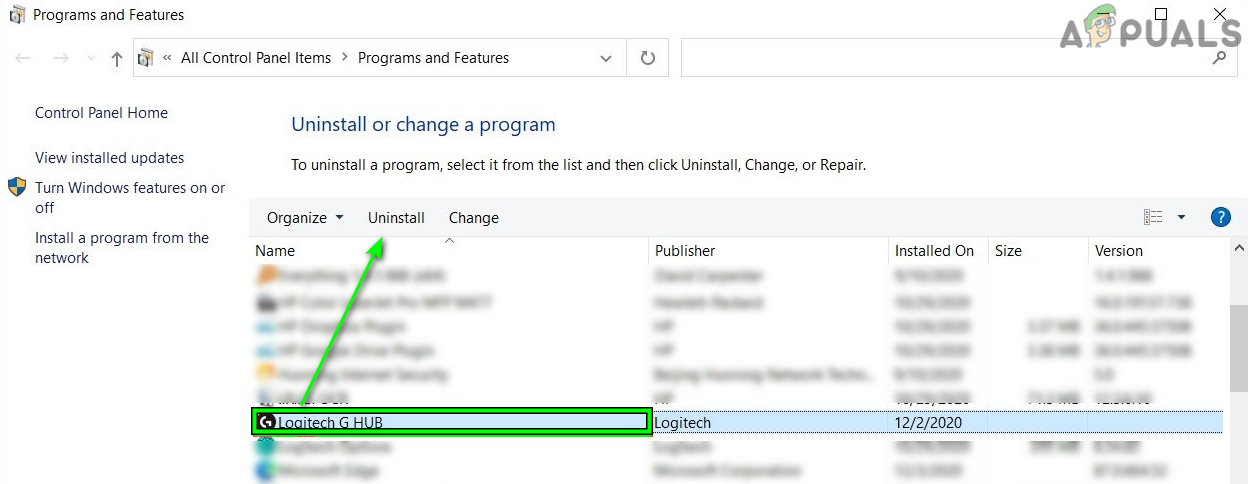
Uninstall Logitech G Hub - Afterward, confirm to uninstall the software and follow the prompts on the screen to uninstall it.
- Once uninstalled, restart your PC, and upon restart, check if the touchpad problem is cleared.
Update or Reinstall the Touchpad Driver
The issue might occur if the Touchpad driver is outdated, incompatible, or corrupt, in this scenario, updating or reinstalling the touchpad driver may solve the issue under discussion.
Update the Touchpad Driver Through the Device Manager or OEM Website
- Right-click on Windows and select Device Manager.
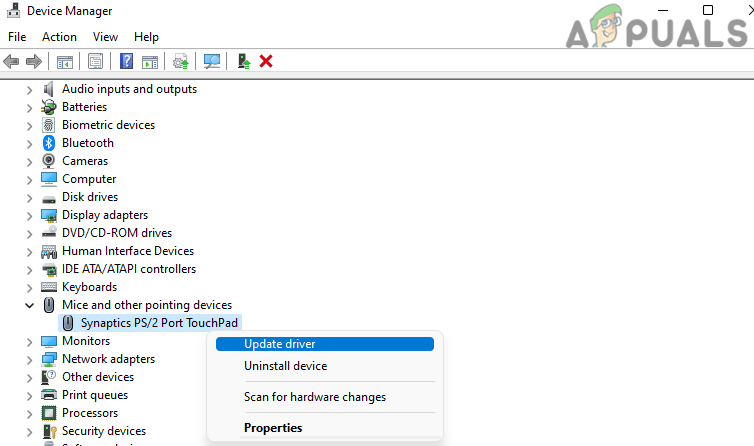
Open Device Manager Through the Quick Access Menu - Now locate the Touchpad device. You may find it under Human Interface Devices, Mice and Other Pointing Devices, or a device with an exclamation mark (under Unknown Devices or another tab like Keyboards).
- Once the Touchpad device is located, right-click on it and select Update Driver.
Update the Touchpad Driver in the Device Manager - Then select Search Automatically for Drivers and if an updated driver is available, download and install it.

Search Automatically for Drivers for the Touchpad Device - Once installed, restart your system, and upon restart, check if the touchpad driver issue is cleared.
Update the Touchpad Driver Through the OEM Website
- Launch a web browser and steer to the OEM website (like Lenovo).
- Now head to the driver’s section of the website and select your laptop model.
- Then download the latest touchpad driver from the list of drivers and once downloaded, launch the downloaded driver as administrator.
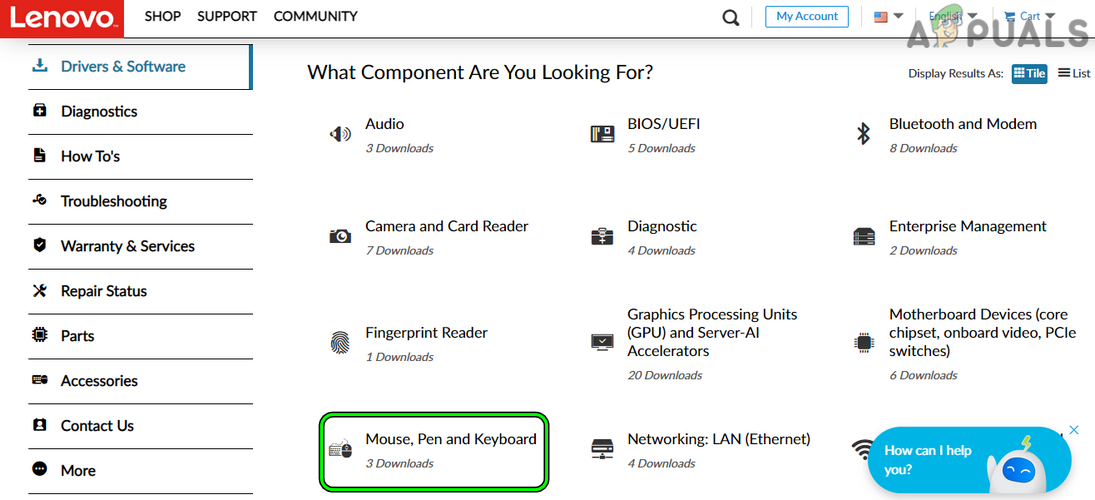
Download the Touchpad driver from the Lenovo Website - Now follow the prompts on the screen to install the touchpad driver and once done, restart your system.
- Upon restart, check if the system is clear of the touchpad issue.
Use the Generic Windows Driver
- Right-click Windows and select Device Manager.
- Now find and right-click on the Touchpad device. You may find it under Human Interface Devices, Mice and Other Pointing Devices, or a device with an exclamation mark (under Unknown Devices or any other tab).
- Then select Uninstall Device and in the resulting menu, click on Uninstall.
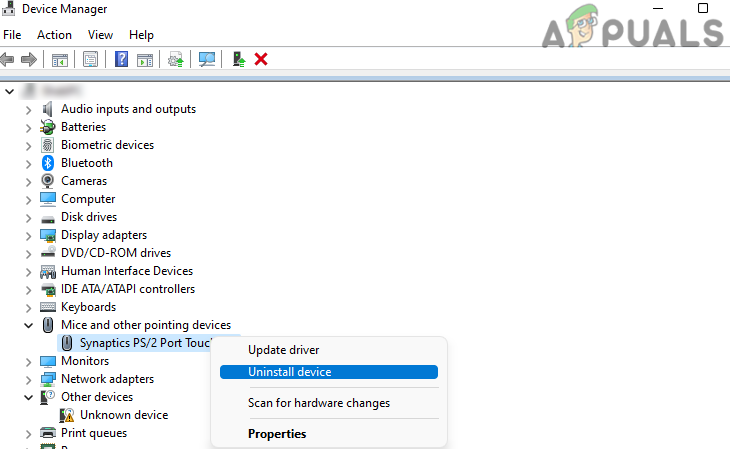
Uninstall the Touchpad Driver in the Device Manager - Wait till the driver is uninstalled and once uninstalled, restart your PC.
- Upon restart, let the Windows install a generic touchpad driver (if it tries to), and afterward, check if the touchpad issue is resolved.
- If not, repeat the above steps but at step 3, select Attempt to Remove the Driver of This Device, and afterward, check if the touchpad driver problem is cleared.
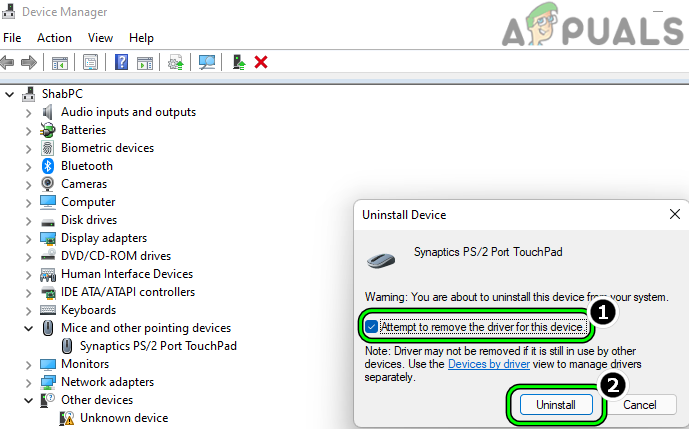
Uninstall the Touchpad Driver After Selecting the Attempt to Remove the Driver of This Device
Reinstall the OEM Touchpad Driver
- Firstly, download the latest touchpad driver from the OEM website and then uninstall the touchpad driver (as discussed earlier) but make sure to checkmark the option of Attempt to Remove the Driver of This Device.
- Once uninstalled, restart your system, and upon restart, install the latest touchpad driver as administrator.
- Once installed, restart your system, and upon restart, check if the system’s touchpad is working fine.
Use Another Touchpad Driver in the Device Manager
- Right-click on Windows and select Device Manager.
- Now find and right-click on the touchpad device. You may find it under Human Interfaces Devices, Mice and Other Pointing Devices, and a device with a yellow exclamation mark (under Unknown/Other Devices or any other tab). In some cases, the touchpad was marked as a Keyboard Device (like Lenovo Keyboard Device).
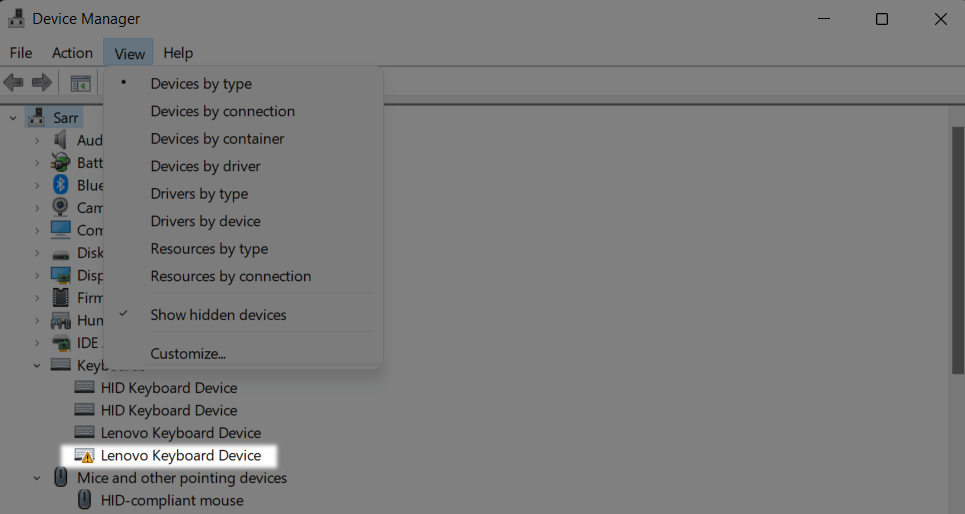
Touchpad Device Mislabeled as Lenovo Keyboard Device - Then select Browse My Computer for Drivers and click on Let Me Pick from a List of Available Drivers on My Computer.
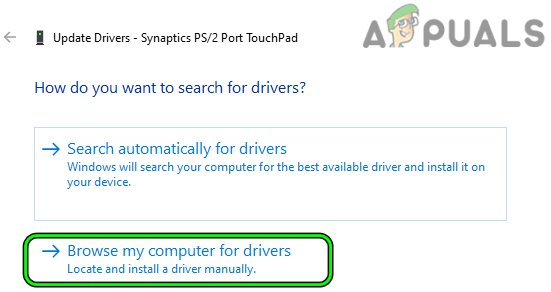
Select Browse My Computer for Drivers When Updating the Touchpad Driver - Now select I2C HID Device (if not shown, you may download the same from the OEM website like the I2C HID Device for Lenovo).
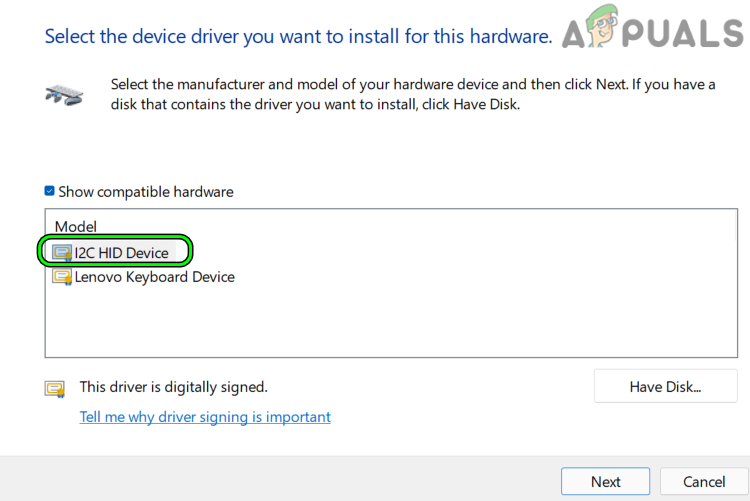
Select I2C HID Device When Updating the Touchpad Driver - Then click on Next and afterward, check if the touchpad driver issue is cleared.
- If the issue is still there, then try other drivers in the driver’s store of the update driver dialogue box of the touchpad device (Update Driver>> Browse My Computer for Drivers>> Let Me Pick from a List of Available Drivers on My Computer>> uncheck Show Compatible Drivers>> drivers) one by one till the issue is resolved.
Update All the System Drivers to the Latest Builds
In a Windows OS, devices share the system resources and incompatibility of one device may affect the other. The same can be the reason for the touchpad issue at hand as an incompatibility of an outdated system driver might be causing issues for the touchpad. Here, updating all the PC’s drivers to the latest build may solve the problem.
- Launch a web browser and head to the support section of the OEM website (like Lenovo Support).
- Now select your laptop model (make sure to use the manual select, not to use the automatic method) and steer to the Drivers and Software section.

Download the Touchpad driver from the OEM Website - Then download all the drivers related (like Intel serial-IO driver or chipset and graphics driver) to the system (ignore any warnings that no update of drivers is required) and once downloaded, install the drivers as administrator one by one. Make sure to restart the system after installing a driver and before starting the installation of another driver.
- Once the drivers are updated, check if the touchpad is working fine.
If that fails, then check if updating the drivers through the OEM utility (if available) like Dell Support Assistant solves the problem.
Uninstall the Conflicting Windows Update
If the issue has started to occur after the latest Windows update, then the incompatibility of that particular update with the system might have caused the issue. Here, uninstalling the same may solve the problem.
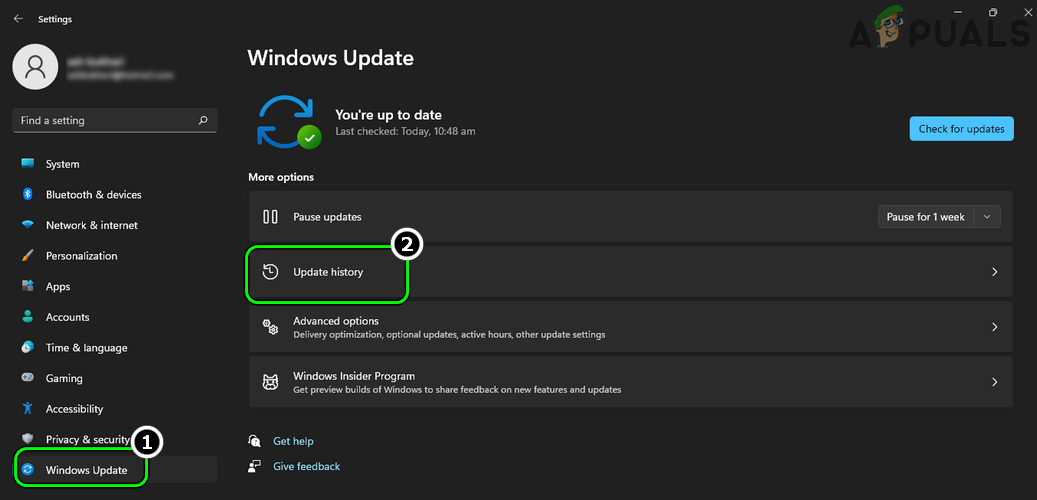
- Right-click Windows and select Settings.
- Now head to the Windows Update tab and in the right pane, select Update History.
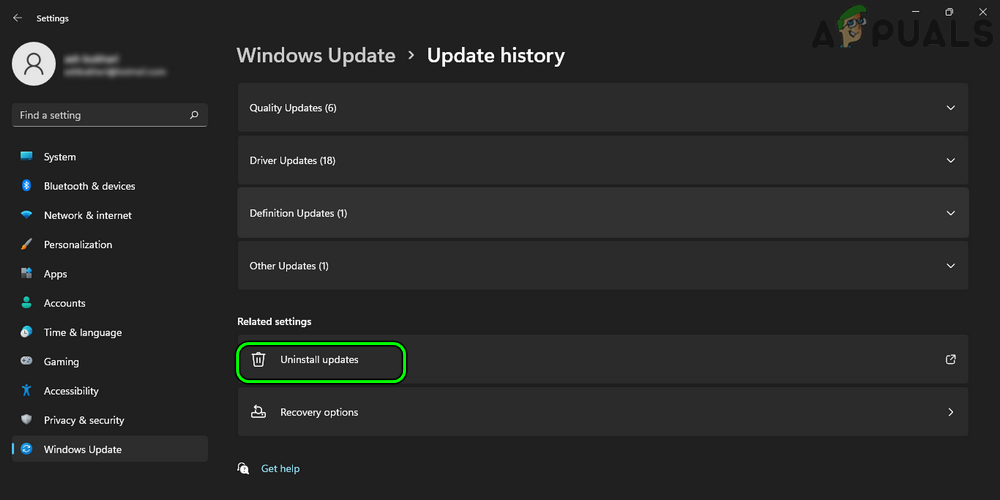
Open Update History in the Windows Update Tab - Then, in the Related Settings section, open Uninstall Updates and select the latest Windows 11 update (like KB5010414).
Open the Uninstall Updates Menu - Now click on Uninstall and follow the prompts on the screen to uninstall the update.

Uninstall the Problematic Windows 11 Update - Once the update is uninstalled, restart your PC and upon restart, check if the touchpad is operating fine.
Performa an In-Place Upgrade of System’s Windows
If none of the above has worked for you, then performing an In-Place Upgrade of the system’s Windows 11 through the Windows 11 ISP file may solve the problem. This is usually a safe process but make sure to backup the essential system data.
- Launch a web browser and steer to the Windows 11 section of Microsoft’s website.
- Now, in the ISO section, select the Windows 11 version and then click on Download.
- Then wait till the Windows 11 ISO is downloaded and afterward, double-click the downloaded ISO to mount it.
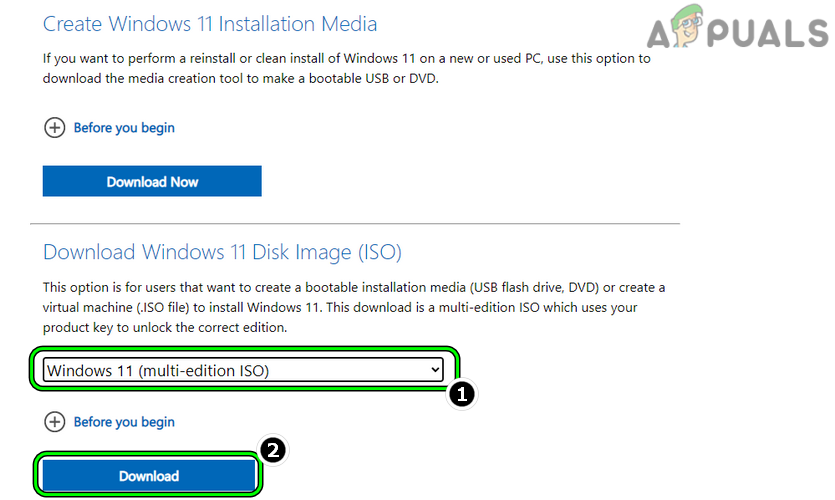
Download the Windows 11 ISO File - Now open the mounted drive and right-click on Setup.exe.
- Then select Run as Administrator and follow the prompts on the screen to upgrade the system’s OS but make sure to select Keep Files, Applications, and Settings option during the process.
- Once the upgrade process is complete, hopefully, the touchpad would be working fine.
Check the Touchpad Operation in the System’s BIOS
If the touchpad did not work even after all the above solutions, then it will be a good idea to check the touchpad works fine in the system’s BIOS.
- Boot your system into BIOS and check if the touchpad is working fine (if the BIOS supports the mouse operation).
- If not, make sure to enable the touchpad in the system’s BIOS.
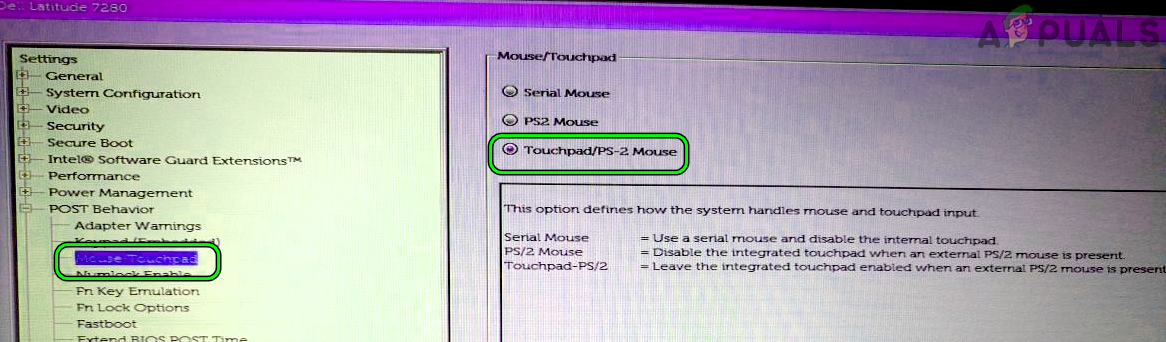
Enable Touchpad in the System’s BIOS - If the BIOS does not support touchpad operation, you may boot the system through a bootable installation media (like Windows installation USB or a live Ubuntu USB) and check if the touchpad is operating fine.
- If the touchpad did not work in the BIOS, then you may use the OEM’s diagnostics test (press F12 and select diagnostics) like ePSA Test to verify the touchpad operation.If the test reports the touchpad is disconnected, then make sure the touchpad ribbon is properly seated in the laptop’s internals (you may open the laptop back cover or get it done through an authorized repair shop), and afterward, check if the issue is resolved.
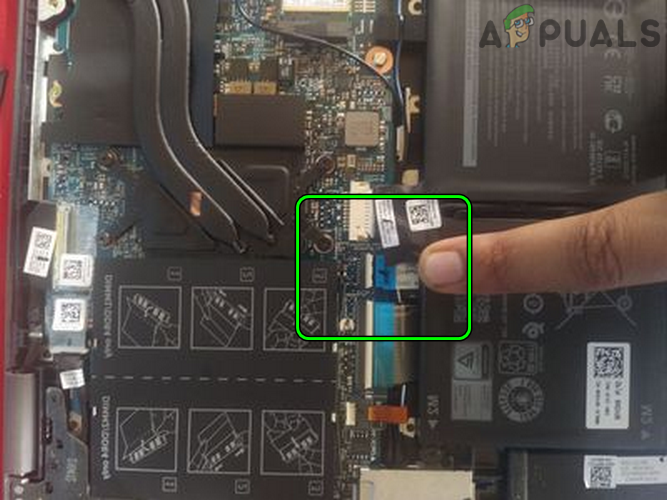
Properly Seat the Ribbon of the Touchpad
If the touchpad did not work in the system’s BIOS and the touchpad ribbon is properly seated, then you may get your system checked for a hardware error.


We had the same problem in our family with laptops from different producers (Dell, Lenovo). Nothing helped, until I found advice that helped: DISABLE GESTURES in touchpad settings. Now everything works well.