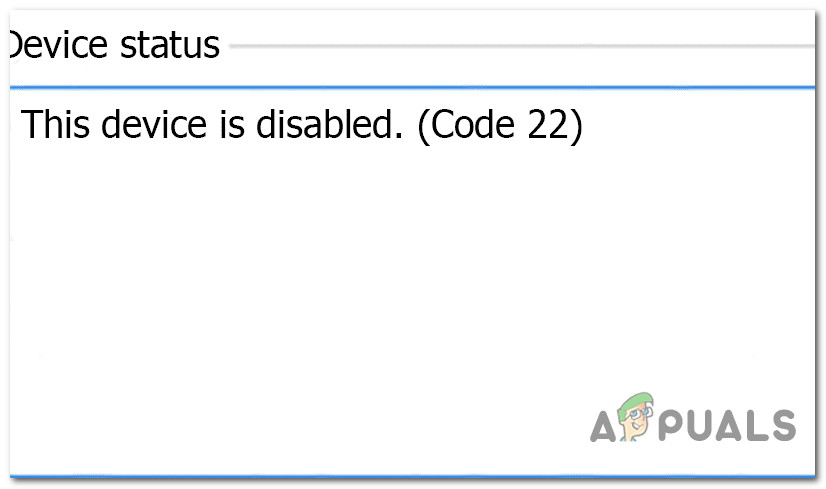
How to Fix ‘The Device is Disabled (Code 22)’
Some Windows users are encountering the ‘This device is disabled. (Code 22)’ error when they use Device Manager or the Services utility to check on the status of a device that doesn’t seem to be functioning properly. This problem is confirmed to occur on multiple Windows versions and it’s not solely caused by the fact that the connected device is disabled inside Device Manager.
After investigating this particular issue, it turns out that there are several different causes that might force this error code to appear. Here’s a list of potential culprits that might be responsible for this issue:
- The device is Disabled – By far, the most common reason why you will end up seeing this error is a simple instance in which the device you are investigating is disabled either by manual user intervention or by a resource optimizing app. In this case, a trip to Device Manager should allow you to get the device in question re-enabled.
- The device driver is deprecated – There are also instances where you will see this error because Windows is recognizing that the available driver for this particular device is deprecated, so it prevents that device from running. In this case, you can override this restriction by updating the driver to the latest version available.
- Common device glitch – It’s also possible that you’re dealing with a common glitch that Microsoft is already aware of. In this case, you can resolve the issue by running the built-in troubleshooter that’s applicable and enforcing the recommended fix.
- 3rd party conflict – If you’re encountering this issue with webcam services, microphones, or other similar devices that will require special permissions, you should investigate the possibility of a conflict between a 3rd party driver and the equivalent that Microsoft tries to use by default. In this case, you can use System Restore to revert your computer back to a state in which this issue was not occurring.
- Bad data cashed by CMOS Battery / Memory chip – According to some affected users, cache data can also be responsible for this kind of issue, especially if you’re seeing this error on a desktop computer. If you find yourself in this scenario, try clearing the CMOS battery or memory chip in order to prevent bad data from being maintained in between startups.
- System File Corruption – Under certain circumstances, you can expect to see this issue if you’re dealing with a certain kind of system file corruption that is affecting the functioning of your connected peripherals. In this case, running a clean install or repair install procedure will allow you to fix the issue by refreshing your Windows files.
Now that you know every potential culprit that might cause this issue, here’s a list of potential fixes that other affected users have successfully used to resolve the ‘This device is disabled. (Code 22)’ error:
Method 1: Enabling the Service inside Device Manager
Of course, the most obvious fix for this particular issue is to simply use Device Manager to re-enable the device. This might seem like the only fix for the ‘This device is disabled. (Code 22)’ error, but in reality, it’s not.
Keep in mind that this will only work as long as the underlying cause for this issue is a manual user interaction that has previously disabled the device (or an optimization app did it for you).
If this scenario is applicable, you can fix the issue by accessing Device Manager and enable the device via the general tab. Follow the instructions below to do this:
- Press Windows key + R to open up a Run dialog box. Inside the text box, type ‘devmgmt.msc’ and press Enter to open up Device Manager.

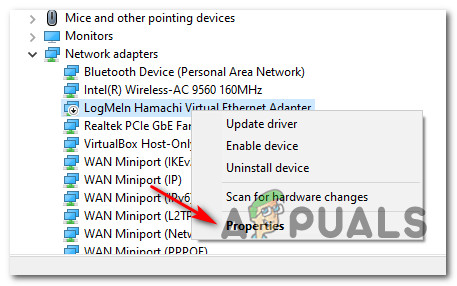
Opening Device Manager - Once you’re inside Device Manager, scroll down through the list of devices and locate the listing that is triggering the ‘This device is disabled. (Code 22)’ error.
- When you manage to find it, right-click on it and choose Properties from the context menu.
Accessing the Properties screen of the affected device - Once you’re inside the Properties screen, click on the General tab, then click on the Enable Device (under the Device Status box).

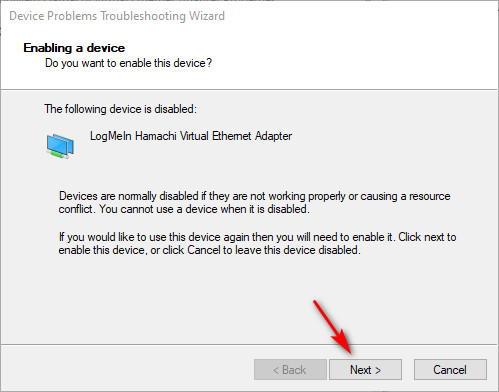
Enabling the device via Device Manager - At the Troubleshooting Wizard, click on the Next menu, then wait for the device to be enabled.
Re-Enabling the device - Reboot your computer and wait for the next startup to complete. After your computer boots back up, check for the status of the device again and see if the problem is now fixed.
In case forcibly re-enabling the device hasn’t made the ‘This device is disabled. (Code 22)’ error go away, move down to the next potential fix below for a different way of resolving the issue.
Method 2: Update the Device Driver
Another common culprit that might trigger this error is a deprecated driver that Windows refuses to use. In this case, you can get the issue resolved by forcing the Device Manager utility to update the current driver to the latest version that your Windows version is okay with.
In case you are unable to deal with the ‘This device is disabled. (Code 22)’ an error by simply re-enable the service, you should try an update the driver and see if the issue goes away on its own.
If this scenario is applicable to your current situation, follow the instructions below to update the problematic device driver via Device Manager:
- Press Windows key + R to open up a Run dialog box. Next, type ‘devmgmt.msc’ inside the text box, then press Enter to open Device Manager.
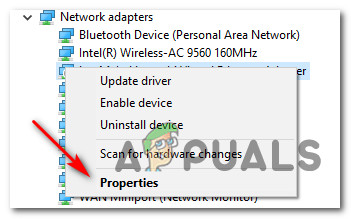
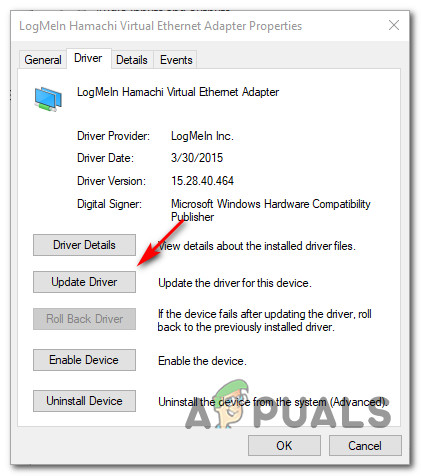
Opening Device Manager - Inside Device Manager, scroll down through the list of devices and right-click on the listing that is showing you this error. Next, from the context menu that just appeared, click on Properties from the context menu.
Accessing the Properties screen of the affected device - Once you’re inside the Properties screen, access the Driver tab from the menu at the top, then click on the Update Driver button.
Updating the driver via Device Manager - Once you get to the next screen, click on Search automatically for updated driver software.
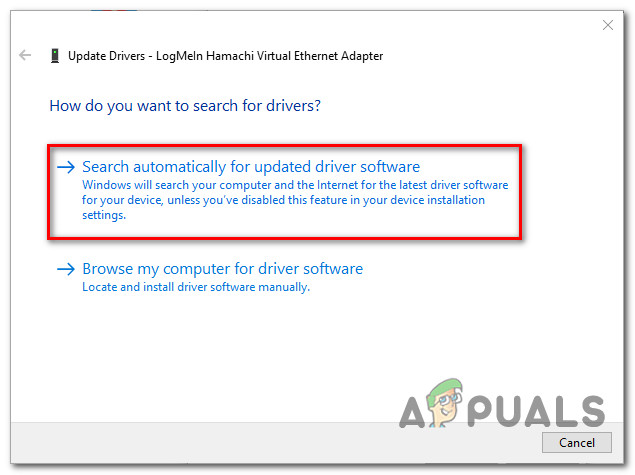
Searching for a new driver version automatically - Once you do this, wait for the initial scan to complete. If a new driver version is found, follow the on-screen prompts to install the newer driver version on your computer.
- Reboot your computer and see if the issue is fixed once your computer boots back up.
If you are still seeing the ‘This device is disabled. (Code 22)’ the error even after updating the driver of the device in question, move down to Method 3.
Method 3: Running the applicable Troubleshooter
If none of the methods above have worked for you, it’s possible that you’re dealing with a device that is stuck in a limbo state (it’s neither disabled nor enabled). Fortunately, this problem is addressed by Microsoft with a lot of automated fixes that can be deployed via the various Troubleshooters that are made available in your OS.
If this method is applicable to your current situation, you might be able to address the ‘This device is disabled. (Code 22)’ an error by running the built-in Troubleshooter that’s applicable to the device that you’re having.
Several affected users that were also facing this issue have confirmed that running the Troubleshooter applicable to the type of device showing the 22 error code allowed them to deploy a fix that resolved the problem and allowed the service to run.
If you haven’t tried this yet, follow the instructions below to run the Windows Troubleshooter that is the most equipped to deal with this issue:
- Press Windows key + R to open up a Run dialog box. Next, type ‘control’ inside the text box and press Enter to open up the Classic Control Panel interface.

Accessing the Classic Control Panel interface - Once you’re inside the Control Panel interface, use the search function (top-right corner) to search for ‘troubleshooter’. Next, from the list of results, click on Troubleshooting.

Accessing the Troubleshooting tab - Once you’re inside the Troubleshooting tab, click on the sub-title that’s applicable to the type of device that you’re having issues with. To do this, click on Hardware and Sound, then click on the specific troubleshooter that’s in charge of fixing issues associated with the device in question.

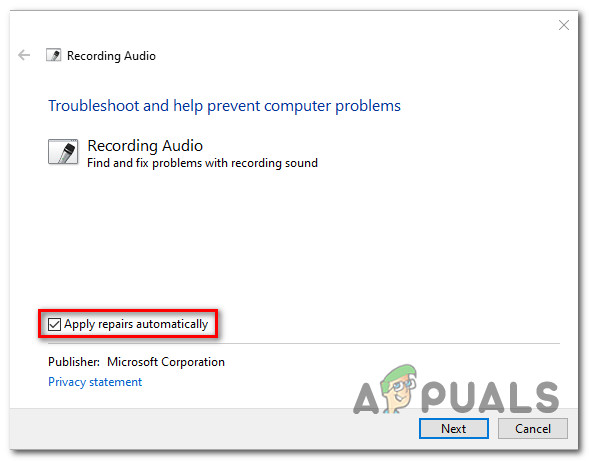
Opening the correct Troubleshooter - After you manage to open the correct troubleshooter, click on the Advanced hyperlink, then check the box associated with Apply repairs automatically. After you do this, click on Next to begin the initial scan.
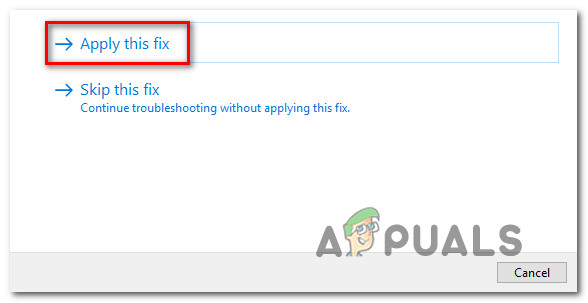
Applying the repairs - Wait until the troubleshooter tries to detect the issue for you. If a viable fix is found, you will be prompted to apply it. If this happens, click on Apply this fix, then wait for it to be applied. Keep in mind that depending on the fix that you need to deploy, the fix might require you to do some manual steps in order to enforce it.
Applying this Fix recommended by the troubleshooter - Restart your computer and see if the issue is fixed at the next system startup.
In case the same problem is still occurring, move down to the next potential fix below.
Method 4: Using System Restore
If none of the methods above have worked for you, it’s possible that a recent change or a conflict between a 3rd party service and a native equivalent might be interfering with the state of the device and causing the ‘This device is disabled. (Code 22)’.
If you find yourself in this particular situation, one way to go about fixing the issue is to use System Restore to restore your computer back to a state in which the current conflict was not occurring.
Note: Keep in mind that by default, System Restore is configured to save regular System Restore snapshots during important events like the installation of a new driver, the installation of a Windows Update, or the updating of an existing app. If you haven’t modified the default behavior of System Restore, you should have plenty of snapshots to choose from.
If you haven’t tried this particular fix yet, follow the instructions below to use System Restore to restore your computer back to a healthy state in which the device error code 22 was not occurring:
- Press Windows key + R to open up a Run dialog box. Next, type ‘rstrui.exe’ inside the text box and press Enter to open up the System Restore utility.

Opening the System Restore utility - Once you’re inside the first screen of System Restore, start by selecting the Choose a different restore point before clicking Next.
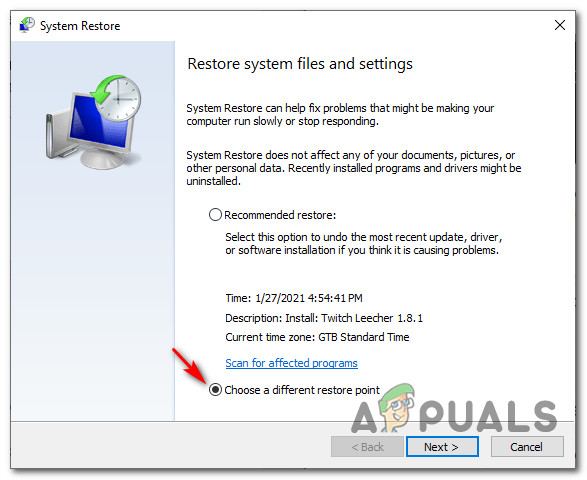
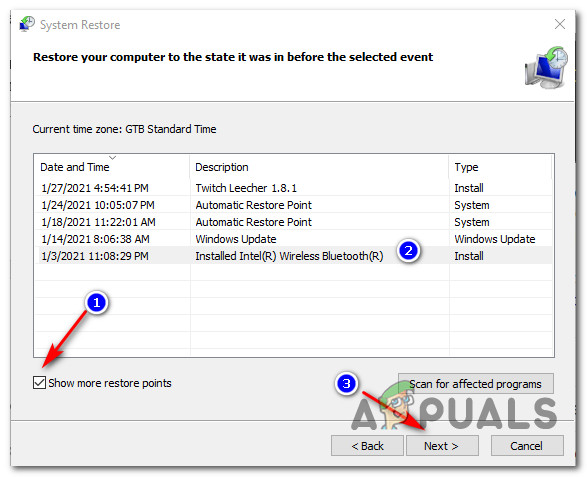
Choosing a Different Restore Point - At the next screen, start by check the box associated with Show more restore point. Next, pick a Restore Snapshot that’s dated before the apparition of the 22 error code. Once the correct snapshot is enabled, click on Next.
Choosing the correct system restore snapshot - At the final screen of System Restore, click on Finish and wait for the utility to enforce the older restore snapshots.
Once the older state is enforced, check on the status of the device and move down to the next method below if the ‘This device is disabled. (Code 22)’ error is still occurring.
Method 5: Clearing the CMOS Battery / Memory Chip
As it’s been confirmed by several affected users, this particular issue can also occur because of cached data that’s being maintained by the CMOS battery/memory chip in relation to the device that is malfunctioning.
In this case, you can also try temporarily removing the CMOS (Complementary Metal-Oxide Semiconductor) battery or memory chip (depending on the case) in order to clear the data that might be contributing to the ‘This device is disabled. (Code 22)’.
Follow the instructions below to learn how to temporarily clear the CMOS battery or the memory chip in order to clear the cached data that might be causing this issue:
- Start by turning your computer off and then unplugging it from the power source that it’s currently connected to.
- Next, equip yourself with a static wrist band in order to ground yourself to the frame of the computer and prevent accidental damage to your PC components produced by static electrical energy.
- Remove the side cover of your computer to get an overview of your motherboard. Once you see it, use your fingernail or another non-conductive screwdriver to remove the CMOS battery or memory-chip (depending on the case).

Removing the CMOS battery / Memory Chip - After you manage to remove the battery, wait for a full minute before plugging it back into place.
- Put the back cover back on, plug your computer back to a power source, start it and allow it to boot normally.
- Once the startup sequence is complete, see if the status of the device has changed to Enabled.
If the status still shows ‘This device is disabled. (Code 22)’ and you can’t enable it manually, move down to the next potential fix below.
Method 6: Refreshing every Windows Component
If none of the methods above have worked for you, you should start considering the possibility that you are dealing with some kind of underlying system corruption that is affecting the functioning of your connected devices.
In this case, the only viable fix at this point is to refresh every Windows component by performing a clean install or a repair procedure. Both of these approaches will effectively replace every Windows file with a clean equivalent, which will end up resolving the variety of issues brought about by corrupted instances.
Depending on your particular situation, follow the instructions below to refresh your Windows installation:
- Clean install (in-place repair) – If you don’t have any crucial data on your OS drive, probably the best way to go about this issue is to do a clean install procedure. You can do this directly from the GUI menu of your Windows installation without having to use compatible installation media. But keep in mind that if you have important files on your OS drive, take the time to back them up before starting this procedure.
- Repair install (in-place repair) – In case you hold essential information on your OS drive, this is probably the best way to go around fixing the issue. Repair installing will only touch the OS files, allowing you to keep personal files, applications, games, personal media, and anything else that is not related to your OS.


