Fix: Stuttering, Freezing, and FPS Drops in Rainbow Six Siege
After some recent updates of Rainbow Six Siege, many players on the game’s forums have been reporting performance issues, such as freezing, stuttering, and heavy frame drops.
The exact cause of these performance issues is yet to be determined, so there can be many factors that are causing these stutters and freezes. Below, we’ve compiled a list of all the possible causes of the performance issues in Rainbow Six Siege.
- System Doesn’t Meet Recommended Requirements: For Rainbow Six Siege to run at a solid framerate, it requires a strong system. If your PC doesn’t meet the game’s recommended system requirements, you’ll need to do a lot of tweaking to get a stable framerate.
- High In-Game Settings: If your in-game settings are set too high, relative to your PC’s specs, then your system will have a hard time running the game, causing performance issues.
- Missing or Corrupted Game Files: While downloading the recent Rainbox Six Siege update, some of its game files may have been improperly downloaded, which might be why you’re experiencing the stutters and FPS drops.
- Fullscreen Optimization: The Fullscreen Optimization feature of Windows is known to cause performance issues and graphical errors in games. This can include frame drops, stutters, freezes, and screen-tearing.
- Too Many Background Processes: If you have too many non-essential processes running in the background while playing Rainbow Six Siege, they can hinder the game’s performance by needlessly using too many resources.
- Outdated Windows: If you don’t allow Windows to update itself frequently, then your outdated version of Windows might be why Rainbow Six Siege is performing poorly.
- App Overlay Interference: If you have enabled the overlays of different programs like Discord, MSI Afterburner, Radeon Overlay, and NVIDIA GeForce Experience, they might conflict with Rainbow Six Siege, preventing it from being able to run smoothly.
- Antivirus/Firewall Conflict: The Windows Firewall or your Antivirus program may interfere with Rainbow Six Siege, resulting in a decrease in performance.
- Bugged Shader Cache: The Shader Cache stored by your GPU may be bugged, causing your GPU to perform poorly while playing Rainbow Six Siege.
- Outdated GPU Drivers: If you’re using outdated GPU drivers, it could be the root cause of the performance problems you’re experiencing in Rainbow Six Siege.
- Peripheral Firmware Interference: The firmware of one or more of your peripherals may be conflicting with Rainbow Six Siege, preventing it from being able to run smoothly on your system.
Check the Recommended Requirements of Rainbow Six Siege
Rainbow Six Siege is a very graphically-intensive game that uses a lot of CPU and GPU power. If you want the game to run smoothly, your PC’s specifications must be comparable to the game’s recommended system requirements.
We’ve listed the recommended system requirements for the game below. See if your PC’s specs are the same or similar to the ones shown below.

But even if your PC’s specifications aren’t comparable to these recommended requirements, you can still improve the game’s performance and fix stutters/freezes/crashes by following the solutions we’ve listed below.
1. Tweak In-Game Settings
You should first tweak the in-game settings when trying to improve Rainbow Six Siege’s performance and fix stutters, freezes, or crashes. The game will suffer significant performance issues if your settings are set too high (relative to your PC’s specs).
So to tweak your settings, launch the game and click on the Settings icon in the top right corner of the home screen. In the Settings menu, navigate to the Display Settings first and tweak the following settings:
- Display Mode: Full Screen
- VSync: Off
- FPS Limit: On
If your Display Mode is set to Windowed or Borderless, Rainbow Six Siege won’t be able to utilize the full power of your PC’s hardware. So to ensure that the game uses all the resources it possibly can, set the Display Mode to Full Screen.
The Vsync setting matches the framerate (FPS) of the game to the refresh rate of the monitor you’re using. This setting is infamous for causing input delay in games, so it should always be turned off – especially if you’re playing a competitive game like Rainbow Six Siege.
After changing the Display settings, move to the Graphics settings menu. You should change these settings according to the capabilities of your hardware. If you have a mid to low-range PC, you shouldn’t set the Graphics Settings any higher than Medium.
Medium provides a good balance between performance and visuals. But if you only care about performance, you can set these settings to Low. The game’s graphical quality will suffer, but you’ll gain a significant increase in performance.
After changing the Graphics Settings, you should return to the Display Settings menu to tweak one last setting: the FPS Limit.
You may think leaving your FPS uncapped is a good idea, as a higher FPS equals better performance, but that’s not entirely true. If you’re experiencing stutters and frame drops in Rainbow Six Siege, you should try putting a limit on your FPS.
This is because when you leave your FPS uncapped, it can reach a very high number, then drop down to a lower number. This results in very noticeable microstutters. So a simple solution to this problem is to limit the FPS of Rainbow Six Siege so the framerate doesn’t spike too much. This will minimize the effect of these frame drops.
Now, the real question is what number you should limit your FPS to. You must run Rainbow Six Siege’s built-in benchmark to find this out. To run the benchmark, click on the Benchmark option at the bottom of the Graphics Settings menu.
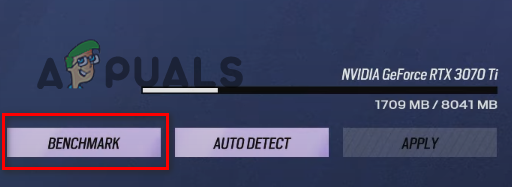
The benchmark feature will do a quick performance test. The test’s end will show you your maximum, minimum, and average FPS. Note down the average FPS shown by the benchmark and then limit your FPS to three times this number. For example, if the benchmark shows that your average FPS is 60, you should limit your FPS to 180 (60 x 3 = 180).
The reason we’re doing this is that putting a limit on FPS has a direct effect on frametimes. And the higher your frametimes go, the more input lag you’ll feel while playing the game. In a competitive shooter game like Rainbow Six Siege, experiencing input delay can ruin the game experience.
So to ensure that your frametimes don’t increase too much, your FPS limit shouldn’t be lower than 3 times your average FPS. But you can try further decreasing the limit to 2x of average FPS if you’re still experiencing noticeable stutters at this FPS limit. Doing so will increase your frametimes but may also solve your stuttering/frame drops issue.
After changing these settings, go into a game and see how much the performance has improved. If you’re still experiencing stutters, freezes, or FPS drops, continue with the solutions we’ve listed below.
2. Verify the Integrity of Rainbow Six Siege’s Game Files
While downloading the newest update of Rainbow Six Siege, if your internet connection experienced some turbulence, it could have improperly downloaded the game files. When this happens, it results in missing and/or corrupted game files.
These missing/corrupted game files can seriously impact the game’s performance, causing lag, stutters, and even crashes.
So to make sure that there are no missing/corrupted files in your Rainbow Six Siege folder, you must verify the integrity of the game files through its launcher.
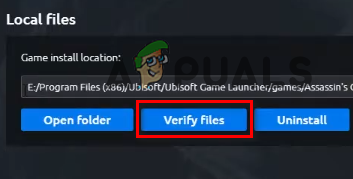
If you’re playing Rainbow Six Siege through Steam, follow the steps listed below to verify the integrity of its files:
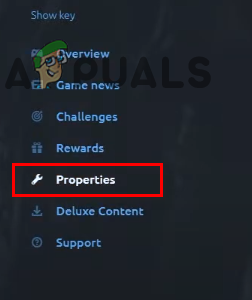
- Open your Steam Library.
- Right-click on Rainbow Six Siege and select “Properties”.
- Click on the Local Files tab in the Properties Window.
- Select “Verify Integrity of game files…”
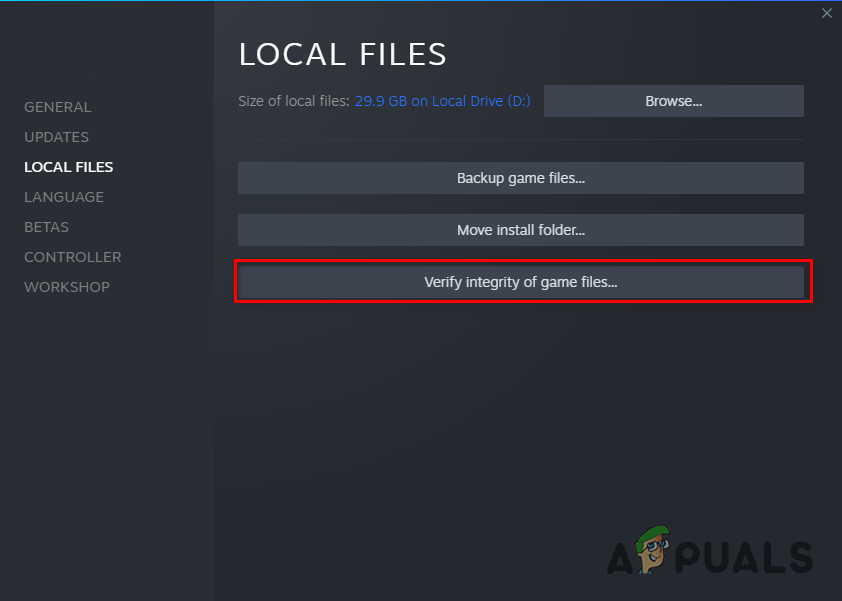
Verifying Integrity of Game Files through Steam
Steam will now begin a quick verification process for Rainbow Six Siege’s game files. If it finds any missing or corrupted files, it’ll replace them.
If you’re playing Rainbow Six Siege through Ubisoft Connect, follow the steps listed below to verify the integrity of its files:
- Launch Ubisoft Connect.
- Click on the “Games” tab at the top of the Window.
- Locate Rainbow Six Siege and click on the small arrow under its name.
- Select “View game details”
- Click on the Properties on the left side of the screen.
- Click on Verify Files.
Verifying Integrity of Files through Ubisoft Connect
Once you click on the Verify Files option, Ubisoft Connect will begin verifying Rainbow Six Siege’s game files. After a few minutes, the verification process will be completed, and Ubisoft Connect will repair the corrupted files and replace the missing ones.
After completing the file verification process, launch Rainbow Six Siege and see if the stuttering/freezing has stopped.
3. Disable Fullscreen Optimization
Windows 10 has a feature called Fullscreen Optimization, which is supposed to improve performance in video games. When the Fullscreen Optimization feature is enabled for a game, it runs the game in a hybrid of fullscreen and windowed mode.
This hybrid display mode was designed to improve performance and allow users to quickly minimize/maximize the program. However, the Fullscreen Optimization feature does the exact opposite of what it’s supposed to.
If you have this feature enabled, it is likely hindering the game’s performance. It can also result in graphical errors such as screen-tearing.
So, you must ensure that Fullscreen Optimization is disabled for all your games. To disable Fullscreen Optimization for Rainbow Six Siege, follow these steps:
- Go to your desktop and right-click on Rainbow Six Siege.
- Select Properties.
- Navigate to the Compatability tab.
- Put a checkmark next to “Disable Fullscreen Optimization“
And while you’re in the Properties menu, ensure there’s also a checkmark next to “Run as administrator”. This will ensure you’re granting Rainbow Six Siege complete read and write privileges. This is another quick way to boost the game’s performance.
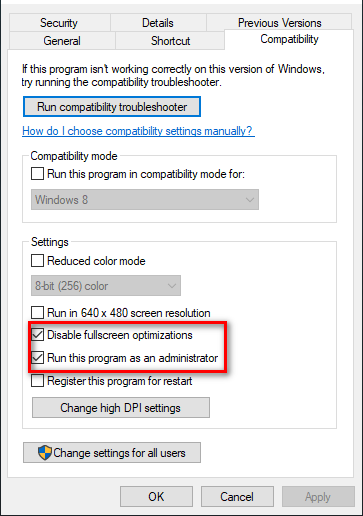
After putting checkmarks next to Run as Administrator and Disable Fullscreen Optimization, click on Apply.
If you had enabled the Fullscreen Optimization feature, you would notice a significant performance improvement and a decrease in graphical errors after disabling it.
4. Close Non-Essential Background Processes
A quick way to improve Rainbow Six Siege’s performance on your system is to ensure that no non-essential background processes are running while you’re playing the game.
These background processes usually don’t use many resources individually, but if you have several running simultaneously, they can take up a big chunk of your PC’s processing power. If you want Rainbow Six Siege to run smoothly on your system, you’ll need to ensure that no non-essential program takes resources away.
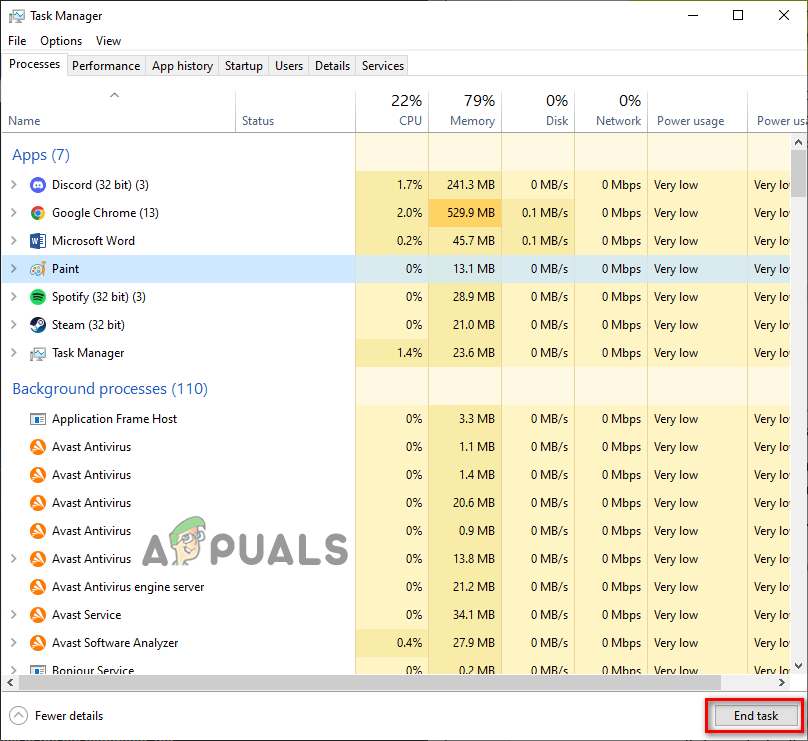
To check what programs you have running in the background, open Task Manager by pressing Windows Key + X. Task Manager will show you all the currently running processes in the Processes tab. It’ll also show you the exact CPU, Memory, Disk, and Network usage of each process.
Scroll through the list and see which processes are non-essential. When you find a non-essential process, click on it and select “End Task” at the bottom of the Window to close it. This way, you’ll be able to free up more resources for Rainbow Six Siege.
Launch Rainbow Six Siege now and go into a game. You should immediately feel a performance improvement.
5. Free Up Some Disk Space
Open up File Explorer and see how much free space is left in the disk where you have Rainbow Six Siege installed. If the amount of free space is less than 25% of the total disk space, then this can be one of the reasons why you’re experiencing performance issues in Rainbow Six Siege.
While playing a game like Rainbow Six Siege, it must create temporary files within its saved disk. If there’s no space available on the disk, then the game won’t be able to create these files – resulting in errors and performance problems.
Your PC also uses free space in the disk as Virtual Memory, which serves as additional RAM. So low disk space also results in an inefficient amount of Virtual Memory. And when your PC doesn’t have much Virtual Memory available, the performance of games like Rainbow Six Siege suffers.
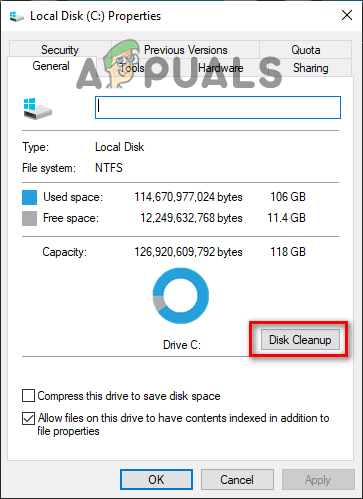
To free up some space on your disk, you can use the native Disk Cleanup feature of Windows. To perform a Disk Cleanup, follow these steps:
- Open File Explorer.
- Click on This PC.
- Right-click on the drive where Rainbow Six Siege is installed and select Properties.
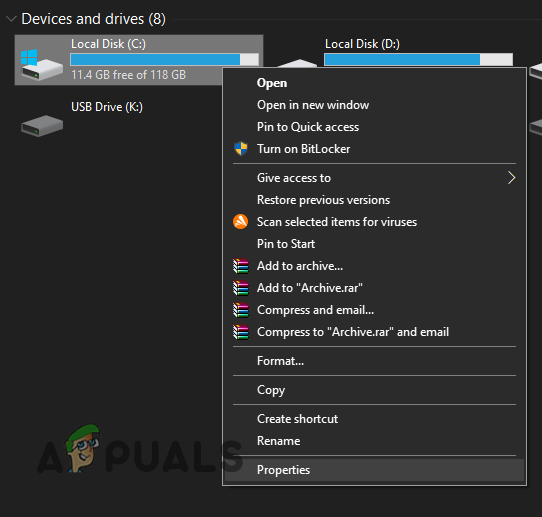
Opening Disk Properties - Click on Disk Cleanup.
Performing Disk Cleanup
After the Disk Cleanup finishes, it’ll show you all the junk files found on your disk. To delete the junk files, put a checkmark next to them and click OK.
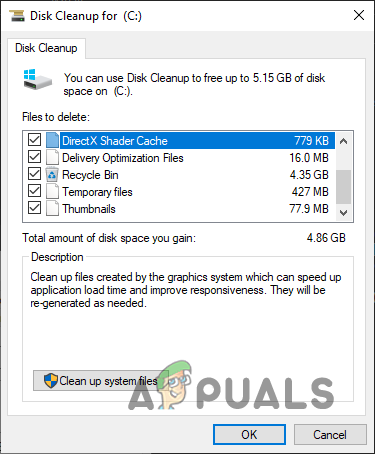
But do note that Disk Cleanup often shows your Downloads folder as junk, so make sure that there’s no checkmark next to it before you clean up system files. Only delete the files and folders that are junk.
6. Create Firewall Exception and Disable Antivirus
The Windows Firewall has a tendency to interfere with video games, preventing them from being able to perform all the operations that they need to. If this happens, it can severely affect the game’s performance, causing stutters and freezes.
So to make sure that Windows Firewall isn’t blocking any of Rainbow Six Siege’s game files, you have to create an exception for Rainbow Six Siege, and Steam/Ubisoft Connect in the Windows Firewall settings. You can do so by following the steps listed below:
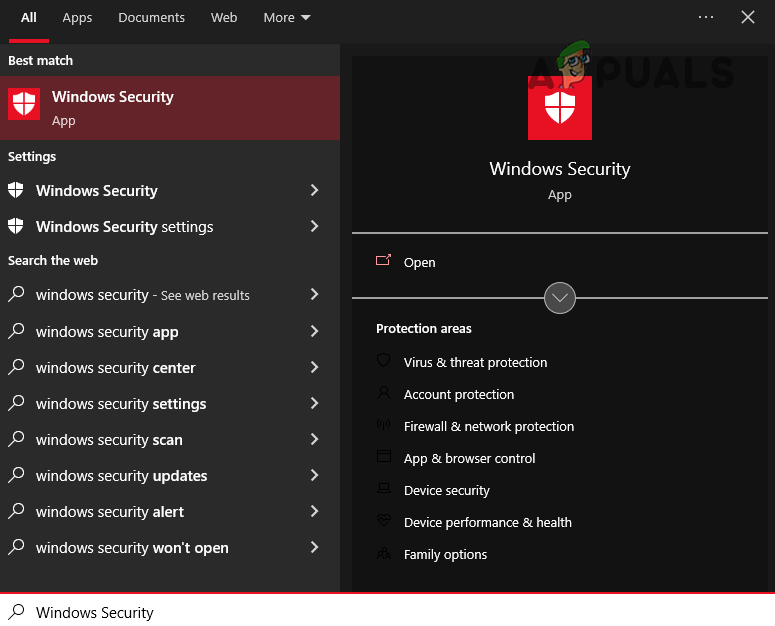
- Press Windows Key, type Security in the search bar and enter.
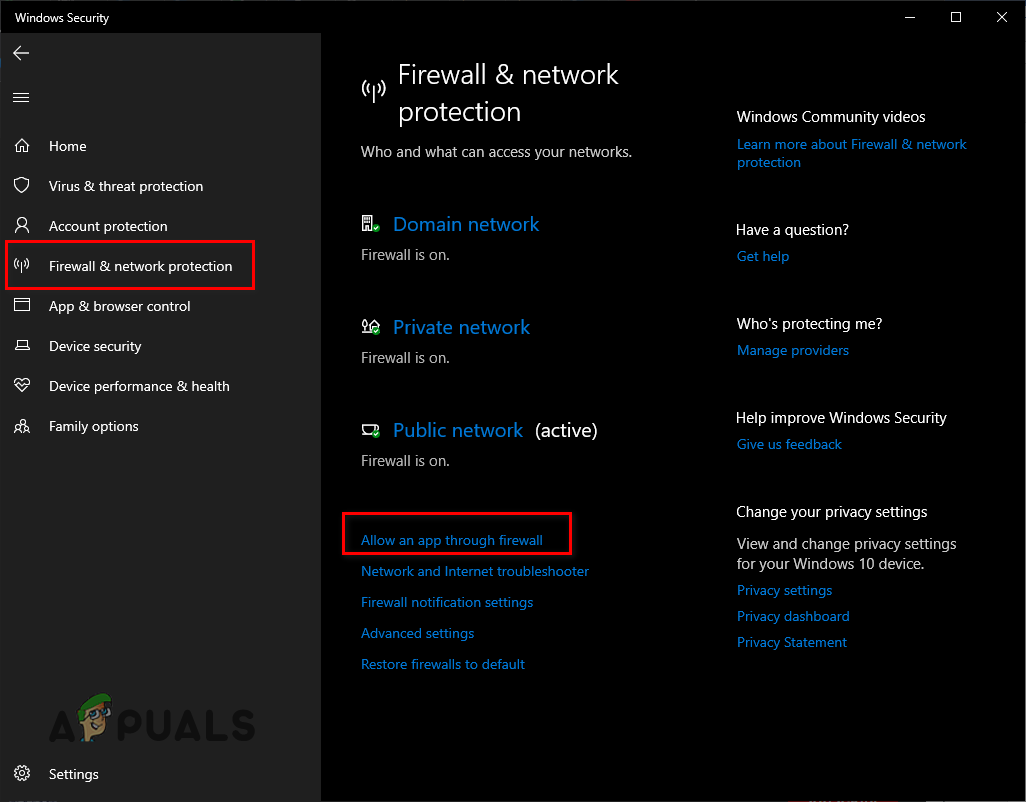
Opening Windows Security - Click on Firewall & Network Protection in the Windows Security menu.
- Select the “Allow an app through Firewall” option.
Opening Firewall Settings - Put a checkmark next to Steam/Ubisoft Connect and Rainbow Six Siege in the list of apps.
- Click on OK to confirm the exceptions.

Adding Firewall Exception
After you’ve created the Firewall exceptions, the next step in ensuring that no security app conflicts with Rainbow Six Siege is to disable your Antivirus program.
Antivirus programs help keep your system safe from potential threats, but they often cause problems with video games as they mistakenly mark them as threats; despite them being completely safe.
Because of this, it’s a good idea to disable your Antivirus program while you’re playing games like Rainbow Six Siege. Follow the steps below to disable your Antivirus.
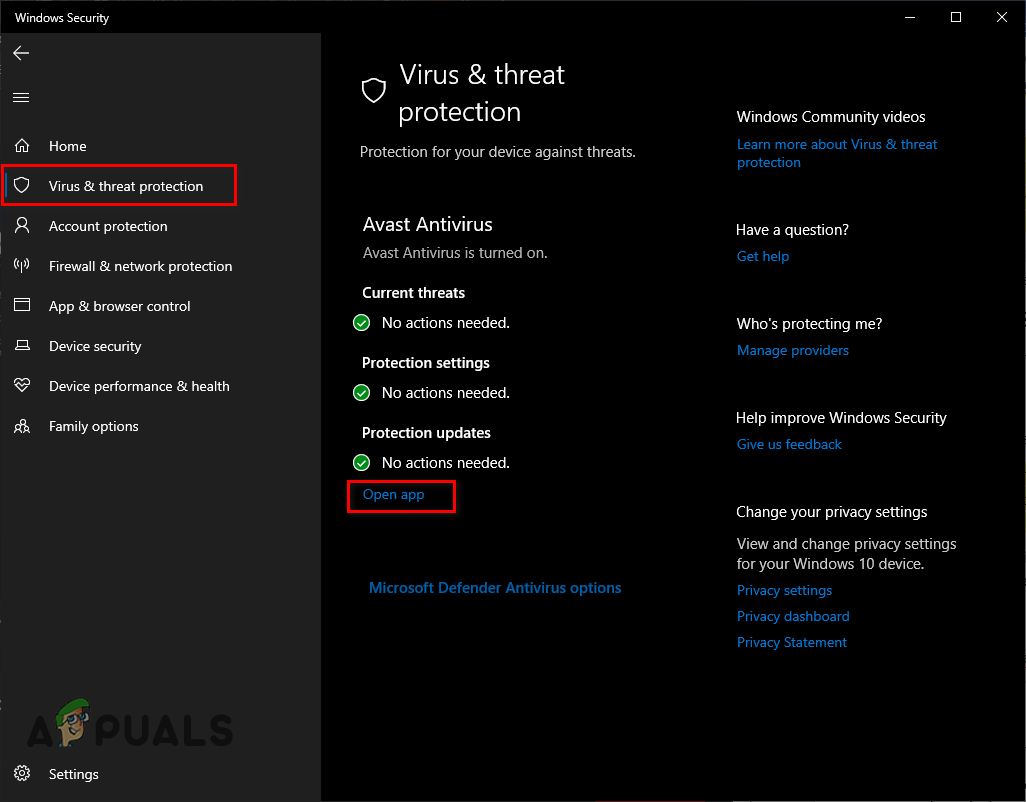
- Press Windows Key, type Security in the search bar, and press enter.
Opening Windows Security - Click on Virus & Threat Protection in the Windows Security menu.
- Select the “Open app” option.
Disabling Antivirus
This will open the menu of your Antivirus program. From the menu, head to settings and disable the Antivirus. Keep it disabled while you’re playing Rainbow Six Siege, and turn it back on once you’ve finished playing.
7. Update Windows
If you keep delaying the Windows updates to a later date and never get around to letting Windows perform the update, then the performance of your system will likely suffer.
To ensure that your online games run as smoothly as possible, you must update Windows regularly. The main reason for this is Network Drivers. These drivers allow your system to connect to online servers, such as game servers.
Whenever there’s an update for Windows, a Network Driver update usually comes with it. So if you don’t let Windows update itself, your Network Drivers will become outdated. This can cause performance issues in online games such as Rainbow Six Siege.
To update Windows, follow the steps we’ve listed below:
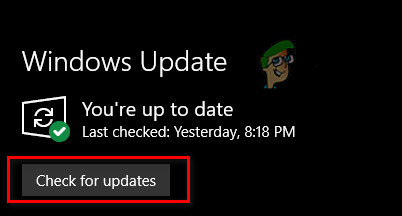
- Press the Windows Key, type Settings, and press enter.
Opening Windows Security - In the Settings menu, select Updates & Security.

Opening the Updates and Security Menu - Click on Check for Updates.
Updating Windows
If any updates appear after you click on Check for Updates, then go ahead and install them. Once Windows finishes updating, launch Rainbow Six Siege and get into an online match. You should notice a difference in performance.
8. Delete Shader Cache
Every time your GPU compiles a new shader, it stores it in your system as Shader Cache. Because of this Shader Cache file, the next time your GPU needs to load that shader, it won’t need to start from scratch. It’ll already have the shader prepared.
But sometimes, the Shader Cache file can become bugged, causing Shaders to load improperly. This can have a big impact on the performance of games, and it is known to cause stutters and freezes. You’ll need to delete the Shader Cache file from your system to solve this issue.
To delete the Shader Cache, follow the steps we’ve listed below:
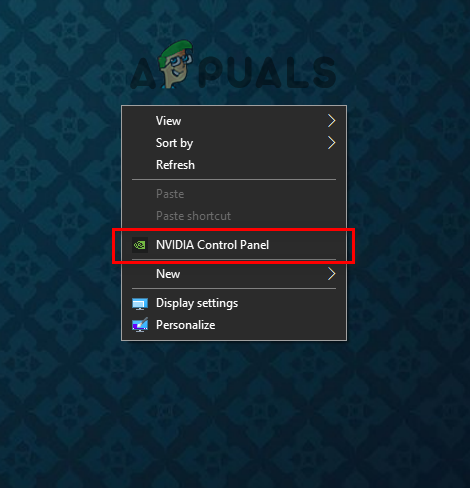
- Right-click on your desktop and select NVIDIA Control Panel.
Opening NVIDIA Control Panels - On the left side of the NVIDIA Control Panel, click on Manage 3D Settings.
- Scroll down in the Global Settings until you find Shader Cache.
- Disable Shader Cache and click on Apply.

Disabling Shader Cache - Restart your PC.
- After your PC restarts, open File Explorer.
- Right-click on the drive where you have Windows installed and select Properties.
Opening Disk Properties - Click on Disk Cleanup.
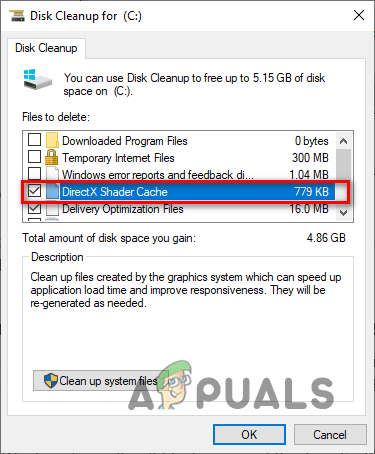
After the Disk Cleanup process is completed, a window showing you all of the junk files in your system will appear. Put a checkmark next to DirectX Shader Cache in the list of junk files. Before pressing OK, ensure there’s no checkmark next to Downloads or Downloaded Program Files. Otherwise, your entire Downloads folder will be deleted.
After deleting the Shader Cache, open NVIDIA Control Panel again. Go to the Manage 3D settings section and re-enable Shader Cache.
After the Shader Cache is enabled, restart your PC and launch Rainbow Six Siege. The game will load slower than usual as it’s now compiling the shaders from scratch and renewing the Shader Cache. But once the game has loaded, the stutters/freezes should be fixed.
9. Disable Overlays
Many programs, such as Discord, NVIDIA GeForce Experience, and MSI Afterburner have built-in overlays that allow you to access them without having to switch over from the program you’re currently using. These overlays are very convenient and can increase your productivity, but they have a tendency to conflict with some applications, causing errors and performance issues.
So if you’re experiencing stutters, freezes, and frame drops in Rainbow Six Siege, you should try disabling all of the overlays you currently have enabled. After you’ve disabled all overlays, relaunch Rainbow Six Siege and see if there’s an improvement in the game’s performance.
10. Update Graphics Card Drivers
If you want a GPU-intensive game like Rainbow Six Siege to run smoothly on your system, you must always update your Graphics Card (GPU) drivers to their latest version. Every time your GPU’s manufacturer releases a new driver update for your GPU, they optimize the drivers so that your GPU continues to perform well in modern games.
So if you don’t regularly update your GPU’s drivers, it will severely impact the performance of games like Rainbow Six Siege on your system, causing low FPS, stutters, freezes, and even crashes.
To update your Graphics Card drivers, you first need to figure out what GPU you have installed in your system. To do that, follow the steps listed below:
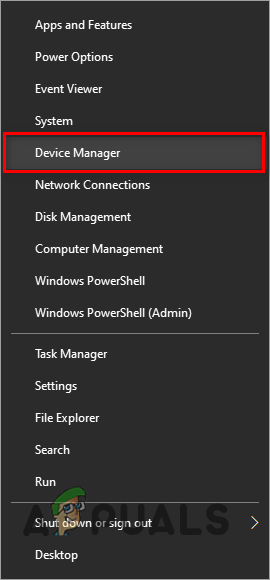
- Press Windows + X simultaneously and click on Device Manager.
Opening Device Manager - Expand the Display Adapters section by clicking on the small arrow beside it.
- Note down the name of the device that pops up.
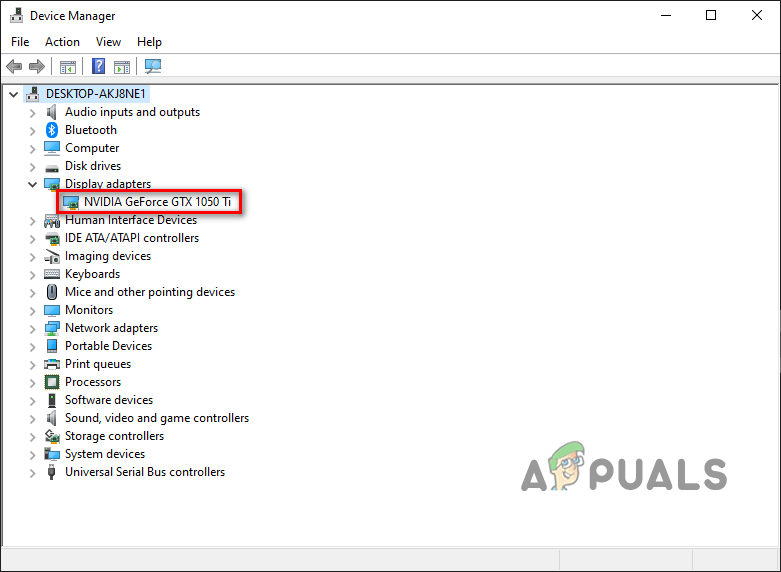
Identifying GPU model using Device Manager
The device which appears under Display Adapters is your GPU. So in this way, you’ll be able to determine the brand name and model number of your Graphics Card.
However, if you expand the Display Adapters section and all you see is “Microsoft Basic Display Adapter”, then it’s an indicator that your GPU drivers are either corrupt or haven’t been installed.
So, in this case, you’ll need to do a little more digging to find your GPU’s actual name. Follow the steps below:
- Press Windows + X simultaneously and click on Device Manager.
Opening Device Manager - Expand the Display Adapters section by clicking on the small arrow beside it.
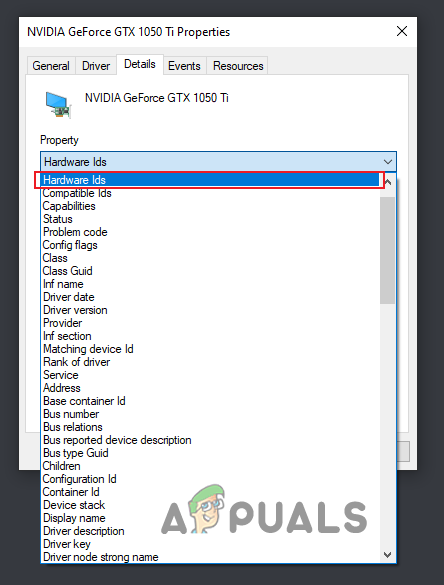
- Right-click on Microsoft Basic Display Adapter and select Properties.

Selecting GPU Properties - Click on the Details tab.
- Expand the list of items below Property.
- Click on Hardware Ids.
Selecting Hardware Ids - Under value, right-click on the first line of text and copy it.
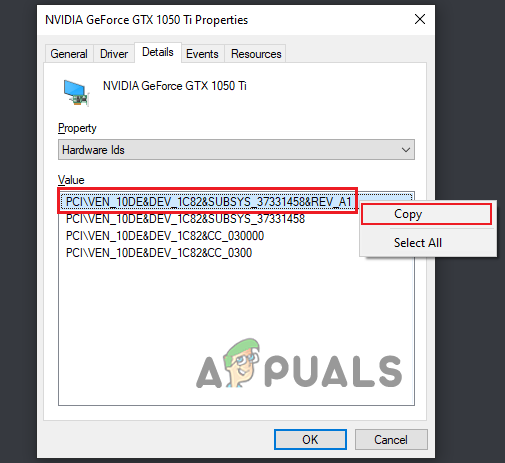
Copying Hardware Id - Paste this text into the search bar of your browser and press enter.
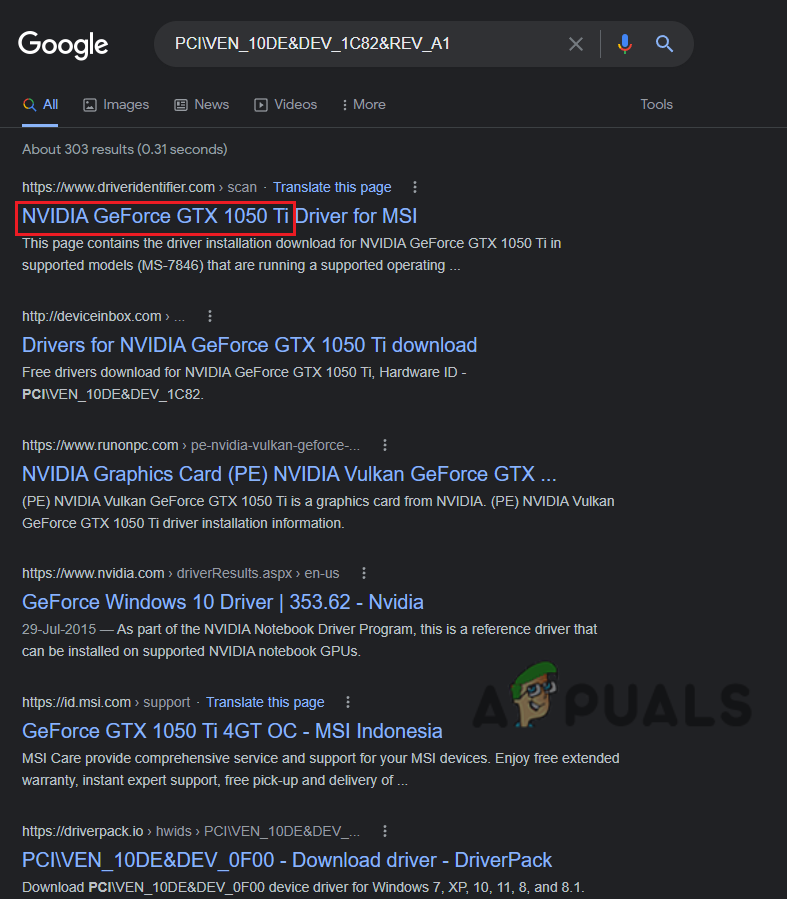
Finding the name of GPU through Google
The results that show up on Google will allow you to determine the exact model of your GPU. And now, you’ll be able to search for its drivers online. But instead of installing your GPU drivers immediately, you first have to get rid of the old ones currently installed in your system.
If you don’t wipe these current drivers, they will conflict with the newer ones you’re about to install and cause all sorts of issues.
You should use the Display Driver Uninstaller (DDU) program to wipe your current GPU drivers. The native driver uninstaller of Windows is infamous for failing to do its job properly. So if you wipe your current GPU drivers using the Windows driver uninstaller, then some residue files will most likely be left behind. And they will cause problems when you install the newer drivers.
So head to the official DDU website and download the program from there. Once DDU is installed, you must boot your PC into Safe Mode. We’re doing this to ensure that nothing conflicts with DDU while it’s uninstalling your GPU drivers.
To boot into Safe Mode, follow along with the steps listed below:
- Press the Windows Key on your keyboard.
- Click on the Power icon in the bottom left corner of the start menu.
- Hold the Shift Key and select Restart.
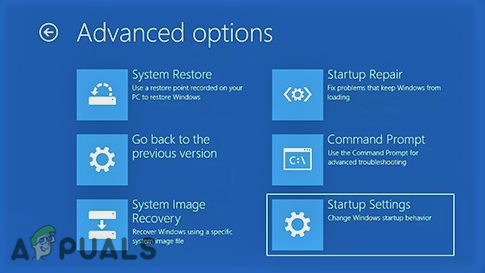
- Click on Troubleshoot and then select Advanced Options.

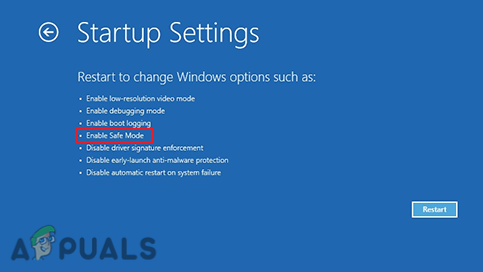
Opening Advanced Options - Click on the Startup Settings option.
Selecting Startup Settings - Press F5 to boot your PC into Safe Mode.
Booting into Safe Mode
After your PC boots up, open up DDU. On the right side of the menu, select GPU as your device type and then your brand of GPU. Afterward, select the “Clean and restart” option to begin the driver uninstallation process.

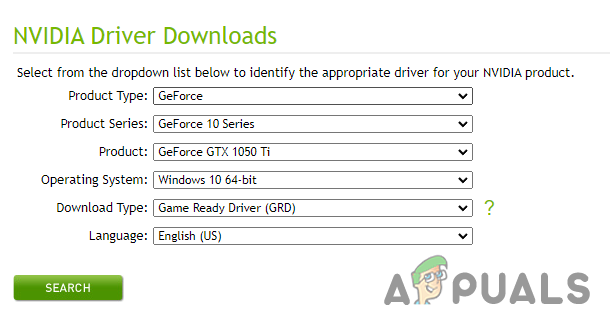
Once your drivers are wiped, your PC will restart once. After it restarts, you can begin the installation of the latest version of your GPU’s drivers, which you can do by visiting the official website of your GPU’s manufacturer.
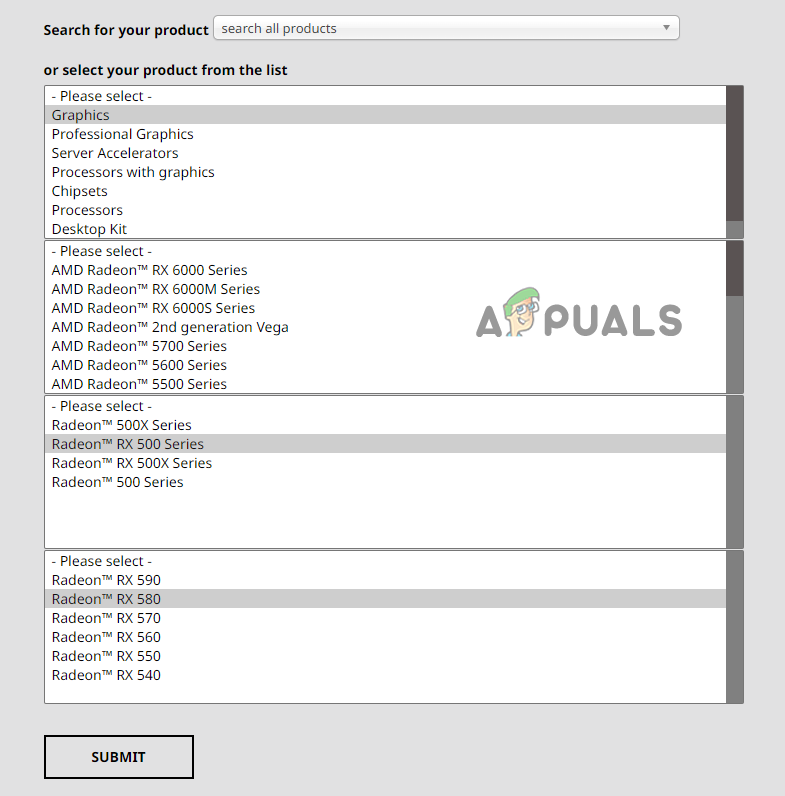
If you have an NVIDIA GPU, go to this website and search for your GPU’s drivers using the drop-down lists.
If you have an AMD GPU, go to this website and search for your GPU’s drivers using the drop-down lists.
After downloading the driver installation file, open it up and select the “Express” installation option. Do a quick restart of your PC once the drivers complete their installation, and then launch Rainbow Six Siege. You’ll instantly feel a great performance boost.
11. Disconnect Non-Essential Peripherals
All USB devices connected to your system come with their own integrated software, called firmware. The firmware allows the devices to function as they’re intended. But sometimes, the firmware of different peripherals can conflict with each other or conflict with other programs on your system. This results in problems such as microstuttering, FPS drops, and slow loading in games.
To ensure that none of your peripherals are causing any problems with Rainbow Six Siege, you should try disconnecting all of the non-essential peripherals connected to your system. This includes speakers, USB hubs, second/third monitor, webcam, controller, etc.
Once you’ve disconnected all non-essential peripherals, launch Rainbow Six Siege and go into a match. If you notice a boost in performance, it means that one of your peripherals was indeed conflicting with the game.
You’ll need to reconnect each peripheral individually to figure out which peripheral it was. Launch the game after connecting each peripheral and take note of its performance. When the stutters/freezes start occurring again, it means that the last peripheral you reconnected is the cause of the issue.
To fix this firmware conflict, you’ll need to update or reinstall the drivers of the peripheral.


The game has never been having fps drops on my PC. Never was freezing. Suddenly new update and it happens! I reinstalled… drivers, game, even Windows! I went throgh all possible processes to fix it. Never have changed anything in my PC. Just it freezes and has fps drops if i check ubsiosft connect for challenges. This game is broken, and no repairs required. This game just works bad and Ubisoft cannot fix it!!!