How to Split Screen in Windows 10 and 11
 Reviewed by Muhammad Zubyan
Splitting the screen in Windows 10 and Windows 11 allows you to work on multiple applications simultaneously, improving your productivity and multitasking capabilities. Although the process is similar in both operating systems, there are some differences in the user interface. In this article, we will guide you through the steps of splitting the screen in both Windows 10 and Windows 11.
Windows offers various methods to split your screen, allowing you to work on multiple applications simultaneously. Let’s explore each method in detail.
Using the “Snap Windows” feature
The “Snap windows” feature in Windows makes it easy to split your screen and organize your workspace. By using this feature, you can have two applications side by side, allowing you to efficiently work on both simultaneously. To use it, follow these simple steps:
- Open the first application or window you want to snap to one side of the screen.
- Click and hold the title bar of the window and drag it to the left or right edge of the screen until an outline appears.
- Release the mouse button to snap the window to that side of the screen.
- Repeat the process with the second application or window, but snap it to the opposite side.
Using Keyboard Shortcuts
Windows also provides convenient keyboard shortcuts to split your screen quickly. Here are the commonly used shortcuts:
- Snap the current window to the left side of the screen: Win + Left Arrow
- Snap the current window to the right side of the screen: Win + Right Arrow:
- Maximize the current window: Win + Up Arrow
- Minimize the current window or restore it if it’s maximized: Win + Down Arrow
- Switch between virtual desktops: Ctrl + Win + Left/Right arrow key
These keyboard shortcuts are great for users who prefer a faster and more efficient way of splitting their screen.
Use FancyZones to Split Screen in Windows 10
If you’re looking for a more advanced and customizable way to split your screen in Windows 10, FancyZones is the perfect solution.
FancyZones is a powerful window manager tool developed by Microsoft that allows you to create custom layouts and snap windows into specific zones. In this article, we will guide you through the process of using FancyZones to split your screen and optimize your multitasking experience.
How to Install FancyZones
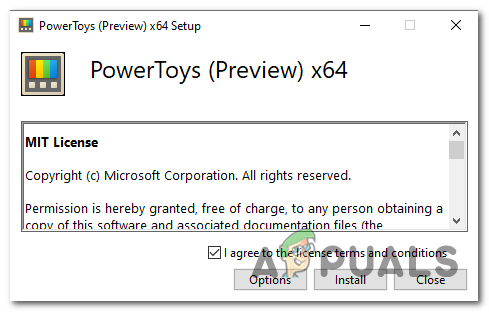
Before you can start using FancyZones, you need to install the PowerToys utility, which includes the FancyZones feature. Follow these steps to install FancyZones:
- Visit the official GitHub repository for PowerToys (https://github.com/microsoft/PowerToys), and download the latest release of PowerToys.

- Run the installer and follow the on screen instructions to complete the installation.
- Once PowerToys and FancyZones are installed on your system, you can proceed to configure and use FancyZones to split your screen.
Configuring FancyZones
To configure FancyZones and set up custom layouts, follow these steps:
- In the PowerToys window, navigate to the “FancyZones” tab.
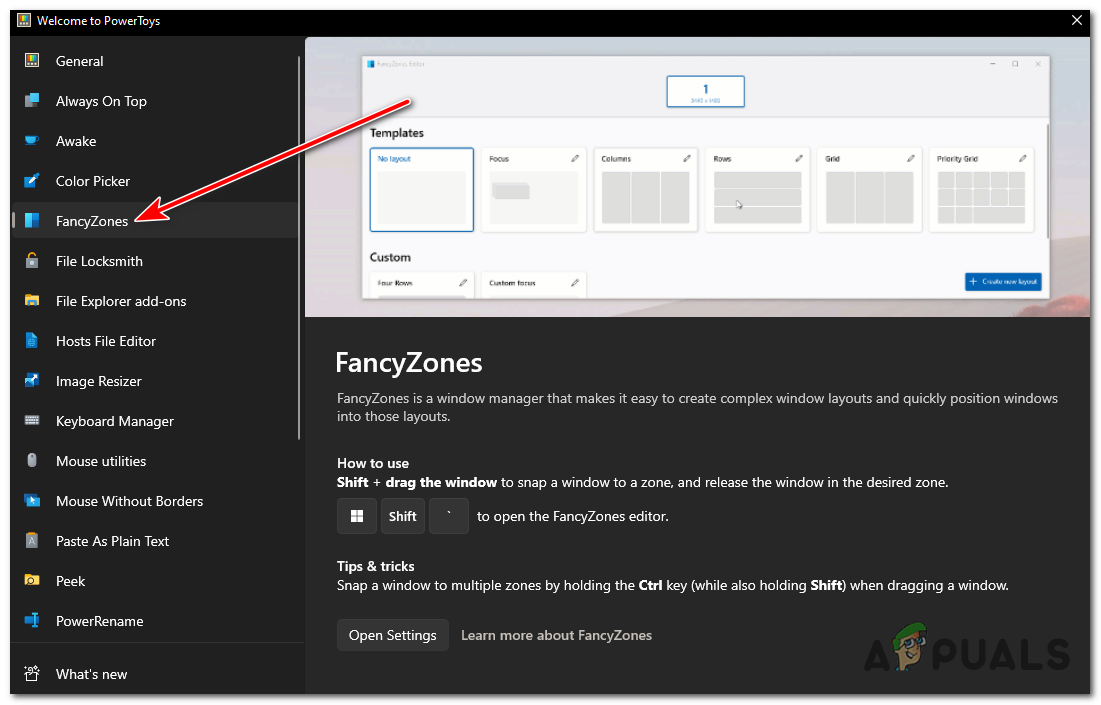
In the PowerToys window, navigate to the “FancyZones” tab. - Open the FancyZones settings by selecting “Open Settings”.
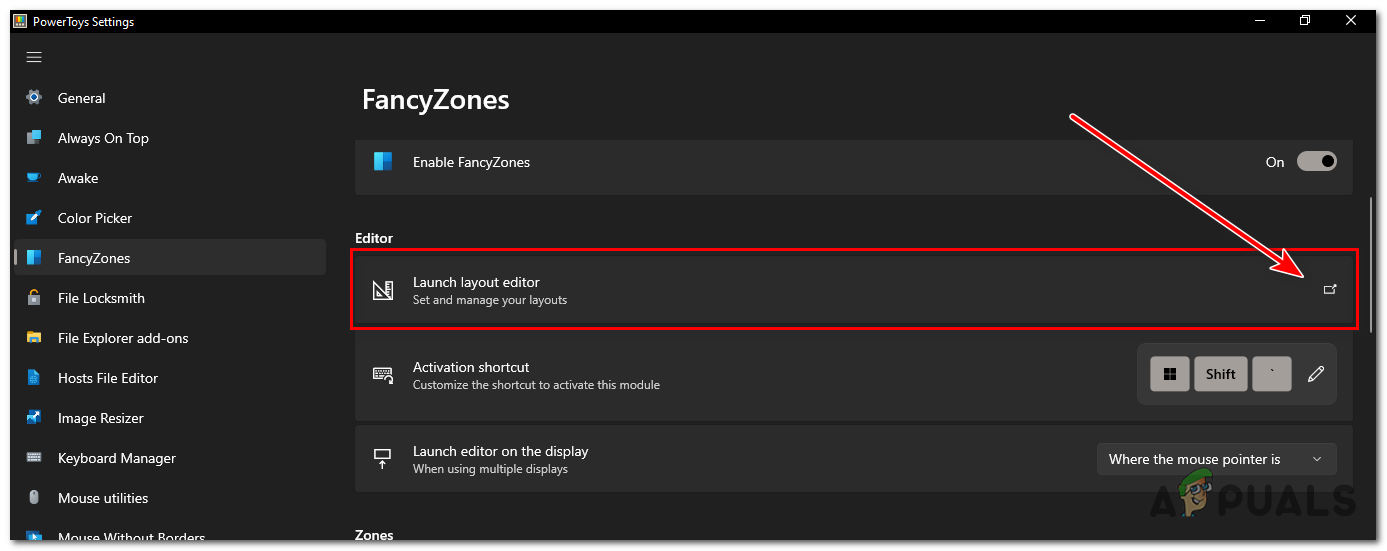
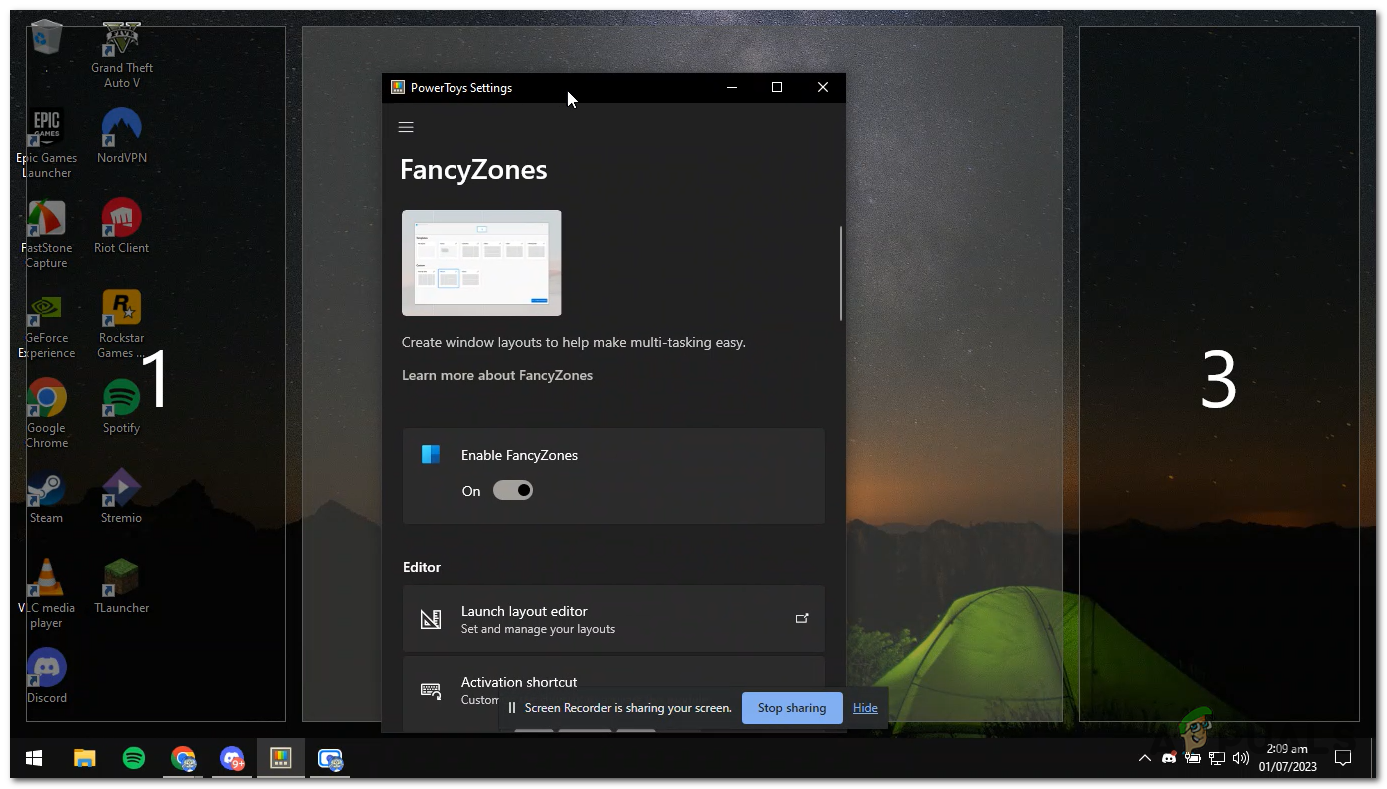
- Enable FancyZones by toggling the switch to “On”.
- Click on “launch layout editor” to create and customize your desired layouts.
Creating Custom Layouts
FancyZones allows you to create and save multiple custom layouts based on your preferences. Follow these steps to create a custom layout:
- In the FancyZones settings, click on “launch layout editor” to enter the layout editor.
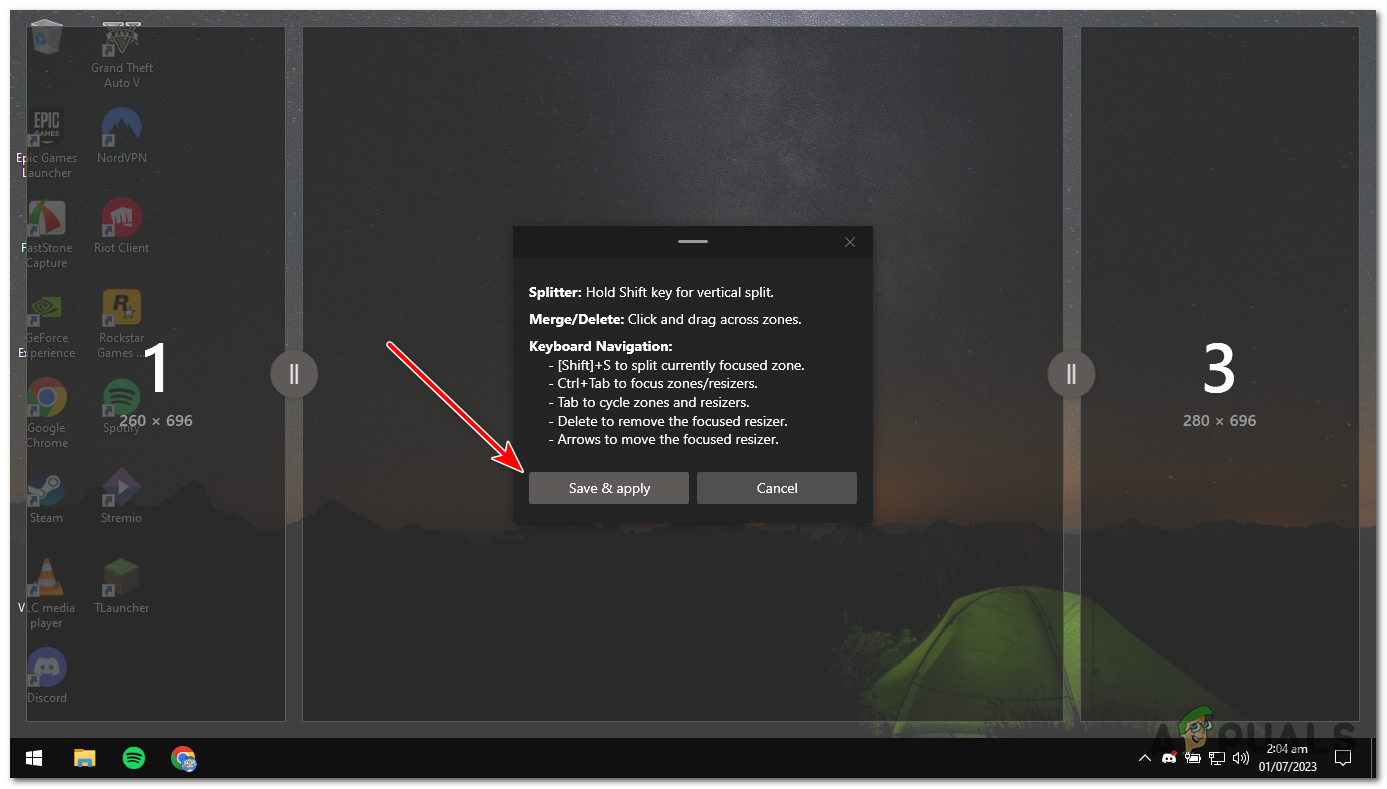
click on “launch layout editor” to enter the layout editor. - Click on “Create New Layout“” to create a new custom layout.
- Drag and drop the zone presets from the right sidebar to the layout editor canvas.
- Adjust the size and position of the zones to fit your desired screen layout.
- Save the custom layout by clicking on “Save & apply”.
Snapping Windows into Zones
Once you have configured your custom layouts, you can start snapping windows into zones using FancyZones.
- Drag the title bar of a window to the edge of the screen or to a specific zone, and hold the “Shift” key on your keyboard.
- When you approach the edge or zone, you will see a translucent preview of the snap area.
When you approach the edge or zone, you will see a translucent preview of the snap area - Release the mouse button to snap the window into the selected zone.
- You can repeat this process to snap multiple windows into different zones according to your layout.
Managing FancyZones
FancyZones provides additional features to enhance your productivity and manage your snapped windows. Here are some useful tips:
- To resize a window within a zone, hover over the edge of the window until you see a resize cursor, then click and drag.
- To move a window to a different zone, drag it by the title bar to the desired zone or edge.
- To switch between different layouts, right-click on the PowerToys icon in the system tray, hover over “FancyZones”, and select the desired layout.
- To disable FancyZones temporarily, use the keyboard shortcut “Win + `“.
Split Screen in Windows 11 using Snap Layouts
Snap Layouts is a new feature introduced in Windows 11 that allows you to organize multiple windows into pre-defined layouts. By splitting your screen, Snap Layouts enables efficient multitasking and boosts productivity. Snap Layouts is enabled by default in Windows 11, but if you have disabled it or want to confirm its status, follow these steps:
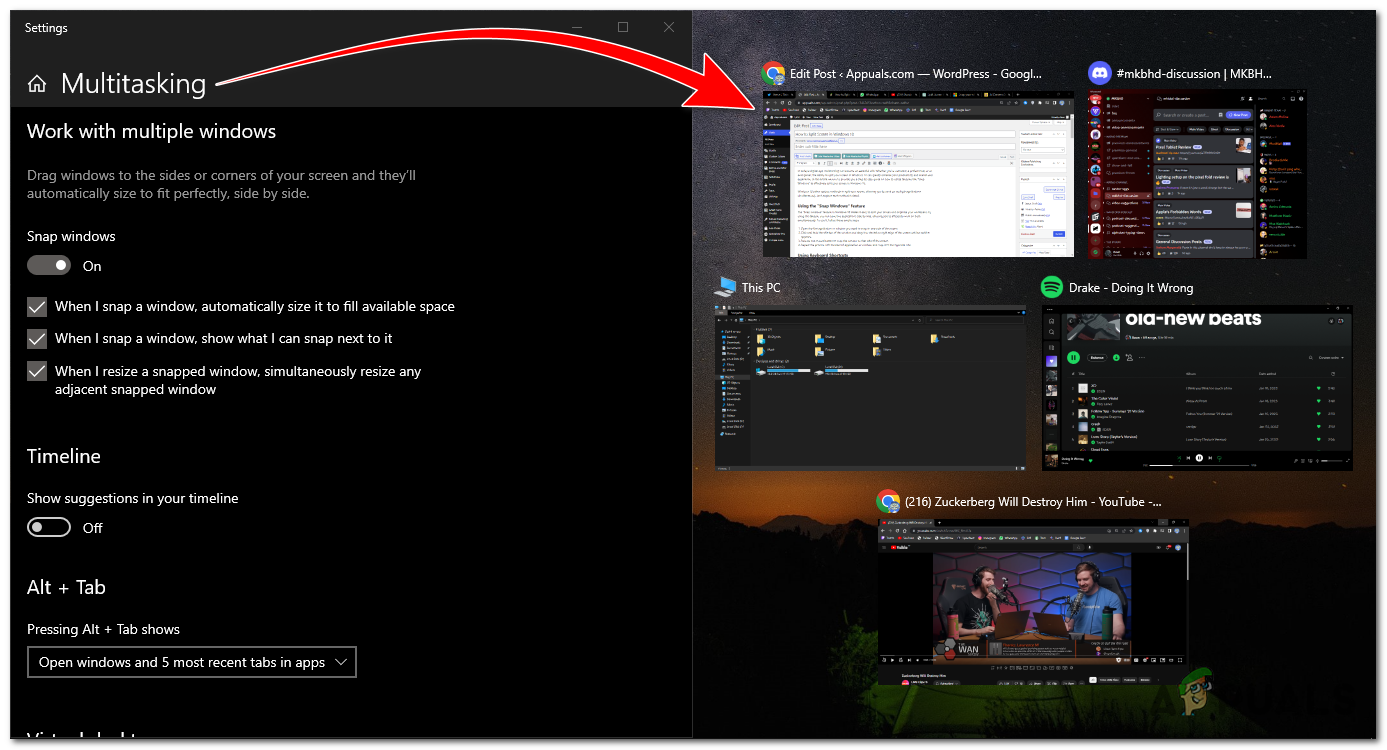
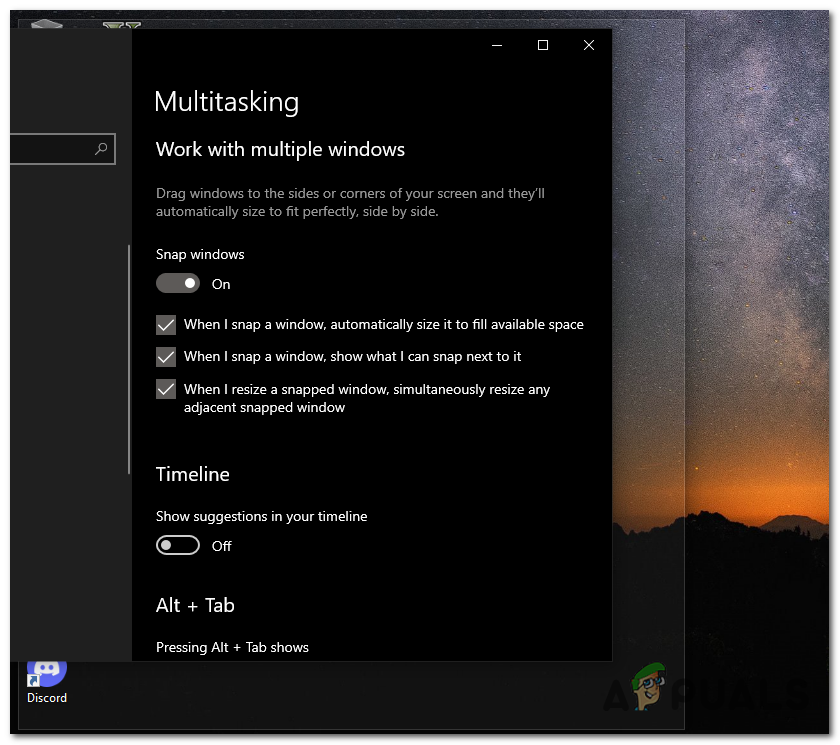
- Go to Settings > System > Multitasking > Snap windows.
- If Snap windows is toggled off, turn it back on.
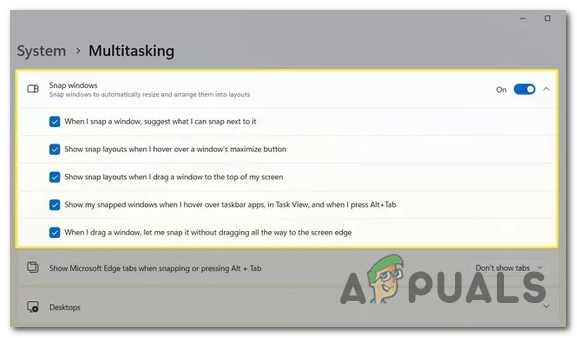
If Snap windows is disabled, turn it back on.
Once enabled, you can start taking advantage of Snap Layouts to enhance your workflow. Snap Layouts offers various options and techniques to efficiently organize and use multiple windows on your screen. Let’s explore some key features and methods:
Snapping Windows
To snap a window to a specific area of your screen using Snap Layouts, follow these steps:
- Click and hold the title bar of the window you want to snap.
- Drag the window to one side of the screen until you see a transparent overlay indicating the available snap positions.
- Release the mouse button to snap the window to the selected position.
- You can repeat this process with additional windows, and they will automatically adjust to fit the remaining space on your screen.
Switching between Snap Layouts
Windows 11 allows you to switch between different Snap Layouts easily. To switch between layouts, follow these steps:
- Click on the maximize button of a snapped window.
- A menu will appear showing the available Snap Layouts.
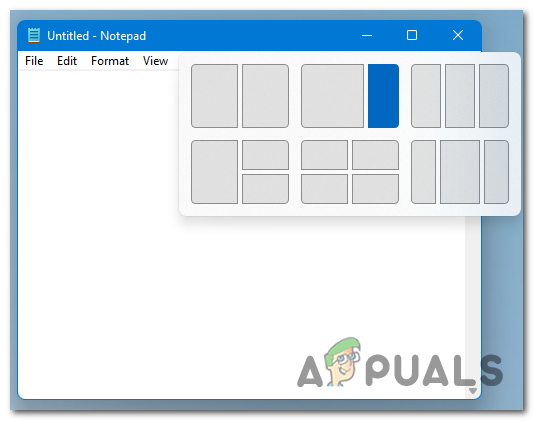
the available Snap Layouts. - Click on the desired layout to switch to it.
Customizing Snap Layouts
Windows 11 allows you to customize Snap Layouts according to your preferences. Here are a few customization options:
- Resize Snap Layouts: To adjust the size of a snapped window, hover your mouse over the boundary until it changes to a double-headed arrow. Then, click and drag the boundary to resize the window.
- Create Custom Snap Layouts: You can create your own custom Snap Layouts by manually resizing and positioning windows. Once you have arranged the windows as desired, right-click on the taskbar and select “Snap Layouts” > “Remember window layout.”
- Saving and Reusing Snap Layouts: If you frequently work with a particular set of windows, you can save the Snap Layout for future use. To do this, hover over the maximize button of a snapped window and click the pin icon to save the layout. Later, you can restore the layout by clicking on its thumbnail in the Snap Layouts menu.
Conclusion
Splitting your screen in Windows is a valuable skill that can significantly boost your productivity and multitasking abilities. By using the Snap Windows feature, keyboard shortcuts, FancyZones and Snap Layouts, you can efficiently work with multiple applications side by side. Take advantage of these built in features and explore the possibilities of a more organized and seamless computing experience.
Additional tips
- Experiment with different configurations: Don’t be afraid to try different layouts and see what works best for you.
- Customize Snap settings: Go to “Settings > System > Multitasking” to adjust the snapping behavior and personalize it according to your preferences.
- Use external monitors: If you have multiple monitors, you can extend your workspace and split your screen across different displays for an even more immersive multitasking experience.
How to Split Screen in Windows 10 - FAQs
The “Snap windows” feature allows you to split your screen by snapping applications to either side. Simply drag the window to the left or right edge of the screen until an outline appears, and release it to snap the window into place.
Windows 10 provides convenient keyboard shortcuts for splitting your screen. Press “Win + Left Arrow” to snap the current window to the left side of the screen, and “Win + Right Arrow” to snap it to the right side. “Win + Up Arrow” maximizes the current window, while “Win + Down Arrow” minimizes or restores it.
To resize the windows that are snapped to your screen, hover the cursor over the divider between the two windows until it turns into a double-headed arrow. Click and drag the divider to adjust the size of each window according to your preference.
To access Snap Layouts, click the maximize button (the square icon) in the title bar of any window. A menu will appear, displaying various layout options. Select the desired layout, and the windows will automatically snap into place.
Reviewed by Muhammad Zubyan


