Snipping Tool for Mac: How to Screenshot Effortlessly
 Reviewed by Huzaifa Haroon
Even though the Snipping Tool is a Windows feature, all Macs come with their own built-in screenshot tool that lets you easily capture clean and sharp screenshots. All you need to do is press “Command + Shift + 4” at the same time. It’s that simple.
In this article, we’ll explore everything you need to know when using the snipping tool on a Mac.
When it comes to using the snipping tool on Mac, there isn’t just one way to take screenshots. Instead, the built-in tool lets Mac users capture their screen in several ways. From taking a snapshot of your whole screen to selecting a specific area, you just need to use the correct key combinations.
Here are a few different methods to capture your screen using the built-in snipping tool for Mac:
Why There’s No “Apple Snipping Tool” App
If you came here looking for an Apple version of the Windows Snipping Tool app, here’s the short answer: there isn’t one — and you don’t need it. macOS has built-in screenshot shortcuts that do everything Snipping Tool does, plus a more powerful screenshot toolbar (⌘ + Shift + 5) that includes screen recording. Most Mac users never install a separate snipping app because the built-in tools are already excellent.
Mac Screenshot Shortcuts at a Glance
| Shortcut | What it captures | Saved to |
|---|---|---|
| ⌘ + Shift + 3 | Entire screen | Desktop (PNG) |
| ⌘ + Shift + 4 | Selected area (drag to select) | Desktop (PNG) |
| ⌘ + Shift + 4, then Spacebar | Single window or menu | Desktop (PNG) |
| ⌘ + Shift + 5 | Screenshot toolbar (with screen recording option) | Choose location |
| Add Control to any shortcut above | Same capture, but to clipboard instead of file | Clipboard (paste with ⌘ + V) |
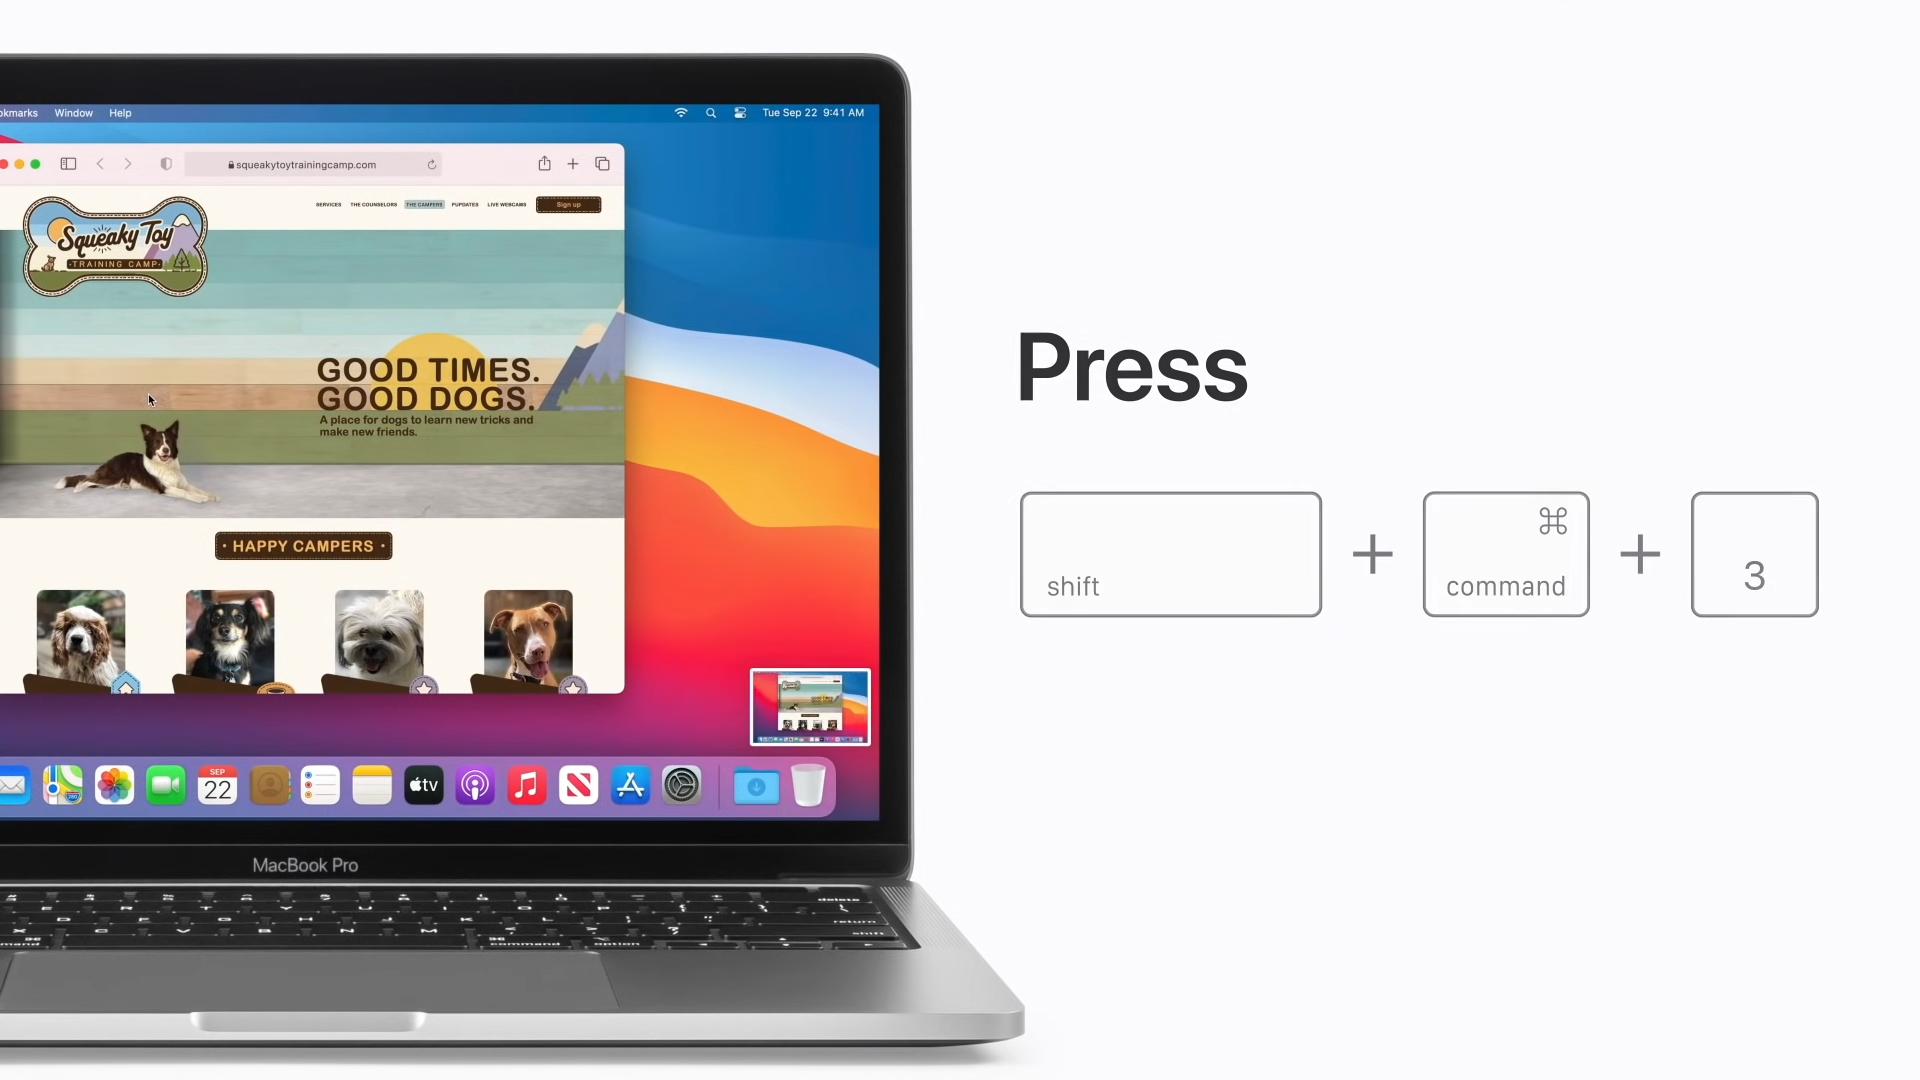
1. Capture Your Entire Screen (⌘ + Shift + 3)
If you want to screenshot your whole Mac screen, simply use the combination “Command + Shift + 3”. This will capture your entire main window. Once it’s done, your image will appear as a small thumbnail in the bottom-right corner of your screen.
You can also open your screenshot in the Preview app to crop, add text, and use other editing options.
2. Capture a Specific Portion (⌘ + Shift + 4)
If you only want to capture a certain area—like an Instagram post or a funny meme—this shortcut is perfect.
- Press Command + Shift + 4.
- A crosshair will appear on your screen.
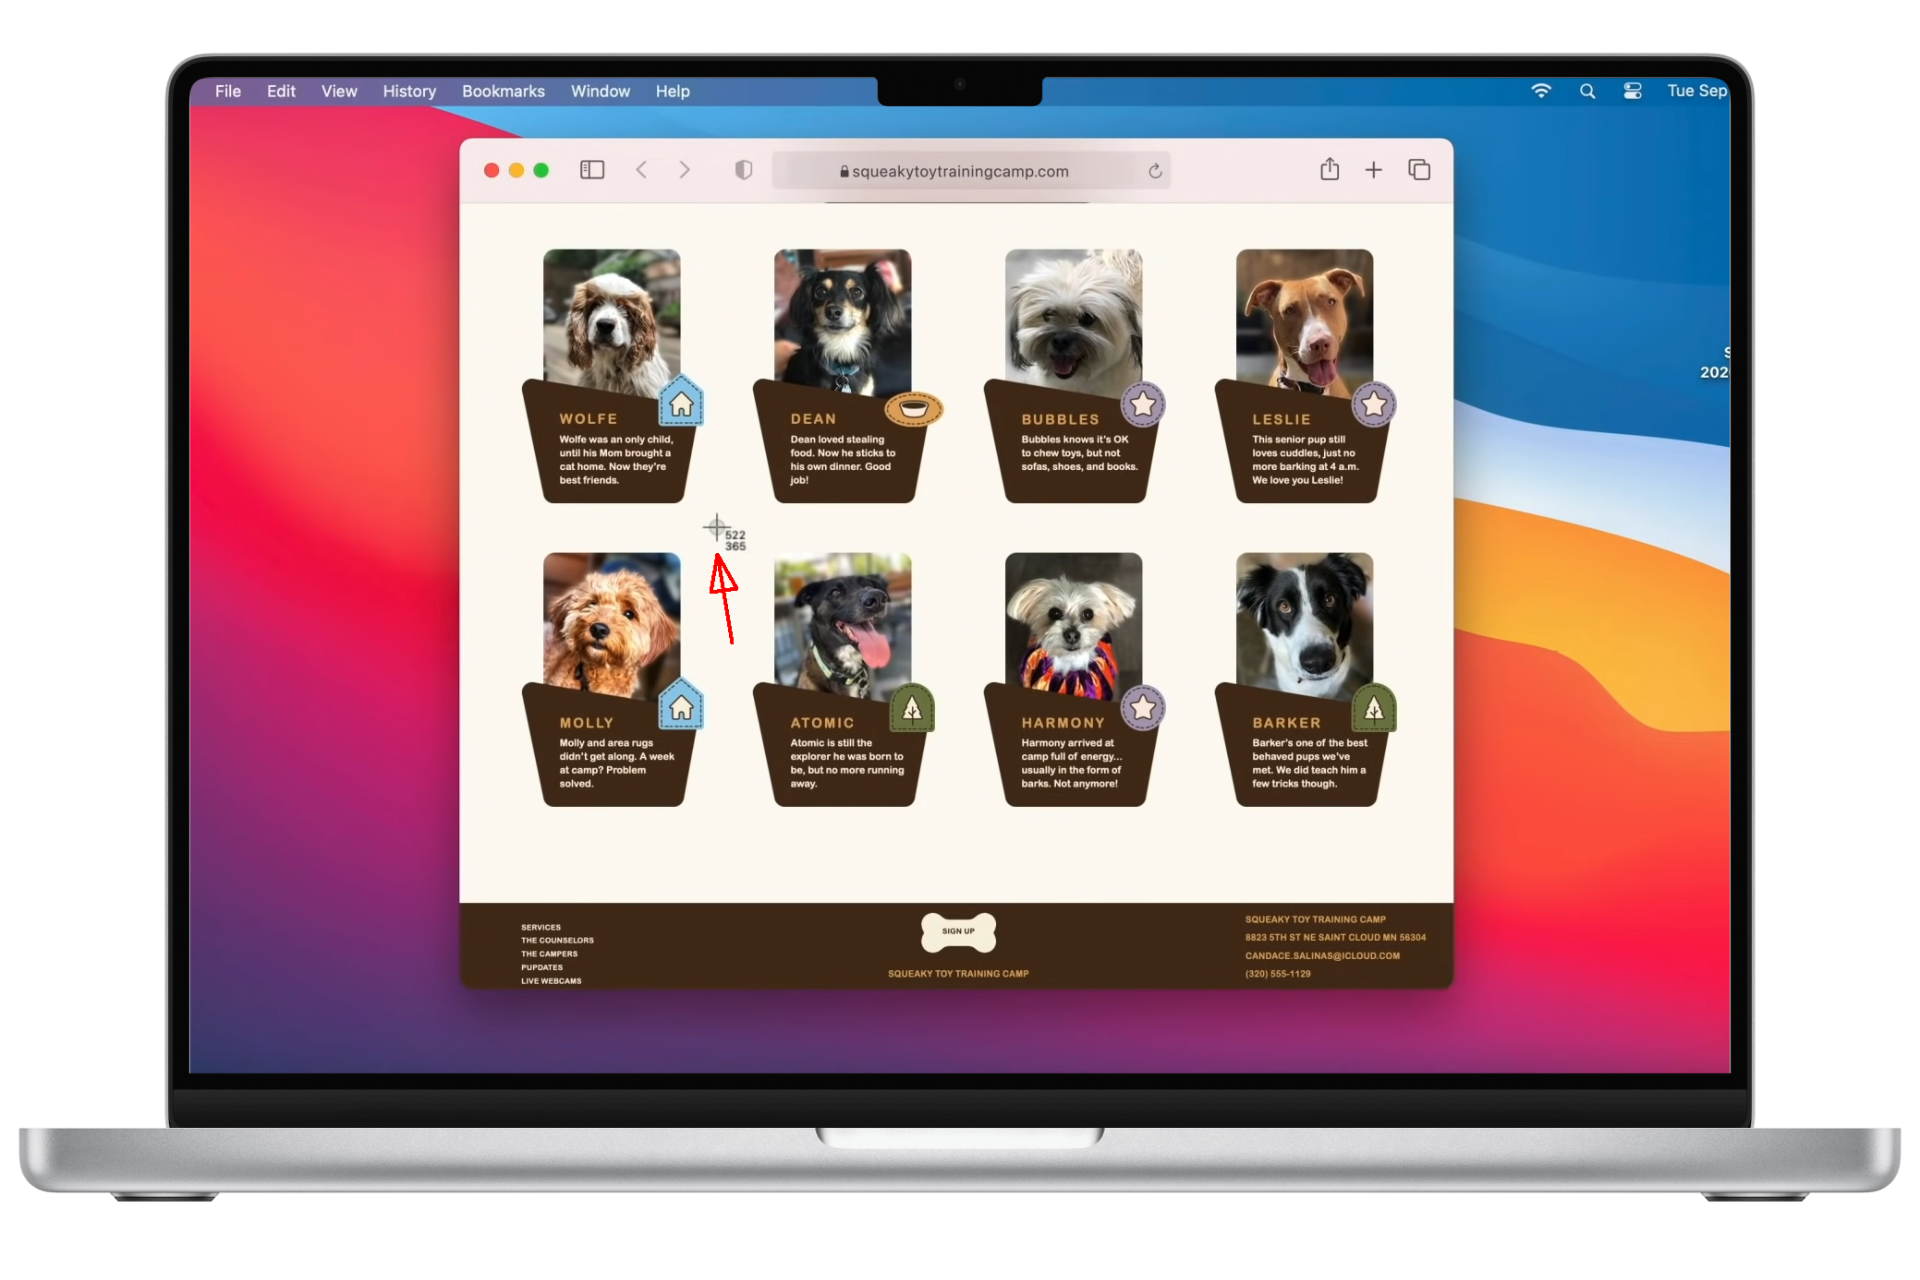
Crosshair should look like this - Move the crosshair and click and drag to select the area you want to capture.
Drag the crosshair to select your screenshot
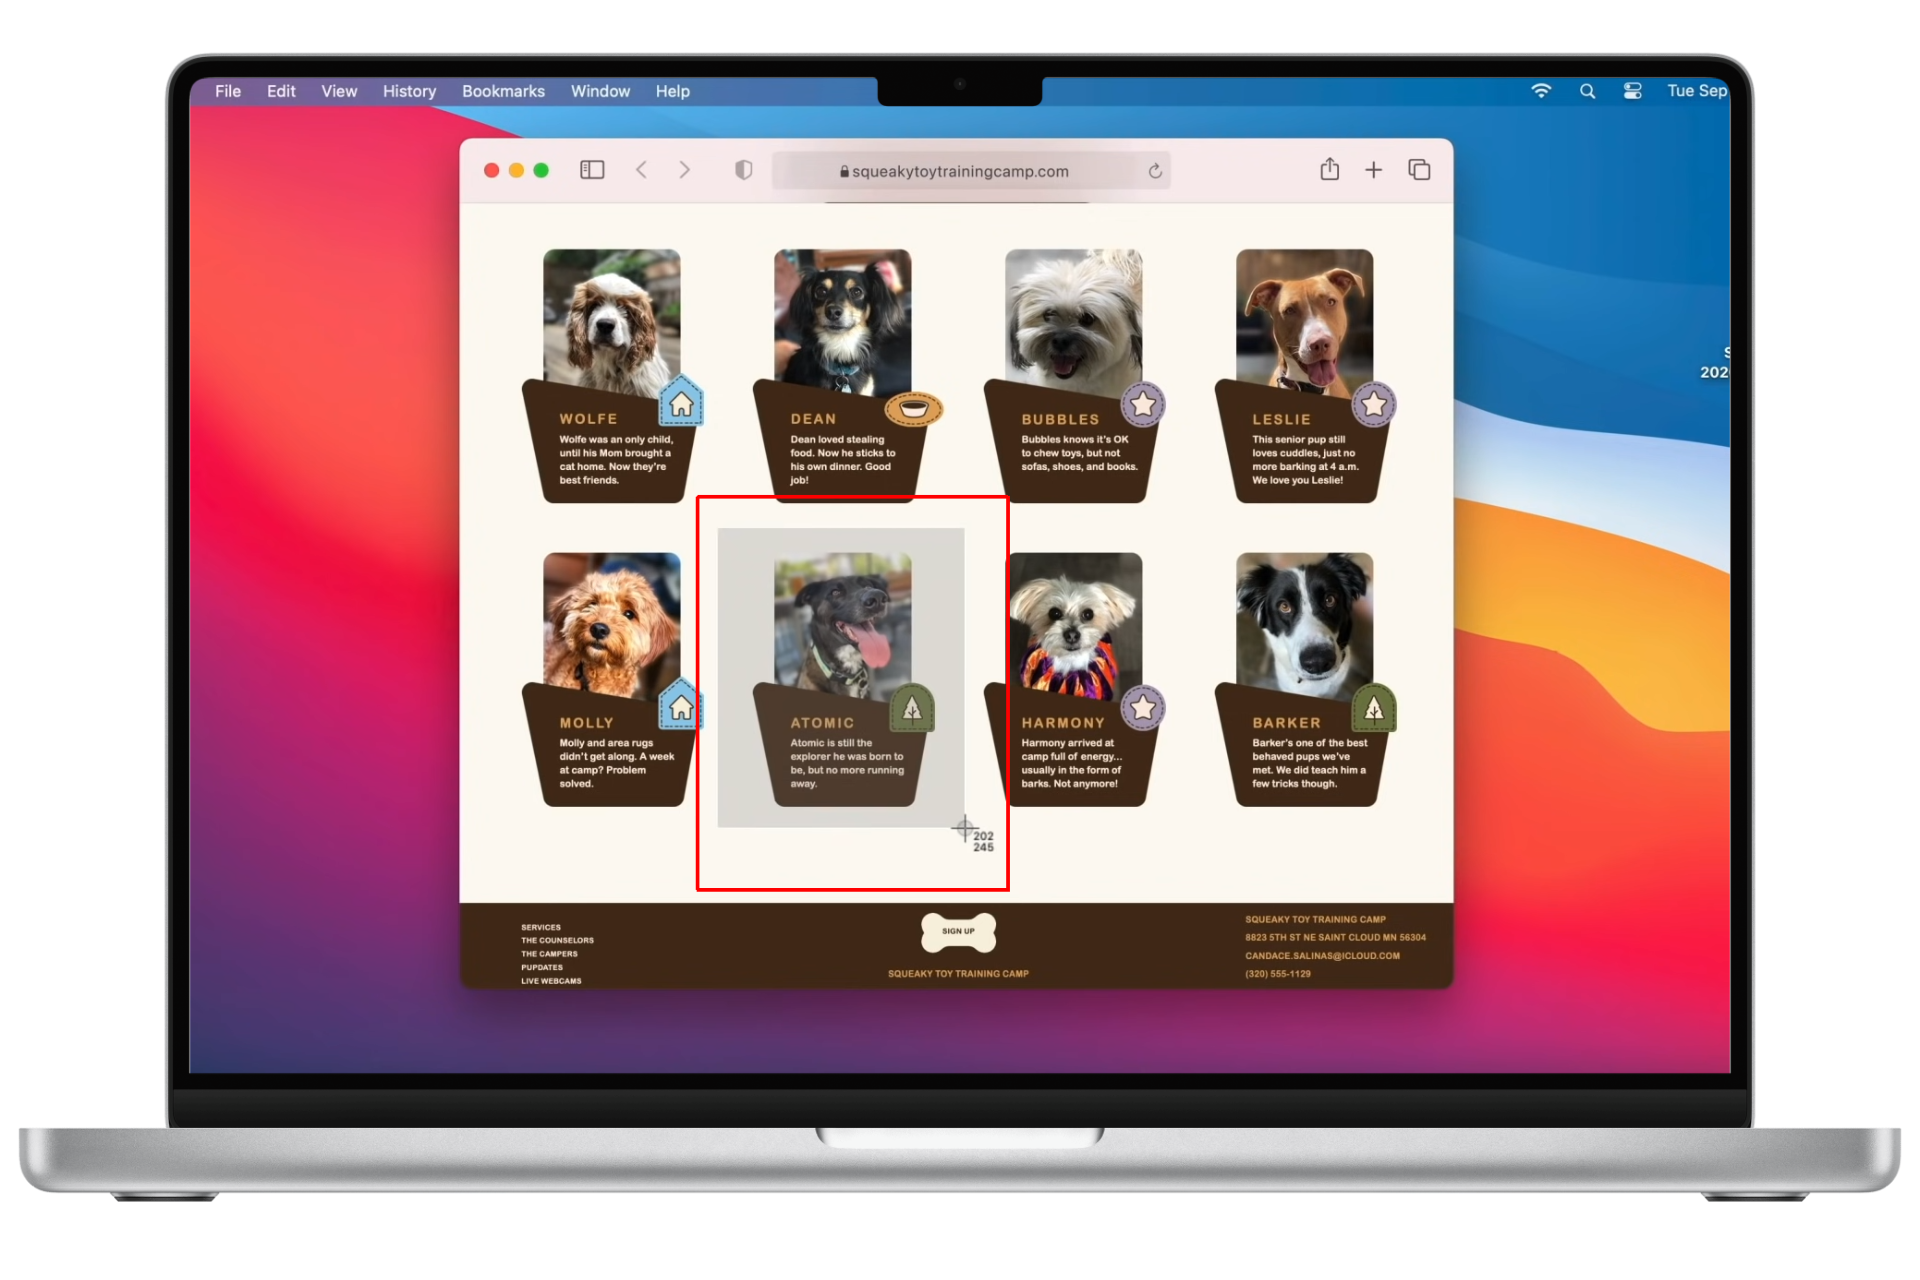
As you make your selection, the chosen area will become darker. If you need to move your selection before capturing, just hold down the spacebar while dragging, then release the mouse button.
If the shortcut isn’t working, check out our troubleshooting guide: How to Fix Command Shift 4 Shortcut Not Working on MacOS.
Bonus: Video Captures Using Snipping Tool
Besides taking screenshots, the snipping tool can also record videos of your screen. There’s no quick shortcut for recording, but you can open the snipping tool menu by pressing ⌘ + Shift + 5 and select the recording options from there.
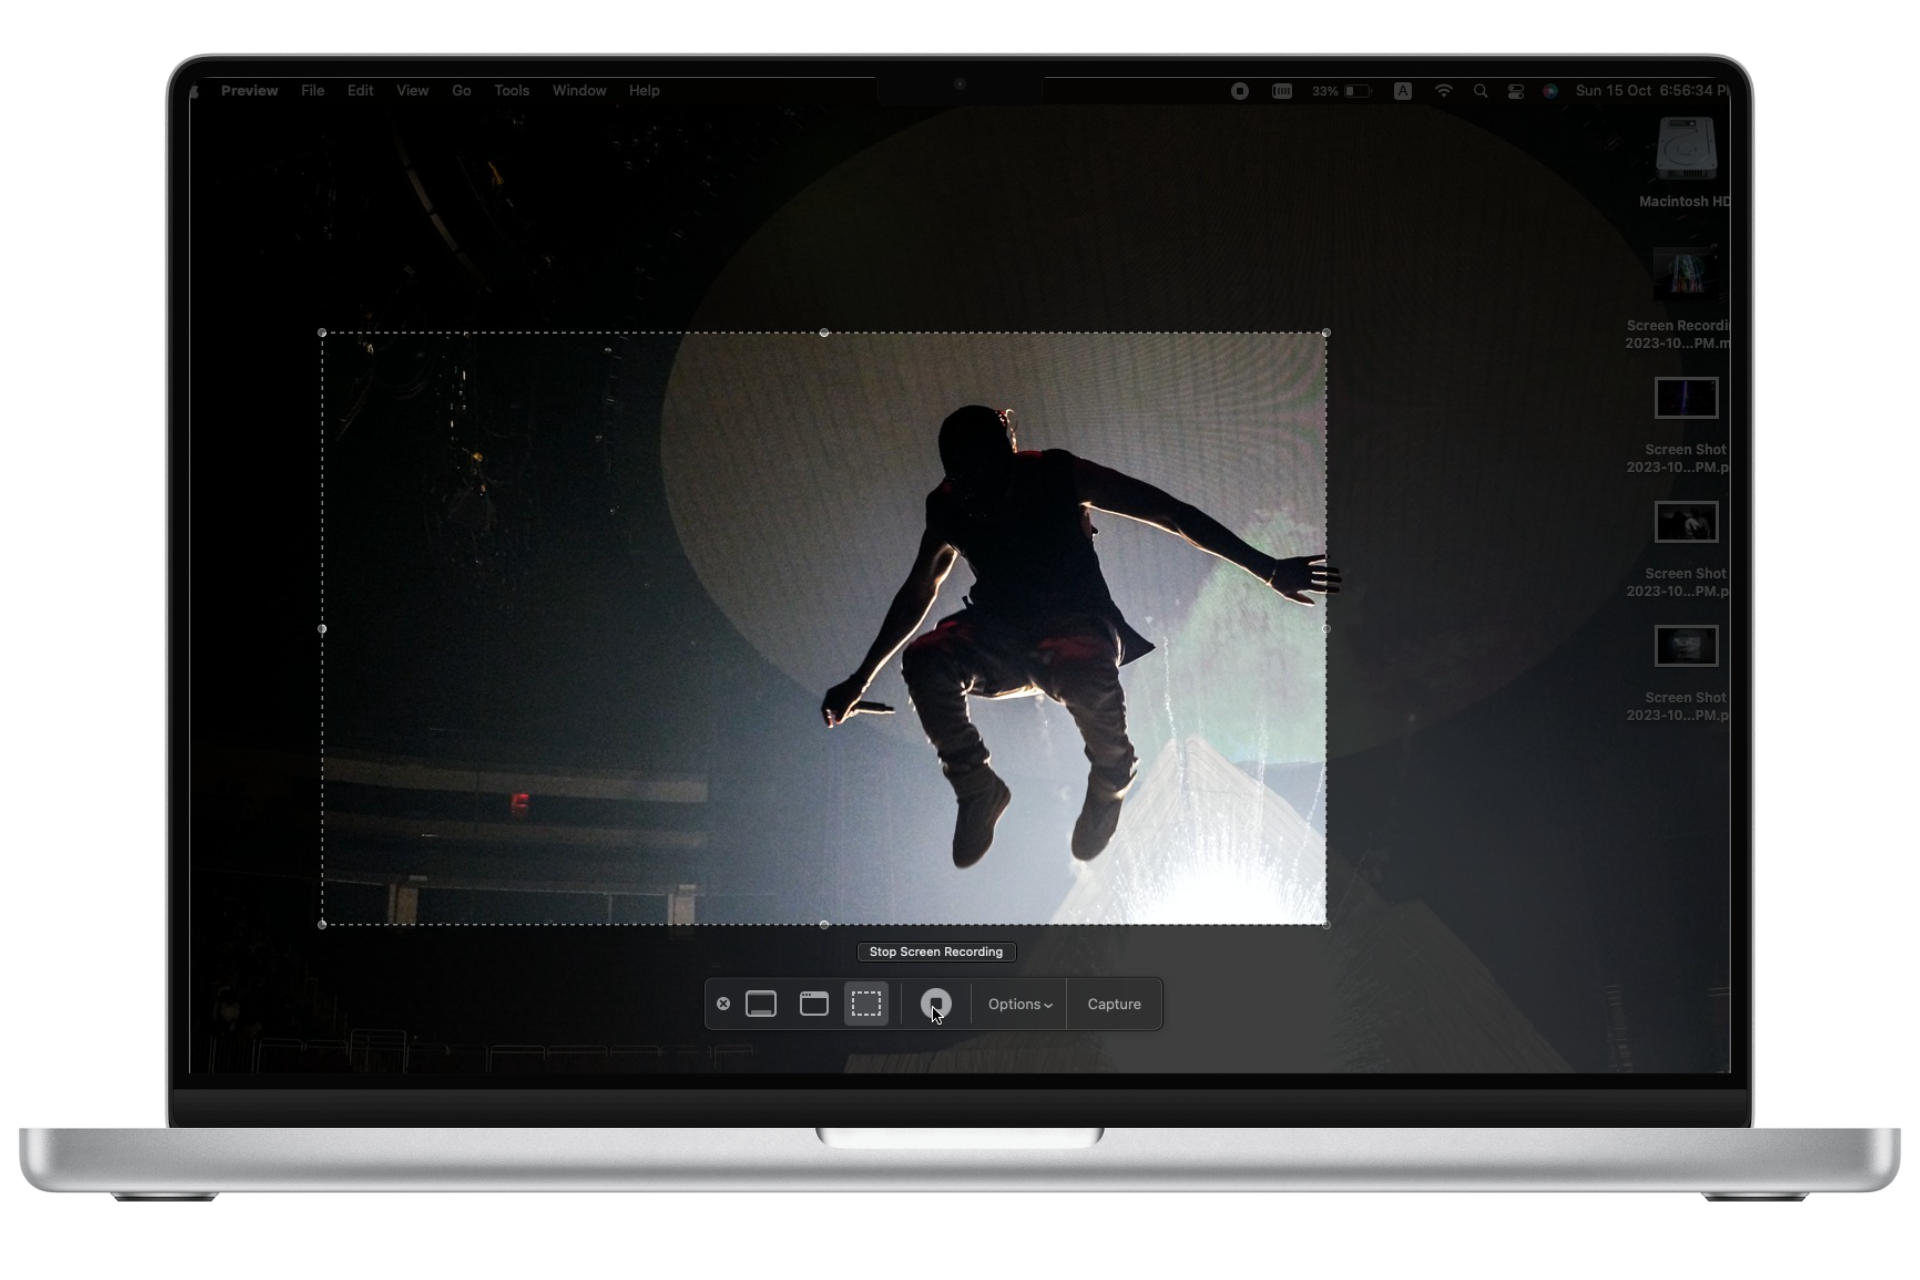
When you enter recording mode, the “Capture” button turns into a “Record” button, which starts the screen recording.

To stop the recording, open the screenshot toolbar again (⌘ + Shift + 5) and click the Stop Screen Recording button.
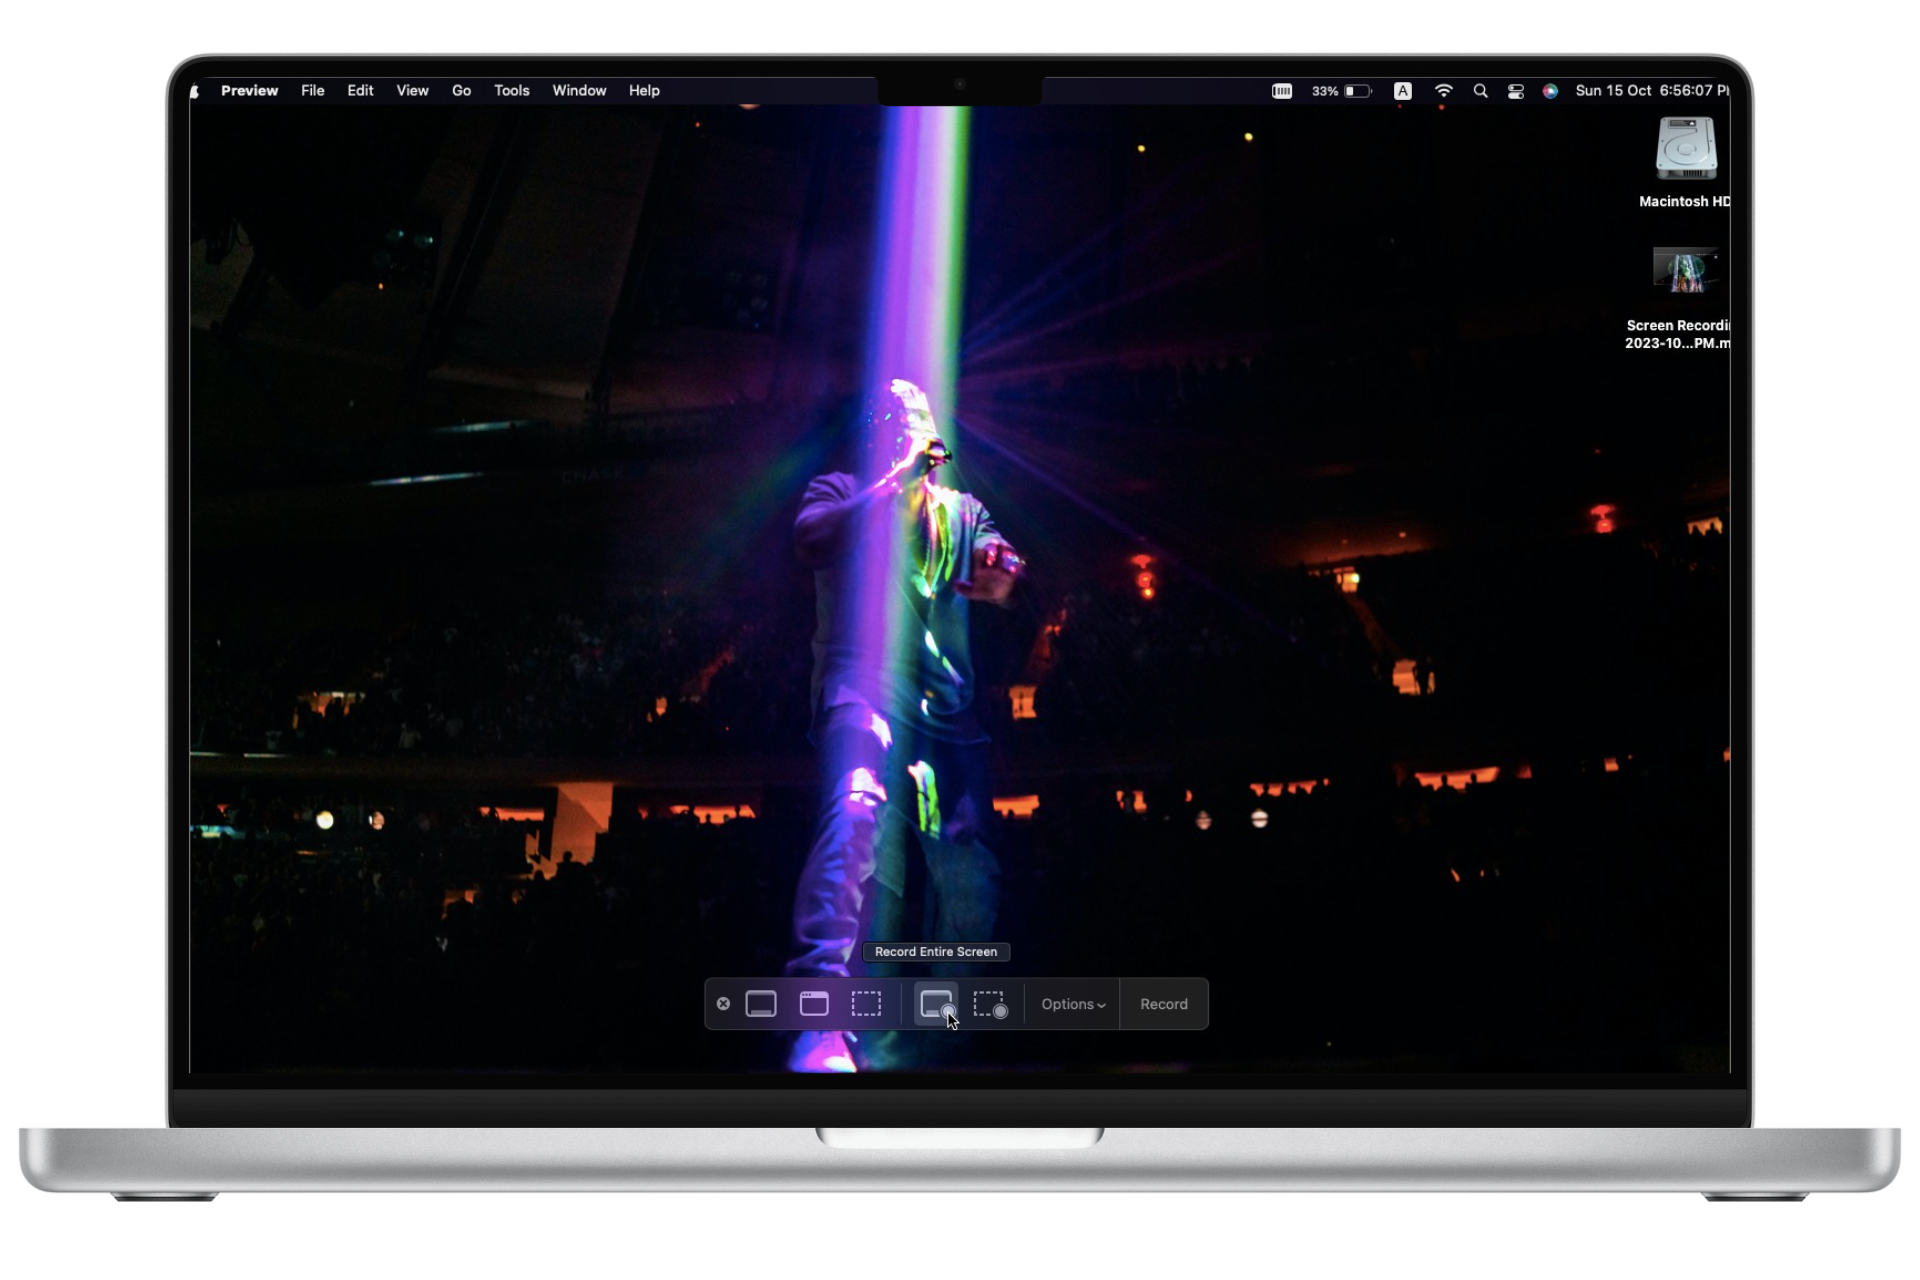
Within the main control menu, you’ll see two main options: Record Entire Screen and Record Selected Portion.
- Record Entire Screen: This option records everything on your screen.
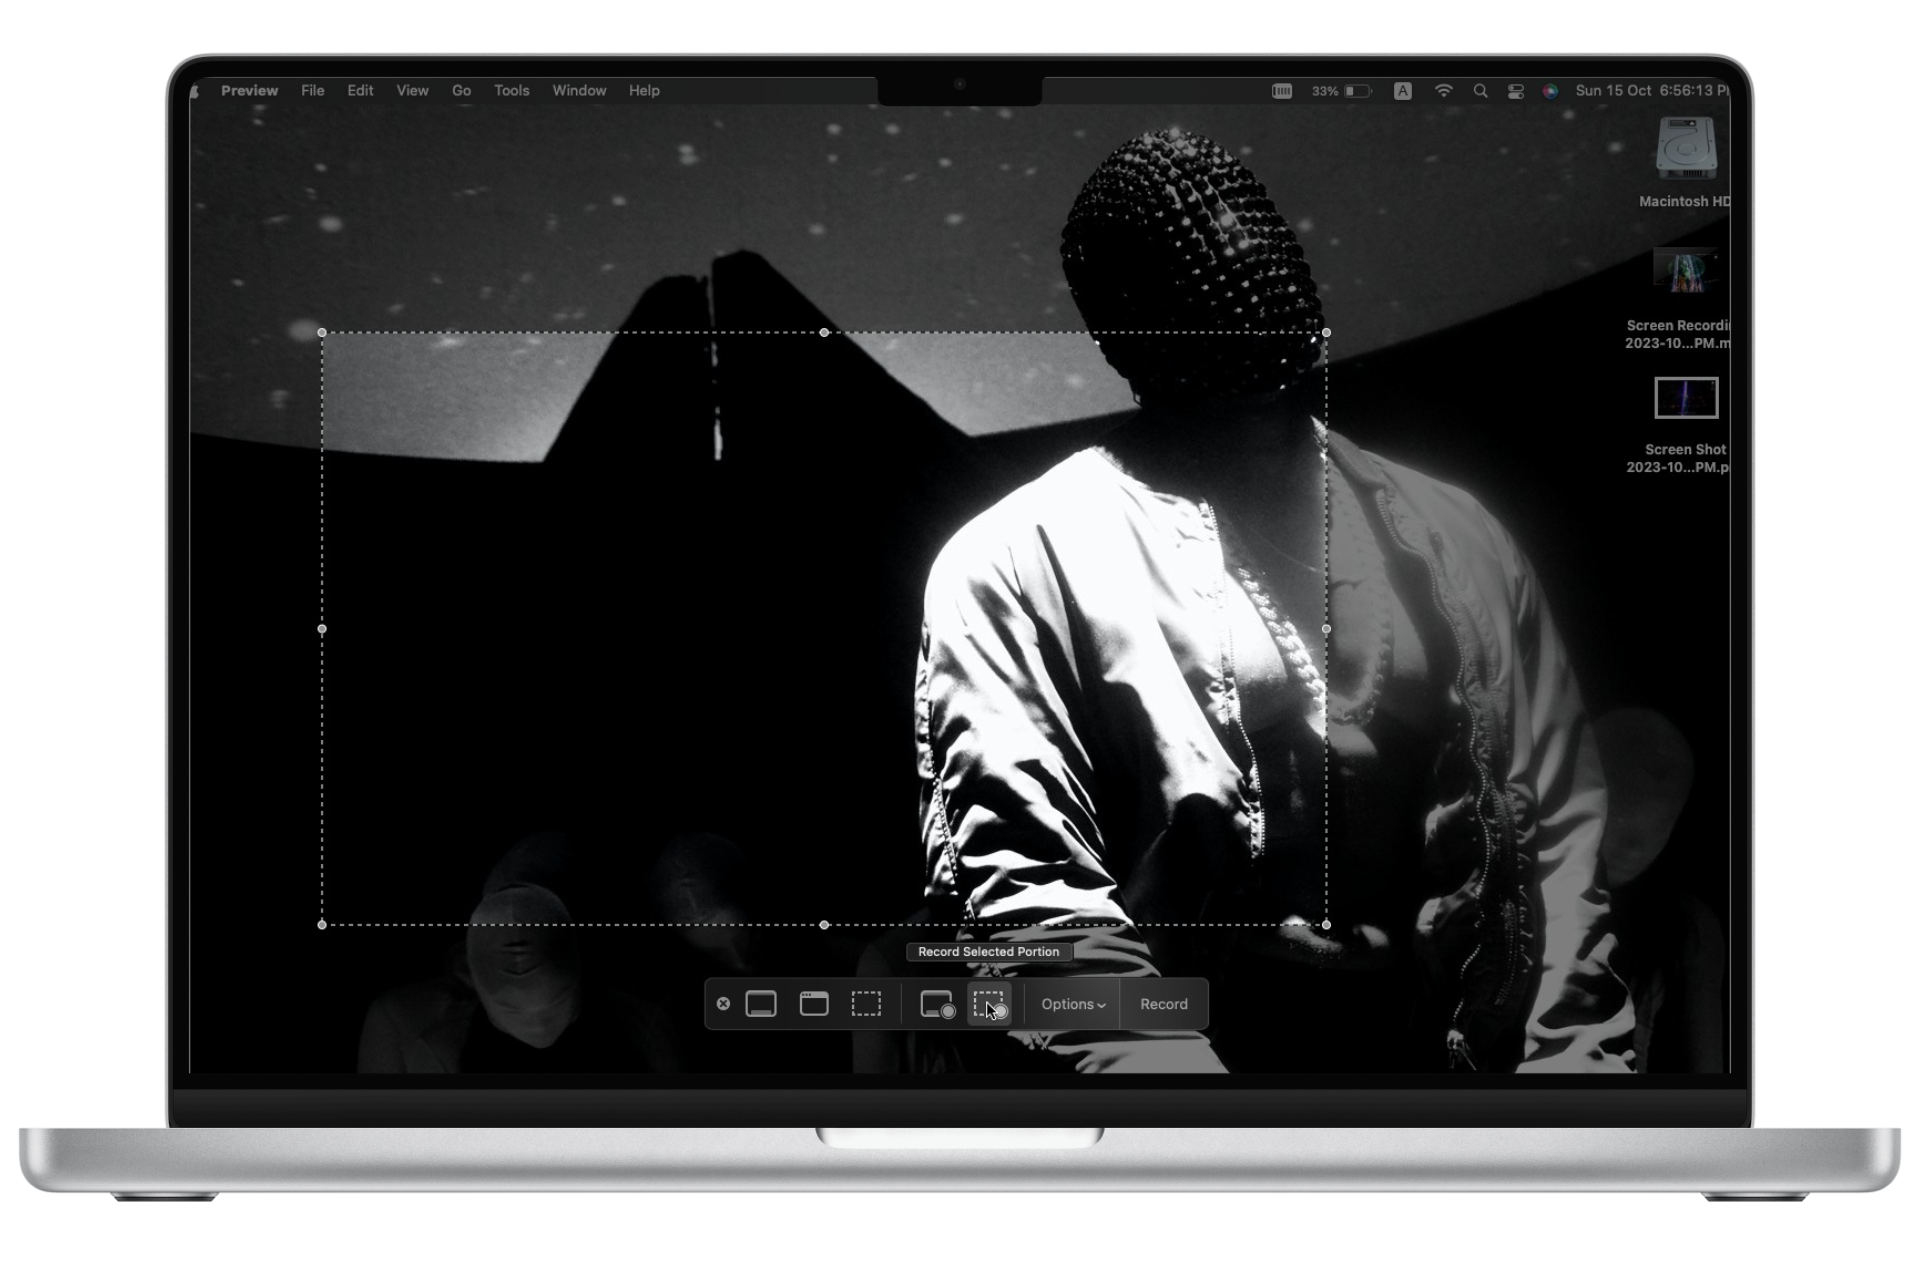
- Record Selected Portion: This option lets you choose and resize a specific part of the screen to record only that portion.
3. Add Screenshot Option to Touch Bar
One cool thing about the MacBook is the Touch Bar—a responsive OLED strip above the keyboard. The touch bar replaces traditional shortcut keys and gives you quick access to lots of tools and controls.
Besides basic functions like Do Not Disturb or Siri, you can use the touch bar for media controls, favorite sites, editing tools, and more.
If you don’t want to memorize keyboard shortcuts and prefer easy access to the Snipping Tool dashboard, you can add the screenshot shortcut to your touch bar with these steps:
- Click the View option in the menu bar.
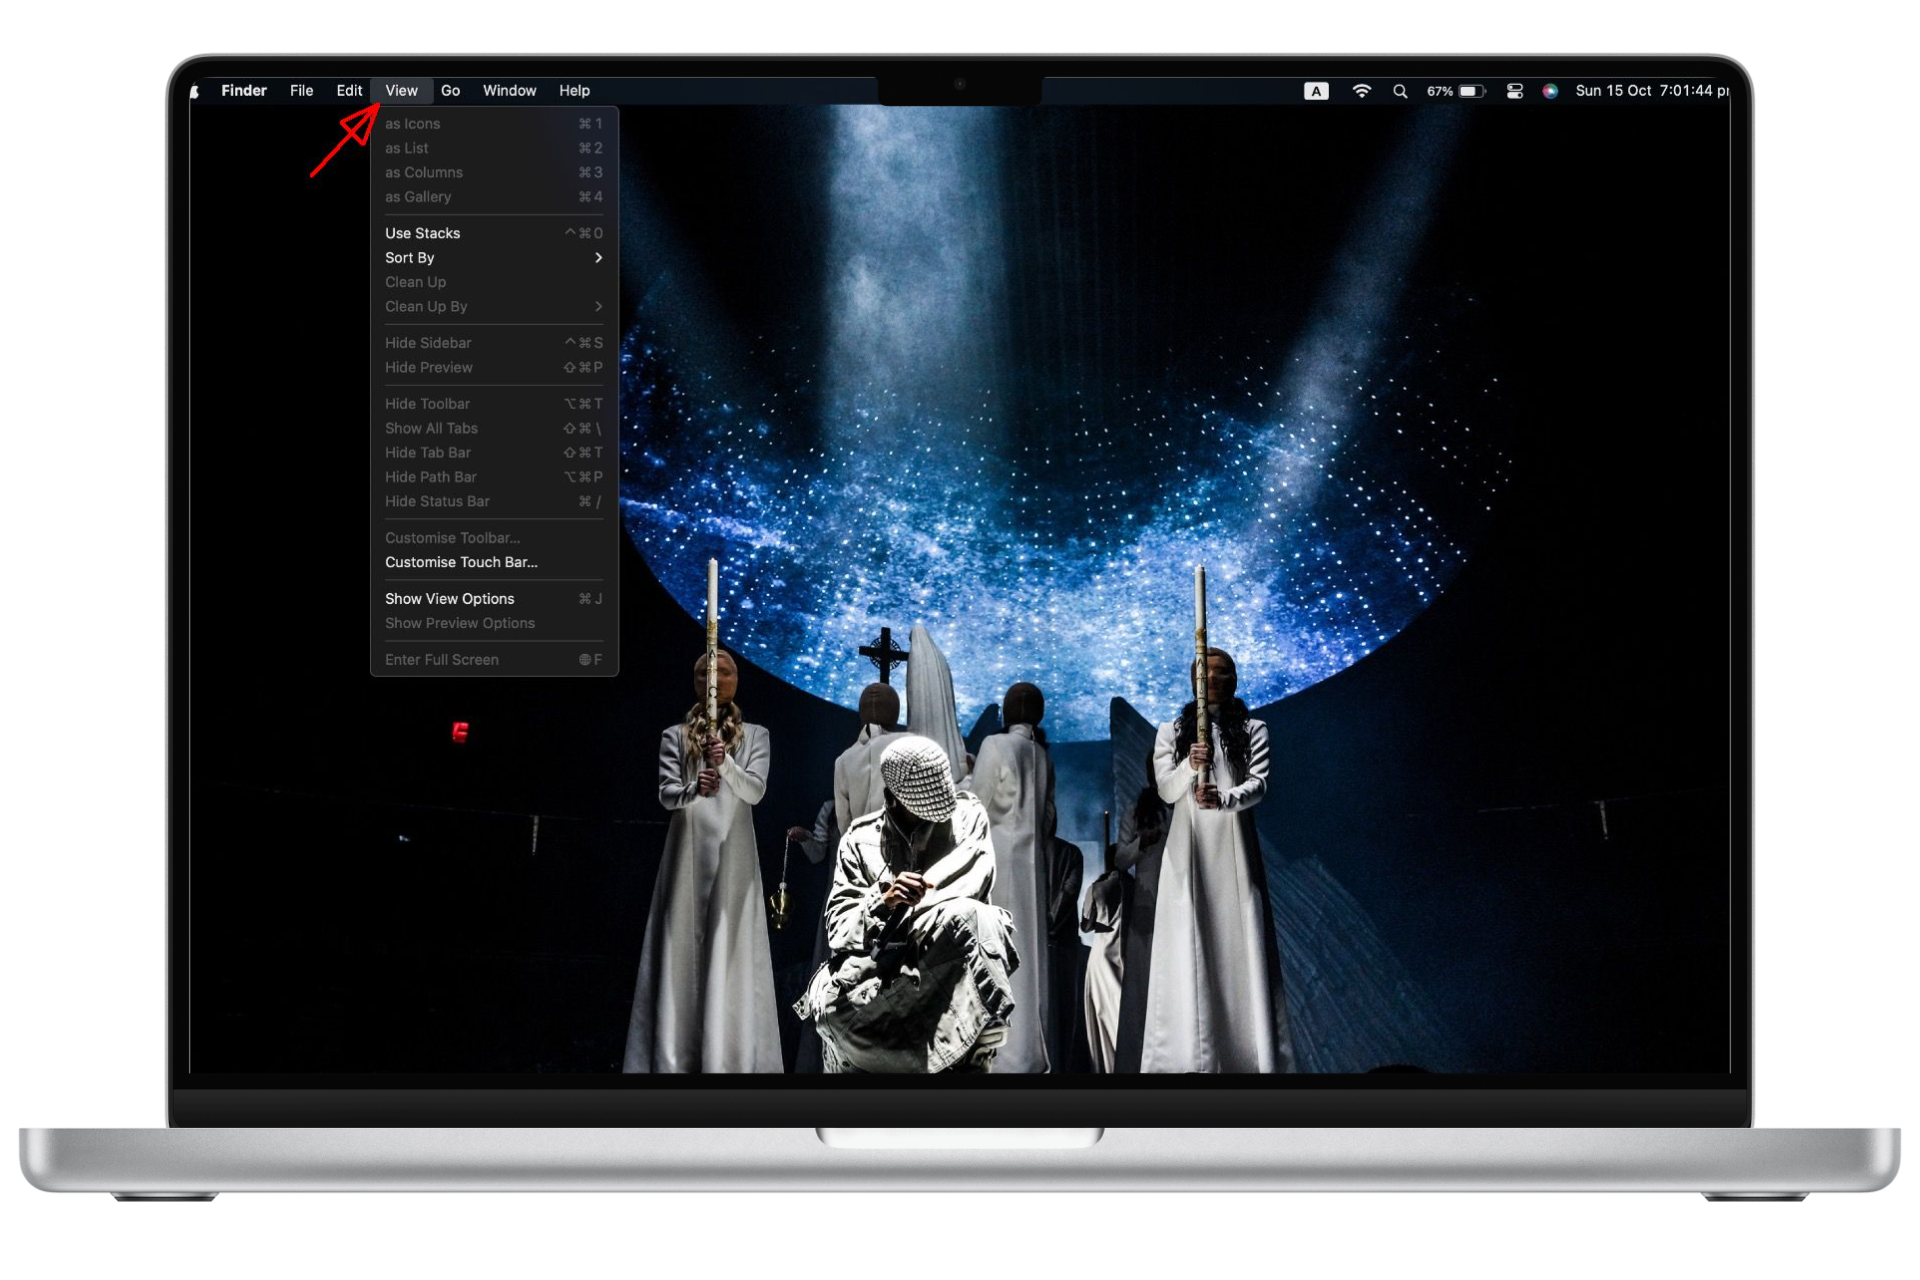
Click on the View tab - Select the “Customize Touch Bar” option.
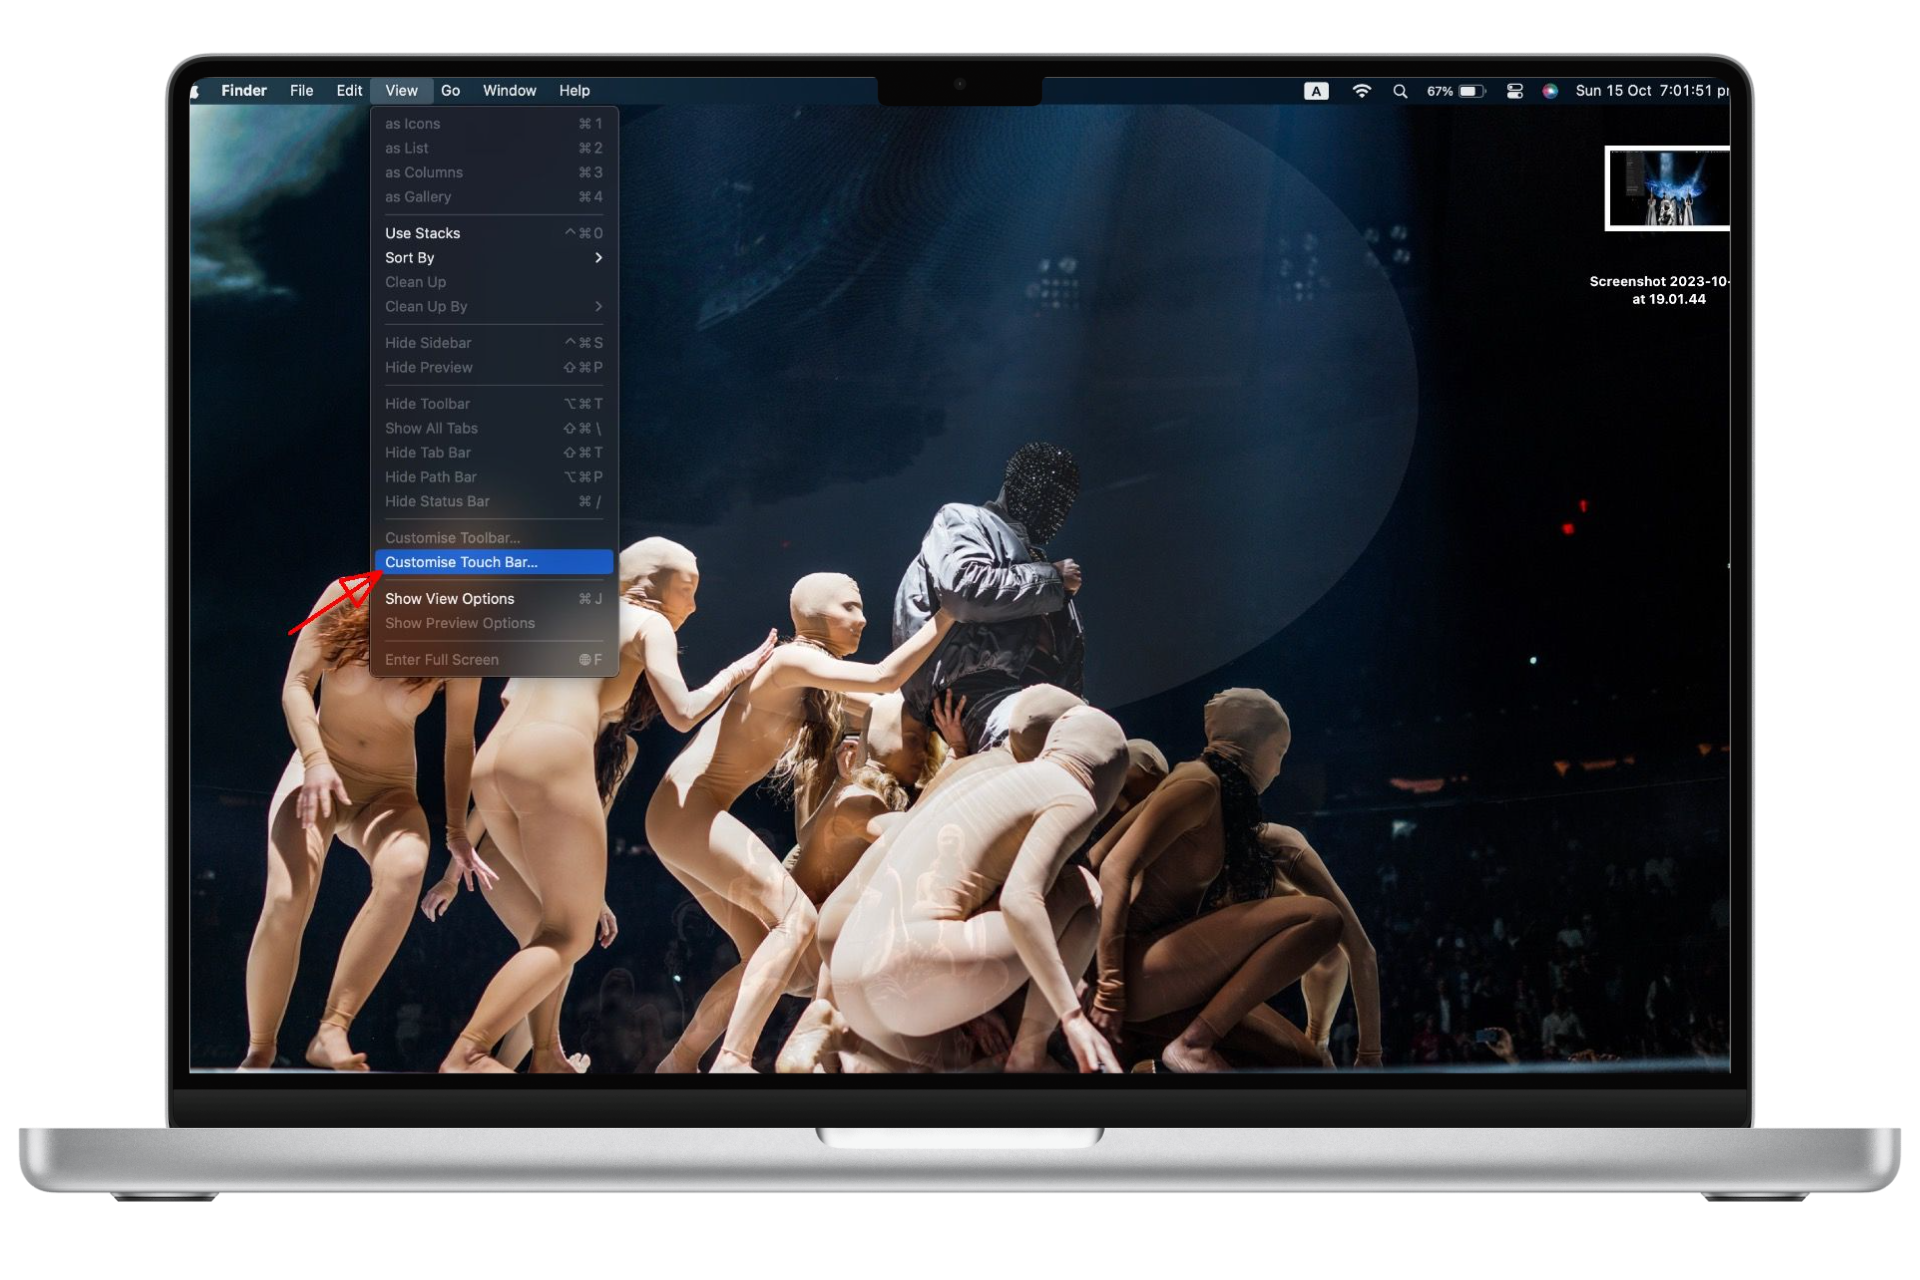
Choose the Customize Touch Bar option - Pick which icons and functions you want on your touch bar.
- To add the Screenshot tool, look for the camera icon.
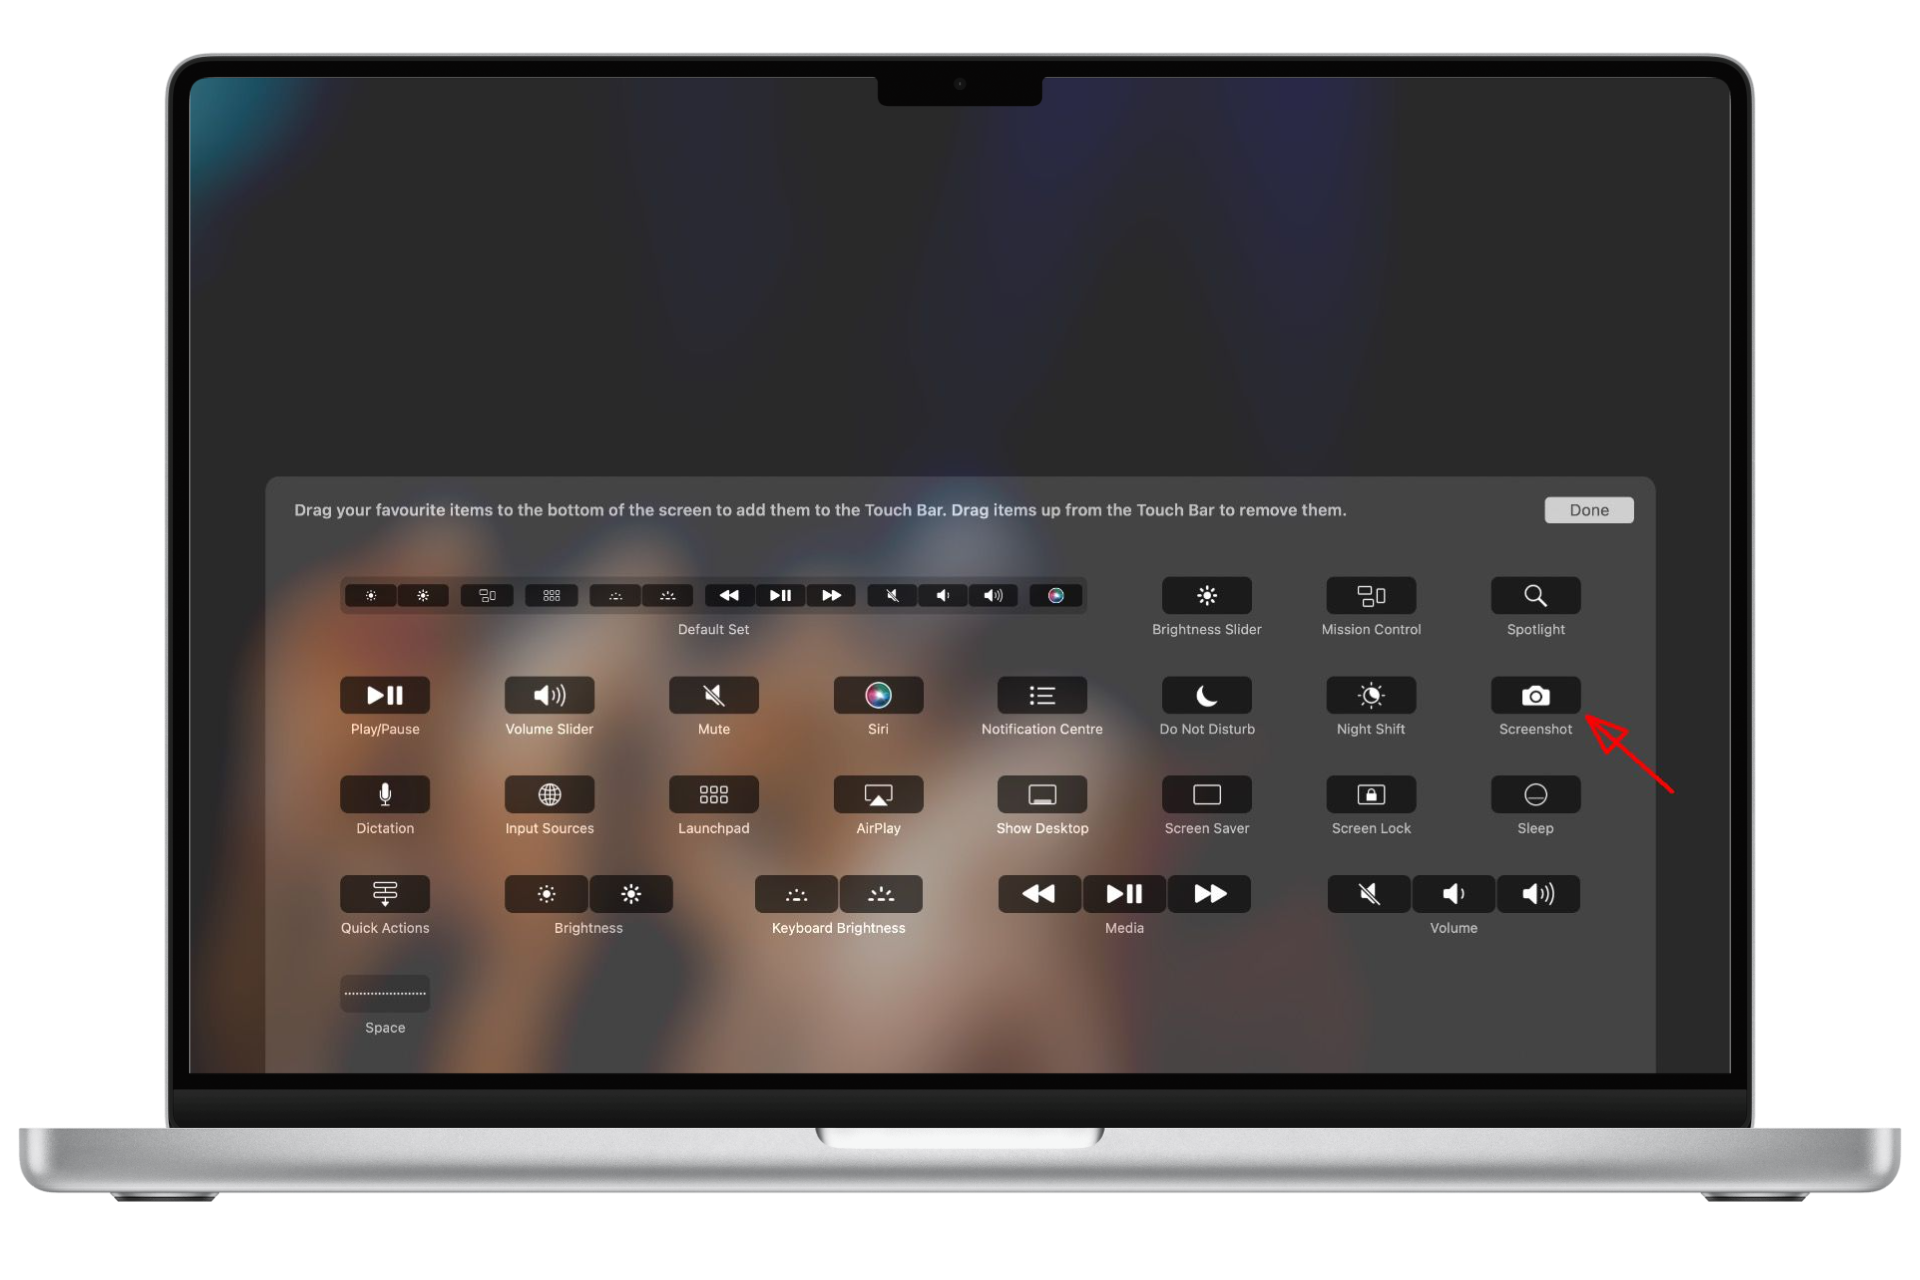
Look for this camera icon - Drag the camera icon down to your touch bar and it will appear right away.
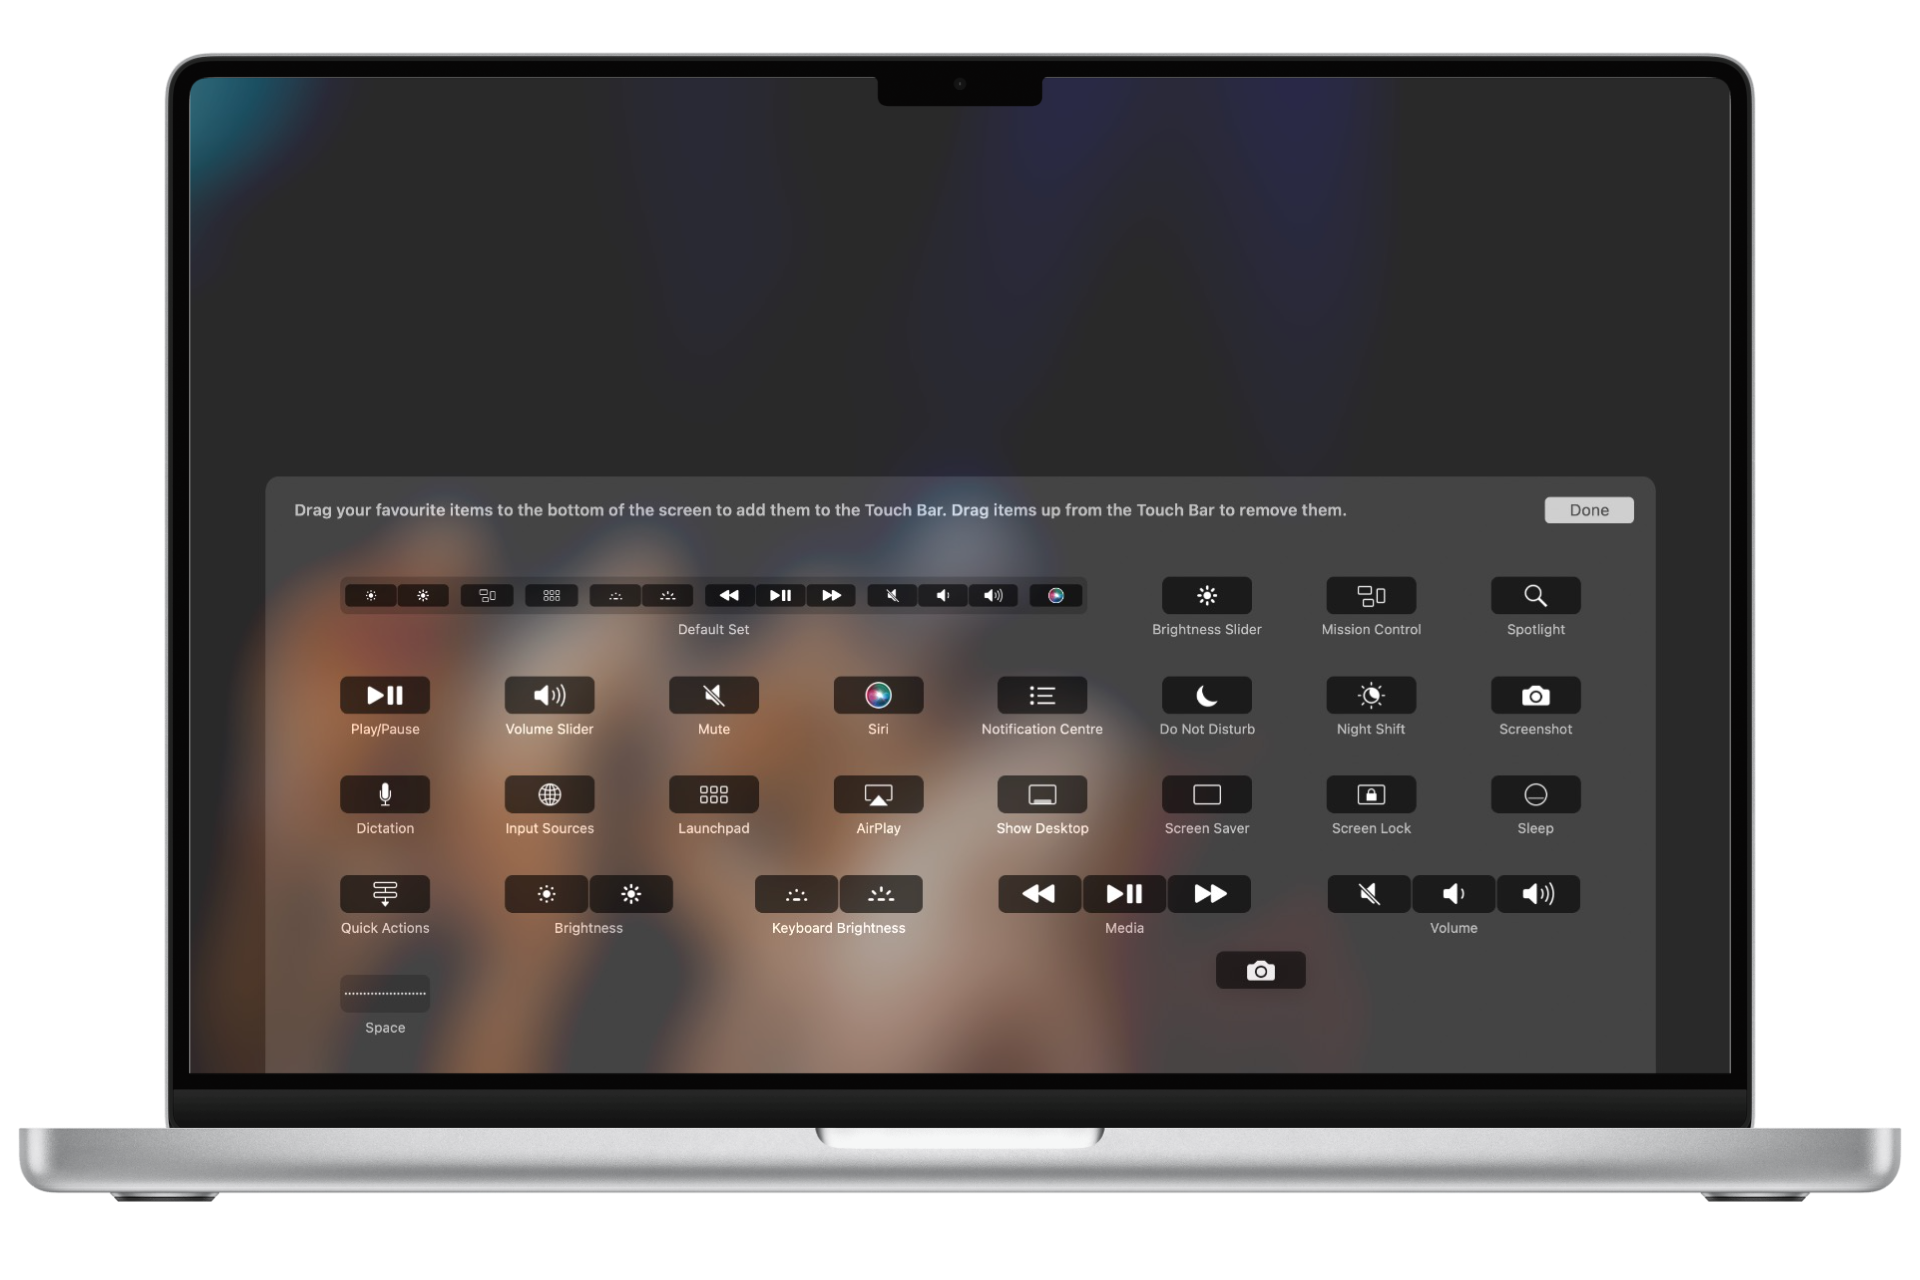
Drag the camera icon to your touch bar
Now that the shortcut is added, all you need to do is tap the Camera icon on your Touch Bar to open the screenshot menu and take a screenshot however you like.
Third-Party Snipping Tools
While macOS has a user-friendly built-in snipping tool with basic features, it does have a few limitations.
If you’re looking for advanced screenshot features, consider third-party apps like CleanShot X or Shottr. These tools give you extra options like advanced annotations, cloud storage, and special screenshot modes (such as capturing drop-down menus).
There are many screenshot apps out there, but our favorites are CleanShot X and Shottr because they are intuitive and full of advanced features for a small cost. Just note that CleanShot X is a paid app.
1. CleanShot X
- Press the standard Mac screenshot shortcut (⌘ + Shift + 3).
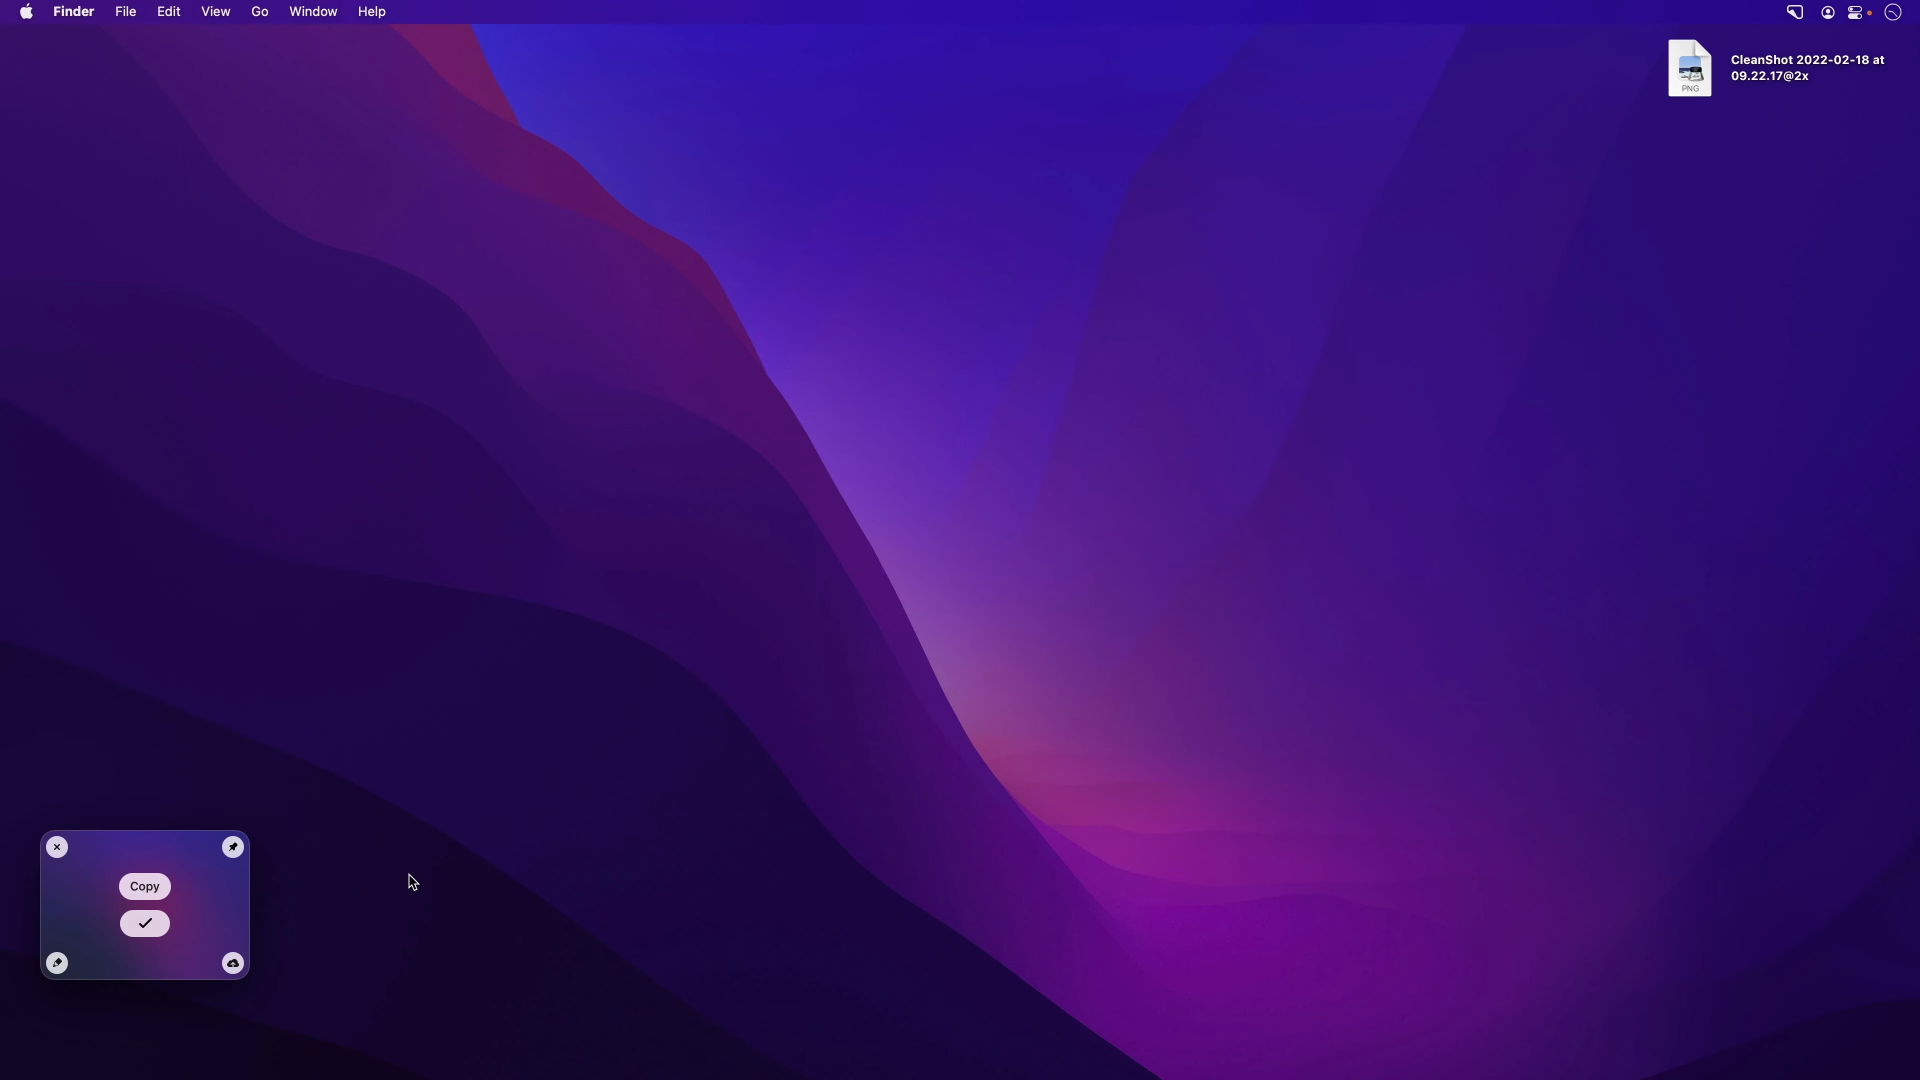
- After the screenshot is taken, you’ll see a small overlay at the bottom left, a bit like the one from the built-in tool—but with a lot more features.

CleanShot X snip preview - From here, you can edit, save to the cloud, copy, or download your image.

Several options to choose from - When you’re ready, click Save, and your screenshot will appear on your desktop.
 The screenshot will look like this on the desktop
If you want to screenshot a specific area or window, just use the same shortcuts as you would on your Mac, and CleanShot X will handle the capture.
2. Shottr
- After you install Shottr, its icon will appear in your Menu Bar. Click the icon to open its drop-down menu.
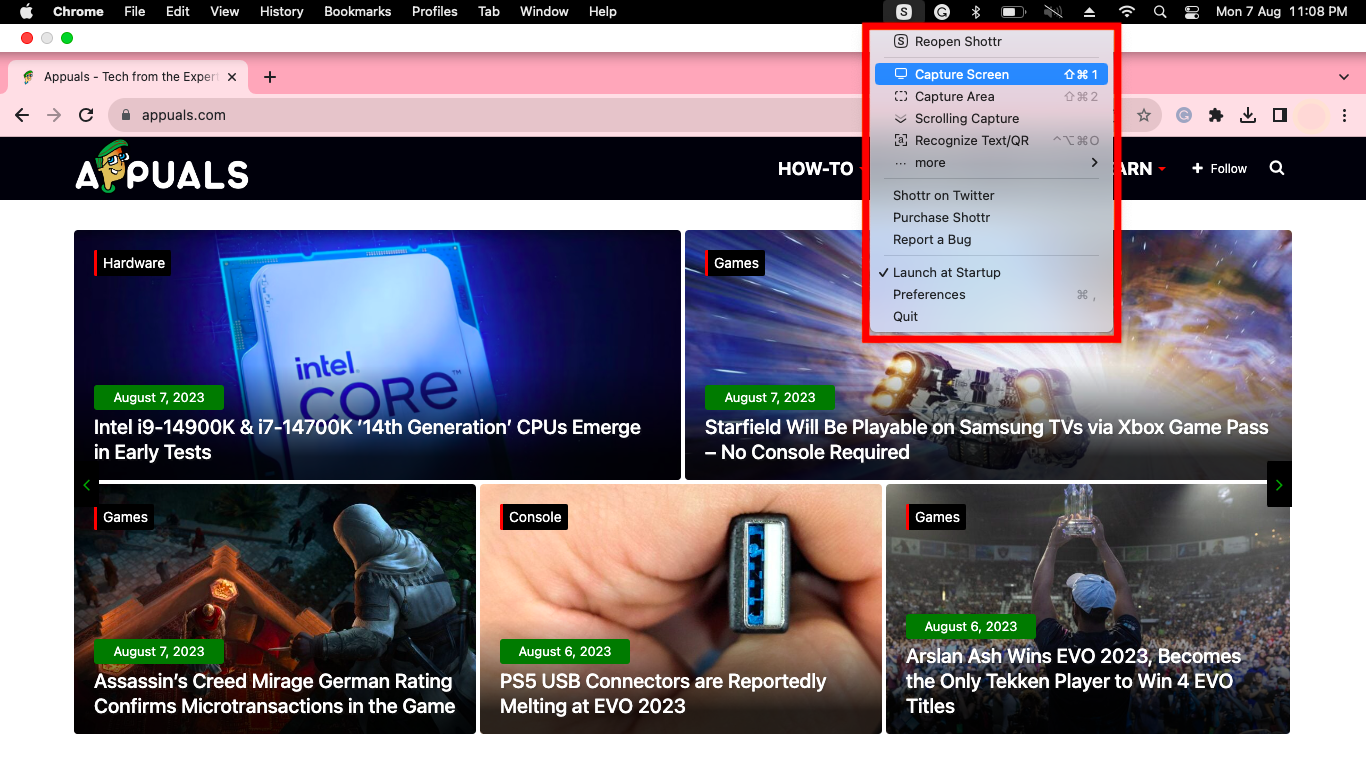
Shottr drop-down menu - You’ll see options like Capture Screen, Capture Area, and unique tools like Scrolling Capture and Recognize Text/QR. For a quick full-screen snip, just choose Capture Screen.
- After you take your screenshot, an editing window will pop up (just like the Windows Snipping Tool). If you don’t want to make changes, simply click the save icon in the upper left.
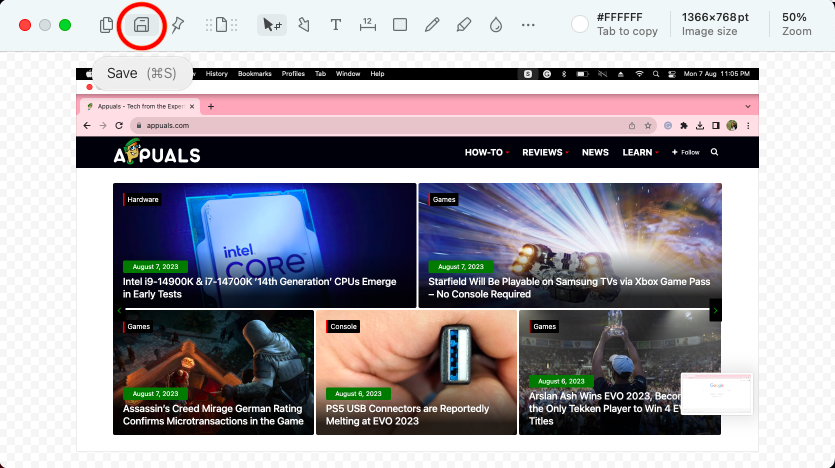
Hit the save icon
Where Do Mac Screenshots Save?
By default, Mac screenshots save to the Desktop with filenames like Screenshot 2026-04-29 at 10.00.00 AM.png.
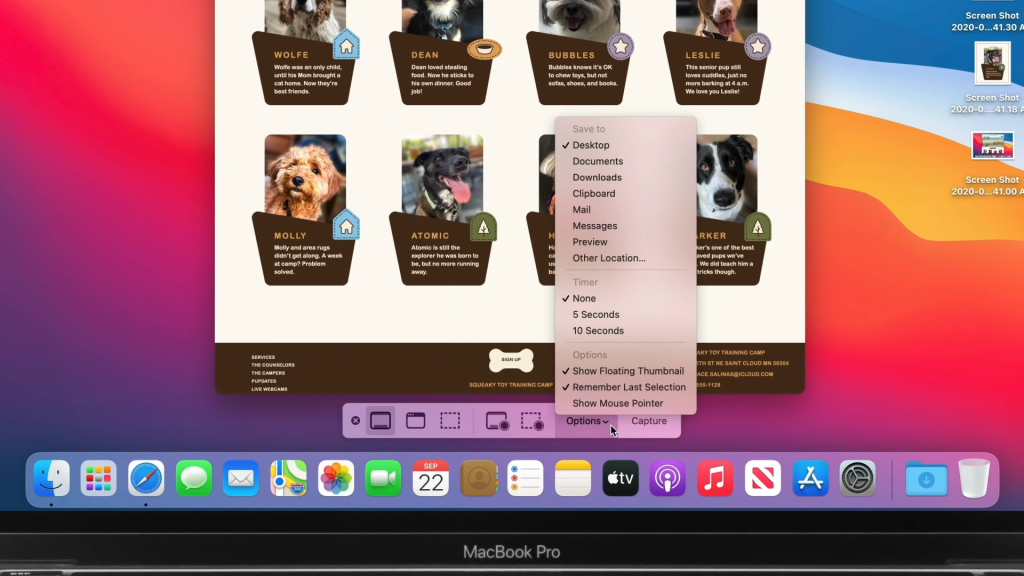
To change the save location, press ⌘ + Shift + 5 to open the screenshot toolbar, click Options, and under “Save to” pick a different folder (Documents, Clipboard, Mail, Messages, Preview, or any custom folder).
If your screenshots are missing from the Desktop, three things to check:
- The save location may have been changed previously — check ⌘ + Shift + 5 > Options > Save to.
- If macOS Stacks is enabled, screenshots may be grouped under a “Screenshots” stack on the Desktop. Click the stack to expand.
- If you used the Control modifier (⌘ + Ctrl + Shift + 4 etc.), the capture went to the clipboard instead of a file.
Annotate and Edit a Screenshot Right After Capturing
After taking a screenshot, a thumbnail appears briefly in the bottom-right corner of your screen. Click it before it disappears (about 5 seconds) to open the screenshot in a quick markup editor. From there you can:
- Crop the screenshot
- Draw arrows, boxes, and freehand annotations
- Add text labels
- Highlight or blur sensitive regions
- Save, share, copy to clipboard, or delete
If the thumbnail disappears before you click it, open the saved file from the Desktop and use Preview’s built-in markup tools (the pencil icon in the toolbar) — same set of features.
Mac Screenshot Troubleshooting
Screenshots aren’t working at all
- Open System Settings > Keyboard > Keyboard Shortcuts > Screenshots.
- Make sure each screenshot shortcut is enabled (checked).
- If the shortcut is correct but not firing, another app may have hijacked the same key combination — quit recently-installed apps and try again.
Screenshots are blurry or low quality
Native Mac screenshots are pixel-perfect at the screen’s actual resolution. If they look blurry, the issue is usually viewing them on a different screen at a different resolution, or sharing them through an app that compresses (e.g., Slack, WhatsApp). To preserve quality, share the original file directly.
Frequently Asked Questions
What is the Mac equivalent of the Windows Snipping Tool?
The closest equivalent is the ⌘ + Shift + 5 screenshot toolbar, which gives you the same flexibility as Windows Snipping Tool plus screen recording. For quick captures, ⌘ + Shift + 4 is faster.
Can I take a scrolling screenshot on Mac?
The built-in Mac screenshot tools do not capture scrolling pages. For scrolling captures (full webpage in one image), you need a third-party tool like CleanShot X or Shottr, or use your browser’s “Save as PDF” option.
How do I record my screen on Mac?
Press ⌘ + Shift + 5 to open the screenshot toolbar. The right two buttons are screen recording: one for the entire screen, one for a selected region. Click Record to start, then click the stop icon in the menu bar when finished. Screen recordings save as MP4 files.
Why isn’t my screenshot saving to the Desktop?
The save location may have been changed. Press ⌘ + Shift + 5, click Options, and check the “Save to” setting. Alternatively, if you held Control while taking the screenshot, the image went to the clipboard instead of a file — paste it into any app with ⌘ + V.
Reviewed by Huzaifa Haroon


