How to Fix the Screen Flickering Issue in Microsoft Edge?
For the longest time, Microsoft Edge users have been plagued by a weird issue that made all their currently opened tabs flicker for less than a second before resuming their normal behavior. In most documented cases, the Microsoft Edge tab screen flickers only once immediately after the browser is opened. This problem is confirmed to occur on both Windows 10 and Windows 11.
After investigating this issue thoroughly and looking at various user reports, we realized that there are several different underlying causes that might be at the root of this problem. Here’s a shortlist of potential scenarios that might be responsible for this weird behaviour with Microsoft Edge:
- Pending hotfix – Microsoft has already published a hotfix geared specifically at resolving this flickering screen issue if you just started experiencing this issue after installing optional update KB5012643. Install each pending Windows update accessible on your computer before applying the hotfix.
- Corrupted Microsoft Edge installation – A specific corruption issue can also cause this type of screen flickering if the problem happens immediately after you open the browser. To rectify this behaviour, use an elevated Powershell prompt to reset and reinstall the Microsoft Edge installation.
- Missing Intel Drivers – Intel recently released a massive infrastructure update across their driver fleet to tackle these flickering screen issues on Windows 10 and 11. If you’re experiencing this issue with every browser, not just Microsoft Edge, use the Intel System Support Utility to ensure that your Intel Drivers are fully updated.
- Corrupted cached data – This problem can also occur when some kind of cached Edge-specific data is causing this type of screen flickering. To fix this issue, access the Settings menu of your Edge browser and clear the temporary data.
- Corrupted Windows account – It’s not uncommon to experience this problem due to some corrupted rooting inside your Windows account. To fix this problem, you’ll need to create a new account and see if the issue stops occurring.
- Outdated GPU driver – One culprit often discarded is an outdated GPU driver facilitating these flickering screen issues in every program (not just Edge). Take the time to uninstall your current GPU driver fleet and clean install the latest version to see if the problem is now fixed.
- Hardware acceleration is enabled – Hardware acceleration will speed up rendering in most cases and make your PC seem more snappy, but the unintended consequence is that you might experience screen tearing and screen flickering with specific applications (particularly UWP applications). If this is the case, access your Windows Settings app and disable this feature to prevent screen flickering.
- Smooth scrolling is enabled at a system level – Smooth scrolling is a feature that can be very well responsible for this issue, especially if you have it enabled at a system level. In this case, you can get the issue fixed by disabling this feature from the Performance Options menu.
Now that we have gone over every potential reason why you might be experiencing this type of issue let’s go over a series of verified fixes that other Windows 10 and Windows 11 users finding themselves in the same situation have used to get rid of the flickering screen issue inside Microsoft Edge.
1. Install pending hotfix
If you only started to experience this problem after installing optional update KB5012643, you’ll be pleased to know that Microsoft already released a hotfix aimed explicitly at stopping this flickering screen issue.
As it turns out, this hotfix was deployed using the newer KIR (Known Issue Rollback) method, but you still might need to install every pending Windows update to ensure that you eliminate the issue entirely.
Most impacted users that we’re constantly encountering a brief moment of screen flickering when opening Microsoft Edge has confirmed that the issue went away entirely after they installed every pending Windows update via Windows Update.
Note: This fix is confirmed to be effective on both Windows 10 and Windows 11.
Here’s what you need to do:
- The Run dialogue box will appear when you press Windows + R.
- In the text box, enter “ms-settings:windowsupdate” to open the Windows Update tab of the Settings application.

Open Windows Update - You could now get a User Account Control window requesting you to allow extra rights unless you fiddled with the default UAC settings. To provide admin access in this situation, select Yes.
- Next, choose to Check for Updates from the pane on the right.
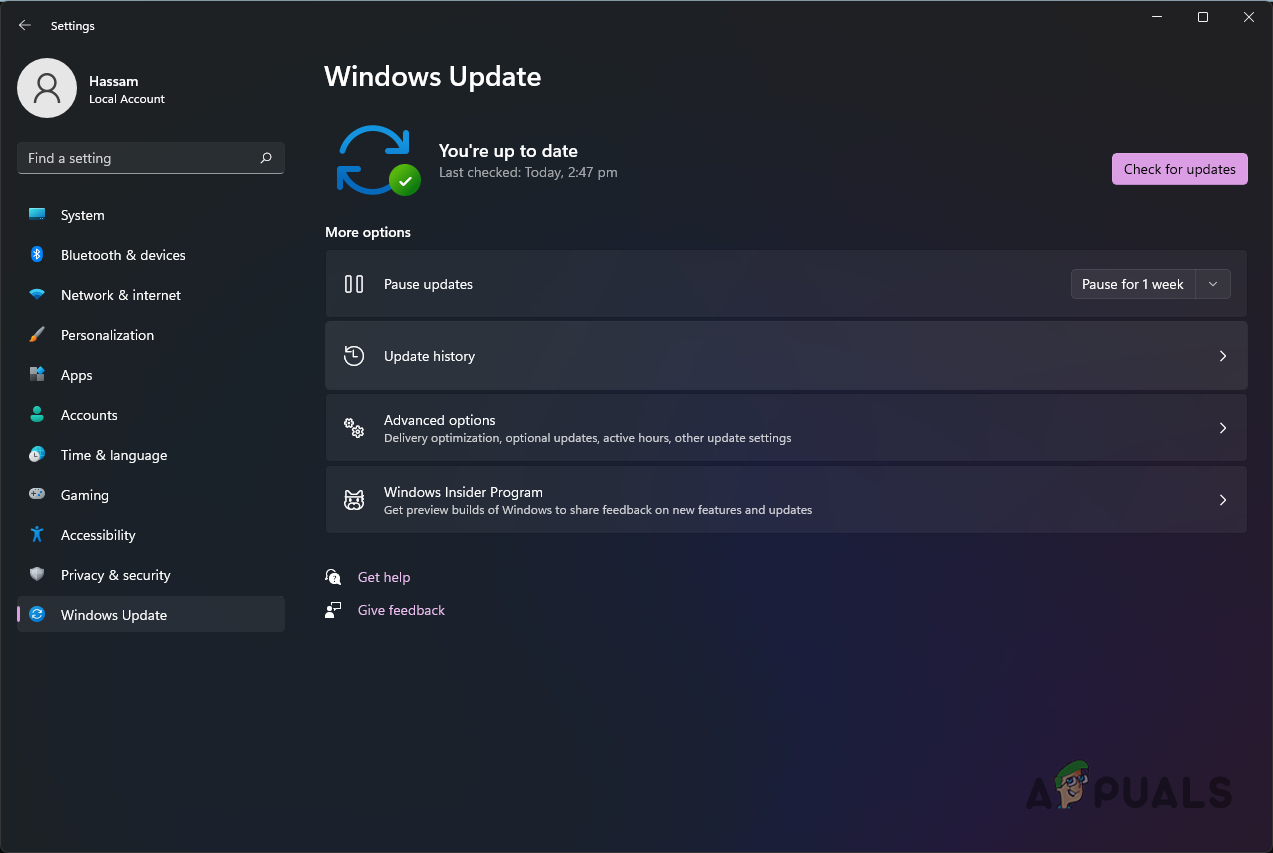
Checking for updates - After downloading the update locally, click Install Now to begin the installation process.
Note: If you have a lot of pending updates, you might be asked to restart before you get the chance to install every pending update. If this happens, reboot early as instructed, but return to this method at the next startup to complete the operation. - Restart your computer to see if the problem has been resolved.
If the flickering screen issue is still occurring undisturbed when you open Microsoft Edge, move down to the next method below.
2. Reset Microsoft Edge
If this problem is still occurring despite you making sure that the hotfix is installed, you should also troubleshoot for a specific corruption issue that can cause this type of screen flickering issue immediately after you open the browser.
Some users got lucky with this problem and fixed it by opening an elevated Powershell window and using a couple of commands to reset and reinstall the entire native browser component effectively.
Note: The instructions below will work on both Windows 10 and Windows 11.
Follow the steps below to effectively reset and reinstall Microsoft Edge to eliminate every case of potential corruption.
Here’s what you need to do:
- Start by ensuring that Microsoft Edge is closed and not running in the background.
- Press the Windows key + R to open up a Run dialog box.
- Next, type ‘powershell’ inside the text box, then press Ctrl + Shift + Enter to open up an elevated Powershell window.
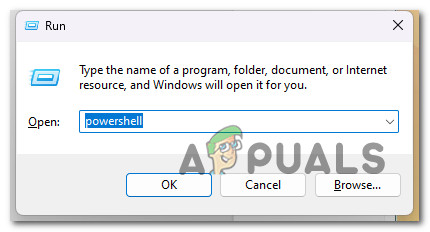
Open Powershell - Click Yes to grant admin access when the User Account Control (UAC) is prompted.
- Once you’re finally inside the elevated Powershell window, run the following command by pasting or typing it inside the prompt and pressing Enter:
remove-item $env:localappdata\Packages\Microsoft.MicrosoftEdge_8wekyb3d8bbwe\* -recurse -Force
Note: This command will effectively reset and forcibly remove Microsoft Edge and every associated dependency.
- Once the first command is processed successfully, type or paste the following command and press Enter to reinstall Microsoft Edge effectively:
Get-AppXPackage -Name Microsoft.MicrosoftEdge | Foreach {Add-AppxPackage -DisableDevelopmentMode -Register "$($_.InstallLocation)\AppXManifest.xml" -Verbose}
- After the second command is successfully processed, reboot your PC and see if the flickering screen issue is now resolved by opening the native browser again once the next startup is complete.
If the same issue is still happening, try the following method below.
3. Install missing Intel drivers via SSU (if applicable)
If you are experiencing this issue while running on Intel hardware, you first should ensure that you are running on the latest available drivers. As it turns out, Intel recently released a massive infrastructure update across their driver fleet to tackle these flickering screen issues on Windows 10 and 11.
If you are experiencing this issue with every browser (not just Microsoft Edge) and you are running on Intel hardware, your best chance at fixing this issue is to download and use the Intel SSU (System Support Utility) to update all your Intel’s driver fleet to the latest version available.
For specific instructions on how to do this, follow the steps below:
- Open your default browser and navigate to the download page of the Intel System Support Utility.
- Once inside the download page, click the Download button and wait until the operation is complete.
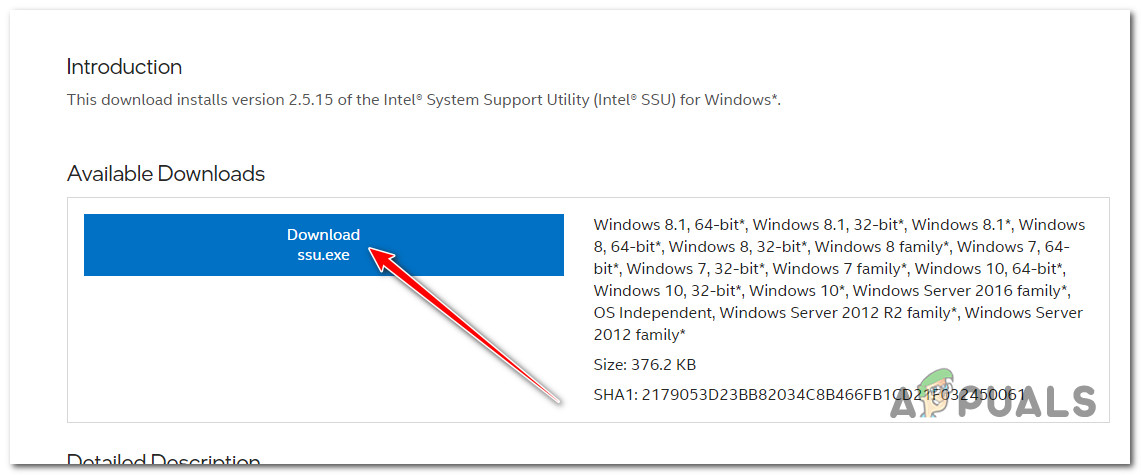
Download the SSU utility - Accept the licence agreement by clicking on I accept the terms in the license agreement, then wait until the download is complete.
- After the download is complete, double-click on the ssu.exe executable and click Yes to grant admin access.
- At the first prompt of the System Support Utility, select Everything, then click on the Scan button.
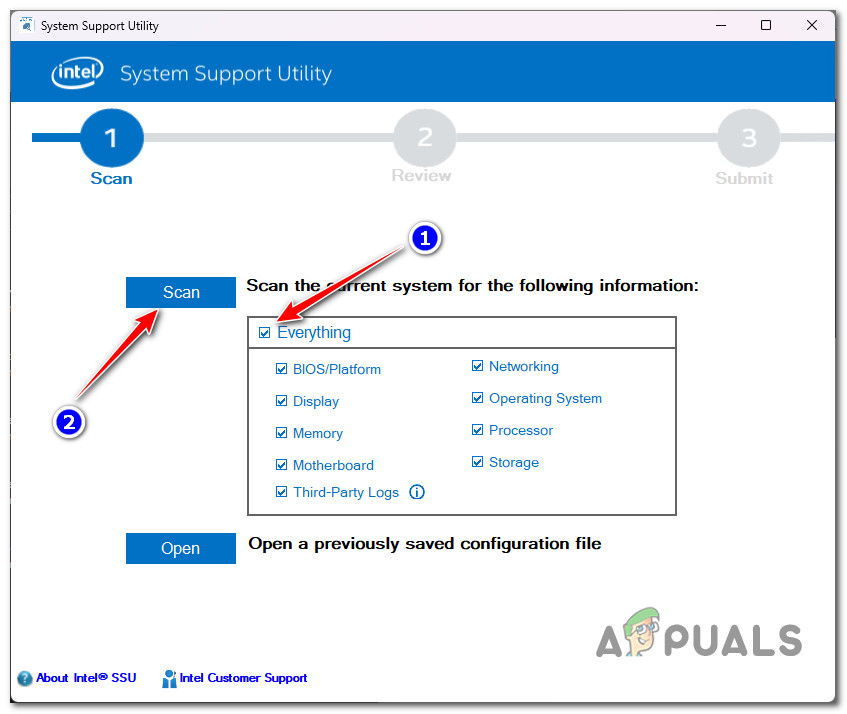
Deploy a scan via SSU - Wait until the scan is complete. It might take several minutes to use an SSD or a traditional HDD.
- Review the results once the initial scan is finished, then click on Next.
- Look at the results to figure out which drivers ar outdated, then go ahead and install every recommended driver update.
- Reboot your PC and see if the problem is now fixed.
If the flickering screen issue still occurs inside Microsoft Edge even after you update your Intel driver’s fleet, move down to the following method below.
4. Clear Microsoft Edge Temporary Data
According to other affected users, this problem can also occur when some kind of cached Edge-specific data is causing this type of screen flickering.
Several users also dealing with this problem have reported that the screen flickering was completely eradicated after all the currently stored temp data associated with Edge was removed.
Note: This method is typically reported to be effective when you only experience this problem with certain web pages.
Here’s how to clear the Microsoft Edge Temporary data to prevent screen flickering:
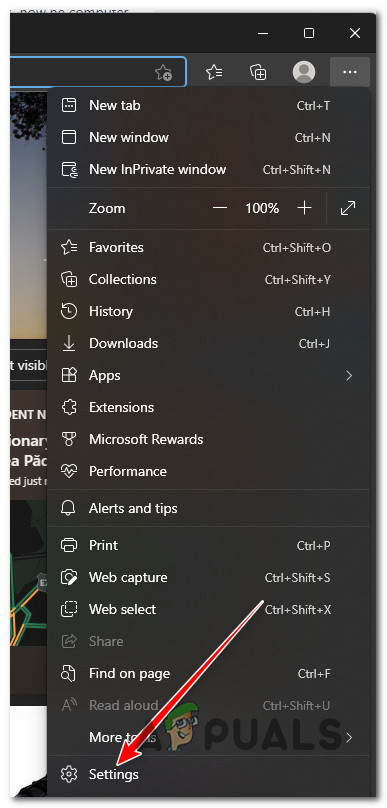
- Open Microsoft Edge and click on the More Action (three-dot icon) in the top-left section of the screen.
- Next, from the context menu that just appeared, click on Settings.
Access the Settings menu of Microsoft Edge - Next, click on Privacy, search and services from the left-hand side menu.
- Move to the right-hand side section and click on Choose what to clear (under Clear browsing data).

Choose what to clear - Next, check the box associated with Browsing history, Cookies and Saved Website data and Cached data and files and click on Clear to start the operation.
- Wait until the operation is finished, reboot your PC and see if the problem is now fixed.
If the same screen flickering issue still occurs, move down to the following method below.
5. Use a newly created Windows account
Your Windows profile may have been corrupt, which would explain this issue. After switching to a local Microsoft account, users who only saw screen flickering using Microsoft Edge on Windows 11 have reported that the issue has been fixed.
It should be warned that this method will eventually delete any infected dependencies associated with your active user profile.
After creating a local user account for your Windows installation, sign in as soon as you launch a native Windows application by doing the actions listed below:
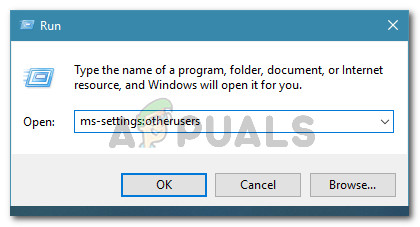
- To launch the run dialog box, use the Windows key + R.
- To access the Family & other users page of the Settings app, type “ms-settings:otherusers” into the text box that just opened and hit Enter.
Access the Oher Users tab - On the Family & other users tab, scroll down and select Add someone else to this PC under the Other user’s option.
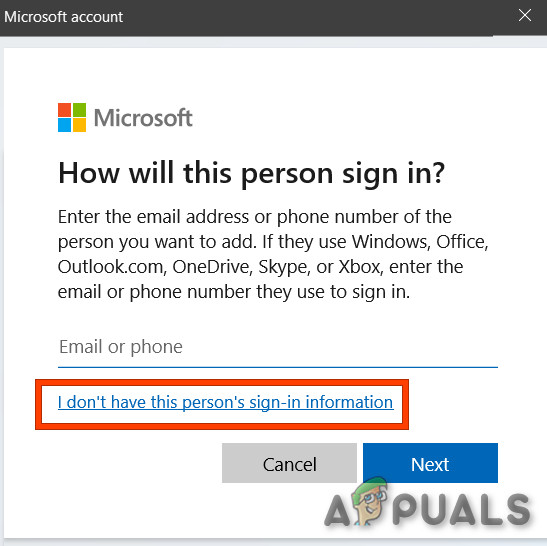
- To establish a local account, choose “I don’t know this person’s sign-in information” from the selection that appears.
Don’t have this persons sign in information - After logging in with your Microsoft account, choose to Add a user without a Microsoft account on the next page.
- Configure the username, password, and string of security inquiries for the new account.
- After that, restart your computer and log in the following time; it should start using the newly created account.
- Open Microsoft Edge and see if the problem is now fixed.
Move on to the technique listed below if the same problem remains.
6. Update GPU drivers
Additionally, you may have this issue if you were running a deprecated or out-of-date GPU driver. When users upgraded their GPU drivers to the most recent version, several users who had experienced Edge-specific screen flickering reported that the problem was resolved.
The simplest method to accomplish it is first to uninstall every Nvidia component, then use Display Driver Uninstaller + CCleaner (or a similar application) to eliminate any dependencies, followed by a clean installation of the most recent suitable GPU driver version.
Here are the steps to take if you need step-by-step directions on how to achieve this:
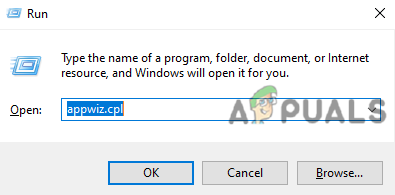
- To start, open the Run dialogue box by pressing the Windows key + R.
- To open the Programs and Features menu with admin access, put “appwiz.cpl” into the dialogue box’s text field and hit Ctrl + Shift + Enter.
Open up the Programs and Features menu - After the User Account Control (UAC) option prompts you to provide admin access, click Yes.
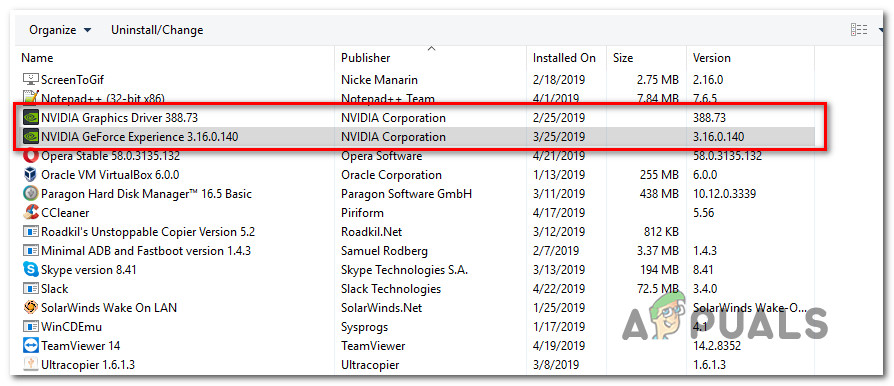
- Once you’ve reached the Programs and Features menu, click on the Publisher column to arrange all the installed programs appropriately.
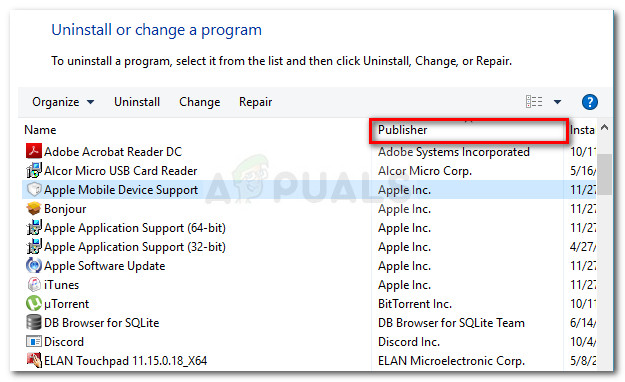
Sort via publisher - After that, uninstall all Nvidia components, including the GeForce Experience PhysX System and other NVIDIA-published software. By selecting Uninstall from the context menu when you right-click on any NVIDIA item, you may force an uninstall.
Uninstall every Nvidia dependency Note: You’ll see your screen flashing many times when you delete all connected NVIDIA dependencies. Do not worry; this process is quite typical.
- After successfully eliminating every NVIDIA software and its dependencies, restart your computer to enable the generic GPU drivers to take effect.
- Once your computer has restarted, use CCleaner or BleachBit to check that there are no NVIDIA application dependencies that might prevent the installation of the new driver.

Using Ccleaner - The next step is to check for driver-specific dependencies that the previous NVIDIA drivers may have left behind. Download and install the most recent version of Display Driver Uninstaller to ensure that isn’t the case.
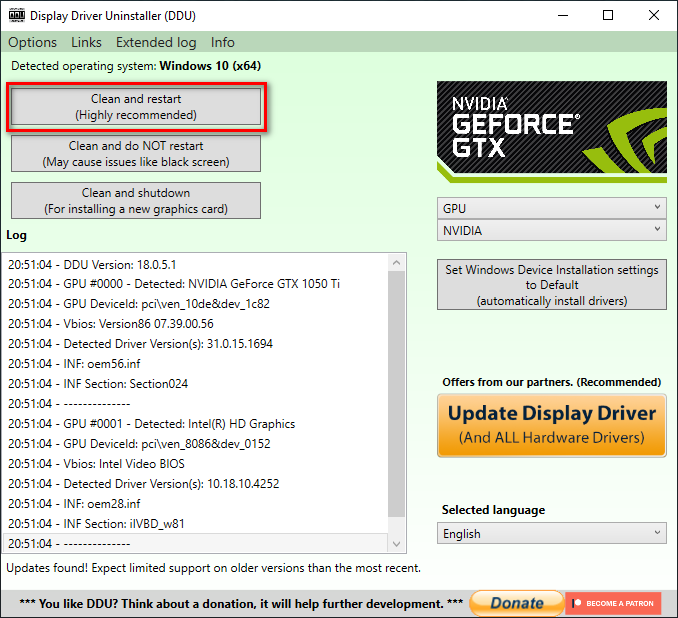
Using DDU Note: Using this utility, you may eliminate any leftover traces and dependencies from earlier GPU driver installations.
- To install it on your PC, adhere to the on-screen instructions. Remember that you will occasionally be instructed to restart in Safe Mode to improve your chances of success. Follow the directions by launching the Start menu, selecting the Power button, holding down the Shift key, and selecting the Restart button.
Restart in Safe Mode - Once Safe Mode has been successfully enabled on your computer, run the Display Driver Uninstaller and select Clean and Restart. Your computer will restart again and start cleaning the essential files in a short while.
- Visit the official Nvidia Driver Download page and download the most recent driver compatible with your GPU when the DDU tool has removed all of your old GPU files.
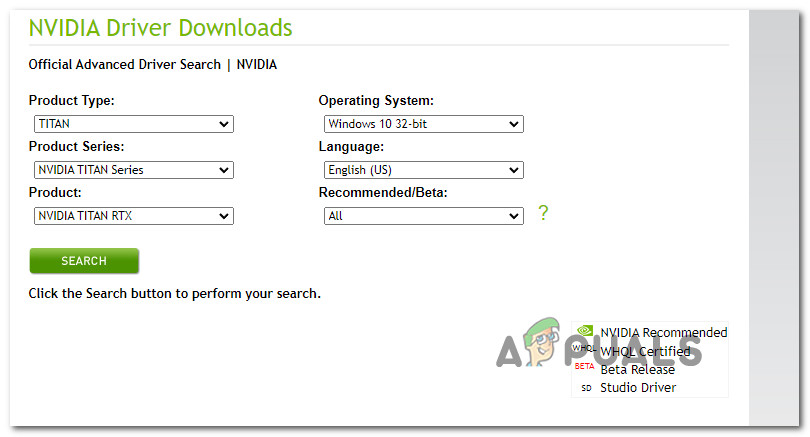
Download the latest driver - Double-check that you’ve chosen the right operating system, series, and product type. Only use recommended or beta drivers if you’re playing older games.
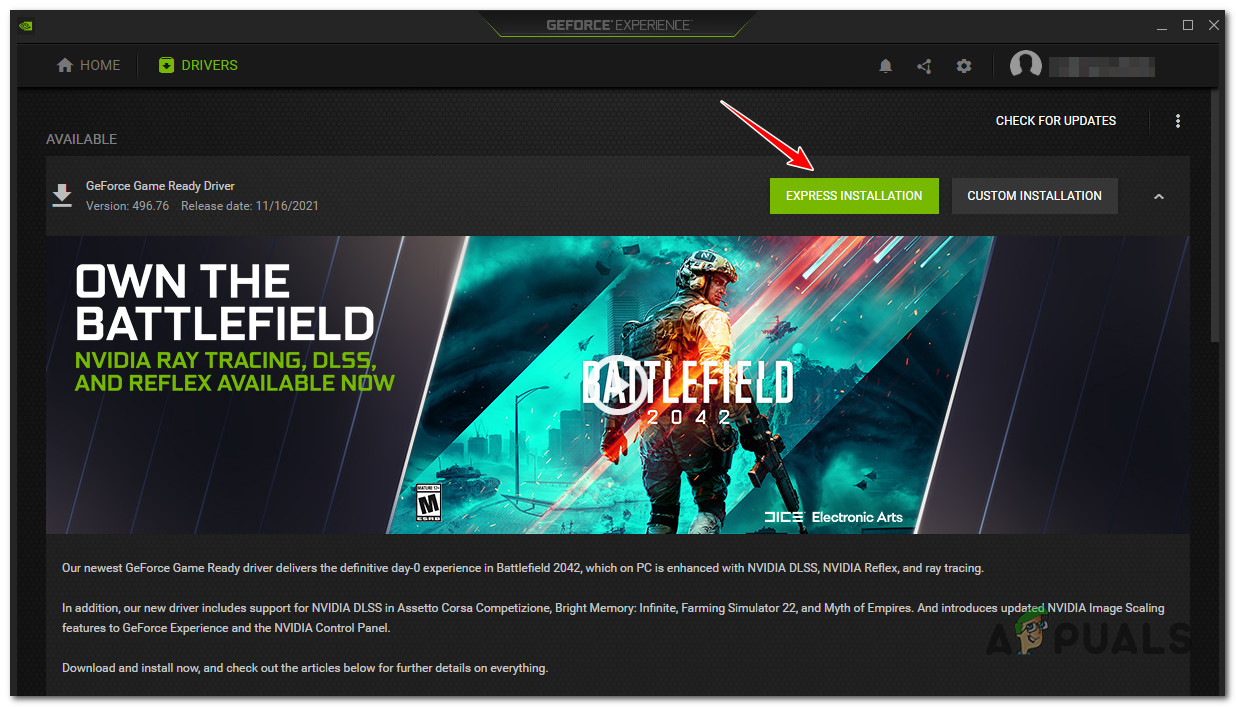
Note: you may automate this procedure using Nvidia Experience and let the program choose the appropriate driver for your GPU model. - Once the necessary driver executable has been downloaded locally, run it as administrator and follow the on-screen instructions to finish installing the driver.
Install Nvidia Driver - After installing the updated driver, reboot your PC, open Microsoft Edge and see if the flickering screen issue is now fixed.
If the same problem is still occurring, move down to the following method below.
7. Disable Hardware acceleration
As it turns out, application-specific screen flickering can also be caused by your GPU being forced to do hardware-accelerated GPU scheduling.
This will speed up rendering in most cases and make your PC seem more snappy, but the unintended consequence is that you might experience screen tearing and screen flickering with specific applications (particularly UWP applications).
If you are experiencing screen flickering only with Universal Windows Platforms apps and hardware-accelerated GPU scheduling is enabled, follow the instructions below to temporarily disable the Hardware-accelerated GPU scheduling from the Settings app and see if the problem is fixed.
Follow the instructions below for specific instructions on how to do this:
Note: These steps will work on Windows 10 and Windows 11 with minor GUI differences.
- Press Windows key + I to open up the Settings menu.
- Inside the Settings menu, click on System from the vertical menu on the left.
- Next, move over to the right-hand side menu and click on Display.
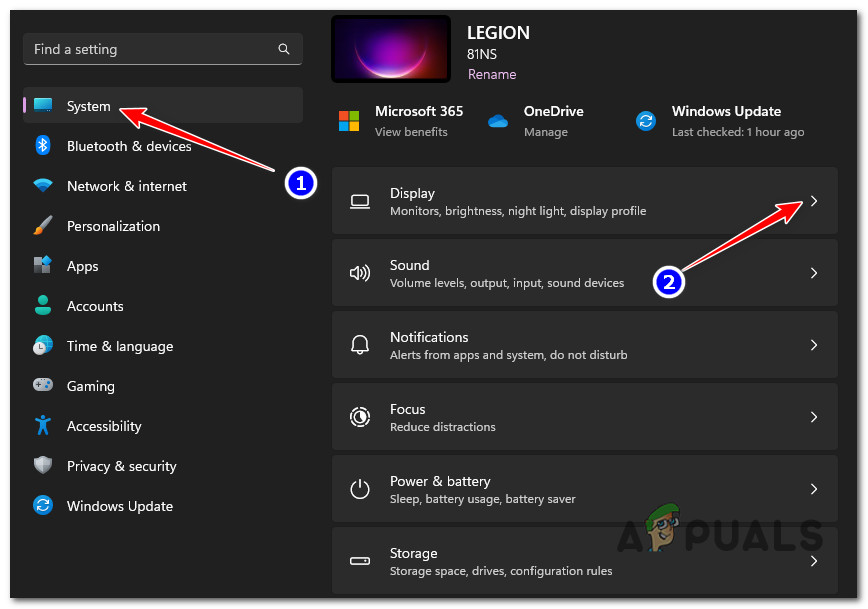
Access the Display Settings - Inside the Display settings, scroll down through the list of settings and click on Graphics (under Related settings).
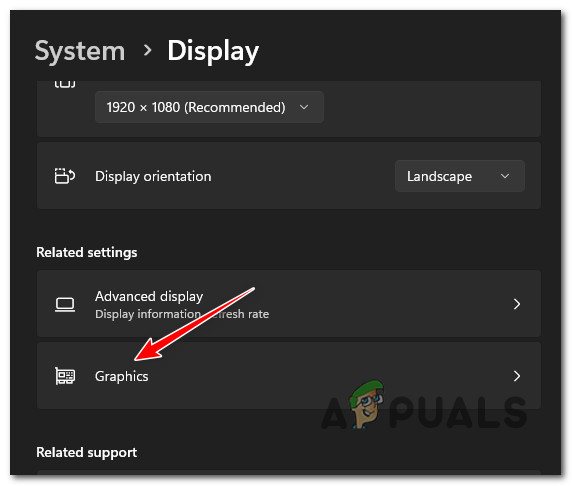
Access the Graphics card - From the next screen, click on Change default graphics settings (under Default Settings).
- Finally, once you’re inside the Default graphics settings, disable the toggle associated with Hardware-accelerated GPU scheduling.
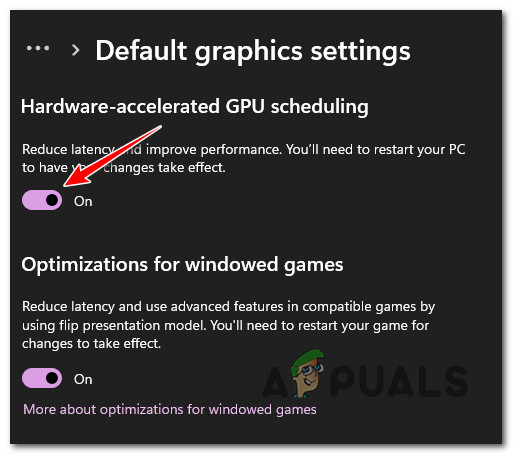
Disable the Hardware-accelerated GPU scheduling - Once hardware acceleration has been disabled, reboot your PC and open Microsoft Edge once the next startup is complete to see if the flickering screen issue is now fixed.
If the problem is still not fixed, move down to the following method below.
8. Disable Smooth Scrolling in Edge
As it turns out, smooth scrolling is a feature that can be very well responsible for this type of issue, especially if you have it enabled at a system level.
On Windows 10 and on Windows 11, you will find this feature camouflaged as ‘Animate controls and element inside windows’ inside the Performance Options menu.
If you have this feature enabled and you are experiencing system-wide screen flickering, follow the instructions below for specific instructions on disabling animated controls (AKA smooth scrolling) for all supported applications:
- Press the Windows key + R to open up a Run dialogue box.
- Next, type ‘%windir%\system32\systempropertiesperformance.exe’ and press Ctrl + Shift + Enter to open up the Performance Options menu with admin access.
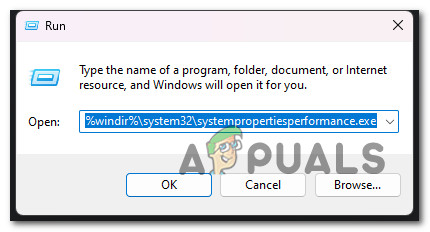
Access the Performance options menu - Click Yes to grant admin access when prompted by the User Account Control (UAC).
- Once you’re finally inside the Performance Options menu, use the ribbon bar at the top to select Visual Effects.
- Next, select Custom, go below and uncheck the box associated with Animate controls and elements inside windows.
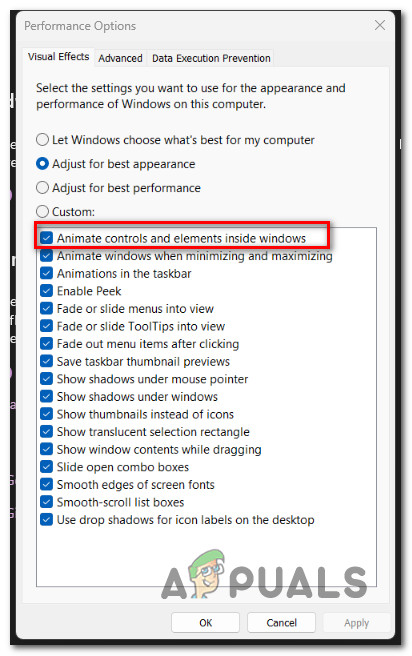
Disable Smooth Scrolling - Click Apply to save the changes, reboot your PC and see if the flickering screen issue has been fixed.


I had this same flickering issue when I click on new tab on Microsoft edge.To fix it:
Check edge://gpu/ for Vulkan is enabled.
If so go to edge://flags/ and disable Vulkan.
Then restart Microsoft edge browser.Problem solved. Enjoy!