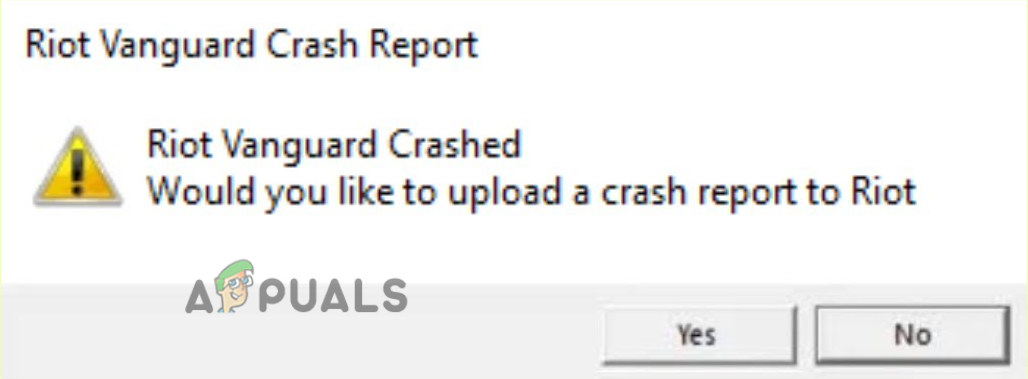
How to Fix “Riot Vanguard Crashed” Error on Valorant?
Several users have reported in forums that they are getting crashed while playing Valorant and also they got an error that says “Riot Vanguard Crashed”. The error appears when Vanguard gets crashed from your system while playing Valorant.
We had a look into this and discovered some important causes that might be interrupting you to play Valorant.
- Windows-specific feature- There is a chance that some specific Windows feature might be preventing you to play Valorant, to fix this you have to disable it.
- Corrupted vanguard Files- Corrupted Riot vanguard Valorant files can cause a crashing error just like Riot Vanguard Crashed because it is an anti-cheat program of valorant.
- Valorant background services- At some point, background services can cause a crashing error because they run 24/7 in the background, restarting the services can fix the Riot Vanguard Crashed error.
- Corrupted Cache files- Cache files are the temporary files but if they get corrupt then they can create problems for our application.
- Antivirus or Windows defender- There is a possibility that your antivirus or Windows defender might be blocking the Valorant to fix this you can disable it temporarily to check if that works.
Now we have some knowledge of the Riot Vanguard Crashed error, so let’s straight jump into solutions that helped users to fix this annoying error.
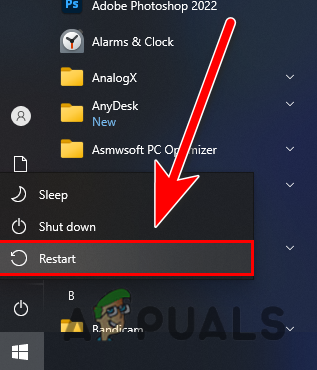
Restart Your Computer
Before we get into it, we suggest you to restart your computer because restarting the Windows operating system fixes the temporary bugs and errors, it also restarts the services that may stop you to play Valorant for that reason restart your computer then make some changes in your system for fixing the Riot Vanguard Crashed error.
Reinstall Riot Vanguard
Sometimes the vanguard files get corrupted due to several reasons such as high CPU/Memory usage, for that reason, we will have to reinstall Riot Vanguard by following the below steps:-
- Press the Windows + R keys to open the Run Window.
- Type appwiz.cpl and press Enter.
- Here find and select the Riot Vanguard, now click on Uninstall button.
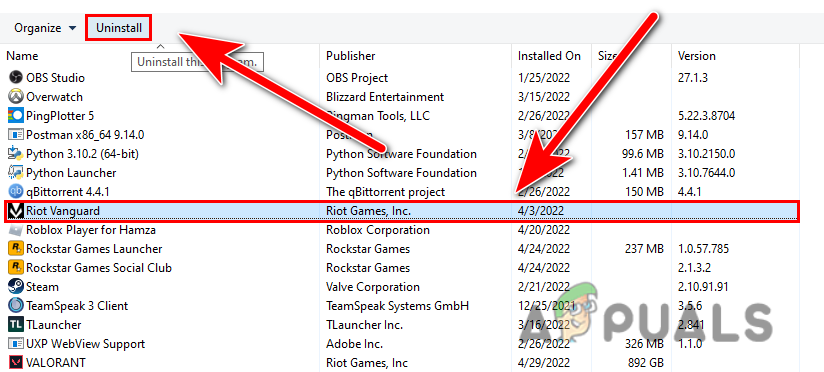
Uninstall Riot Vanguard - After that launch the Valorant and it should automatically start installing Vanguard.
- Once done, check if the error persists.
Disable Hyper-V Feature on Windows
The Hyper-v is a Microsoft feature that allows the virtualization of a hardware server into multiple virtual servers. it also helps in running a virtual machine software, remote software, and also the emulators however this feature can hurt gaming performance and it can also cause Riot Vanguard Crashed error.
Several users have reported in forums that disabling the Hyper-V feature fixed the Riot Vanguard crashed error.
Follow the steps to disable Hyper-V Feature on Windows:-
- Press the Windows key and search the Turn Windows feature on or off, and open it.
- Now uncheck the Hyper-V and press ok to save the changes.

Uncheck Hyper-V and press ok to save the changes - Restart your computer and check if the error persists.
Enable Data Execution Prevention
DEP or Data Execution Prevention is a Windows inbuilt security feature that helps to protect the computer systems from attacks and malicious data through your memory. By default, Data Execution Prevention is enabled for inbuild Windows programs and services for that reason the feature does not monitor the vanguard vgc service and it can cause Riot Vanguard Crashed error.
Follow the steps to enable the Data Execution Prevention feature:-
- Press the Windows key, and type the command prompt in the search box.
- Open command prompt as administrator by pressing ctrl + shift + Enter keys together.
- Insert the below command to enable Data Execution Prevention if it is disabled.
bcdedit.exe /set {current} nx OptIn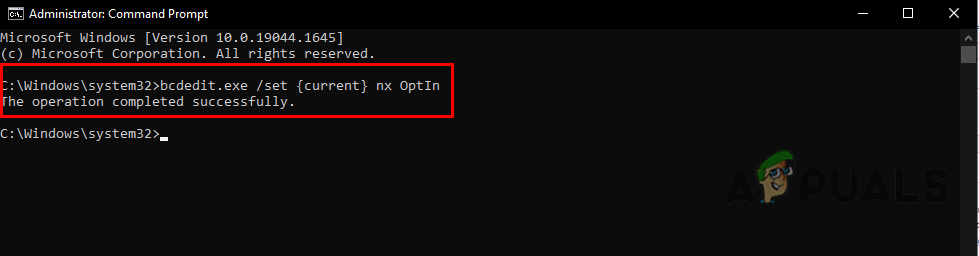
Insert the command in the command prompt to enable Data Execution Prevention - Once done check if the issue still persists.
Disabling Windows Testing Mode
Windows Testing Mode is for the developer to create a new driver without a signature, it is similar to save mode but only used in development. However, it allows you to run the unsigned drivers on Windows operating system for that reason it can cause the Riot vanguard crashed error. There might be chances that the testing mode is enabled in your operating system by the program which you installed recently and it is in the test phase.
Follow the steps to disable Windows testing Mode:-
- Press the Windows key and type the command prompt in the search bar.
- Press the Ctrl + shift + Enter keys together to open a command prompt as administrator privilege.
- Now insert the below commands one by one to disable Windows testing Mode.
bcdedit -set TESTSIGNING OFF
bcdedit -set NOINTEGRITYCHECKS OFF
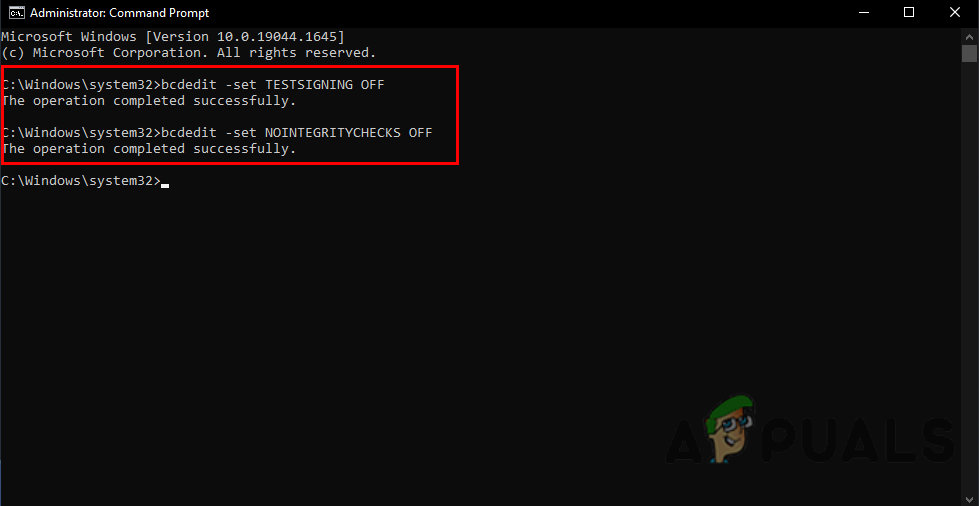
Insert commands to disable Windows testing mode - Restart your computer and open the Valorant then check if the issue is resolved.
Verify and Reinstall Graphics Drivers with DDU
Reinstalling the graphics driver might work in this case because if your graphics driver is unverified, Valorant does not allow having an unverified graphics driver, in the response, it can crash, freeze, and might not launch so to fix this you have to completely uninstall your drivers and to make sure that the drivers are completely uninstalled from the system we use DDU or display driver uninstaller that allows users to uninstall drivers completely from the operating system.
It is recommended to uninstall drivers in safe mode for the absolute result.
Verify Your Graphics Drivers
If you are not sure that the error is occurring due to unverified drivers then simply you can verify your Graphics driver.
There is a utility in Windows operating system then can check Graphics drivers, and tells you which driver is unverified then simply you can fix this by reinstalling the Graphics Driver.
Follow the steps to verify your graphics drivers:-
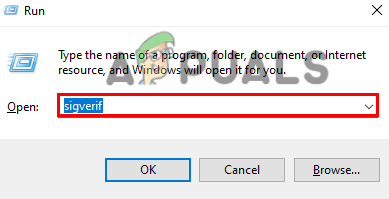
- Press the Windows + R keys together to open the Run Window.
- Type sigverif in the search box and press enter.
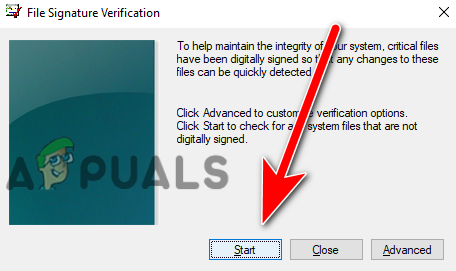
Type sigverif in the Run Window - Now Click on the Start button to run the signature verification process.
Click on the Start button to start the file signature verification - Wait for the verification process to finish.
- If it detected the unsigned driver, then it will show up on the screen, then you will have to search the filename on google to see where it belongs, if it belongs to Nvidia or AMD drivers then simply reinstalling the graphics driver will fix the issue.
- In my case, it did not detect any unsigned or unverified Graphics driver because I have a signed graphics driver which belongs to the official Nvidia website.
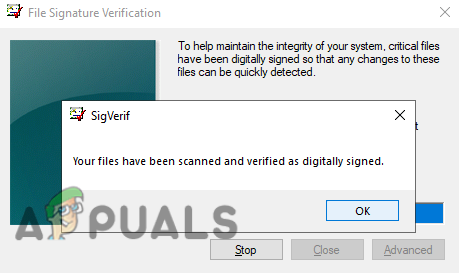
No unsigned driver found
Uninstall Graphics Driver
- Download the Display driver uninstaller from the official website.
- Now you have to restart your computer, click on the Start button then click on the Power button.
- Hold the shift key and select the Restart option to open the Windows in safe mode.
- The Display driver uninstaller comes in the Zip folder, which you have to extract.
- Go to the download folder, right-click on the DDU folder and select Extract to extract the folder.

Extract DDU-1 - After that, navigate to the folder and double-click on the DDU v18.0.4.9 application.
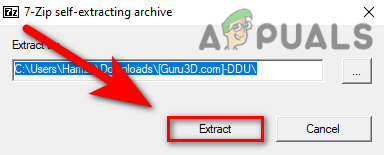
- In the next popup Windows, click on Extract and navigate to the extracted DDU v18.0.4.9 folder.
Select the Extract button for the DDU application - Run the Display driver uninstaller application.
- Select your device type from the top-right then select your Graphics card manufacturer.
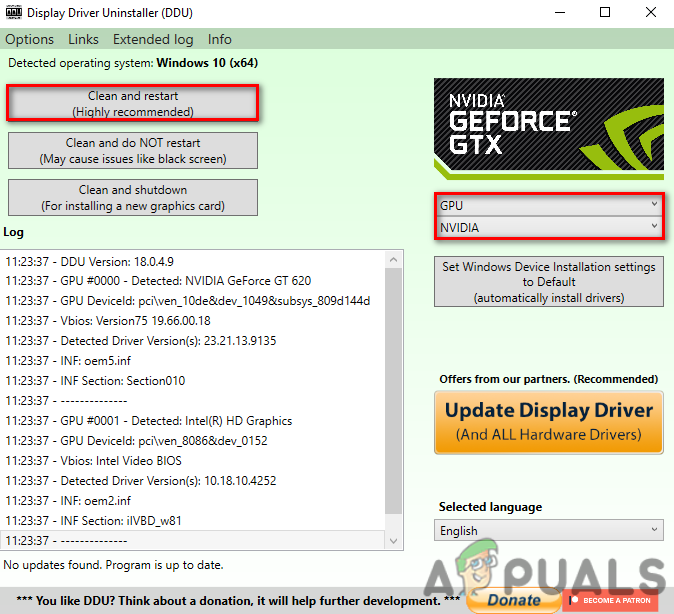
Choose the device type and your graphics card manufacturer from the top - Click on Clean and Restart, it will completely uninstall the previous graphics driver and reset your computer.
Install Graphics Driver
Now you have to install verified Graphics drivers from the official website because if you download your graphics driver through the third-party website then again it can cause the Riot Vanguard Crashed error.
AMD Radeon
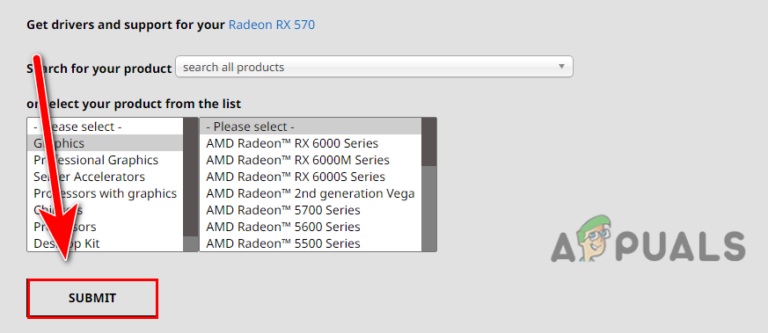
- For AMD users, go to the official website of AMD Radeon.
- Here select your Graphics card Model, then click on Submit button to get the latest Graphics driver.
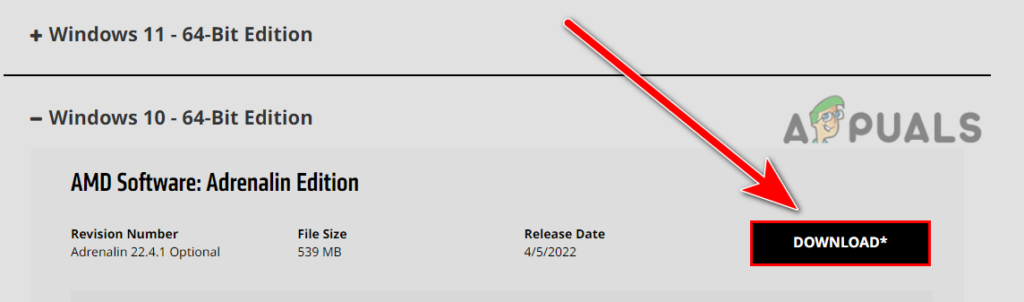
Select Your Graphics Card-then click on Submit button - In the next window, choose your Windows operating system, and click on the Download button to download the latest drivers.
Select the Operating System then-click-on-Download-button-to-download-the Graphics Drivers - Once the downloading Is started, wait until it’s done, then double-click on the Driver installer and follow the further instruction to install the Graphics card driver.
- Once done reboot your computer and check if the error is resolved.
Nvidia Drivers
- For Nvidia users, open the Nvidia official website on your favorite browser.
- Carefully select your Graphics card Model then click on the Search button.
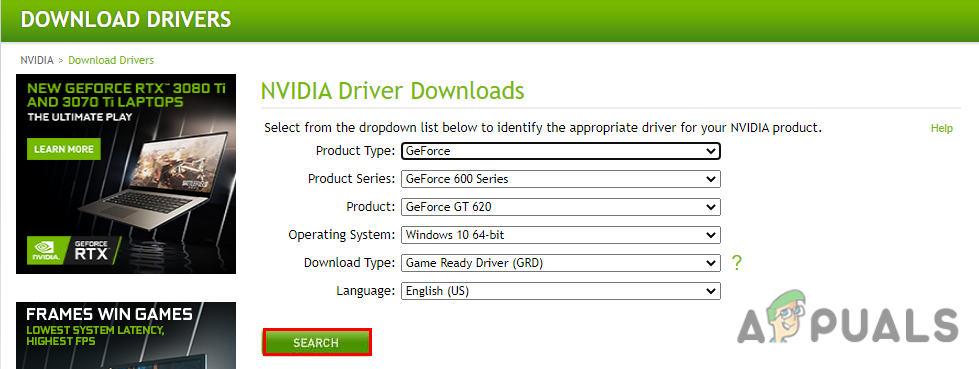
Click on the Download button - It will automatically search for the latest driver.
- Once done click on the Download button to download the Graphics card driver.

Select the Download button to download the drivers - Double click on the installer, and follow the instruction to install verified drivers.
Delete Cache Files and Crashes Reports
Cache files stores temporary data about the game and the GPU cache contains the reports that are created by your graphics driver, generally deleting the cache files fixes many errors in games so you can use this method to check if that works.
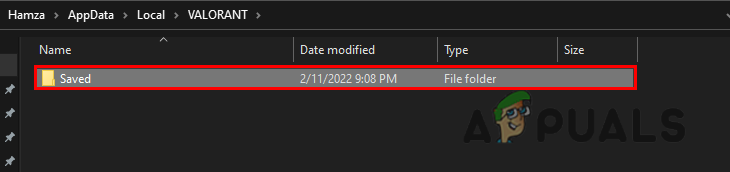
- Press the Windows key and type AppData in the search box then press enter
- Navigate to Local>VALORANT>Saved.
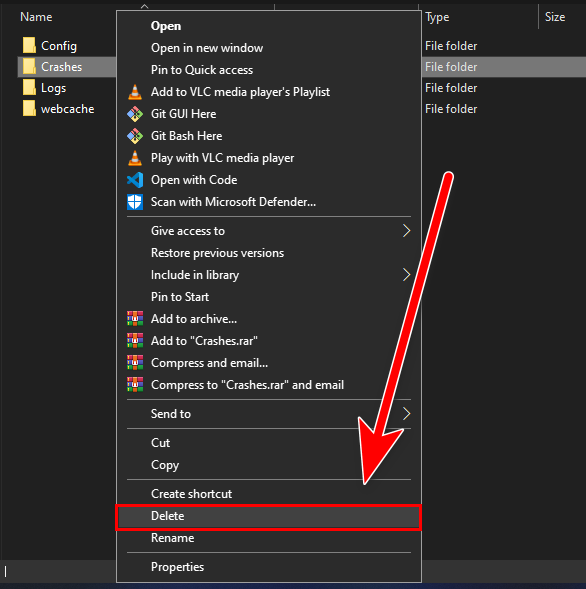
Navigate to the Saved folder - Right-click on the Crashes folder and select delete.
Right-click on the Crashes folder and select delete - Now navigate to webcache, and again right-click on the GPUCache select delete.
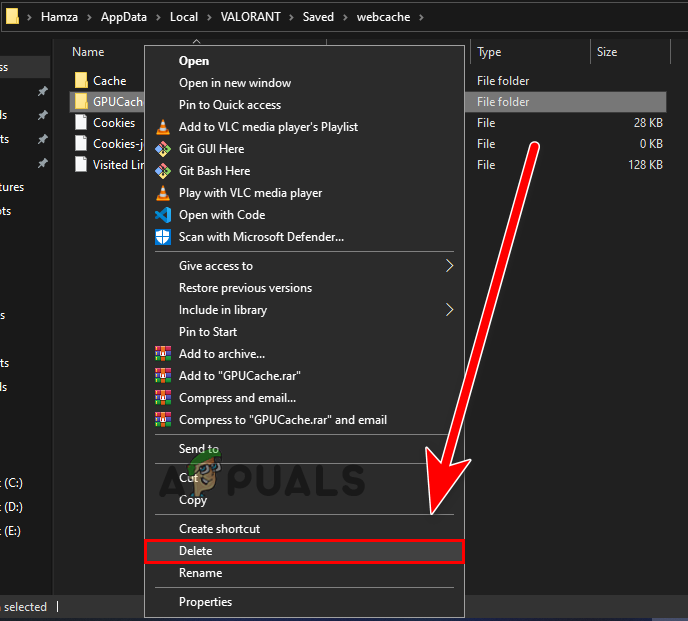
Delete GPUCache folder - Repeat the same process for the Cache folder to delete it.
- Once done, launch the valorant and check if the error persists.
Run Disk cleanup
Disk Clean-up is a computer maintenance utility included in Windows operating system to scan and delete all the temporary data that are no longer required by you such as rejected programs and files which end up in recycle bin or temporary Windows files and also corrupted files.
If the error is occurring because of some corrupted valorant temporary files then you can delete those files by using Disk cleanup.
Follow the steps to delete temporary files:-
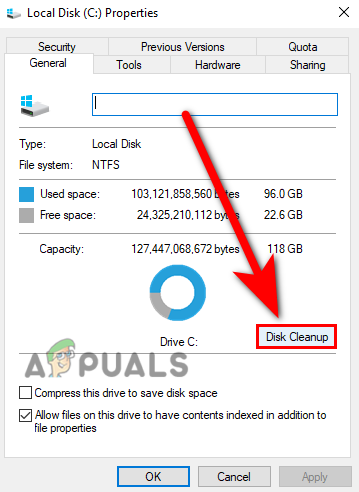
- Open file explorer, and Right-click on the disk where the Valorant is installed.
- Select the Properties option to select the Disk cleanup option.

Select the Properties option, where the Valorant is installed. - Click on Disk Cleanup to clean up the disk.
Click on disk cleanup - Here tickmark all the files and don’t worry these files are no longer important, just checkmark all of them.
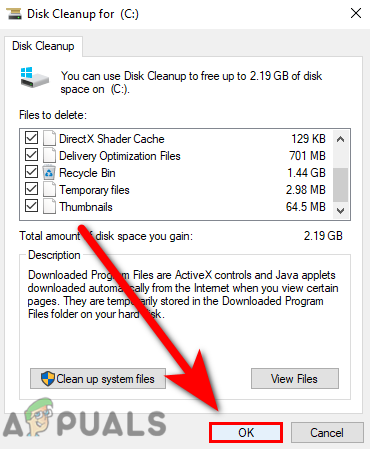
Checkmark all the files - Then click on Ok, in the next Window click on Delete Files.
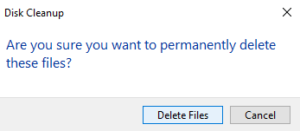
Click on delete files - Once done check if the error is solved.
Add Valorant in Exclusion
There is a chance that the Windows defender might be blocking Vanguard or it might be interfering in Vgc (vanguard service).
Add Valorant in exclusion means let’s suppose you are trusting on the application that was continuously detected by WIndows defender as malware then you can stop it by just adding the application in Exclusion.
Follow the steps to add Valorant in Exclusion Mode:-
- Press the Windows + I keys together to open the settings.
- Navigate to Update & Security and select Windows Security to view the security option.
- Click on Open Windows Security, then Virus and threat protection.
- After that, click on Manage settings under the Virus & threat protection settings.
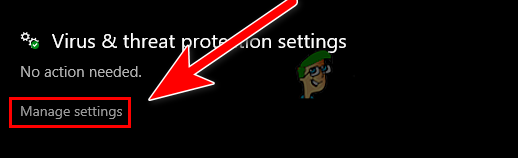
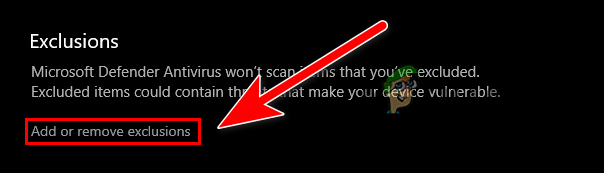
Click on Manage settings to view the other security option - Scroll down to Exclusions, and click on Add or remove the exclusion.
Click on Add or remove exclusions - Click on Add an exclusion button, then click on File in the extended menu.
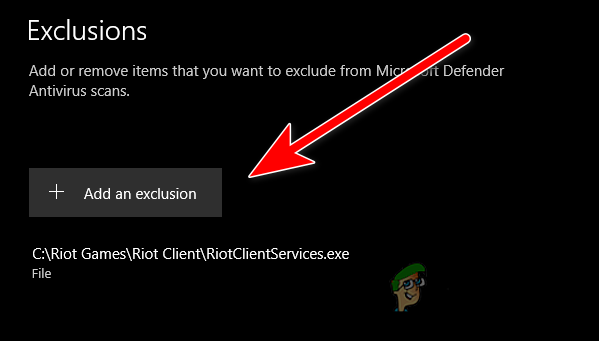
Click on Add an exclusion to select the Valorant.exe file - Now navigate to the location where the Valorant is installed, and click on the Riot Client folder and select RiotClientServices.exe.
Run Valorant as Administrator
Running any program as an administrator means you are giving special permission to access the restricted parts in Windows operating system, for that reason, it can help to fix the problems such as freezing, and crashing just because you are giving the full authority and read privilege to the application.
Here is how you can do this:-
- Right-click on the Valorant launcher and select Run as administrator.
- Launch the game and check if that works, if it is then follow the one more step to permanently open the Valorant as administrator privilege.
- Right-click on the Valorant launcher and select properties.
- Go to the Compatibility tab from the top, and checkmark the option Run this program as an administrator.
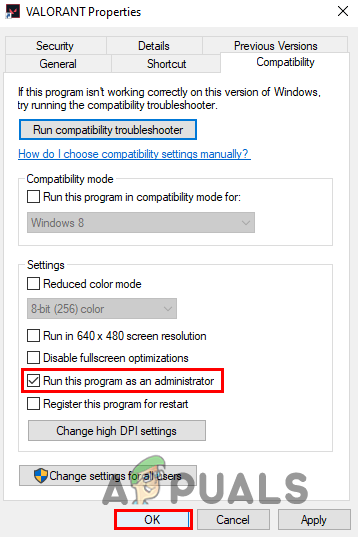
Checkmark the Run this program as an administrator
Restart Vanguard Service
Vgc comes with the installation of Valorant. It is a Riot vanguard service that runs 24/7 in the background to operate multiple tasks such as preventing cheats and detecting suspicious activity and is also used for hardware ban. Restarting the Valorant services might fix the Riot Vanguard Crashed error.
Follow the steps to restart Valorant services:-
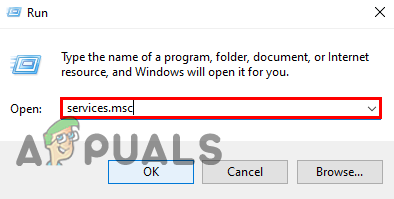
- Press the Windows key and type services.msc then press enter.
Type service.msc in the Run program - Scroll down to vgc service, you can type VGC on the keyboard and it will automatically take you to the VGC service.
- Right-click on the service, and select Properties.
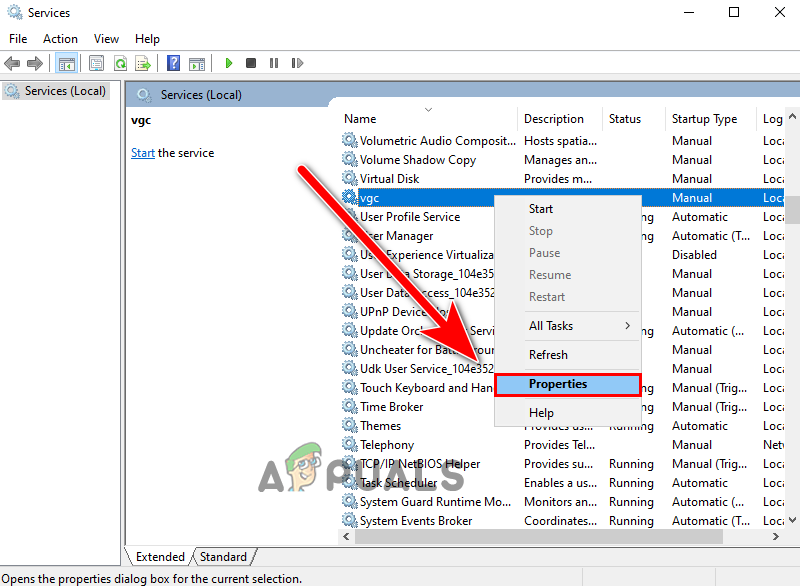
Right-click on vgc service to select properties - Change the Startup type to Automatic for this click on the dropdown icon and select Automatic.

Change startup type to Automatic then press ok - Now click on the Start button then hit Apply and press ok to save the changes.
- Once done restart your computer, launch the valorant, and check if the error persists.
Repair or Reinstall Valorant
If none of the methods worked then the error might be related to your game files or your files might get corrupted, you can use this method as the last option, to fix this you have to Reinstall the valorant from your system.
Here is how you can reinstall valorant:-
- Press the Windows key and search control pane then open it.
- Click on Uninstall a program under the Programs category.
- Here find and select the Valorant then click on Uninstall button on the top.

Uninstall Valorant - Download the Valorant launcher/setup from the official website.
- Once the setup is downloaded, run the setup.
- Click on the Advanced option and select the directory where the Valorant has been installed.
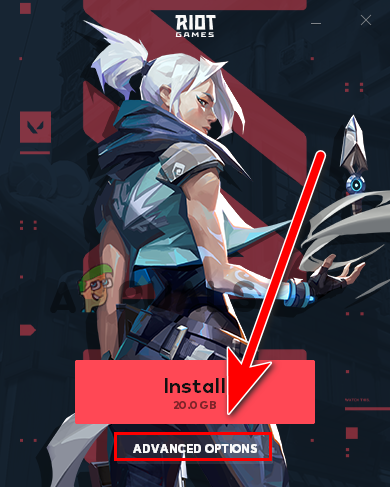
Click on Advanced options - Once done click on the Install button to repair and verify the Game files.
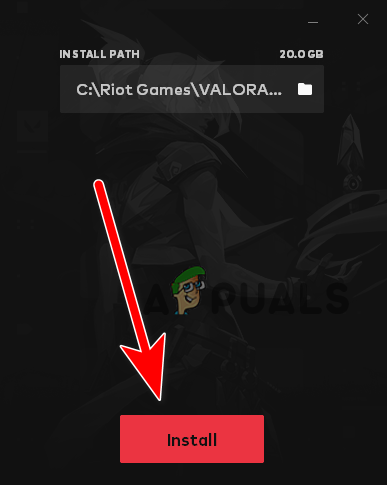
Click on the Install button - It should start the Verification process.
- Once done restart your computer and check if the error persists.
Submit a Ticket
If All the solutions given solution did not work for you then you have to submit a ticket because your problem is kind of unique and serious, to fix this you need a Riot expert who will help you to resolve this in under 48 hours.
Submit your ticket to Riot by following the below steps:-
- Go to the Official Valorant website and sign in to your existing account.
- Now hover your mouse on the Support menu and select the Support option in the expanded menu.

Hover your mouse on the Support menu and select on Support option - Scroll down to the bottom and click on SUBMIT A TICKET option.

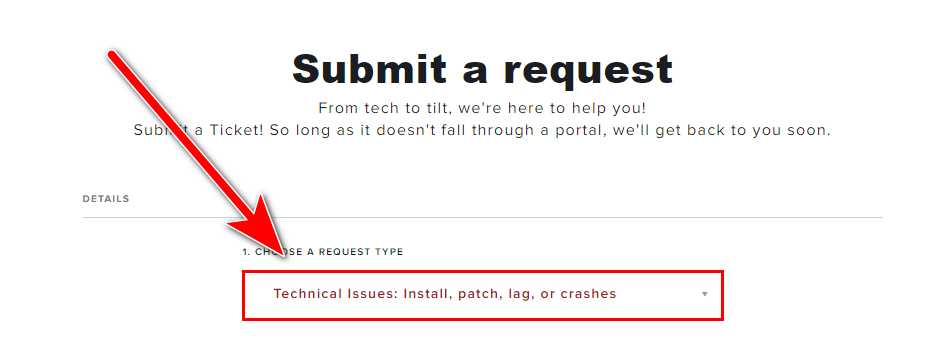
Click on SUBMIT A TICKET - In the next Window choose the Technical Issues: Install, patch, lag, or crashes.
Choose Technical Issues Install patch, lag, or crashes - Here describe your issue then click on SUBMIT button.
Hopefully, you have solved the Riot Vanguard Crashed error, if there is a problem while applying methods then you can mention it in the comments section, we would like to appreciate it.


