Fix: Recovery Tab Won’t Open on Windows 10/11
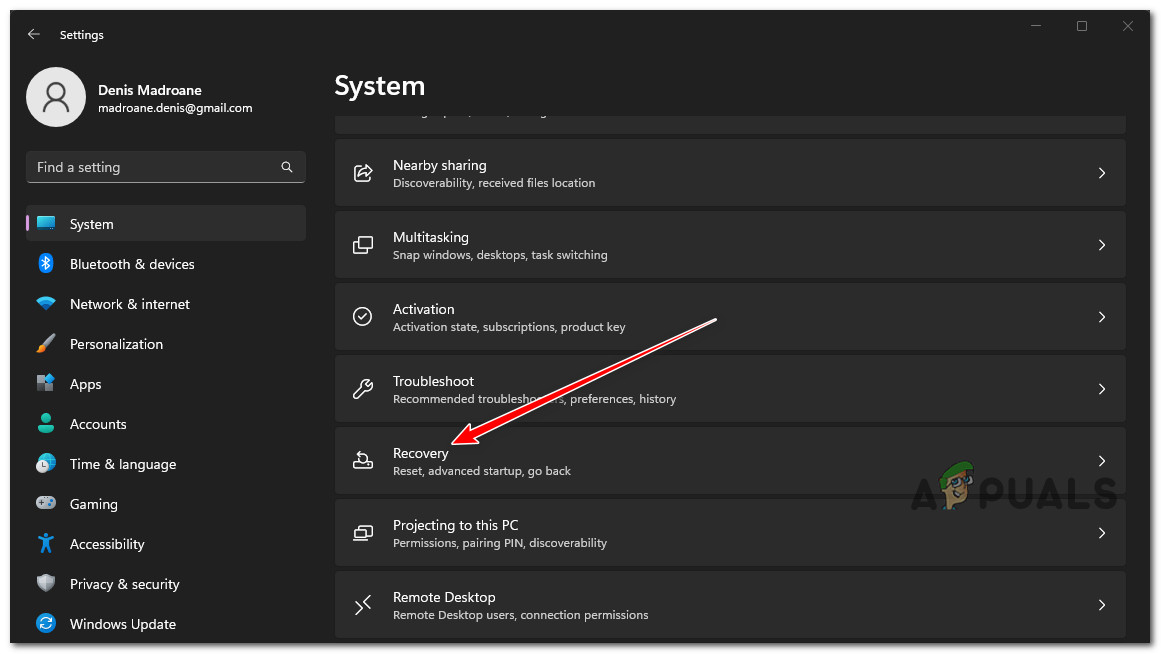
Some Windows users report that the Settings app crashes and closes when they access the Settings menu and click on System> Recovery options. Upon repeating this action, the same kind of behavior reoccurs. This problem seems to only occur on Windows 11 and Windows 10.
After we’ve looked into this issue thoroughly, we realized that there are several different underlying causes of why you might experience this type of issue. Here’s a list of potential culprits that you should be aware of when troubleshooting this issue:
- Broken Recovery GUI – If the Recovery crashes due to a graphical control element that is independent of the functionality of this Windows feature, you might be able to avoid the crash entirely by booting directly into the recovery menu and resetting your PC via a cloud download.
- Missing Windows hotfix – As it turns out, Microsoft has released several different hotfixes aimed at addressing this multi-version bug that occurs on both Windows 10 and Windows 11. Before trying anything else, you should ensure that your Windows version (10 or 11) is updated to the latest version available.
- Recent machine change – A recent machine change such as a driver installation, an update, or an AV scan might end up indirectly causing an issue with the Recovery menu. In this case, you can revert the changes using a system restore and a snapshot to revert your PC to a state where this problem was not occurring.
- System file corruption – Depending on your circumstances, this particular issue can also occur due to corruption affecting your PC’s ability to initiate recovery actions. In this case, you can attempt to fix the problem by running SFC and DISM scans in quick succession or by performing a clean install or repair install.
- Failing storage sectors – Run a CHKDSK scan on your conventional (HDD) drive if you’re still using one to see whether this behavior is linked to a failing disk sector that is starting to die. The corrupted sectors will be replaced with unused equivalents following this type of scan.
- Corrupted Windows account – One of the primary causes of this persistent issue might also be corruption impacting the Windows profile. If this situation applies, establishing a new Windows account should solve the problem.
- Corrupted Settings app – There’s a good likelihood that the issue affects the app’s whole GUI framework if you’re having identical crashing problems with any other Settings tab (apart from the Recovery page).
- 3rd party interference – Several moving pieces might end up causing the Recovery component to malfunction. You should boot in Safe Mode and attempt launching the service once again to eliminate third-party software or service interference from your list of potential offenders. You are dealing with some third-party influence if the mistake doesn’t occur again.
Now that we covered every potential scenario why you might experience this problem let’s go over a series of verified fixes that other affected users have successfully used to get to the bottom of this issue.
1. Reset this PC via cloud download
You may be able to avoid the crash entirely by booting directly into the recovery menu and resetting your computer through a cloud download if the Recovery program crashes due to a graphical control element unrelated to this Windows feature’s functionality. In this scenario, you will be able to avoid the crash.
Note: This method involves forcing your Windows 10 or 11 computer to boot directly into the recovery menu. This way, you can circumvent a scenario where the Recovery menu crashes before you get the chance to do anything.
Remember that this method will only be effective in scenarios where the Recovery component is not affected by corruption.
To force your PC to boot directly into the recovery menu and deploy the recovery procedure from a cloud download, follow the instructions below:
- Press the Windows key to bring up the Start menu.
- Next, press and hold the Shift key and click on the power icon from the Start icon.
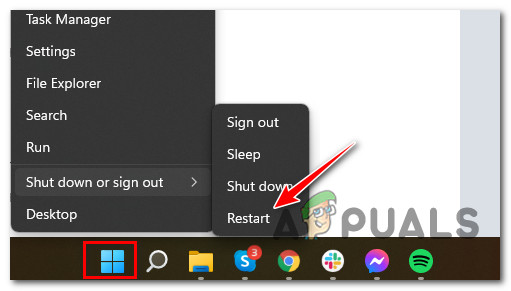
Restart directly into the recovery menu - Click on Restart once again at the confirmation prompt and wait until your PC boots directly into the recovery menu.
- Once your PC boots inside the recovery menu, click on Advanced Options from the list of options and Troubleshoot from the context menu that just appeared.
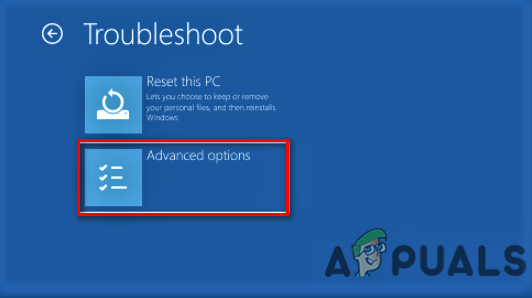
Access the Advanced Options menu - Once you’re finally inside the Troubleshoot menu, choose Reset this PC, then select Download Cloud when you are prompted to choose one from the different recovery options.
- Complete the recovery operation and see if you are allowed to use this utility without it crashing.
If the same crashing problem reoccurs when you boot directly into the recovery menu, move down to the following method below.
2. Install every pending update
As it turns out, Microsoft has published a variety of hotfixes to solve this multi-version fault that manifests itself on Windows 10 and 11. Before you attempt anything more, you need to make sure that the Windows version you are using (either 10 or 11) has been updated to the most recent version that is currently available.
Because Microsoft has recently sent a few updates to reduce the likelihood of issues of this nature, this is the potential solution you should investigate next.
Accessing the Windows Update component and confirming that you are operating on the most recent build available for your version of Windows 11 is the first step in solving this issue, which can be done by clicking here.
To prevent a crash from occurring while entering the Recovery menu, follow these steps to install the most recent available build of Windows 11 using Windows Update:
- To launch the Run dialog box, press the Windows key + the R key simultaneously.
- In the following step, within the text box, write “ms-settings:windowsupdate” and then hit the Enter key to access the Windows Update tab within the Settings application.
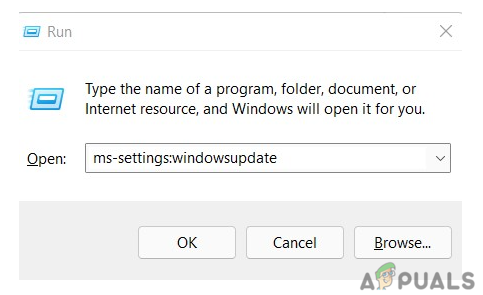
Access the Windows update menu Note: You may be prompted for an account control prompt at this stage, even if you have not tampered with the default settings for the UAC. In this scenario, you should select Yes to enable admin access.
- After that, proceed to the area on the right and click the button labeled Check for Updates.
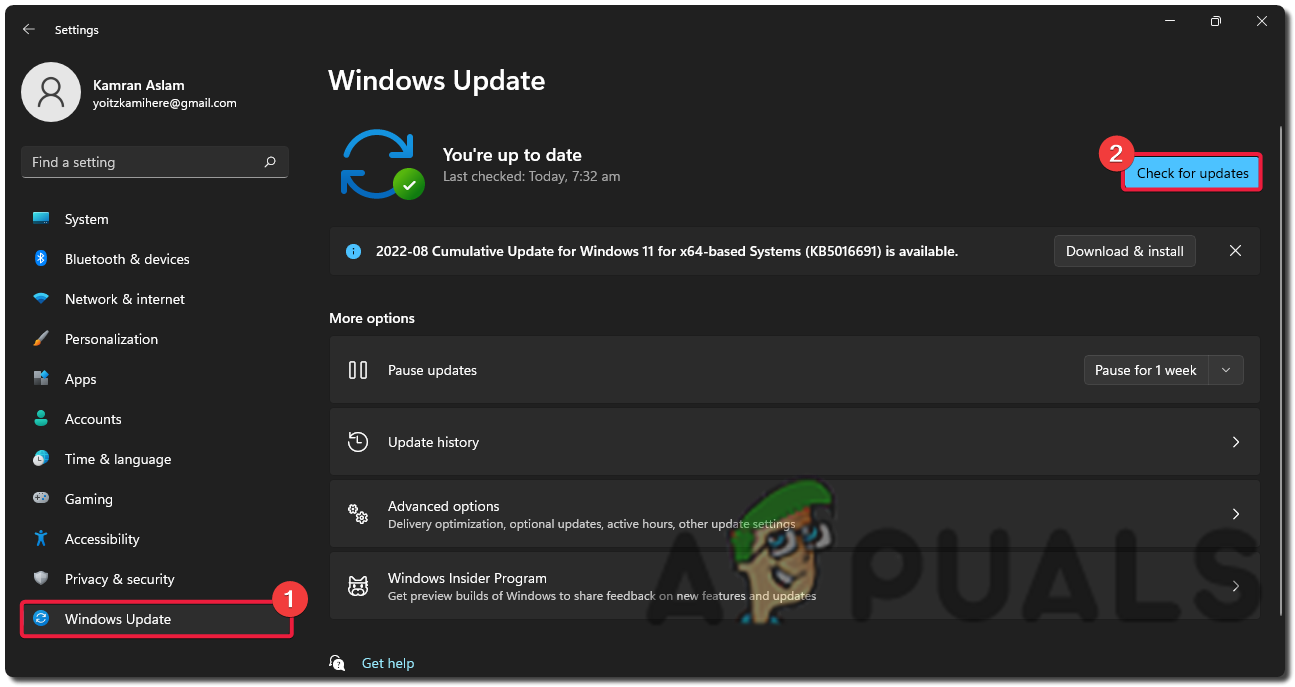
Checking for updates - After downloading the update locally, click the Install Now button to begin installing it locally.
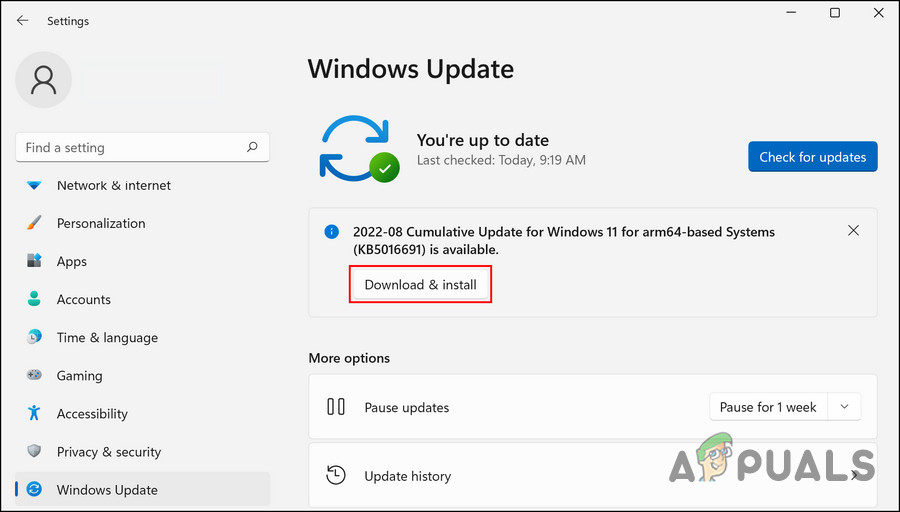
Download and install Windows Updates - After everything else, restart your computer and check to see if the issue persists.
If you are still experiencing the same problem while attempting to access the Recovery menu, go to the probable solution listed further down this page.
3. Deploy SFC and DISM Scans
You may also be experiencing this problem due to corruption that affects the Recovery component (either directly or indirectly).
The next step in resolving this problem is to run quick successions of SFC (System File Checker), and DISM (Deployment Image Servicing and Management) scans.
Note: Even though SFC and DISM are somewhat similar, we advise running both scans quickly, one after the other, to increase your chances of fixing the corrupted system files. Even if the two scans are comparable in some ways, this should still be done.
If this circumstance applies, you must start with a basic SFC scan.
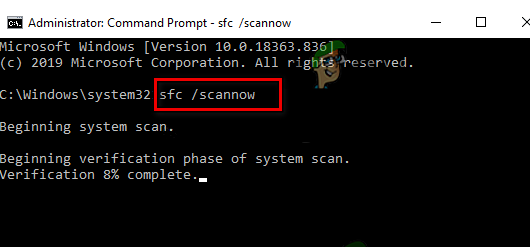
Necessary: This tool functions entirely locally and does not require you to be actively connected to the internet to use it. The CMD window must not be closed after this procedure starts, even if the utility seems to have stopped responding and frozen.
Wait until the process is complete before interfering because doing so might cause logical errors on your HDD or SSD.
Restart your computer when the SFC scan has been completed, and after the machine has started again, check to see if the issue has been fixed.
If you cannot install the pending cumulative update(s), carry out a DISM scan and complete the process by following the on-screen instructions. This will be your final fallback if you cannot install the update.
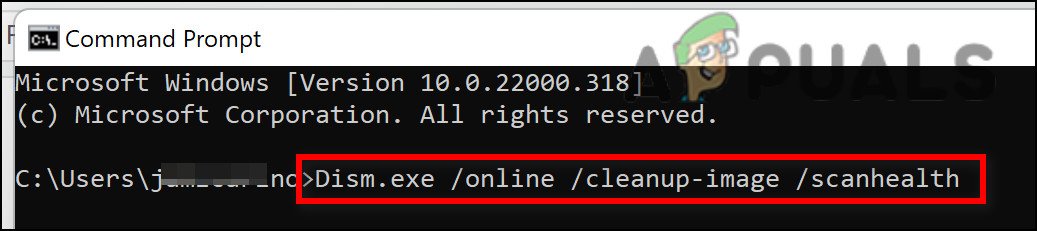
Noting that DISM uses a component of Windows Update to retrieve healthy copies of corrupted system files to replace such files, this is an important distinction between DISM and SFC. As a result, you must make sure that you have access to a solid internet connection before starting this process.
You will need to restart your computer once again to determine if the problem has been fixed once the DISM scan has been successfully completed.
If the problem still persists, follow the next method below to deploy a CHKDSK scan.
4. Perform a CHKDSK scan
Run a CHKDSK scan to see whether this behavior is connected to a failing disk sector that is just starting to fail if you’re still using a conventional (HDD) drive. The corrupted sectors will be replaced with unused equivalents following this type of scan.
According to many users who have encountered this problem, this problem may also arise if the HDD or SSD that is now housing your OS installation starts to malfunction. This scenario can easily be verified, and you can even extend your storage hardware’s life by performing a CHKDSK scan – this will effectively replace damaged storage sectors with healthy ones (for a few more months).
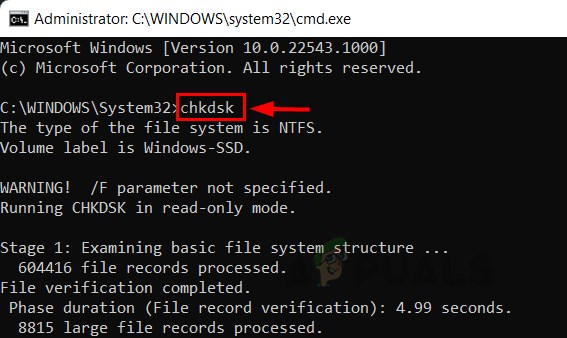
Running a Check Disk Scan will help you extend the life of your HDD in this situation by replacing damaged sectors with healthy ones. Try running a CHKDSK scan from an elevated CMD prompt to rule out this scenario.
Widespread Launch of a CHKDSK scan
Note: Fortunately, the built-in CHKDSK application in Windows can scan for faults and corruptions and repair any logical errors and damaged data that could have been left behind by a forced deletion attempt.
Open it in an elevated CMD window to grant CHKDSK the permissions required to repair damaged files. The procedures should function no matter what version of Windows you’re using.
After the CHKDSK scan is complete, restart your computer to see whether you can now enter the Recovery option straight from the Settings menu.
If the issue continues, try the next method below.
5. Reinstall the Settings app
If you’re experiencing similar crashing problems with other Settings tabs (besides the Recovery tab), there’s a big chance that the problem is occurring due to an issue that affects the entire GUI framework of the Settings app.
Several affected users who are also dealing with this problem have confirmed that they resolved the issue by using an elevated CMD window to reinstall the Settings app effectively.
Note: This method is confirmed to work on both Windows 10 and Windows 11.
Follow the instructions below for specific steps on reinstalling the Settings app from an elevated CMD window:
- Press the Windows key + R to open up a Run dialog box. Next, type ‘cmd’ inside the text box and press Ctrl + Shift + Enter to open an elevated CMD prompt with admin access.
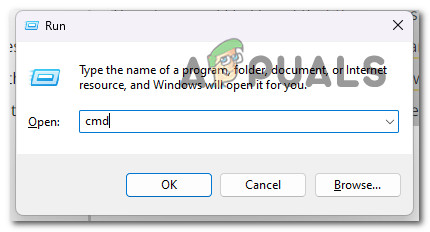
Open a CMD window - Click Yes to grant admin access at the User Account Control (UAC).
- Once you’re inside the elevated CMD prompt, type or paste the following command to reinstall the Settings app effectively:
Get-AppXPackage | Foreach {Add-AppxPackage -DisableDevelopmentMode -Register “$($_.InstallLocation)AppXManifest.xml”} - Once the command has been enforced successfully, reboot your PC and see if the problem is now fixed.
If the same issue is still occurring, move to the next method below.
6. Open the Recovery menu from Safe Mode (workaround)
There are several moving elements that have the potential to cause interference with the recovery component. If you wish to rule out the possibility that interference from third-party software or service is to blame for the issue, you should boot your System in Safe Mode and then attempt to reopen the service.
If the issue does not reappear, it is quite evident that you are dealing with some form of influence from a third party.
In this scenario, you can try to boot into safe Mode with Networking and then start the remote desktop service when you are positive that there is no potential interference causing this behavior.
This is the procedure to follow:
- To pick Restart while holding down the Shift key, hit the Windows key to open the Start menu (while keeping the Shift key pressed).

Boot in Safe Mode - Your computer will immediately access the Recovery menu after resuming.
- When you eventually get to the recovery option, select Troubleshoot from the drop-down menu.
- Select Startup Settings from the drop-down menu in the Advanced Options menu.
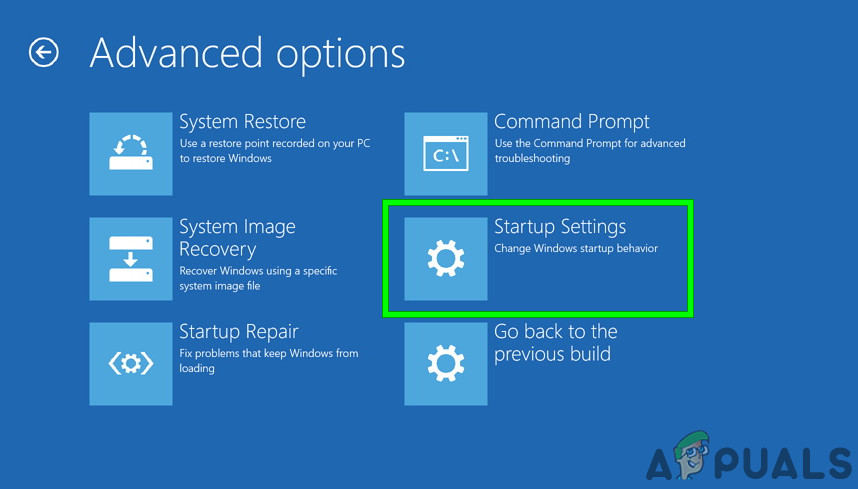
Access the Startup Settings - Press F5 to start your computer in Safe Mode with Networking on the next page.
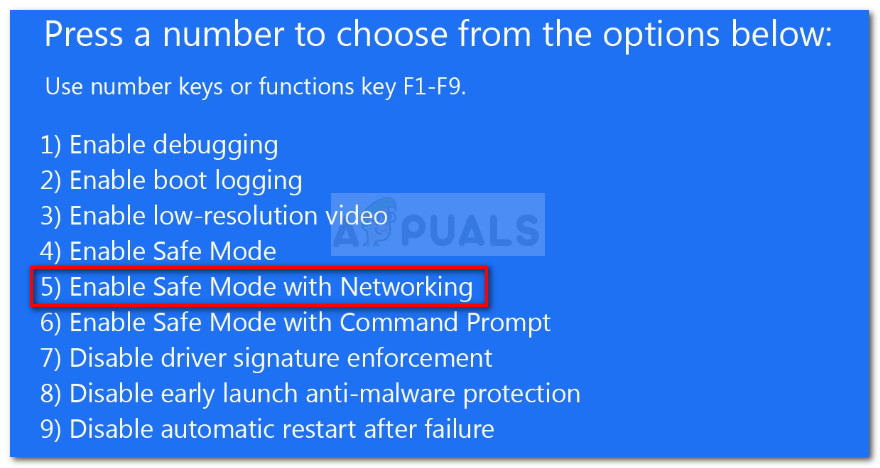
Safe Mode with networking - Wait until your PC boots in safe Mode, then see if you can open the Recovery page.
Move on to the technique that is listed below if the same sort of problem is still present.
7. Create a new Windows account
It has come to our attention that one of the possible causes of this issue is corruption, which originates from within your Windows profile.
Users who were experiencing this issue while attempting to open a native Windows app have reported that the issue was fixed when they switched to a local Microsoft account. This was validated by these users.
Note that utilizing this approach will ultimately result in deleting any tainted dependencies currently associated with your active user profile.
Create a new local user account for your Windows installation by following the instructions below, and then log in with that account whenever you start a native Windows application:
- First, click Windows key + R to enter the run dialog box.
- To enter the Family & other persons page of the Settings app, type “ms-settings:otherusers” into the text box that just opened and hit Enter.

Access the Other Users tab - Click on Add someone else to this PC under the Other user’s tab of the Family & other users page by scrolling down.
- To establish a local account, choose “I don’t have this person’s sign-in information” from the following selection.
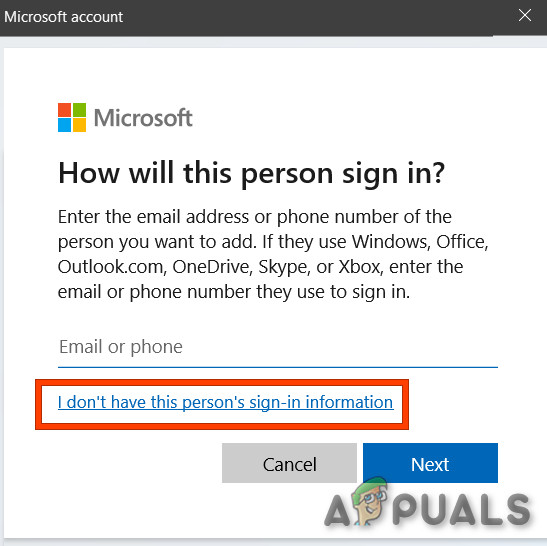
Don’t have this persons sign in - Sign in using your Microsoft account on the next page, then select Add a user without a Microsoft account.
- Create a username, password, and a set of security questions for the new account.
- After that, restart your computer and log in the following time it starts up using the newly established account.
Launch the Recovery component and see what happens to see if the issue has been fixed. Continue to the next potential solution below if the issue is still not resolved.
8. Restore to a healthy snapshot
It is important to remember that a recent change to the computer, such as the installation of drivers, the updating of software, or the running of an antivirus check, may have inadvertently caused an issue with the Recovery menu.
The trouble with these issues is that most of the time, there is no way to identify which one is causing the problem. If this is the case, the simplest solution to fix the issue at hand is to use the System Restore software on your computer to return it to a point in time when the issue was not occurring. This will allow you to fix the issue.
It is crucial to note that all current versions of Windows, including Windows 11, include a setting that automatically creates and stores fresh recovery snapshots regularly (during important system events).
Note: The following explains how to configure the settings for System Restore on Windows 10 or 11.
You should have plenty of System Restore points from which to pick and implement this procedure on your own computer, provided that you have not modified the default behavior in any way (or that a third party has not done so for you).
IMPORTANT: However, before you get started with the steps below, it is important to understand that after this process, every change that you made to your System since that restore snapshot was created will be lost. This is important to know because it will prevent you from making any mistakes while you are making the restoration. This will affect any games, programs, and other system updates that may have been installed during that time. This includes any and all updates.
If you are prepared to use System Restore, then the following is a simple instruction on how to use it to restore your machine back to a healthy condition when this problem was not occurring:
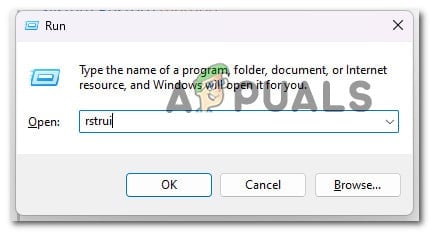
- To launch the Run dialog box, press the Windows key + R simultaneously.
- After that, launch the System Restore menu by typing “rstrui” and pressing the Enter key.
Access the Recovery menu - When you have navigated beyond the first screen that appears when you select System Restore, select the Next option to go to the subsequent menu.

Deploy a System Restore - The following step is to begin by marking the associated box.
- From the screen that follows, proceed by checking the dates of each stored restore point. Choose a restore point that was created before the appearance of this problem.
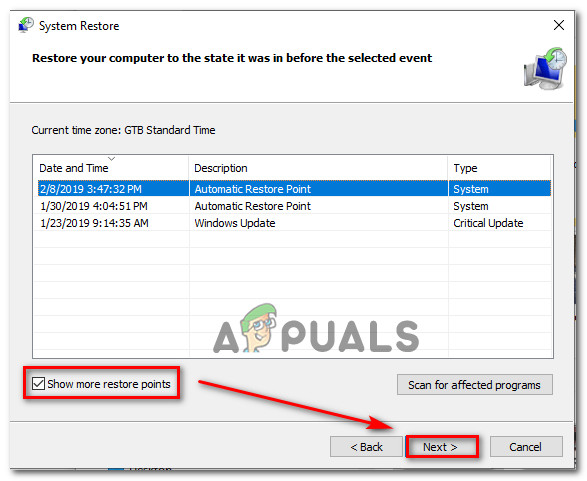
Show more restore points Note: To prevent losing a significant amount of data, you should avoid picking restore points older than one month.
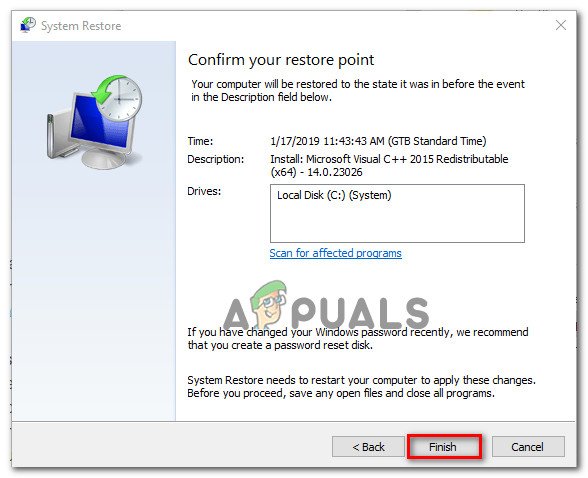
- Once you have ensured that the right restoration point is selected, go to the last option by clicking the Next button.
- The functionality of the utility is now completely operational at this stage. After clicking the Finish button, you will need to wait for the procedure to begin.
Deploy a system restore point Note: You will be required to restart the application shortly after this. Follow the instructions, and then wait for the subsequent startup to finish.
- When your personal computer has finished booting up, try entering the recovery menu once more to see whether or not the issue has been resolved.
If the issue is still experienced, proceed to the next possible solution further down the page.
9. Perform a Clean install or Repair Install
If you can still not access the Recovery menu through the GUI menu, the final thing you should check for is an underlying system corruption issue that cannot be resolved through traditional methods (with DISM and SFC scans).
It has been noted that other customers who have had the same issue have successfully resolved it by doing either an in-place repair (repair install) or a clean installation.
A clean installation is a more straightforward alternative; nevertheless, the primary drawback is that it will not let you save your own data, including programs, games, and personal media (unless you back them out first).
You should consider using a repair install technique if you are searching for a solution to prevent you from losing data. The most significant benefit is that you can preserve all of your own data, including programs, games, personal media, and even some user settings.


