Fix: Realtek Drivers Causing Crackling Audio in Windows 11
There have been quite a few reports by users that their Realtek audio drivers cause a crackling sound that lasts for around 5 seconds before stopping automatically. According to these reports, the sound can be heard quite often, which is frustrating for the users.
We had a look into the issue and discovered that it can be caused due to a corrupt Realtek driver, a generic glitch within the system, and in rare cases, a faulty Windows installation. In this guide, we have listed several effective troubleshooting methods that will help you fix the issue in no time. Let’s get right into it!
Run the Audio Troubleshooter
Unlike other generic responses users usually receive, this solution was suggested by a Microsoft professional. In this solution, you will run the Playing Audio troubleshooter. This will identify and solve the problem.
Here is what you need to do:
- Search for Settings in the Start menu and click on Open.
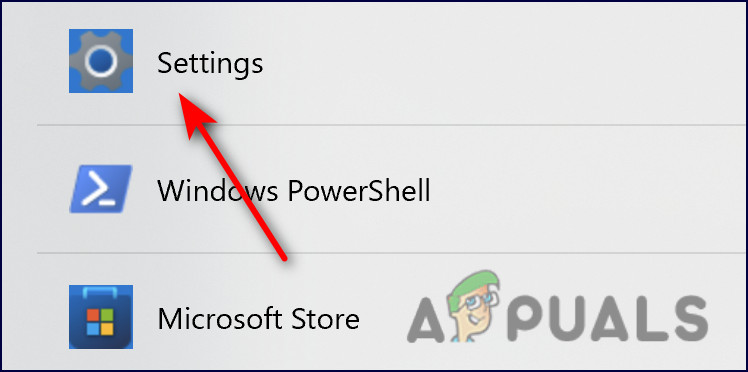
Startup Settings - Locate the Update & security from the list of options available in the Settings window and click on it.
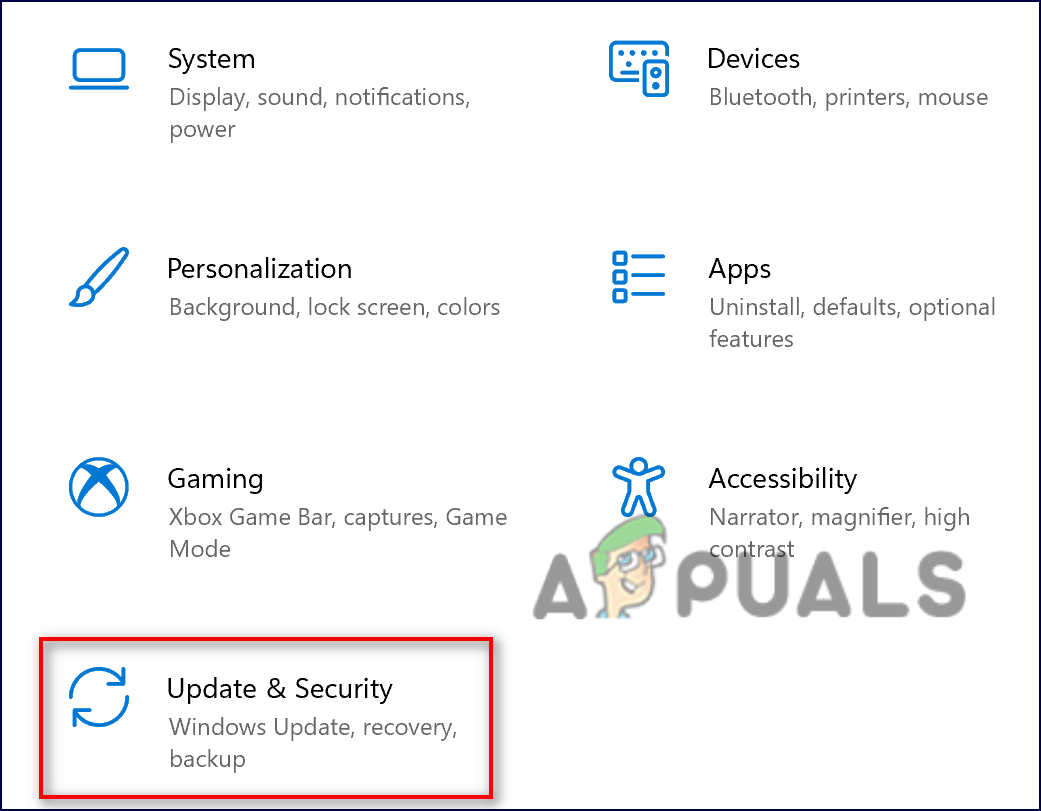
Launch update and security settings - Select Troubleshoot from the left pane and navigate to Additional troubleshooter in the right pane.
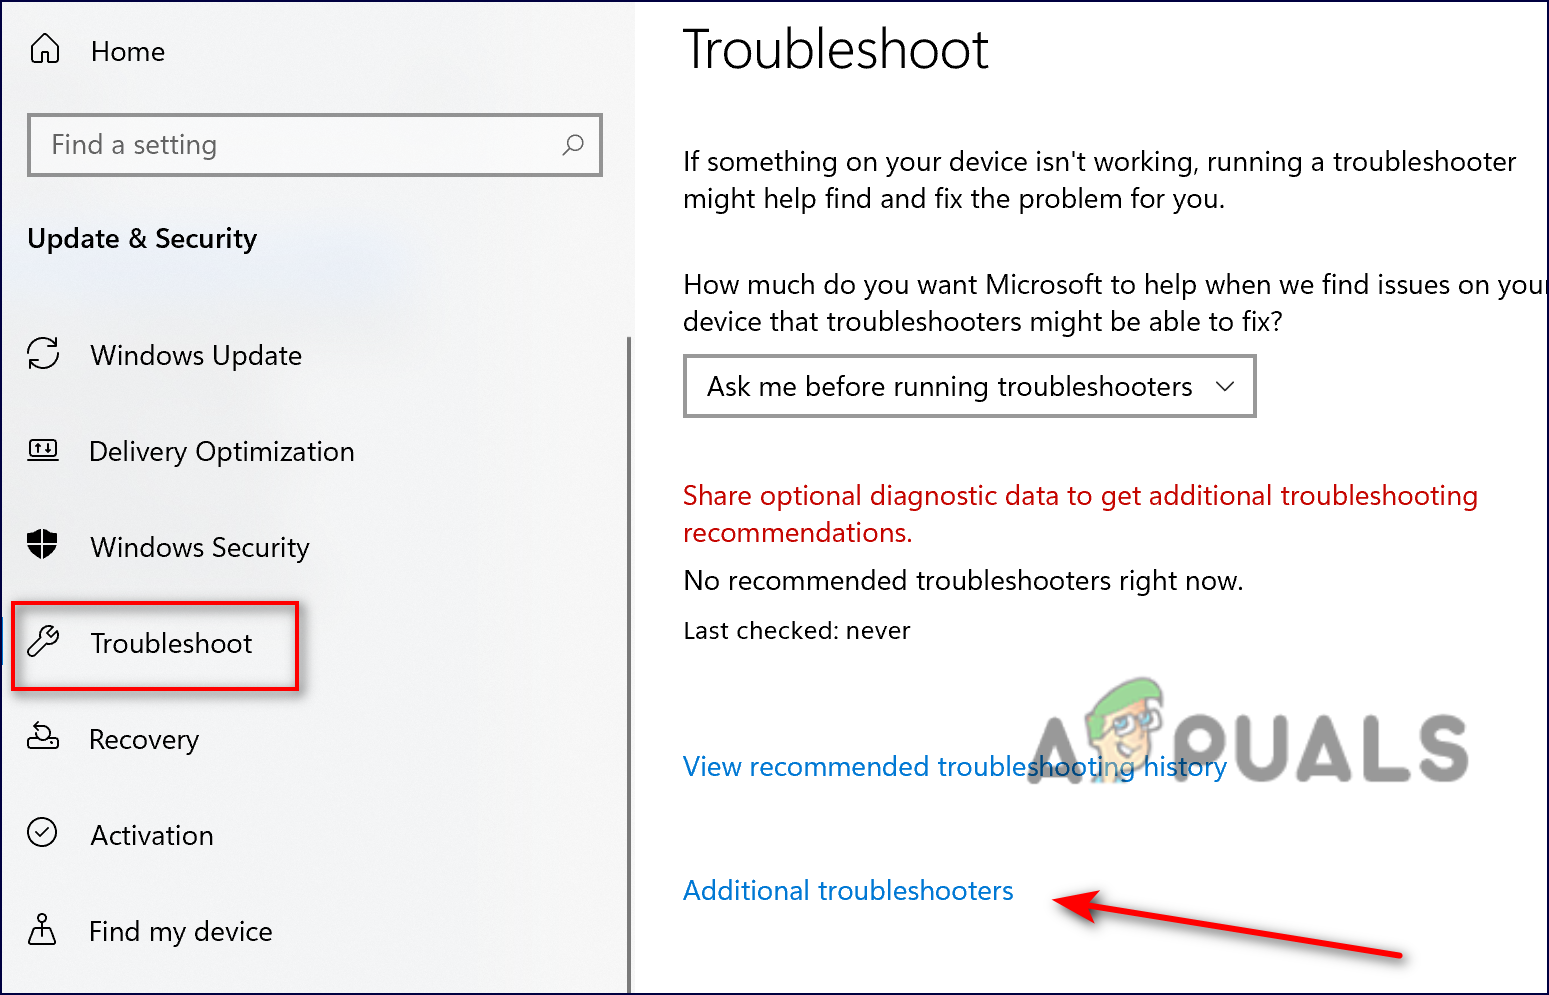
Access additional troubleshooters - Locate Playing Audio and click on the Run the troubleshooter button under it.
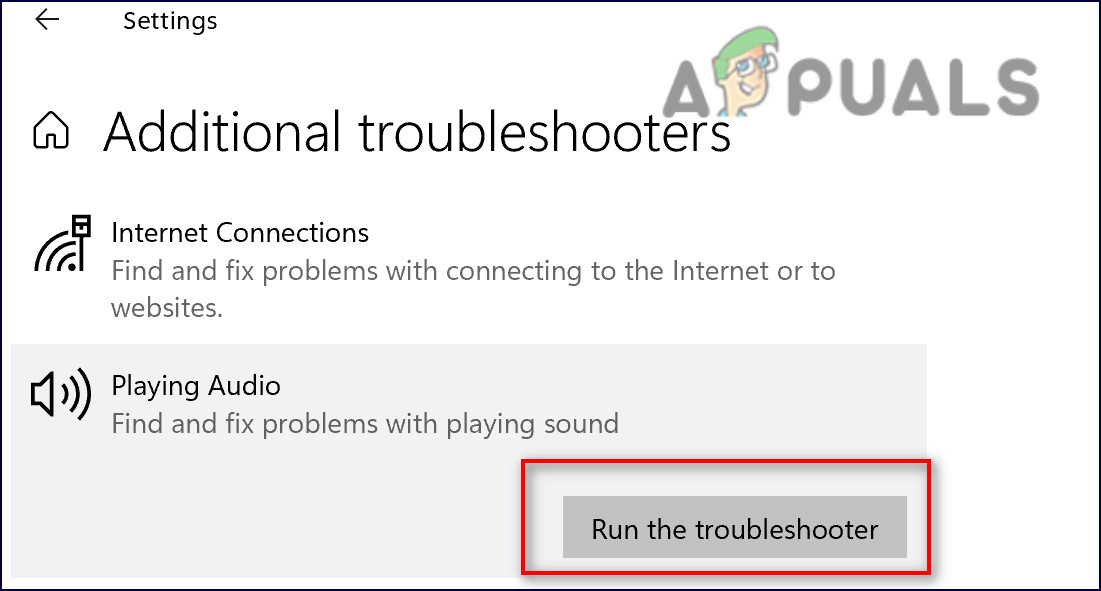
Audio troubleshooter - Once the troubleshooter completes its scan, it will recommend fixes if any issues are identified. Go ahead and click on Apply this fix option in this case and check if doing so resolves the issue with your Realtek audio driver.
Reinstall the Realtek Audio Driver
There is also a chance that there is an issue with the Realtek audio driver, which is typically caused due to the driver being corrupt or outdated. The solution to this is simple, as all that you need to do is reinstall the driver on your PC.
This potential fix has helped several users resolve the issue related to Realtek audio driver, which is why we recommend you give it a chance.
Here is what you need to do:
- Open up a Run dialog box by pressing Windows key + R. Inside the run box, type ‘appwiz.cpl’ and press Enter to open up the Programs and Features menu.
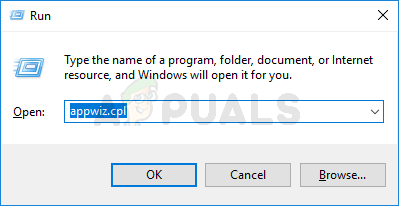
Opening up the Programs and Features menu - Scroll down the list of applications inside the Programs and Features prompt until you locate the Realtek HD Manager (or another audio driver signed by Realtek).
- After you locate the correct driver, right-click on it and select Uninstall from the context menu, then follow the on-screen instructions to install it.

Uninstalling the game - After every Realtek driver is finally uninstalled, reboot your computer and wait for the next startup to complete.
- Then, launch your default browser and head over to the official download page of Realtek audio driver, and download the latest version.
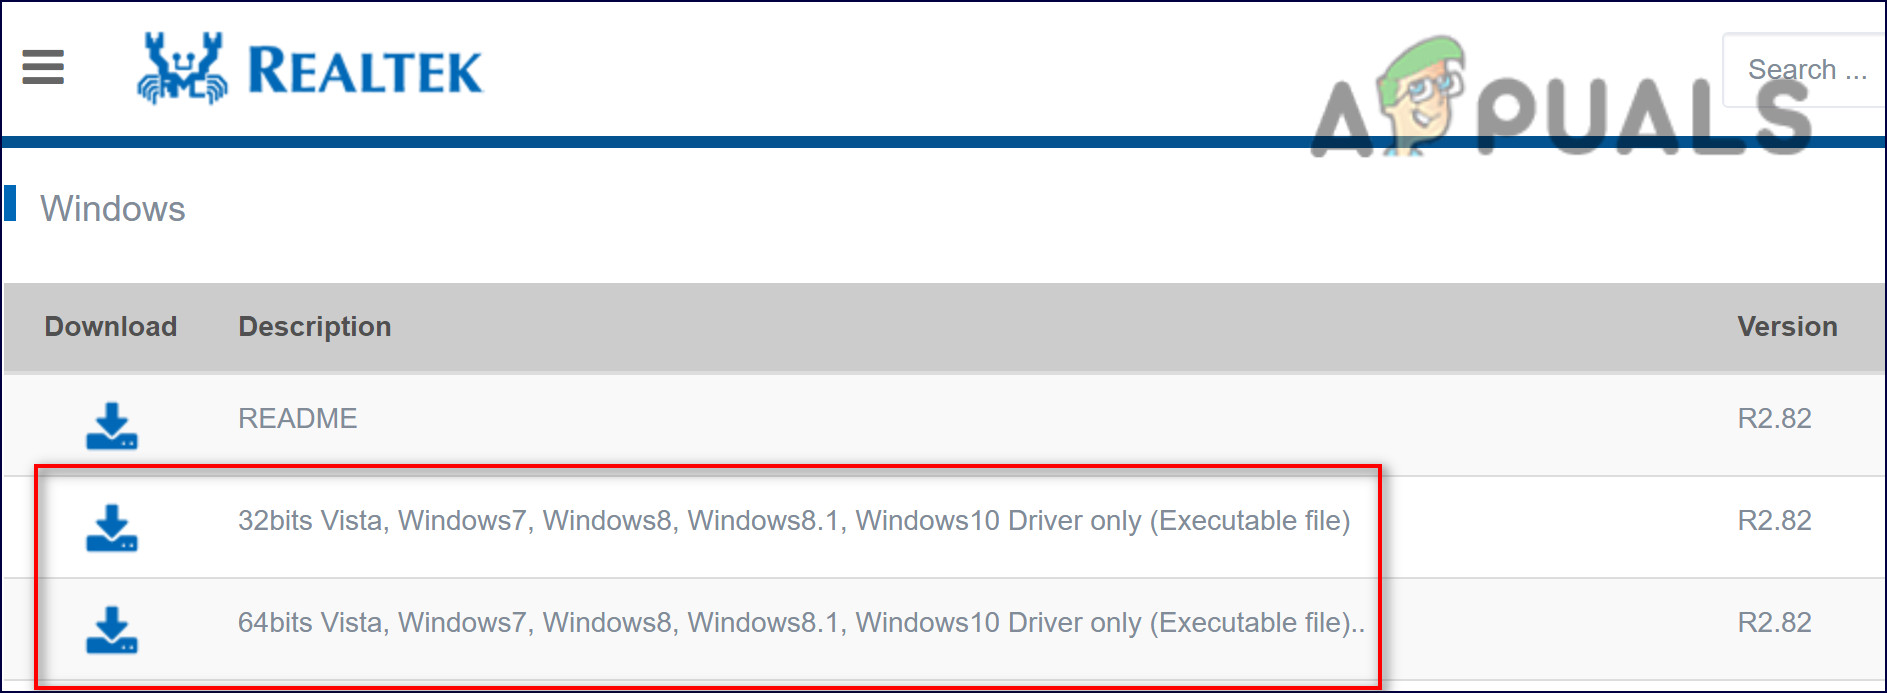
Download latest version of Realtek - Once the download has been completed, run the installer and follow the instructions on the screen to reinstall the latest version of Realtek’s driver.
- Lastly, restart your computer after the installation is complete to see if the error is still present.
Change Sound Settings in Control Panel
As it turns out, you might also be facing this problem with your Realtek driver if the sound settings are not properly configured in the Control Panel. Below, we have listed detailed steps on how to modify these settings, and hopefully, following them will fix the problem in no time.
Here is what you need to do:
- Type Control Panel in the search area of the taskbar and hit Open to launch it.
- In Control Panel, select Large icons from the View by drop-down menu.

Choose large icons under category - Select Sound.

Choose sound - Click on the Playback tab.
- Right-click the Speakers and click Enable.
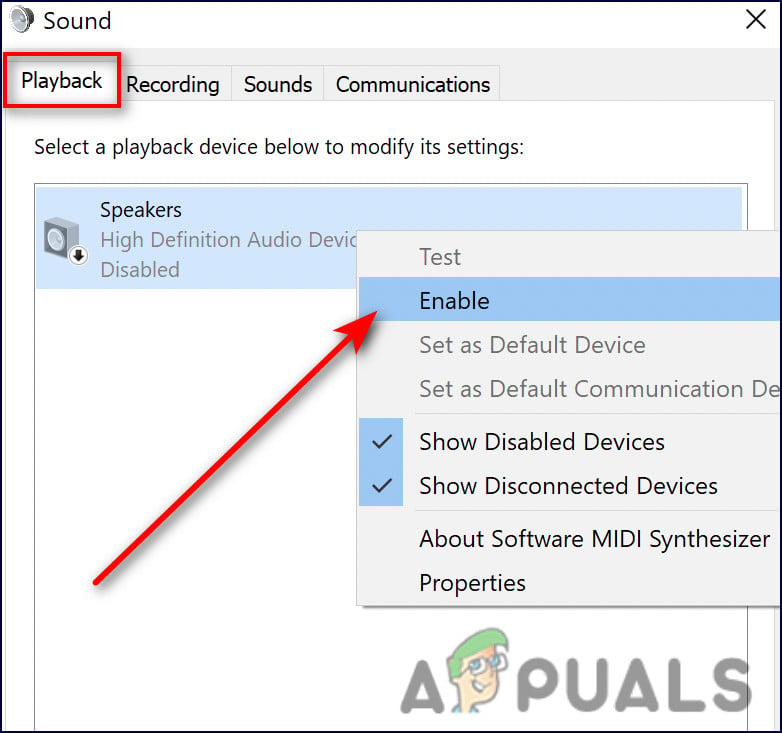
Enable the speaker - Now right-click it again and select Set as Default Device.
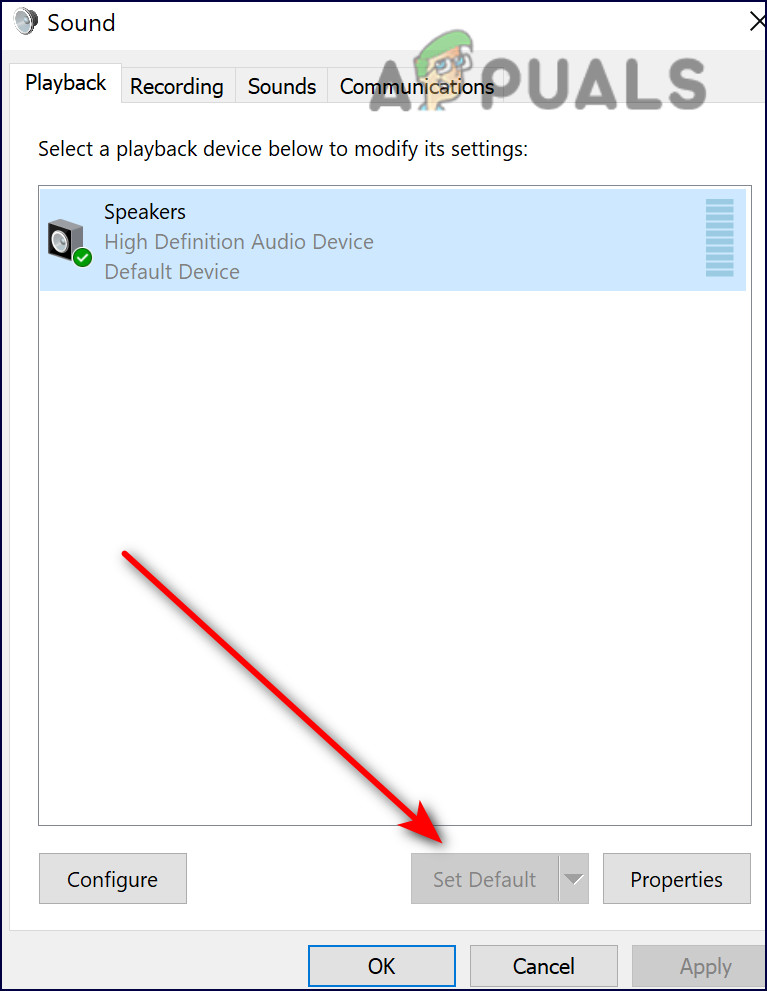
Set speaker as default device - Next, right-click Speakers and click Properties.
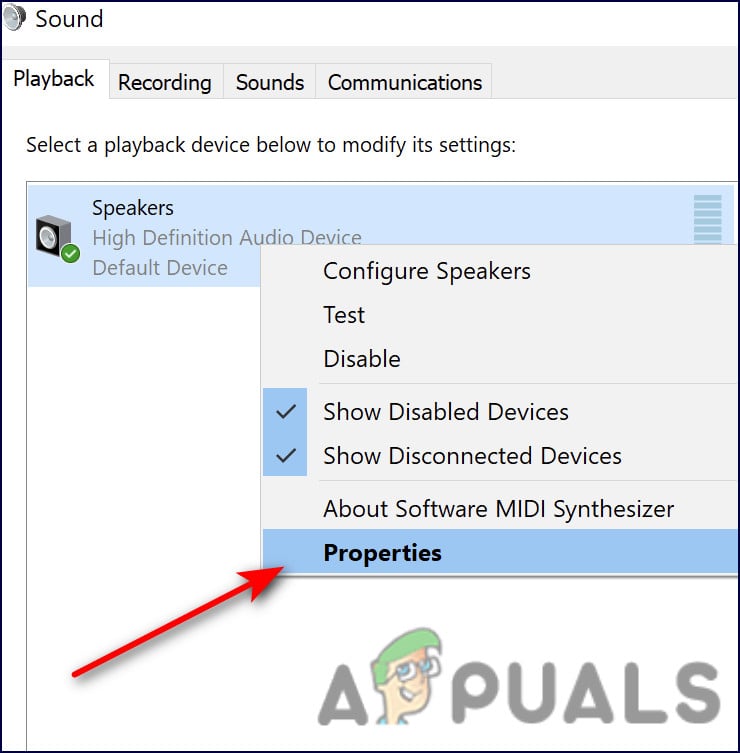
Right-click and choose properties - Click the Levels tab, then drag the volume slider towards the largest value.
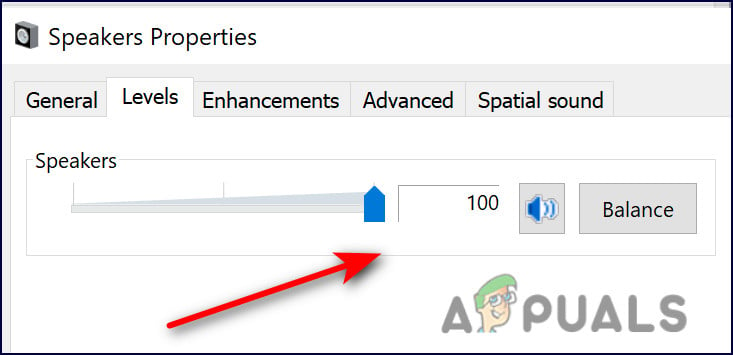
Set to the highest value - Head over to the Advanced tab.
- Uncheck the box to ‘Allow Application to take exclusive controls of this device’ and hit OK.
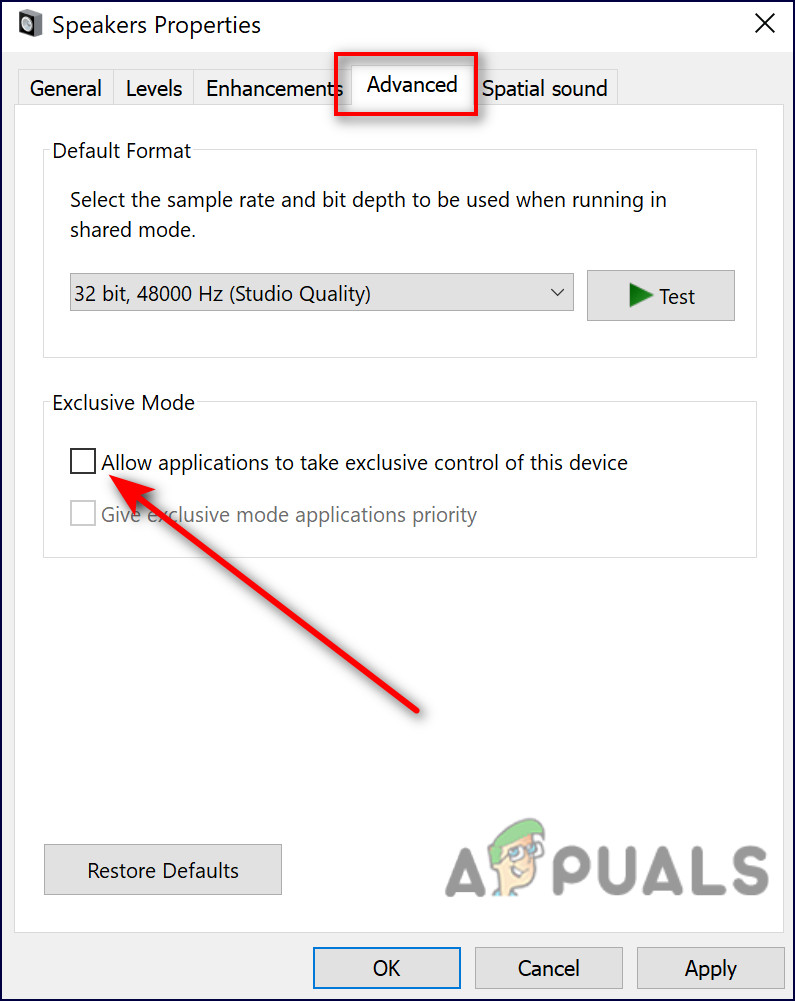
Uncheck - Restart your computer and check the audio of Realtek driver.
Perform an In-Place Upgrade
In the event that nothing has worked for you, a Windows upgrade may be required to resolve the issue at hand. Make sure you back up the essential system files and create a system restore point before you proceed.
- Launch a web browser and steer to Microsoft’s Windows 10 page.
- Now click the Upgrade Now button and wait for the download to complete.
- Once the file is downloaded, launch it as an administrator.
- You will then be prompted to update your PC’s operating system.
- In case of failure, go to Microsoft’s Windows 10 page and click on Download Tool Now (you may have to scroll down a bit to find it).
- Run the downloaded setup file as administrator and select Upgrade This PC Now from the window that appears after the download is complete.
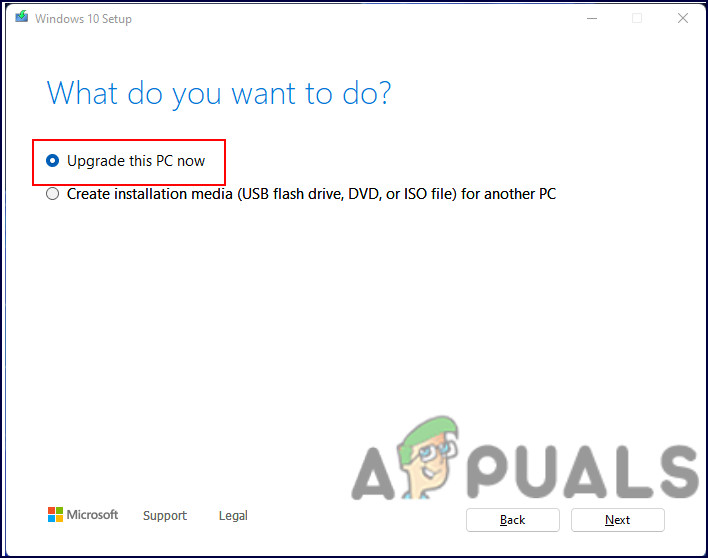
Upgrade PC now - When prompted to upgrade, make sure that you select Keep Windows Settings, Personal Files, and Apps.
- After the upgrade process is complete, hopefully, the Windows would have been completely updated, thus resolving the Realtek error in the process.


