How to Fix Rdbss.sys BSOD (RDR FILE SYSTEM) in Windows 7, 8 or 10
Some Windows users are encountering the Rdbss.sys related BSOD (Blue Screen of Death) in random intervals with no apparent trigger. In most cases, the Stop Error code that comes up is RDR FILE SYSTEM. This problem has been confirmed to occur on Windows 7, Windows 8.1, and Windows 10.
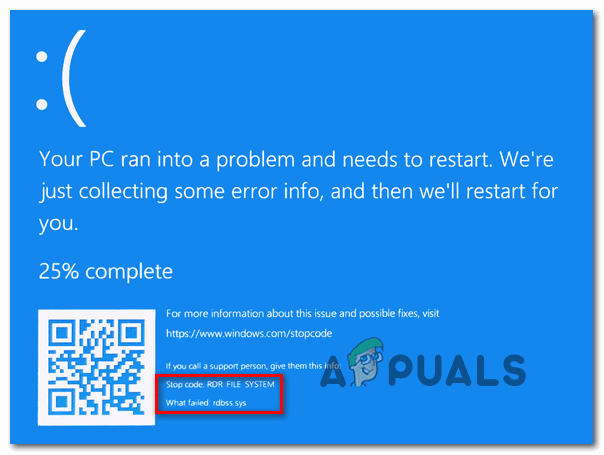
There is one bad Windows Update (KB2823324) that is known to cause BSODs pointing towards the Rdbss.sys file. If this scenario is applicable, you can fix the problem by using the Microsoft Show or Hide troubleshooter to uninstall and hide the problematic update.
However, this particular issue is also reported in conjunction with Microsoft Onedrive. As it turns out, there are certain OneDrive versions that might end up produce unsolicited BSODs. In this case, you should be able to fix the issue by uninstalling the current OneDrive version and then reinstalling the latest version through the official channels.
In certain circumstances, system file corruption can also be the root cause of this error code. To fix this issue, you can deploy SFC and DISM scans in order to fix low and mid-tier corruption instances. But for heavily corrupted OS drives, you will need to do a complete Windows component refresh with a clean install or repair install.
Uninstalling Update KB2823324 (if applicable)
As it turns out, there is one particular update that is known to contribute to the apparition of the Rdbss.sys (RDR FILE SYSTEM) BSOD is a bad Windows Update (KB2823324). As a lot of affected users have reported, this particular update might end up causing general instability with certain CPU models.
If this scenario is applicable, you should be able to fix the issue by uninstalling and hiding this problematic update in order to ensure that the issue doesn’t re-appears.
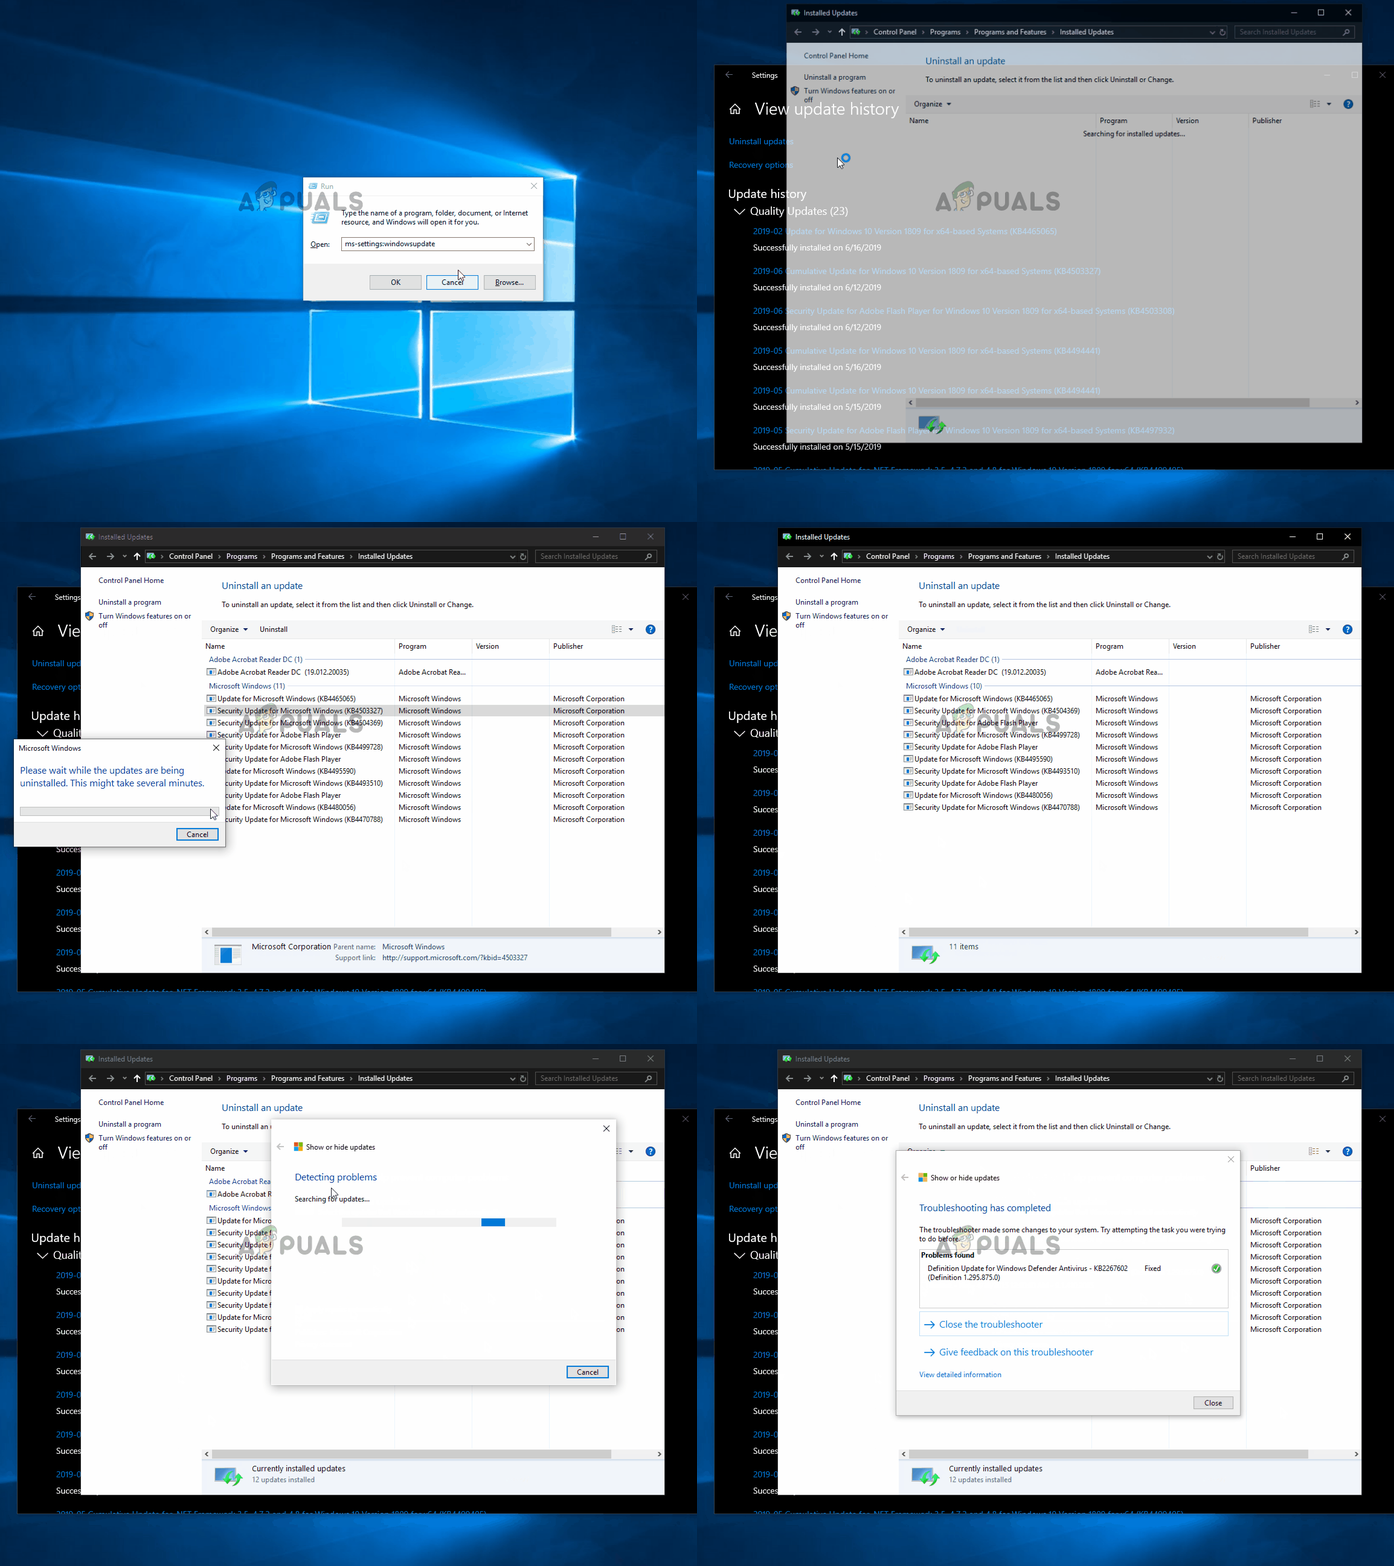
Here’s a quick step-by-step guide that will allow you to uninstall and hide the KB2823324 update in order to prevent your operating system from uninstalling it:
- Press Windows key + R to open up a Run dialog box. Next, type ‘ms-settings:windowsupdate’ inside the dialog box, then press Enter to open up the Windows Update screen of the Settings app.
- Inside the Windows Update screen, use the left-hand section to click on View Update History.
- Next, click on wait until the list of installed updates loads up, then click on Uninstall Updates (at the top of the screen).
- Once you see the full list of updates, scroll down and locate the KB2823324 update. When you see it, right-click on it and choose Uninstall from the newly appeared context menu. At the confirmation prompt, click Yes to start the process.
- After you successfully manage to uninstall the update, access this download page here to download the latest version of the Microsoft Show or Hide troubleshooter package.
- Once the download is complete, open the .diagcab file and wait for the troubleshooter window to appear. Once it does, click ok the Advanced button and check the box associated with Apply Repairs Automatically.
- Click Next to advance to the next menu, then wait for the next utility to finish the update scan. Once it’s finished, click on Hide Updates.
- Next, check the box associated with the KB2823324 update, then click on Next to initiate the operation of hiding this problematic Windows Update.
- Once the operation is complete, reboot your computer and monitor the situation to see if the same BSOD is still occurring.
Reinstalling OneDrive (if applicable)
As it turns out, some users that were previously encountering the Rdbss.sys (RDR FILE SYSTEM) blue screens of death have reported that they finally managed to fix the issue after they reinstalled OneDrive.
There is no official explanation on why this fix is effective, but affected users are supposing that there’s a certain unstable OneDrive version that might end up causing unsolicited BSODs. Some users dealing with this problem have fixed it by uninstalling their current OneDrive version and then reinstalling the latest version through the official channels.
Here’s a quick guide on how to reinstall your current OneDrive version:
- Press Windows key + R to open up a Run dialog box. Next, type ‘appwiz.cpl’ inside the Run dialog box and press Enter to open up the Programs and Features menu.

Type appwiz.cpl and Press Enter to Open Installed Programs List - Inside the Programs and Features menu, scroll down through the list of installed programs and locate Microsoft OneDrive. Once you locate it, right-click on Microsoft OneDrive and choose Uninstall from the context menu.
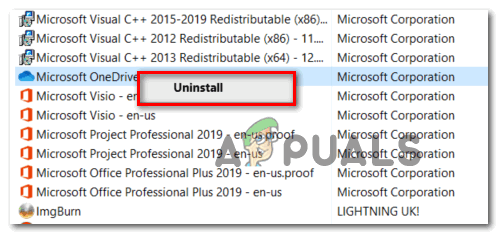
Uninstalling the current OneDrive version - Inside the uninstallation screen, follow the on-screen instructions to complete the process, then restart your computer.
- At the next startup, open your default browser and visit this OneDrive for Windows download page.
- Once you get to this page, click on the Click here to download hyperlink and wait for the download to complete.
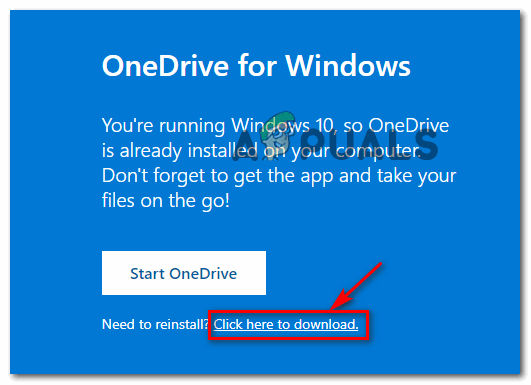
Downloading the latest version of OneDriveSetup - Follow the on-screen prompts to complete the installation, then reboot your computer and see if the issue is now resolved.
Performing an SFC and DISM scan
If none of the fixes above worked for you, it’s entirely possible that these random BSODs pointing towards Rdbss.sys happen due to some type of system file corruption. Fortunately, every recent Windows version is equipped to repair these sorts of issues.
DISM (Deployment Image Servicing and Management) and SFC (System File Checker) are two consolidated utilities that are capable of fixing low and tier instances of corruption.
If you want to put them to good use, start with a simple SFC scan – This operation is 100% local and can run without an Internet connection. What this will do is compare your current OS files against a list of healthy equivalents and replace any files corrupted OS files.

Note: Once you start up this procedure, do not interrupt it forcibly. Otherwise, you run the risk of creating additional logical errors.
After this operation is complete, restart your computer and wait for the next startup to complete. Once your computer boots back up press forward with a DISM scan.
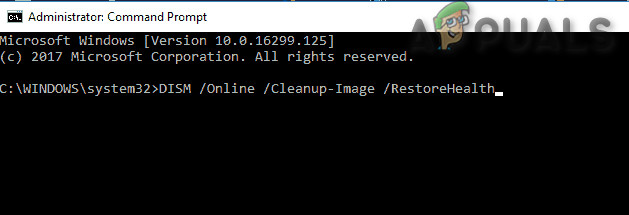
Note: Unlike SFC, DISM requires a stable internet connection because it uses a sub-component of Windows Update to download healthy OS files that will need to replace the corrupted equivalents.
Once the DISM scan is complete, restart your computer and see if the BSOD crashes are now resolved.
Resetting every Windows Component
If none of the potential fixes we’ve presented so far have allowed you to stop the constant Rdbss.sys BSOD, it’s very likely that you’re dealing with serious system file corruption that you will not be able to fix conventionally. In this case, you should be able to fix the problem entirely by resetting every relevant Windows component.
When doing this, you have two ways forward – You can go for a complete OS wipe or you can target only the files belonging to your operating system:
- Repair install – This is also known as an in-place repair procedure. It’s very recommended if you have important information that’s currently being stored on the OS drive. But it’s important to keep in mind that this will require you to use a compatible Windows installation media. However, the main advantage of this is that you get to keep all your applications, games, user preferences, and personal media.
- Clean install – This is the easier operation out of the bunch since this can be initiated directly from the Windows GUI menu without the use of a compatible installation media. But unless you back up your data in advance, be prepared for complete data loss on your OS drive.


