Fix: Quicken One Step Update not Working
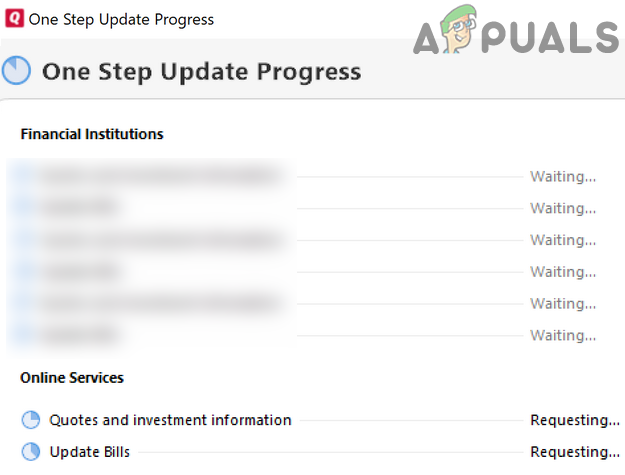
Quicken One Step Update (OSU) may not work due to an outdated version of QuickBooks or an outdated Windows installation. The affected user encounters the error when he tries to perform a Quicken One Step Update and QuickBooks hangs (the user either has to restart his system or use the Task Manager to kill the QuickBooks process). All of the accounts show the status of waiting for eternity. The accounts could be updated individually, but not using OSU. The issue is not limited to a single version and build of QuickBooks. For many of the users, the issue started after a QuickBooks update.
Before moving on with the solutions to fix Quicken One Step Update, restart your system/ networking equipment and try again to perform a One Step Update to rule out any temporary glitch. Moreover, make sure your banks account numbers in QuickBooks are correct. Additionally, check if the issue persists in the safe mode of your system. Sign out and then sign back into QuickBooks to check if the issue persists. Make sure if your Quicken ID is set correctly in QuickBooks Preferences. Also, make sure you are using an updated version of Windows.
Solution 1: Update QuickBooks to the Latest Build
QuickBooks is regularly updated to patch known bugs and cater to new features. You may encounter the error at hand if you are using an outdated version of QuickBooks. In this context, updating QuickBooks to the latest build may solve the problem.
- Create a system restore point (just in case, the latest updates are not up to the mark).
- Launch the QuickBooks and open its File Menu.
- Now hoover over Back Up Company and then Create Local Backup. Now follow the prompts on your screen to create a manual back up of your company file.
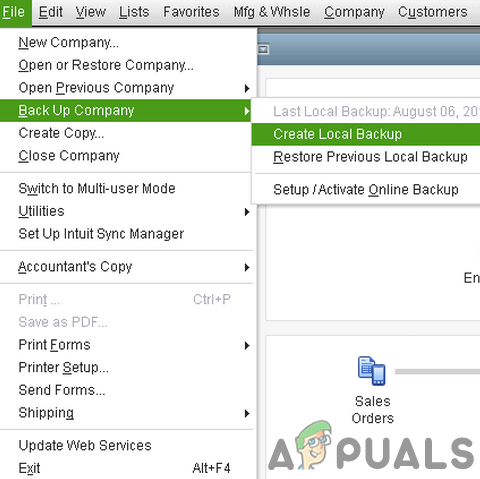
Backup the Company File in Quickbooks - After backing up the file, open the Help menu of the QuickBooks.
- Now click on Update QuickBooks and navigate to the Update Now tab.
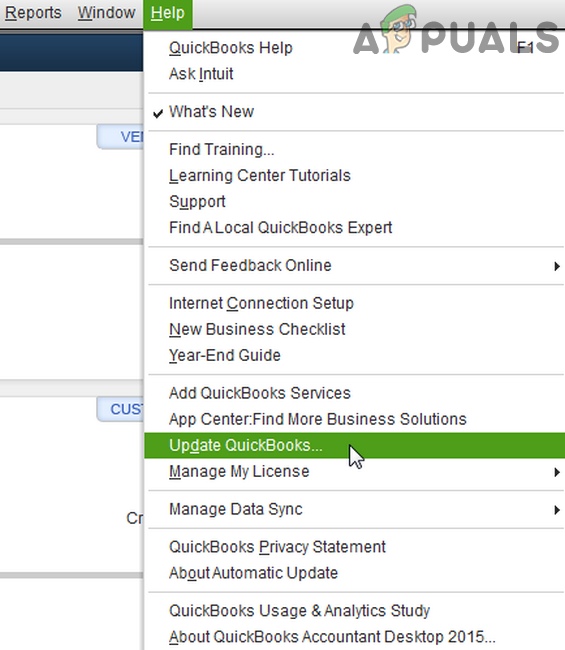
Update QuickBooks - Then select the update and click on the Get Updates button.
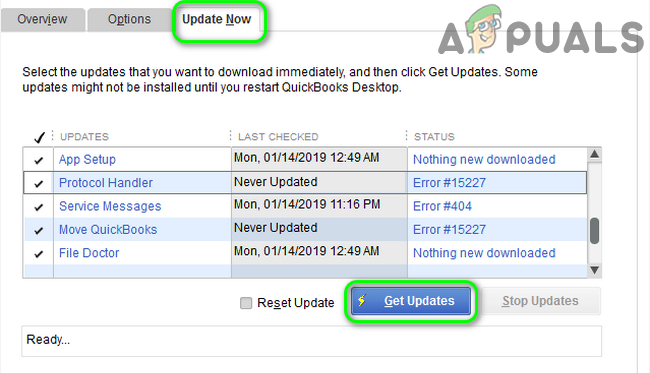
Click on the Get Updates Button in OSU Settings - Wait for the completion of the update process and then exit the QuickBooks.
- Now relaunch the QuickBooks and check if the One Step Update is working fine.
Solution 2: Disable Proxy Settings on your System
Proxy servers help its users in bypassing different ISP’s restrictions. However, you may encounter the error under discussion if you are using a proxy server and a secure connection cannot be established. In this scenario, disabling the proxy server may solve the problem.
- Right-click on the Windows button and then in the menu shown, click on Settings.

Open Windows Settings - Now click on Network & Internet.

Opening Network & Internet settings - Then click on Proxy (located in the left pane of the window).
- Now disable the option of Automatically Detect Settings.
- Then disable the option of Use Setup Script. Now disable Use a Proxy Server (under Manual Proxy Setup).
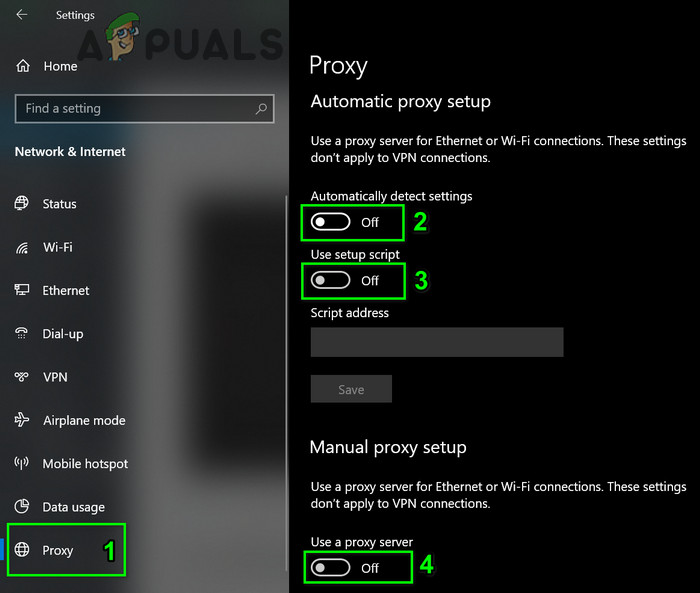
Disable Proxy in Windows - Restart your system and upon restart, check if QuickBooks is clear of the error.
Solution 3: Uninstall the Buggy OS Update
Microsoft has a history of buggy updates and the OSU issue (if started after an OS update) could also be a result of the same. In this case, uninstalling the buggy update may solve the OSU problem. You can always update again to the latest build later on.
- Press the Windows key and then, in the Windows Search box, type Control Panel. Now in the list of results, select Control Panel.
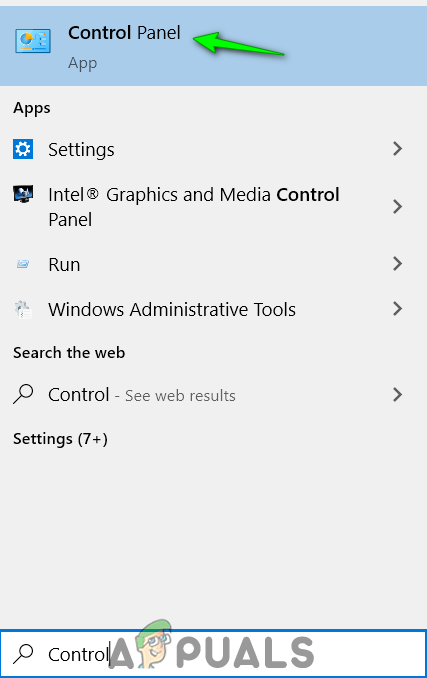
Search and open Control Panel - Then click on Uninstall a Program (under Programs).
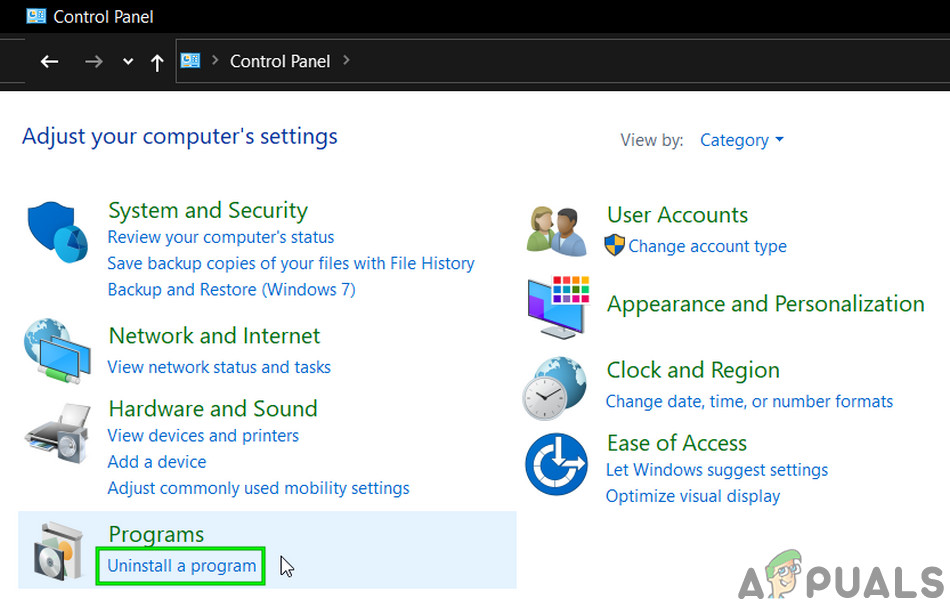
Click on Uninstall a Program - Now click on View Installed Updates (in the left pane of the window) and then in the installed updates, select the problematic update and then click on Uninstall.
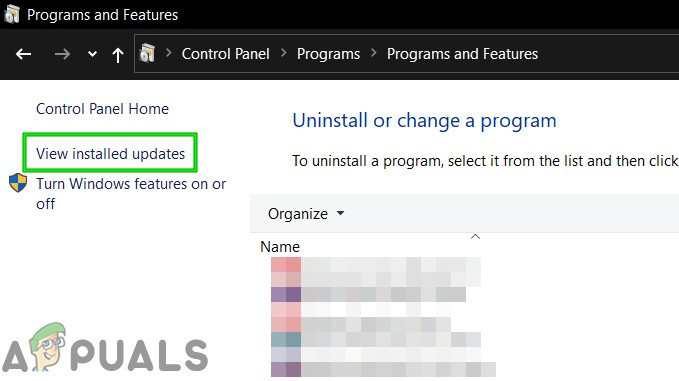
View Installed Updates in Programs and Features - Now, wait for the completion of the uninstallation of the update and then restart your system.
- Upon restart, check if QuickBooks is working fine.
Solution 4: Allow Cookies on Your System
Cookies are used by applications to store server/client communications. You may encounter the error at hand if the cookies policy of your system is hindering the operation of QuickBooks. In this case, allowing the cookies on your system may solve the QuickBooks problem.
- Click on the Windows button and then type Control Panel (in the Windows Search bar). Now, select Control Panel (in the results).
- Now select Network and Internet and then click on Internet Options.

Open Internet Options in the Control Panel - Then navigate to the Privacy tab and click on the Advanced button.
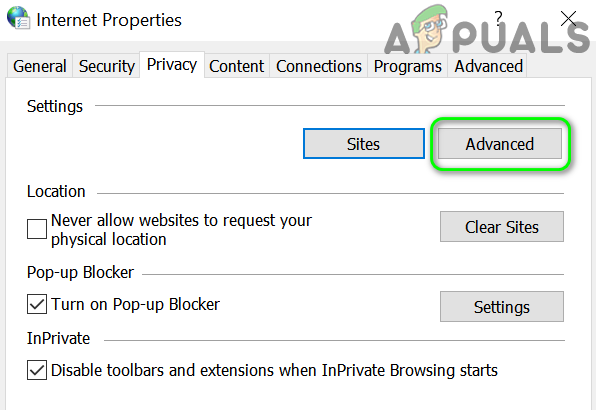
Open Advanced Privacy Settings - Now, under the option of First-party Cookies, select Accept.
- Then, under the option of Third-party Cookies, select Accept.
- Now, checkmark the option of Always Allow Session Cookies.

Allow Cookies on Your System - Then, click on the OK button, and once again, click on the OK button.
- Now, restart your system and upon restart, check if QuickBooks is working fine.
Solution 5: Delete the Log File of QuickBooks
The information in the log file of QuickBooks is used to troubleshoot the QuickBooks installation (by the QuickBooks support). You may encounter the error at hand if the size of the log file has increased too much (in some cases, it increased more than 1 GB). In this case, deleting the log file (do not worry, the file will be recreated on the next launch of the QuickBooks) may solve the problem.
- Exit the QuickBooks and make sure no QuickBooks related process is running in the Task Manager.
- Now press the Windows + R keys (simultaneously) and then navigate to the following path:
%appdata%
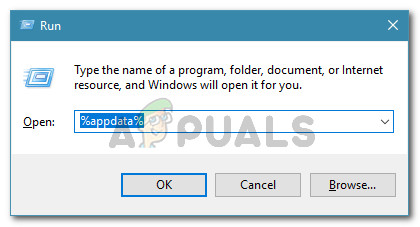
Running dialog: %appdata% - Now open the Quicken folder and then open the Log folder.
- Now delete the qw.log file (it will be better to back up the log file to a save location).
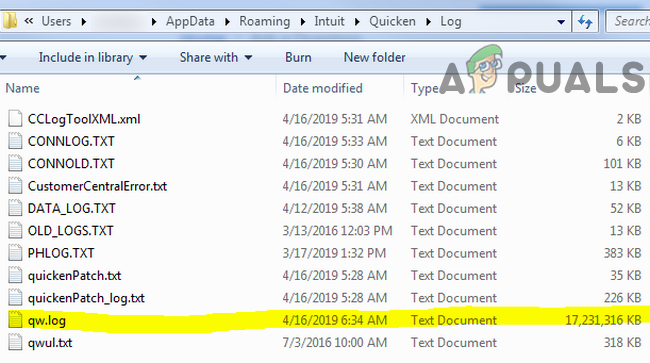
Delete the qw.log file - Now restart your system and upon restart, check if the Quicken OSU issue is resolved.
Solution 6: Disable Animation Settings of QuickBooks
Animations in the application are used to satisfy the aesthetic sense of the user. But these animations can sometimes overload your system. QuickBooks is known to create OSU issues if animations are enabled. In this case, disabling the animations in QuickBooks settings may solve the problem.
- Launch the QuickBooks application and open its Edit Menu.
- Now click on Preference and then in the left pane of the window, select Setup.
- Then in the left pane of the window, disable animations by unchecking the checkbox of “Turn on Animation”.
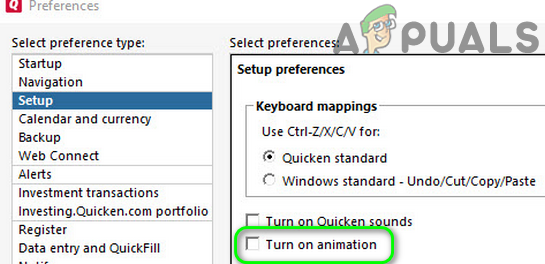
Disable Automation in the QuickBooks Preferences - Now relaunch the QuickBooks and then check if the issue is resolved.
- If not, repeat solution 5 and then repeat the steps mentioned above to check if OSU is operating fine.
Solution 7: Perform OSU After Unchecking the Online Services
QuickBooks has a known bug due to which OSU may hang in the operation if Online Services are enabled. The same could be the reason for the issue at hand. In this context, performing OSU after unchecking the online services may solve the problem.
- Launch the QuickBooks and click on One Step Update Settings (on the toolbar).
- Then, uncheck all the online services.
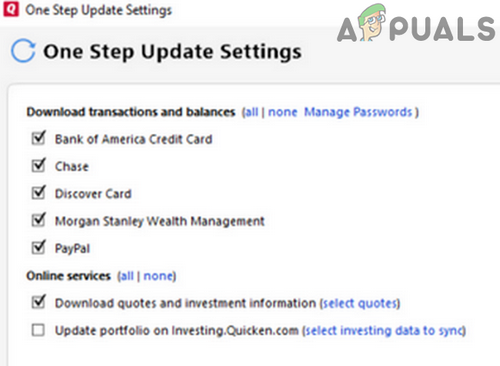
Disable Online Services While Performing OSU - Now click on the Update Now button and check if the OSU issue is resolved.
- If so, then enable online services one by one (cloud sync, quotes, update bills, mobile sync, investment sync, etc.) till you find the problematic service. Once the problematic service is found, either keep it disabled (till the issue is resolved) or contact QuickBooks support for the solution.
Solution 8: Perform OSU After Removing Some of the Accounts
You may encounter the error at hand if a particular account (or type of accounts) is having issues with QuickBooks. In this scenario, performing OSU after removing some of the accounts may solve the problem.
- Launch the QuickBooks and open the One Step Update Settings (from the toolbar).
- Now, uncheck some of the accounts and then check if the issue is resolved. It is better to select the accounts having similar account type i.e. Direct Connect (DC) & Express Web Connect (EWC). Also, uncheck all the accounts that use Multi-factor Authentication.
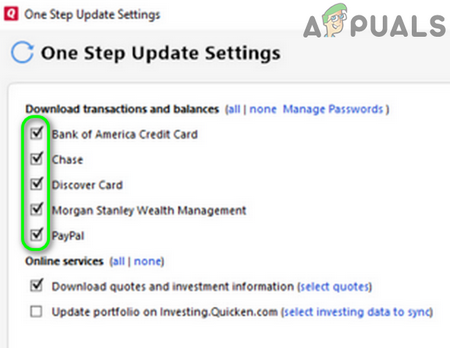
Uncheck Some of the Accounts in the OSU Settings - If OSU was successful, then perform another OSU but this time, uncheck those accounts that were already updated in the previous step.
- If the issue persists, try to re-add the problematic account but with a different connection method and check if QuickBooks is working fine.
Solution 9: Verify and Rebuild Data of the Company File
The OSU not working might also occur if your company file in QuickBooks is corrupt. In this context, verifying and rebuilding data of the company file may solve the problem.
- Create a backup of the company file (steps 1 & 2 of solution 1).
- After backing up the file, again open the File menu of QuickBooks and then hoover over Utilities.
- Now, in the sub-menu, click on Verify Data.
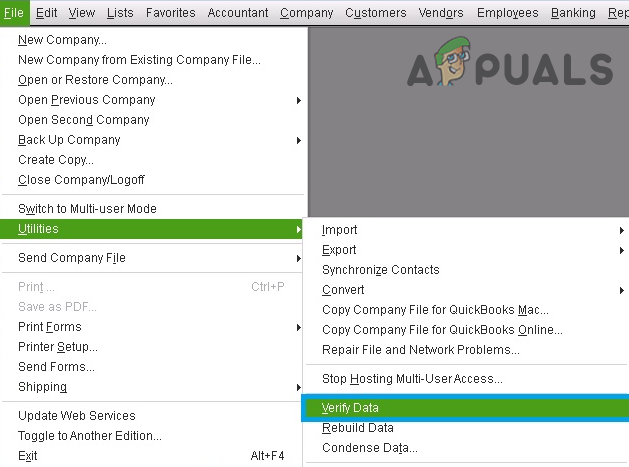
Verify Data of The Company File - If you get a prompt that there is something wrong with the data, then open the File menu of QuickBooks.
- Now hoover over Utilities and then click on Rebuild Data.
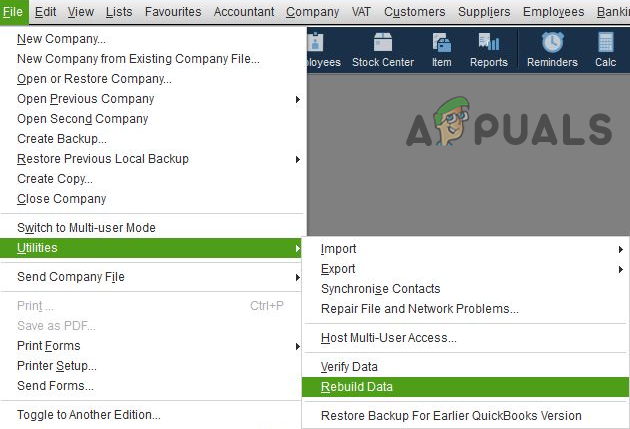
Rebuild Company Data - Then follow the prompts on your screen to complete the rebuilding of data.
- Then relaunch QuickBooks and check if it is clear of the error.
Solution 10: Disable Your Antivirus and Firewall Applications
Antivirus/Firewall applications play a vital role in the safety and security of your data and system. However, OSU may fail to complete if your Antivirus software is conflicting with the application itself. In this case, temporarily disabling your antivirus may solve the problem.
Warning:
Proceed at your own risk as disabling your antivirus may expose your data/system to threats like trojans, viruses, etc.
- Temporarily disable your antivirus and firewall
- Now, check if QuickBooks is working fine. If so, then add QuickBooks in the exceptions list of your antivirus/ firewall applications.
Solution 11: Reinstall QuickBooks
If nothing has helped you so far, then the issue could be a result of a corrupt installation of QuickBooks itself. Here, reinstalling QuickBooks may solve the problem instantly. Make sure you are using an administrator account to perform the steps mentioned below.
- Create a system restore point and back up your company files (follow steps 1 to 3 of solution 1).
- Then download your version of QuickBooks and keep the license info of your product available.
- Now, click on the Windows key and then type Control Panel (in the Windows Search box). Now select the Control Panel (in the list of results).
- Now select Uninstall a Program (under Programs).
- Now, in the list of installed applications, select the QuickBooks, and then click on Uninstall.
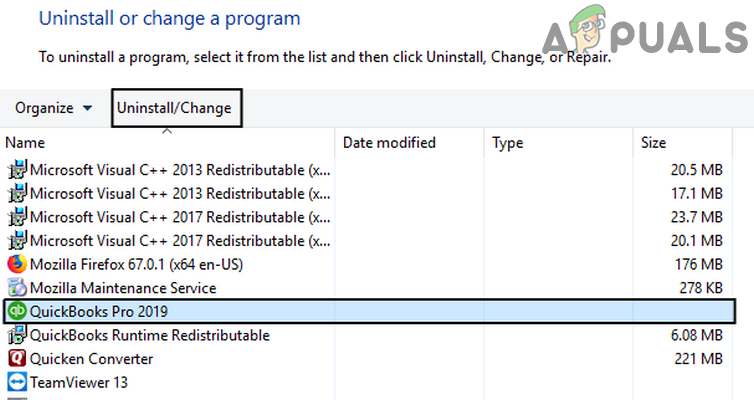
Uninstall QuickBooks - Now, follow the instructions on your screen to uninstall QuickBooks and then restart your system.
- Now download the QuickBooks Tool Hub and then install it with administrative privileges.
- Now launch the installed QuickBooks Tool Hub (with administrative privileges) and then select Installation Issues.
- Now, select Clean Install Tool and click OK.
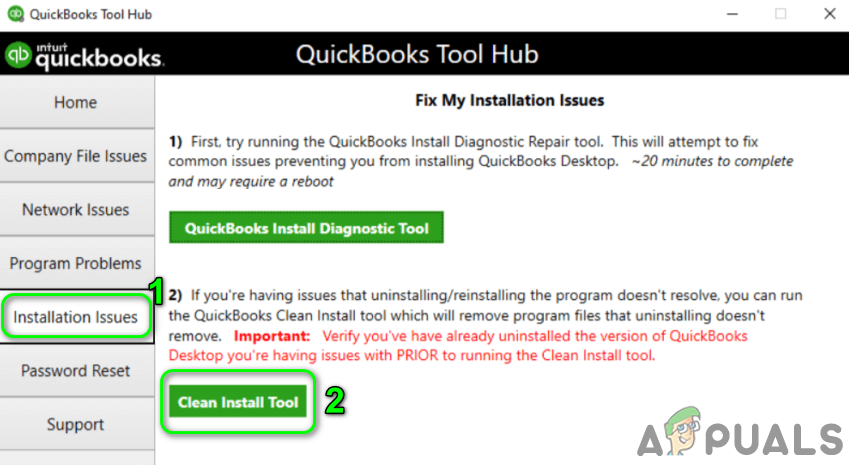
Run Clean Install Tool in QuickBooks Tool Hub - Then choose your version of QuickBooks and select Continue.
- Now, wait, till the message of “Please install your copy of QuickBooks to the default location” is shown and then click on OK.
- Now delete all the temp files and restart your system.
- Upon restart, reinstall the QuickBooks (with administrative privileges) using the downloaded file at step 2.
- After reinstalling the QuickBooks, hopefully, the OSU issue is resolved.
If nothing has worked for you, then check if QuickBooks has released a hotfix for the issue. Also, until the issue is sorted, try to update individual accounts one by one (a tedious task). Moreover, check if QuickBooks is working fine on another computer. Also, check if an older version of the company file (when things were working fine) resolves the issue.


