How to Prevent Apps from Accessing Location on Windows 10?
Several Windows applications will have access to the Location feature in Windows. Sometimes this feature can be helpful for reminders, maps, and other applications that require to track your location so that you can get more relevant information. However, if you are concerned about your privacy, then you can disable the location feature for applications. There are several different methods through which you can configure the location access for applications.
Disabling Location Access for Apps through Windows Settings
Windows Settings is a component of Microsoft Windows that allows the users to customize and configure their operating system. This is similar to the control panel but in a much better-categorized way. You can find all the privacy-related options by simply going to the privacy setting. Location access can be found under the app permissions in the privacy setting. This is the default way to configure this setting.
- Press the Windows + I key together to open the Windows Settings. Click on the Privacy setting at the bottom.
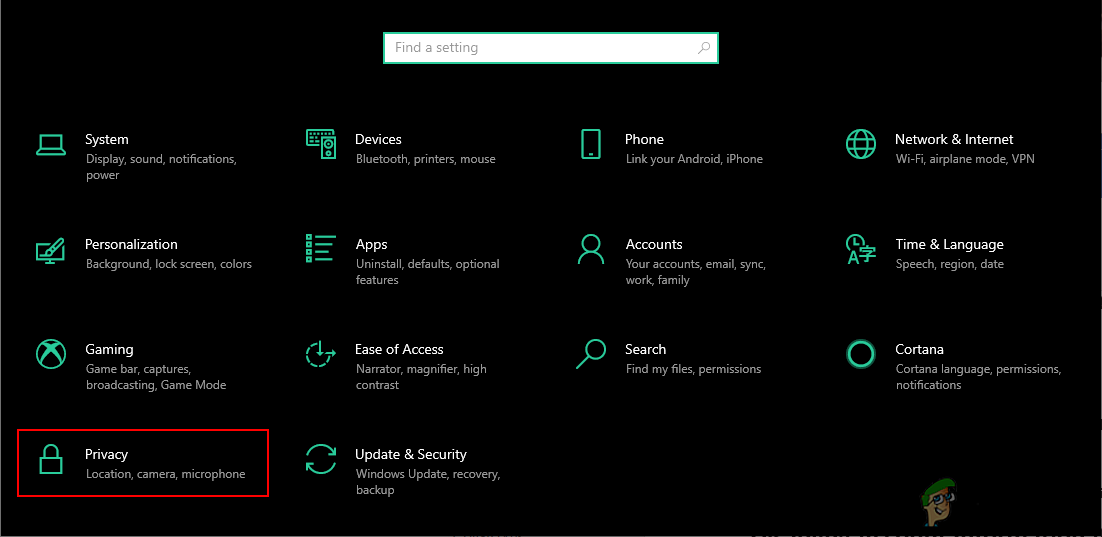
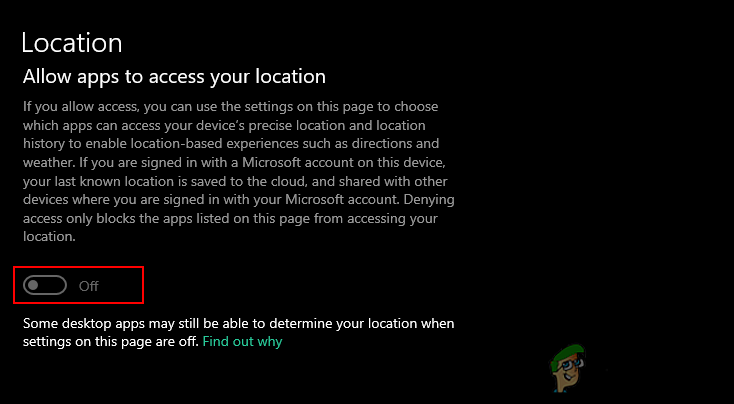
Opening Privacy settings in Windows Settings - Scroll down and click on the toggle for Allow apps to access your location option to turn it Off. You can also set a default location when location detection is turned off. There is also an option for clearing the location history and disabling location for specific applications.
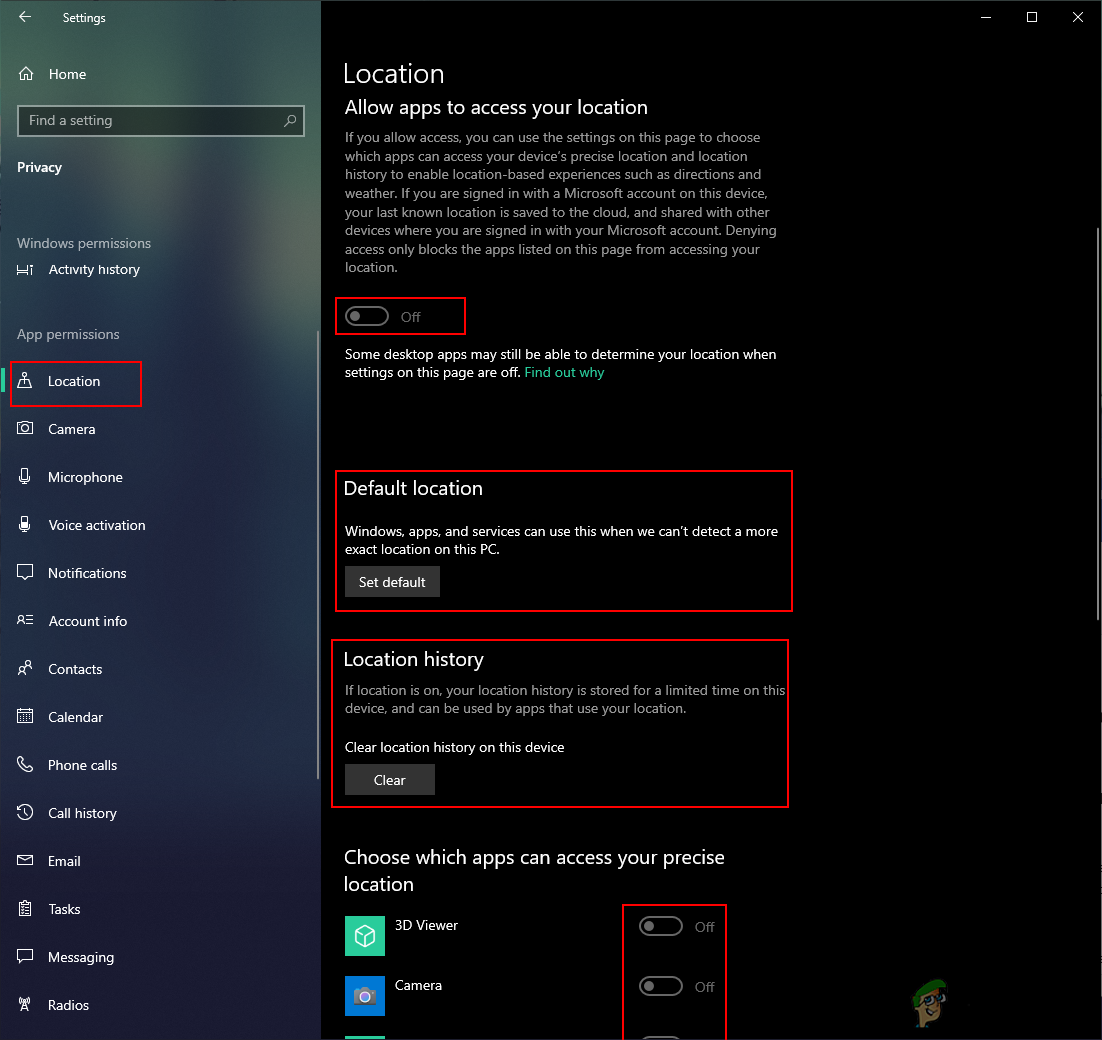
Changing the location settings - Changing the setting to Off will stop the access of location for all applications.
Disabling Location Access for Apps through the Local Group Policy Editor
If for some reason you are unable to use the above method, then the Local Group Policy Editor is a better choice to disable location access for applications. The Local Group Policy Editor has all the settings that users can configure for their operating system.
However, Group Policy Editor is not available in the Windows Home Edition. So, if you are using Windows Home Edition, then skip this method.
If your system has the Local Group Policy Editor, then follow the below guide:
- Open a Run dialog by pressing the Windows + R key together. Now type “gpedit.msc” and press the Enter key to open the Local Group Policy Editor.
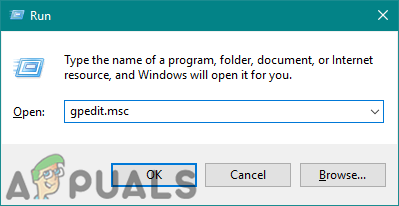
Opening Local Group Policy Editor - In the Local Group Policy Editor window, navigate to the following path:
Computer Configuration\Administrative Templates\Windows Components\App Privacy
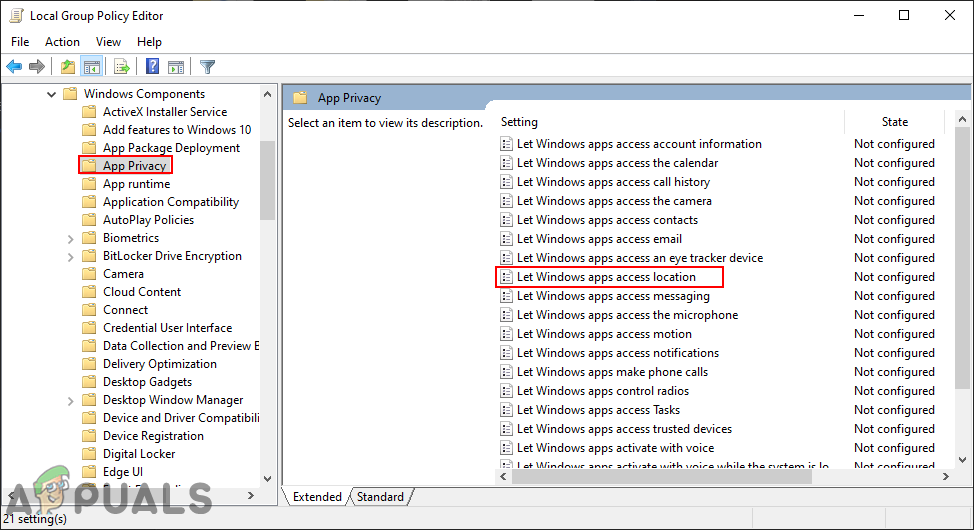
Navigating to the setting - After that, double-click on the “Let Windows apps access location” setting. Select the Enabled option and set the below options as needed. You can set one of the three options as the default for all apps. You can also set these three options for any specific application by adding the Package Family Name (PFN) in the box.
- Once you are done with all the configuration, click on the Apply/Ok button to apply the changes.
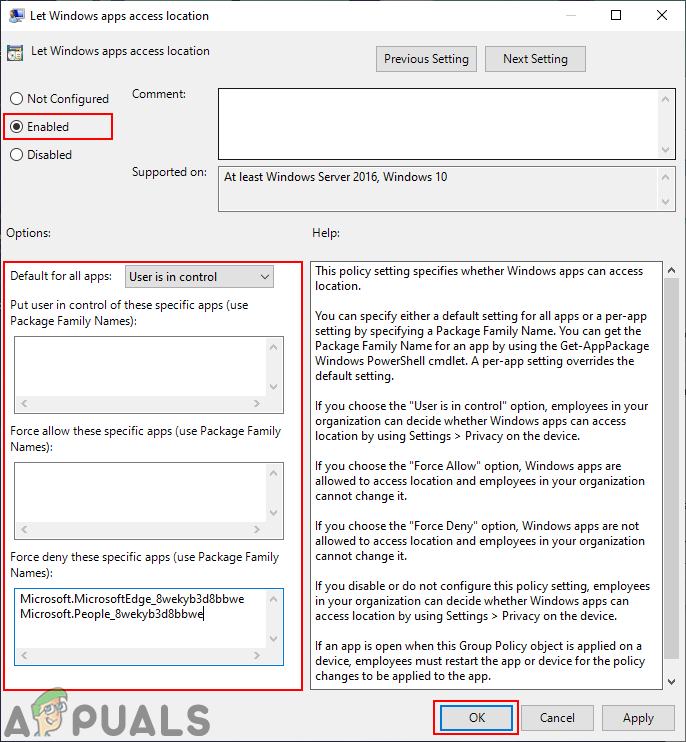
Changing the setting - To find the Family Package Name (PFN), search PowerShell through the Windows search feature, and right-click on it to choose Run as administrator. Now type the following command to find the PFN:
Get-AppxPackage -Name "Microsoft.MicrosoftEdge"
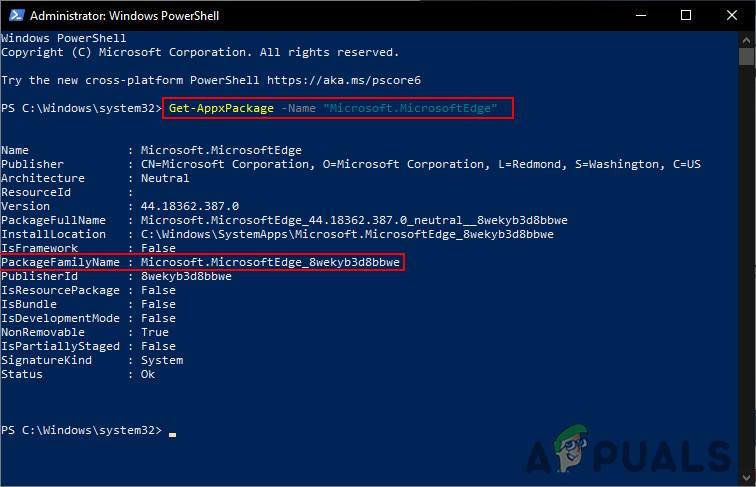
Finding the Package Family Name - In the above command, Microsoft.MicrosoftEdge is a package name. You can find all of the package names through this command:
Get-AppxPackage -AllUsers | Select Name, PackageFullName
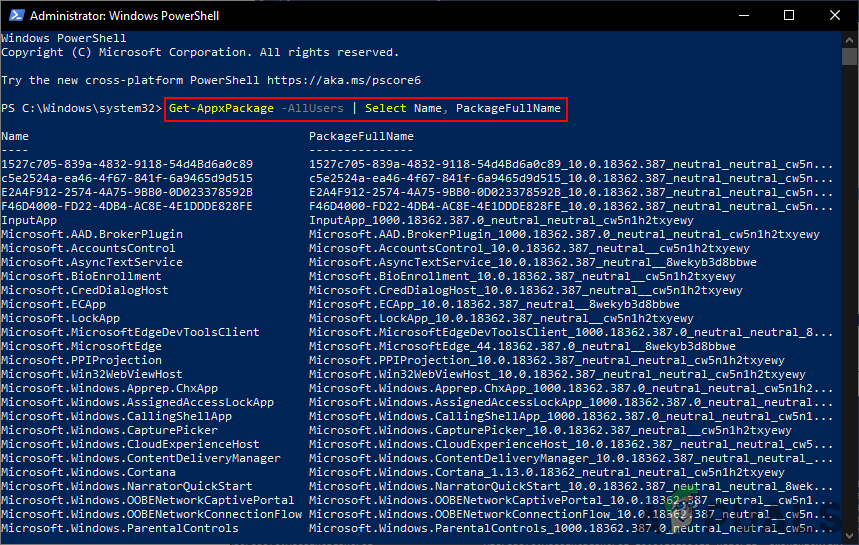
Finding all the package names on your system - By adding the Package Family Names (PFNs) in the Force Deny box, it will disable the access of location for those applications.
Disabling Location Access for Apps through Registry Editor
Users who do not have the Local Group Policy Editor on their systems can try the same setting by using the Registry Editor. The only difference is that in the Registry Editor, users are required to create the missing keys/values for that specific setting.
Note: You can also create a backup of your registry by the export feature before applying any new changes.
Follow the below steps to check how disabling location access for applications is done through Registry Editor:
- Hold the Windows key and press R to open a Run dialog on Windows. Then type “regedit” in the text field and press Enter or click the Ok button to open the Registry Editor. Choose Yes for the User Account Control prompt.
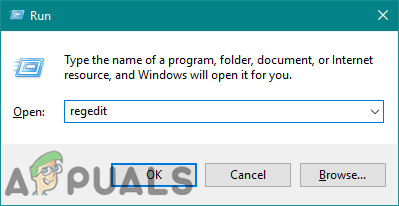
Opening the Registry Editor - Navigate to the following key in the Registry Editor. If the key is missing, then just create it as shown in the below screenshot:
HKEY_LOCAL_MACHINE\Software\Policies\Microsoft\Windows\AppPrivacy
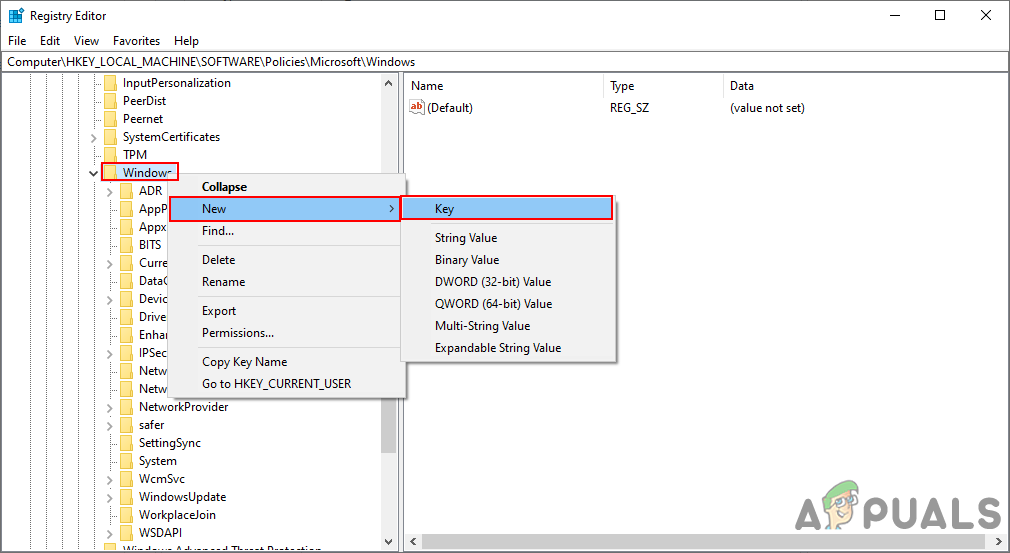
Creating missing key - After that right-click on the right pane of the key and choose New > DWORD (32-bit Value). Name it as “LetAppsAccessLocation“, double-click on it to open and change the value data to 2.
Note: The setting through this value will be considered as a default for all applications. For the user in control you can write 0, for the force allow you can write 1, and for force deny you can write 2 as the value data.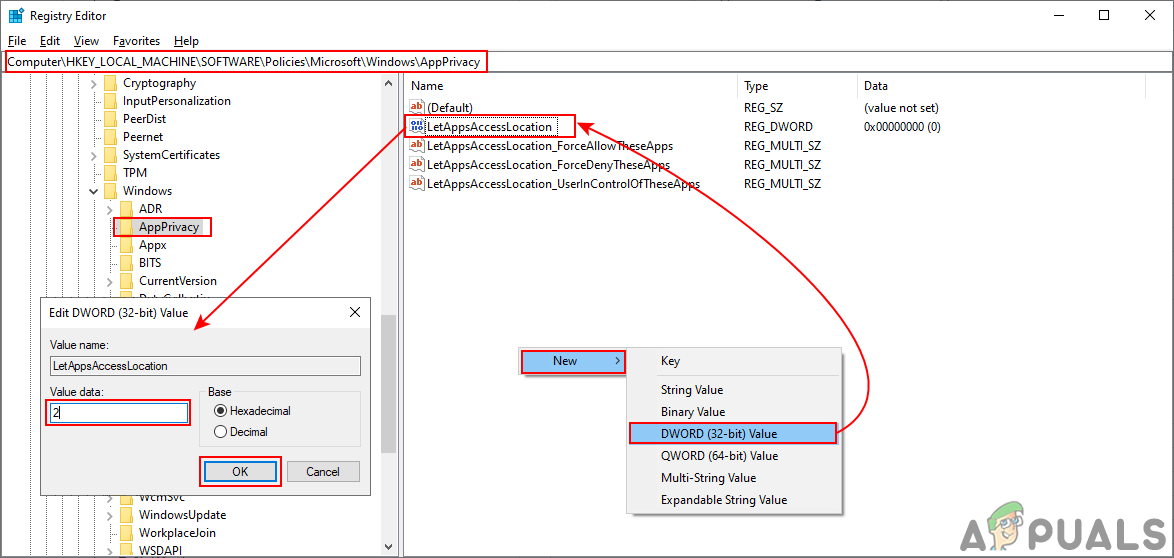
Creating a default value for all applications - You can also create three different values that will work as the boxes option in the Group Policy Editor for specific applications. Therefore, right-click on the right pane and choose New > Multi-String Value option.
- For user in control value, name it as “LetAppsAccessLocation_UserInControlOfTheseApps“. For force allow, name it as “LetAppsAccessLocation_ForceAllowTheseApps“. And for the force deny, name it as “LetAppsAccessLocation_ForceDenyTheseApps“.
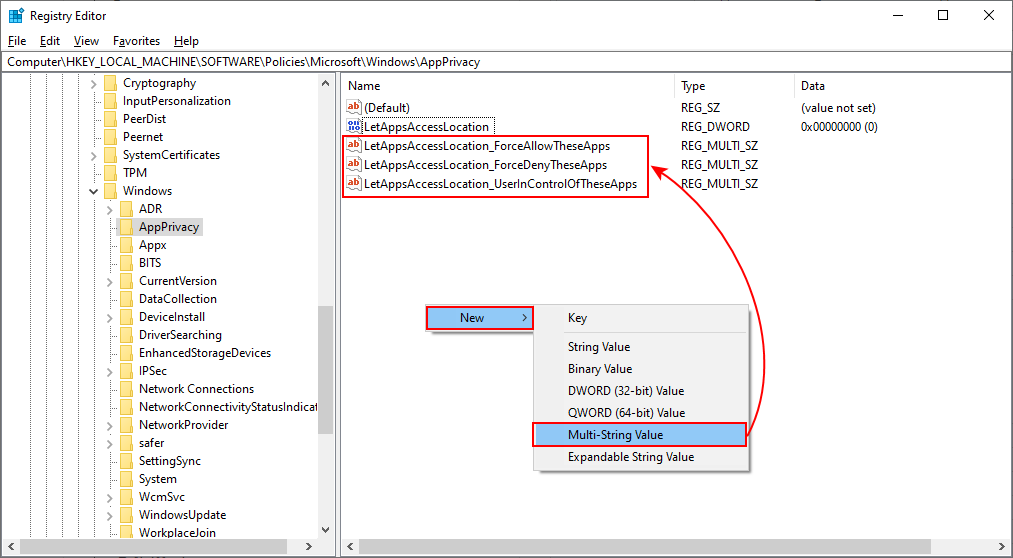
Creating values for different options - Now for the specific setting, open any of these three values and put the Package Family Names (PFNs) in it. Then that setting will apply only for that specific application. After all the changes, restart your system to let the changes take effect.
Note: However, do not put the same PFNs in each one. The screenshot is just to give you the idea.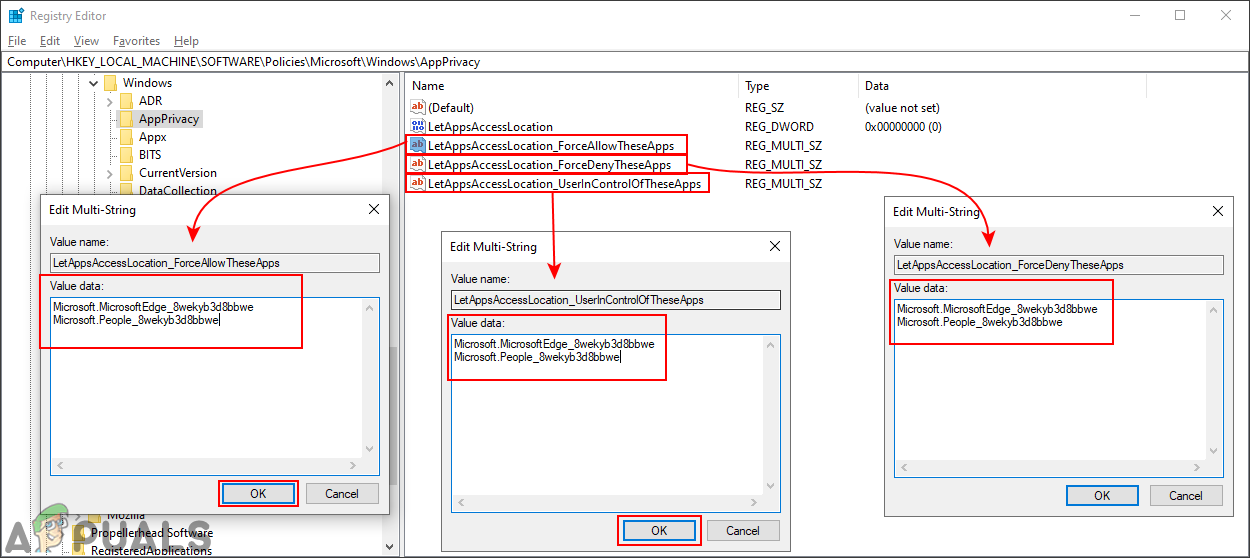
Adding the Package Family Name in any one of the value


