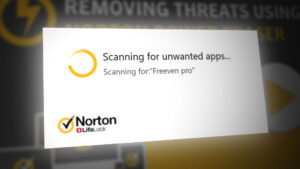
How to Fix Norton Power Eraser Error Code 0x80045001 on Windows 10?
Some Windows 10 users are reporting that they are always encountering the Error Code 0x80045001 when attempting to install Power Eraser. Most affected users are reporting that while the software installs just fine initially, this error message appears at the next reboot. In other cases, this error appears at the very beginning o f the Power Eraser scan.
After investigating this particular issue thoroughly, it turns out that there are several different underlying causes that might be triggering this error code. Here’s a list of potential culprits that might be responsible for the apparition of this error code:
- Norton Server issue – As it turns out, you can expect to see this error code while triggering a scan with Power Eraser if there’s currently an issue with Norton’s server that is preventing it from downloading the latest signatures. In this case, there’s nothing else you can do other than pinpointing the server issue and waiting for Norton’s developers to fix their issue.
- Outdated Power Eraser version – If you’re using Power Eraser version 22.5 or older, you can expect to see this error code due to some specific environment conditions (with certain PC configurations). In this case, you can resolve the issue by updating your Power Eraser version to the latest.
- Missing Windows 10 Aniversary Update – As it turns out, you can expect to encounter some degree of incompatibility with Power Eraser on Windows 10 if you don’t have the Anniversary Update installed on your computer. In this case, you can resolve the issue by installing every pending Windows Update on your computer.
- WIMbot is Enabled on your PC – Keep in mind that Power Eraser doesn’t support WIMBoot. So if your computer is using WIMBoot, you will not be able to use Power Eraser. In this case, you will need to use an alternative to Power Eraser.
- 3rd party Application Conflict – There are certain applications with the potential to conflict with Norton Power Eraser (particularly RAM Optimizing tools). In this case, you can either identify the culprit and uninstall it or you can use System Restore to revert your computer back to a state in which the conflict was not occurring.
- The kernel is affected by malware – Under certain circumstances, you can expect to see this error while attempting to install Power Eraser due to some type of kernel malware that is preventing the installation of AV software. In most cases, a deep scan with Malwarebytes should allow you to fix the issue.
- System File Corruption – Under more serious circumstances, you can see this issue occurring because of some type of system file corruption that is preventing the installation of new software. In this case, you can deploy DISM and SFC scans in an attempt to resolve the issue or go for a repair install / clean install if the built-in utilities are unable to fix the issue.
Now that you know every major potential cause that might be triggering this error code, here’s a list of verified methods that other affected users have successfully used to get to the bottom of this issue.
Method 1: Checking the Status of Norton’s Servers
Before you try any of the other fixes below, you should start by investigating whether or not Norton is currently dealing with a server issue that is affecting the Power Eraser scan. This is possible in those situations where the Power Eraser utility is not able to download the required virus signatures in order to facilitate the scan.
In the past, this has happened due to an underlying server issue that Norton was dealing with. To investigate whether the same is the case now, you should start by checking the official status page of Norton and seeing whether any sub-services are currently experiencing problems or are down.
Once you are inside the status page check every sub-service and see whether any services are affected.
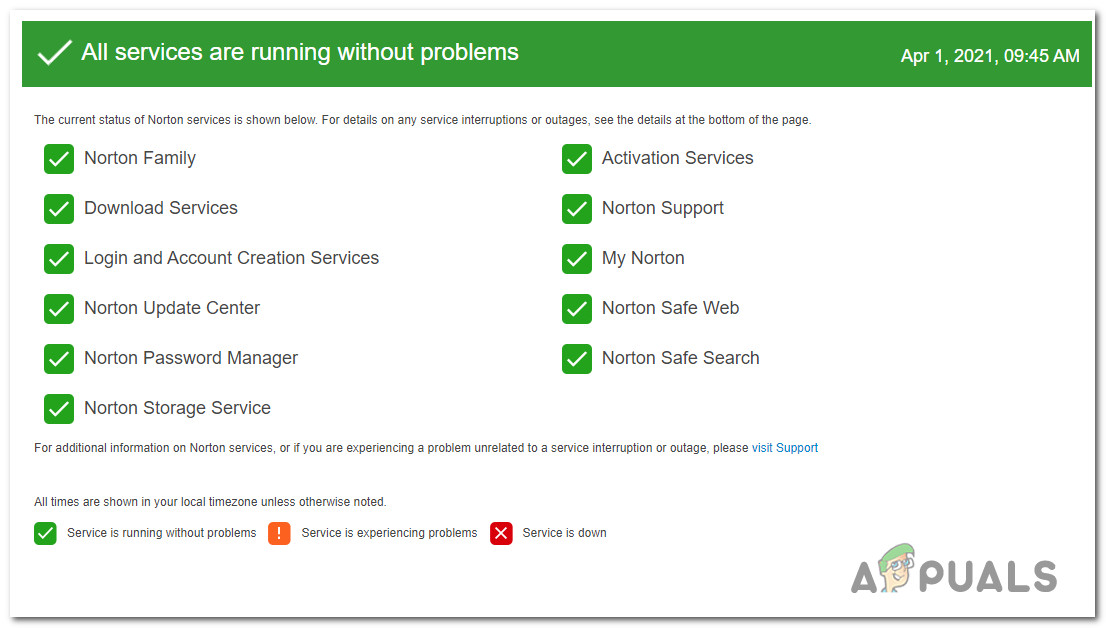
If you discovered some Norton sub-services that are currently down or experiencing problems, the 0x80045001 error code is most likely server related – In this case, there is nothing you can do other than wait until Norton’s software engineers manage to fix the problem.
On the other hand, if the status page shows no evidence of a server issue, you can conclude that the issue is not being caused by a server issue. In this case, move down to the next method below for a few fixes that other affected users have used to resolve the issue.
Method 2: Updating to the Latest Version of Norton Power Eraser
If you’re encountering this issue on Windows 10, it’s also possible to see the 0x80045001 when initiating a scan with Norton Power Eraser if you’re still using version v22.5 or older. According to Norton’s developers, this issue is triggered under some specific environment conditions (with certain PC configurations).
This happens due to a problematic definition that has been since rolled back and replaced with a new definition.
If this scenario is applicable and you’re still using version 22.5 or older, you should be able to avoid the apparition of this issue entirely by uninstalling your current Norton Power Eraser version and installing the latest from the official channels.
To make things easier for you, we’ve put together a series of specific instructions that will show you how to uninstall the current version of Norton Power eraser and install the latest:
- Press Windows key + R to open up a Run dialog box. Next, type ‘appwiz.msc’ inside the text box and press Enter to open up the Programs and Features menu.
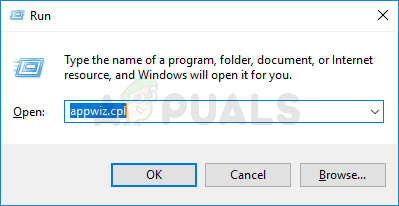
Opening the Programs and Features menu Note: When you’re prompted by the UAC (User Account Control), click Yes to grant admin access.
- Inside the Programs and Features menu, scroll down through the list of installed programs and locate the entry associated with Norton Power Eraser.
- When you see it, right-click on it and choose Uninstall from the context menu that just appeared.
- After the uninstallation process is complete, restart your computer and wait for the next startup to complete.
- Once your computer boots back up, open your browser and navigate to the official download page of Norton Eraser, scroll down to the bottom of the page and click on the Download button under Windows 7 SP1 or newer.

Downloading the latest version of Norton Eraser - Once the download is complete, follow the on-screen prompts to complete the installation of the latest version of Power Eraser.

Using Norton Eraser again - After the latest version is installed, repeat the action that was previously causing the 0x80041000 error and see if the issue is now fixed.
If you were already on the latest version of Norton Power Eraser or you updated to no effect, move down to the next potential fix below.
Method 3: Installing very pending Windows 10 Update
According to some affected users, you can also expect to encounter the 0x80045001 error code with Power Eraser on Windows 10 if you don’t have the Aniversary Update installed.
If this scenario is applicable, you can expect to fix this issue (as a lot of users have confirmed) by installing every pending Windows Update in order to resolve the incompatibility with Norton Power Eraser.
if you’re looking for specific instructions on how to do this, follow the instructions below:
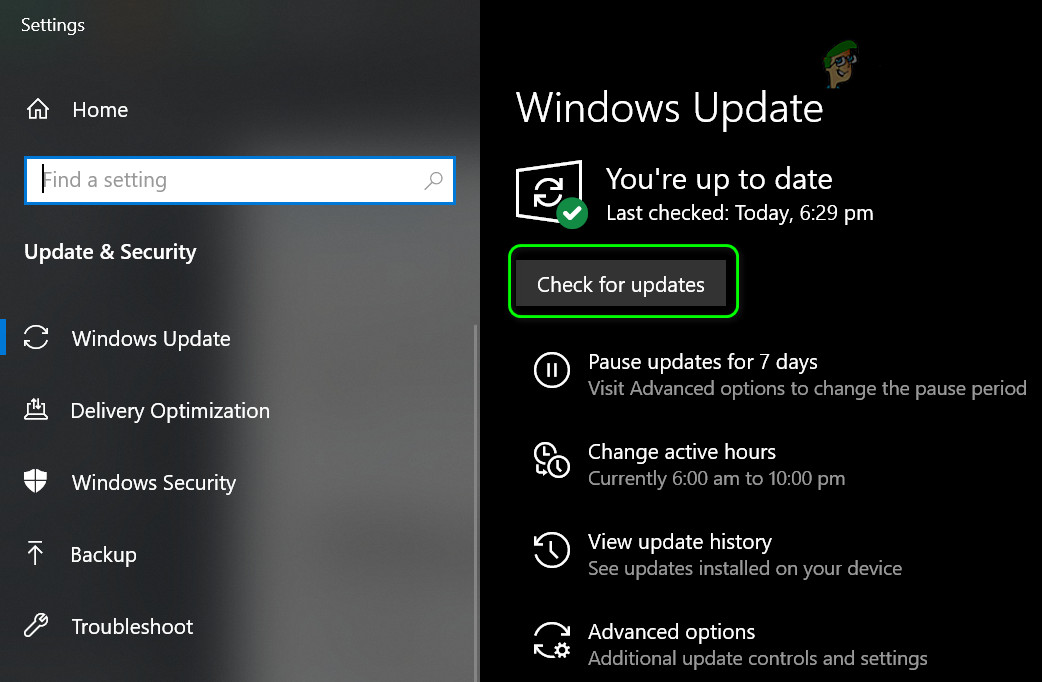
- Start by opening up a Run dialog box by pressing Windows key + R. Next, type “ms-settings:windowsupdate” inside the text box and press Enter to open up the Windows Update tab of the Settings tab.

Accessing the Windows Update screen Note: If you’re prompted by the UAC (User Account Control) prompt, click Yes to grant admin access.
- Once you’re inside the Windows Update screen, move over to the right section of the screen and click on Check for Updates.
Checking for Windows Updates - After the initial scan is complete, go ahead and install every pending Windows update that is waiting to be installed on your computer.
Note: If you have a lot of pending Windows updates, you will be prompted to restart before you get the chance to install every pending update. In this case, restart your computer as instructed, but make sure to return to this screen at the next startup to complete the installation of the remaining updates. - Finally, once you install every pending update, reboot your computer one final time and see if the issue with Norton Power Eraser is fixed.
In case the same problem is still occurring, move down to the next method below.
Method 4: Check to see if WIMBOT is Enabled
Keep in mind that Norton Power Eraser is not fully compatible with WIMBot enabled computers. This happens due to the fact that in a traditional Windows Installation (without WIMBoot), the system files are created in the disk as discrete files.
In a Windows installation with WIMBot enabled, the system files are created as compressed files (WIM Files) in the disk. The installer creates a set of pointer files, which redirect the user to the compressed system file. Since the system files are not available as discrete files, Norton Power Eraser is unable to scan them.
If you suspect that your computer uses WIMBoot, you should investigate to see if this technology is enabled on your computer.
Follow the instructions below to check if WIMBoot is enabled on your computer:
- Press Windows key + R to open up a Run dialog box. Inside the Run box, type ‘diskmgmt.msc’ and press Enter to open up the Disk Management Utility on your computer. If you’re prompted by the UAC (User Account Control), click Yes to grant admin access.
Opening up Disk Management on your computer - Once you’re inside the Disk Management utility, click on Disk 0 partition and see if there’s any mention of WIMBoot in the partitions related to the disk.
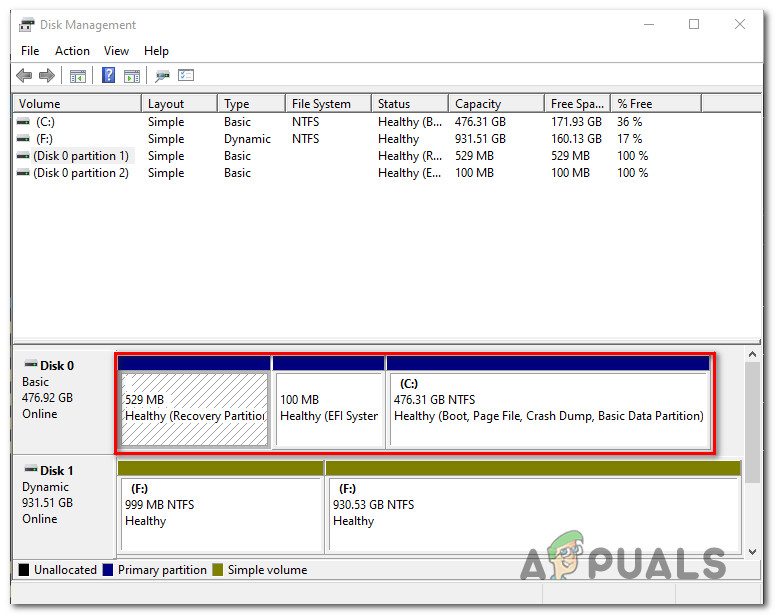
Checking for the WIMBoot partition Note: If you find that your computer is using WIMBoot, Norton Power Eraser will not work on your computer. I this case, you’ll need to go for an alternative program.
On the other hand, if the investigation above has revealed that WIMBoot is disabled on your PC and you’re still unable to complete a scan with Norton Power Eraser, move down to the next method below.
Method 5: Performing an SFC and DISM scan
As it turns out, another potential culprit that might be responsible for the Power Eraser error code 0x80045001 is some type of corrupted system file that is involved in the installation of new software.
Some users that were also affected by this issue have managed to resolve it by running a couple of utilities designed to fix logical errors and system file corruption – DISM (Deployment Image Servicing and Management) and SFC (System File Checker).
While SFC replaces corrupted files by using a local archive to replace corrupted instances with healthy copies, DISM relies on the WU component to download healthy copies to replace bad data.
Generally, DISM is better at fixing OS-related components, while SFC is better at fixing logical errors. Our recommendation is to run both types of scans to resolve this kind of error.
Here’s a quick guide on running both an SFC and DISM scans from an elevated CMD window in order to resolve the 0x80045001 error with Power Eraser:
- Start by opening up a Run dialog box by pressing Windows key + R. Inside the Run window, go ahead and type “cmd” inside the text box, then press Ctrl + Shift + Enter to open up up a Command Prompt with admin access.
Opening a CMD prompt Note: When you’re prompted by the UAC (User Account Control), click Yes to grant administrative privileges to the CMD window.
- When you’re inside the elevated CMD window, type the following command and press Enter to initiate a DISM scan:
Dism.exe /online /cleanup-image /scanhealth
Dism.exe /online /cleanup-image /restorehealth
Note: DISM needs a reliable Internet connection in order to download healthy copies that will be used to replace corrupted files. The ‘scanhealth’ command will initiate a scan to look for system file inconsistencies, while the ‘restorehealth’ command will replace any inconsistencies that are found from the first scan.
- After the first scan is finished (even if the utility reported no fixed files), restart your computer and continue with the steps below.
- Once your computer boots back up, follow the instructions at step 1 again to open up another elevated CMD window. But this time, type the following command and press Enter to initiate an SFC scan:
sfc /scannow
Note: This scan operates at a kernel level, that’s why it’s important not to close or interrupt this scan after you initially start it. If you interrupt the process prematurely, you run the risk of creating further logical errors that might spawn other errors down the line.
- Finally, after the second scan is complete, restart your computer and see if the issue is resolved at the next system startup.
If the same 0x80045001 error with Power Erases is still occurring when you try to install a Windows Update, move down to the next method below.
Method 6: Using System Restore
If you only started experiencing this error code recently and you were previously able to run scans with Power Eraser, it’s likely that the 0x80045001 error started occurring due to a software conflict between Norton and a different 3rd party suite.
In situations like this, you can avoid taking shots in the dark by going for the damage-controlled approach – Running a scan with System Restore. This utility is capable of using a previously saved snapshot to restore your computer state to an older point in time.
Keep in mind that by default, Windows is configured to save System Restore snapshots at important reports such as a critical update installation or a driver update. Unless you modified the default behavior of System Restore, you should have enough restore snapshots to be able to follow the instructions below.
Note: Before you start using the System Restore to restore your computer to a healthy state, consider the fact that any change you made after the snapshot was created will also be lost. This includes any installed apps or drivers, 3rd party or Windows native.
If you understand the circumstances and you still want to go through with this procedure in order to resolve the Error Code 0x80045001 with Power Eraser, follow the instructions below:
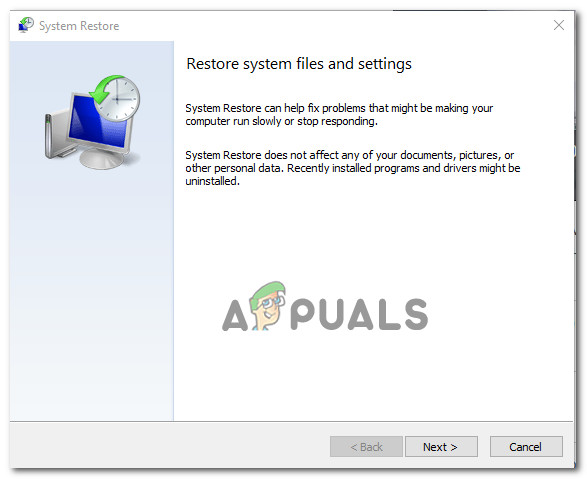
- Start by opening up a Run dialog box by pressing Windows key + R. Inside the text box, type “rstrui” inside the text box and press Enter to open up the System Restore menu.
Opening System Restore from Run Box - Once you arrive at the initial System Restore screen, click Next to advance to the next screen.
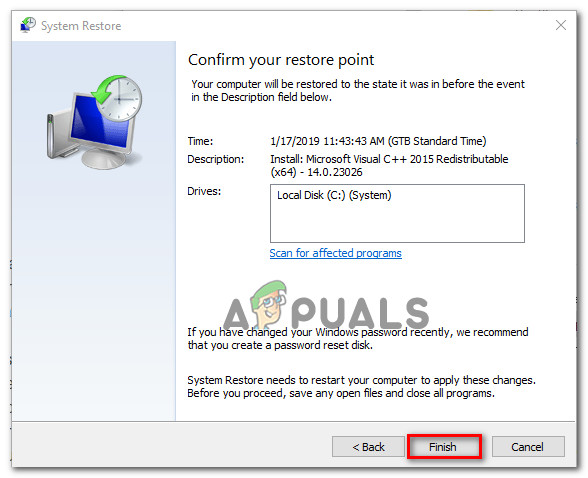
Using System Restore - After you get to the next screen, start by checking the box associated with Show more restore points. After you do this, look at the date of each saved snapshot and select one that is older than the date when you first started to experience the issue with this Norton product. After you select the right snapshot, click on Next to advance to the next menu.

Restoring your system to a previous point in time - At this point, the utility is ready to go, all that’s left to do now is to initiate the restoring process by clicking on Finish. As soon as you do this, your Windows machine will restart and the older state will be enforced.
Starting the System Restore process - After the next startup is complete, restart your computer and see if the issue is resolved.
If you’re still encountering the same error with Norton Power Eraser, move down to the final method below.
Method 7: Performing a Malwarebytes Scan
If your PC is not Wimbot enabled, another reason why you can expect to see the 0x80045001 when attempting to install Norton Eraser or a different AV suite is a security threat that is actively blocking the installation of AV suites.
If this scenario is applicable, chances are your system is already infected with malware that is trying to prevent you from installing a security scanner.
In this case, the best course of action is to deploy a Malwarebytes scan in order to deep clean your kernel files and resolve the security threat.
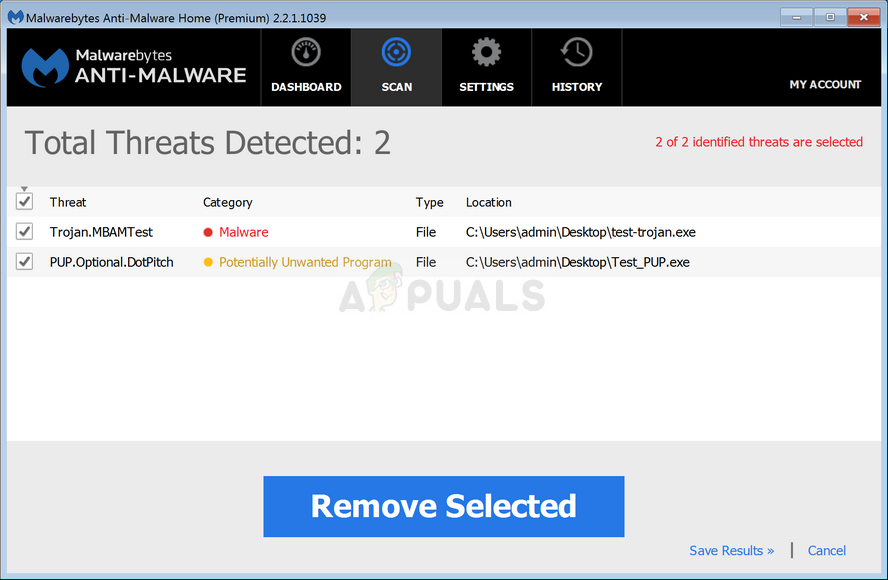
Once the Malwarebytes scan is complete, reboot your computer and see if the problem is now fixed.
If this scenario is not applicable or you already tried this fix with no success, move down to the next potential fix below.
Method 8: Refreshing every Windows Component
If none of the methods above have worked for you, it’s very likely that you’re dealing with some type of underlying system file corruption that is preventing Norton Power Erasing from running properly.
In this case, the only thing you can do is to reset every relevant OS component that’s related to your current Windows installation.
And when it comes to doing this, there are 2 different methods that will allow you to do this:
- Repair install – This is the best way of resetting every relevant Windows component since it allows you to do this without touching any of your personal files present on the OS drive. But keep in mind that the main drawback is that this procedure is quite tedious and you’ll be required to use compatible installation media to perform this operation.
- Clean install – This is by far the easiest procedure since it can be initiated directly from the GUI menu of your Windows 10 installation. But unless you manage to back up your data in advance, expect to lose every personal data on the OS drive (applications, games, personal media, documents, etc.)


