How to Fix Audio Not Working Issue in NFS: Unbound?
Audio not working issue in the Need For Speed: Unbound is due to outdated or corrupt audio drivers. This could also be due to conflicting software e.g if multiple devices are using the same output medium, it could lead to issues such as either program not being able to provide seamless audio transmission.

This issue can also happen if the game’s audio engine is not compatible with spatial sound or if the spatial sound settings are not configured correctly.
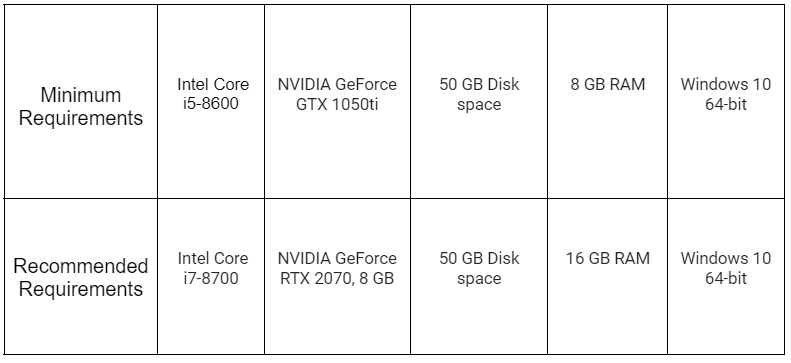
1. Check system requirements
Your computer not meeting the minimum and recommended system requirements causes audio problems such as stuttering, distortion or dropouts.
To troubleshoot audio issues, it’s evident to ensure that your computer meets the minimum and recommended set of system requirements. Here are the system requirements.
2. Select the Correct Output device
If an incorrect output device is selected in the windows settings it is obvious that you won’t be able to hear the game sound. In such a case, you should try selecting the correct output device to cure this problem.
- Press the Windows + I keys simultaneously to open the windows settings application.
- Navigate to System > Sound
- Click on the Drop-down menu beside “Choose where to play sound” and select your desired device.
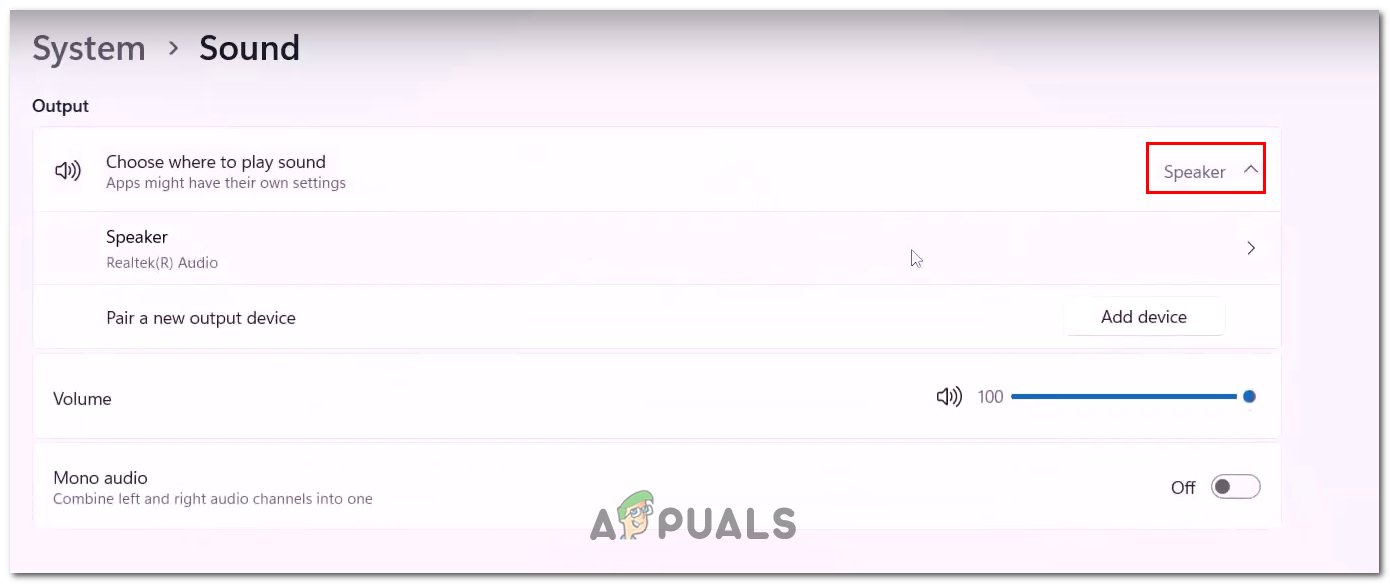
Selecting the audio output device in the sound settings
Once selected, Try playing audio to check if the issue is resolved. If not, continue to the next step.
3. Perform a Clean boot
Interference from a background process can cause the game audio to stop transmitting properly, it is advised to perform a clean boot in such a case.
Clean boot refers to the process in which a computer is started with the least possible amount of background processes.
This way, we can identify if a process running in the background is the reason you’re facing a problem with your main process. Follow these straightforward steps to perform a clean boot:
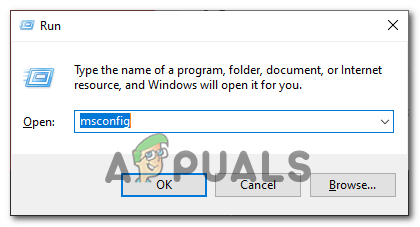
- Press the Windows + R keys together to open the Run dialogue box and in the text field type “msconfig” to open the system configuration window.
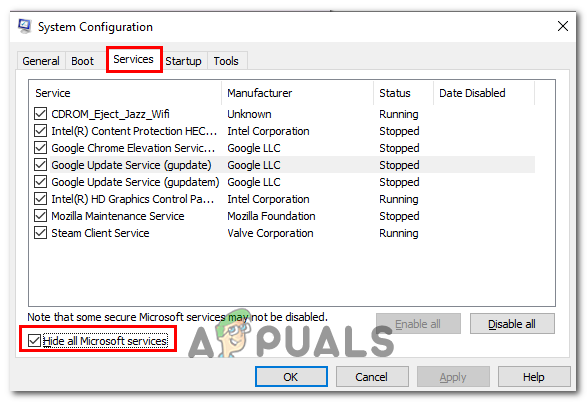
Opening the system configuration window via the Run dialogue box - Navigate to the Services tab and check the “Hide all Microsoft services” option.
Opening the services tab in the System configuration window - Now, Navigate to the start-up tab and click on the “Open the task manager” option.
- Under the startup tab, Disable all startup applications by selecting them and clicking the disable button.
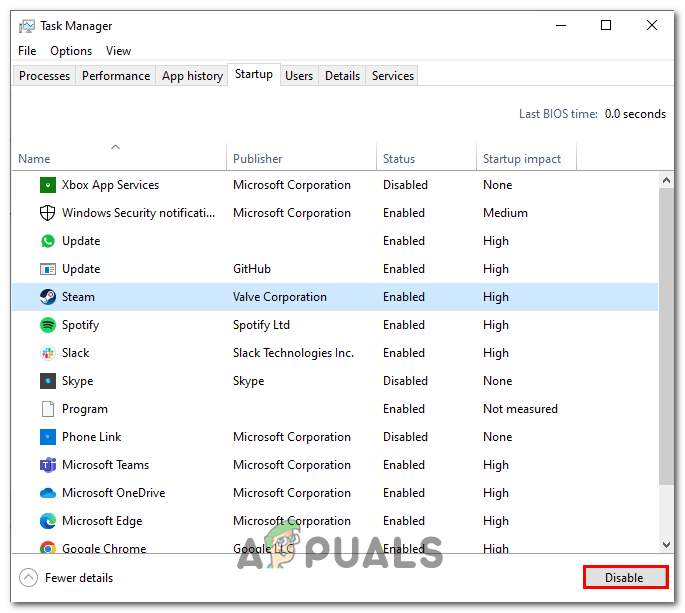
Disabling the startup applications via the start menu - Once done, Restart your computer.
After performing a clean boot, launch the game and check if the audio issue persists. If the audio problem is resolved, then it’s likely that a third-party program or service was causing the issue.
You can narrow down the culprit by re-enabling services and startup programs one by one until you identify the cause of the problem.
4. Update Sound Driver
Outdated sound drivers can cause issues such as poor audio quality, audio that skips or stutters, or no audio output at all.
Updating your sound drivers will resolve these issues and ensure that your audio system is functioning properly. Here’s how you can update the sound drivers:
- Identify the manufacturer and model of your sound card. In this case, we’ll assume you have a Realtek HD Audio card.
- Go to the Realtek website by searching for “Realtek” in a search engine or click here.
- Click on the “Downloads” tab at the top of the page.
- Click on “Computer Peripheral ICs” and then “PC Audio Codecs”.
- Find the driver for your sound card. In this case, we’ll assume you’re using Windows 10 64-bit, so we’ll click on “High Definition Audio Codecs (Software)”.
- Click on the link to download the driver.
- Save the downloaded file to your computer.
- Double-click on the downloaded file and follow the instructions to install the driver.
5. Verify Game files
During the installation procedure, the game files may get corrupted. Corrupt game files can lead to many problems, such as the issue in discussion.
Verifying game file integrity in Steam checks the game files on your computer and compares them to the files on the Steam servers to ensure that they match.
This process helps to identify and fix any corrupted, missing, or modified game files that may be causing issues with the game.
It is advised to verify the integrity of the game files. To verify game file integrity, follow these straightforward steps:
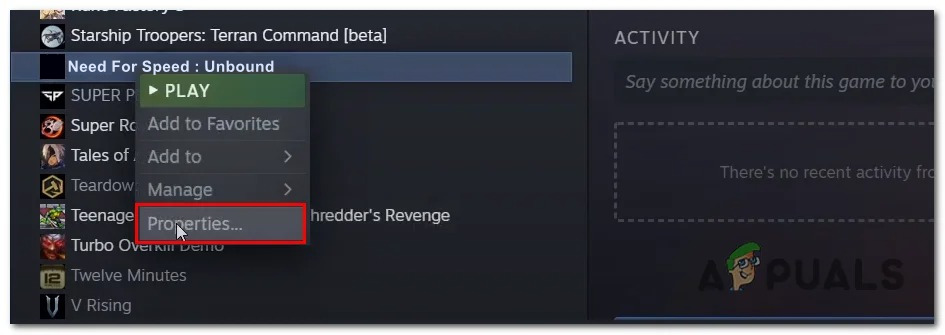
- Open Steam, and locate Need For Speed: Unbound in the panel on the left side of your screen.
- Right-click on Need For Speed: Unbound and click on Properties.
Opening the properties of the game via the steam client - Now, Click on Local Files.
- Click on the Verify the integrity of game files.
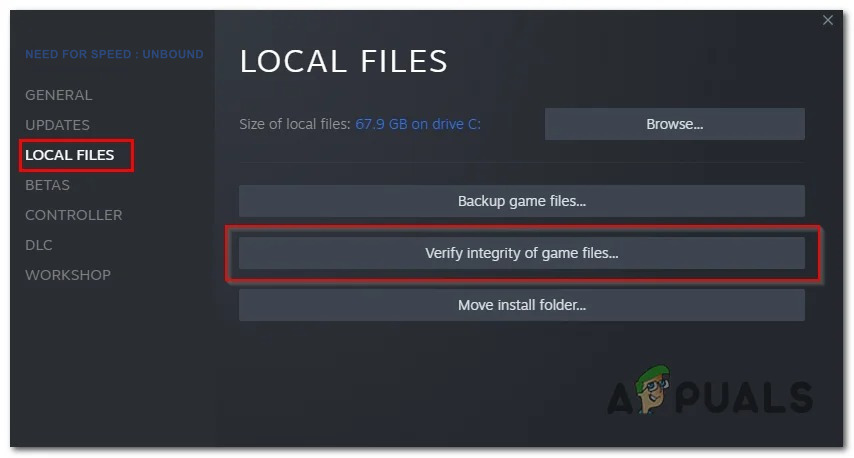
Verifying the integrity of game files via steam - Once done, try playing the game.
6. Disable spatial sound
Spatial sounds creates the illusion of 3D sound, Disabling spatial sound on Windows 10 will turn off any audio enhancements that are designed to simulate a surround sound experience.
Disabling spatial sound will provide a more stable audio experience. For example, if you’re experiencing audio lag or distortion, disabling spatial sound may help resolve these issues. Here’s how you can disable the spatial sound:
- Press the Windows + I keys simultaneously to open the settings.
- Navigate to System > Sound > Device properties.
- Right-Click on your sound output device and click on Properties.
- Now, Head over to the Spatial sound tab.
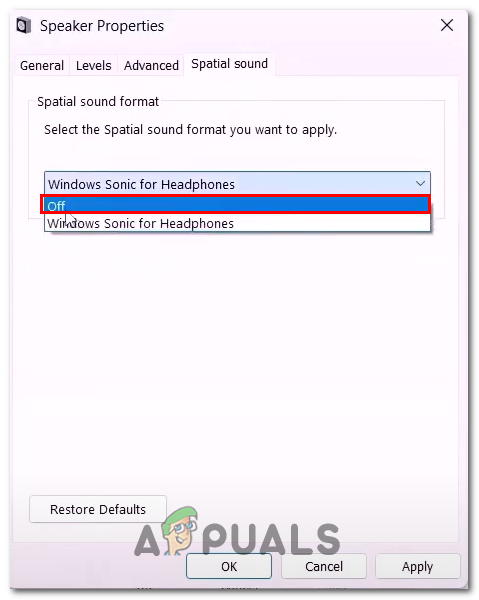
Disabling the spatial sound feature in windows sound settings - Turn it off by opening the drop-down tab and selecting the “off” option.
- Save the changes.
7. Disable handsfree-telephony
Hands-free telephony uses a lower-quality audio codec than standard stereo audio. This results in lower sound quality and compatibility issues with some games.
Disabling hands-free telephony can force your device to use the higher-quality stereo audio codec, which can improve sound quality and compatibility with games.
Here’s how you can disable the hands-free telephony feature in windows.
- Press the Windows + R keys simultaneously to open the run dialogue box.
- Paste the following shell command to open the Device and Printers window in the control panel
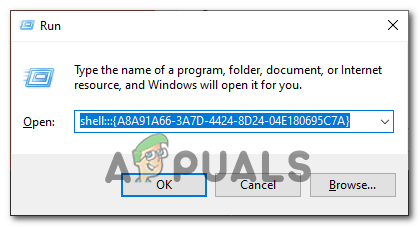
Opening Device and Printers window via shell command shell:::{A8A91A66-3A7D-4424-8D24-04E180695C7A} - Right-Click on your Bluetooth headset and click on the Properties button.
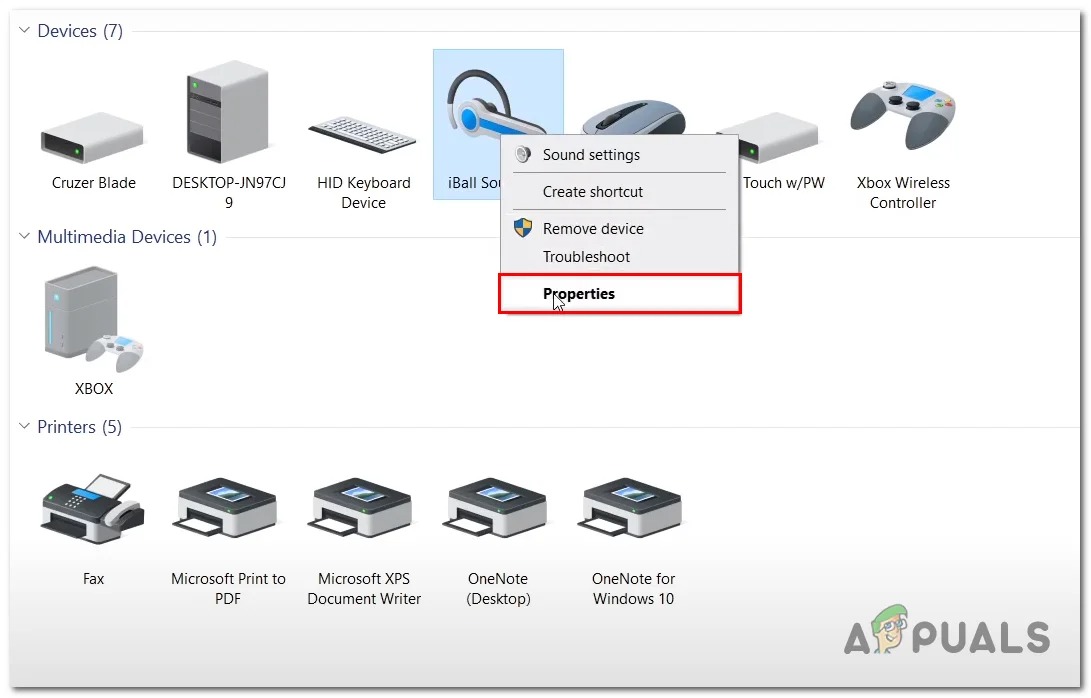
Opening properties of the Bluetooth device - Navigate to the Services tab and Uncheck the “Handsfree telephony” feature.
- Save the changes.
Once the changes have been saved, try launching the game and see if the issue’s been resolved. If not, Continue to the next step.
8. Configure Sound-sample rate
The misconfigured sound sample rate can cause audio issues in Need For Speed: Unbound, as the game may be expecting a certain sample rate and format for the audio playback.
If the sample rate is set incorrectly, it can cause the audio to sound distorted, choppy, or out of sync with the visuals
It’s important to ensure that the sound sample rate in the game matches the sample rate set in the computer’s audio settings to prevent these types of issues. Here’s how you can configure the sound-sample rate:
- Open the Control panel.
- Navigate to Hardware and sound > Sound
- Right-Click on your sound output device and click on the Properties button.
- Now, Navigate to the Advanced tab.
- Under the Default format heading, Click on the drop-down below to open it.
- Select the 24 Bit. 480000 Hz (Studio Quality) option and Save the changes.


