[FIX] Nahimic Companion keeps Reinstalling
The Nahimic Companion is an enhancement of your audio driver by MSI. In many cases, this application was installed without any user interference/acceptance (by the Windows update) & shown in the system’s tray. This application is well embedded into the OS modules & thus not easy to uninstall. Moreover, if a user succeeds to remove it, the application reinstalls on the reboot. This application eats up quite a RAM of the user’s system & at times, it is not even present in the installed applications.

Before moving on with the solutions to get rid of the Nahimic Companion, make sure the BIOS of your system is updated. Also, make sure to disconnect the Internet from your system during the troubleshooting process.
Solution 1: Remove the Nahimic Companion, its Files, and Service
The Nahimic Companion issue may keep emerging if any of the processes/services are continuously reinstalling the Companion app or its service. In this case, you can try the following methods one by one to sort out the issue (it will be better to follow the methods as listed). Some of these methods may not be available to some users. If you want to apply all of these methods at once, then do not restart after each method but restart after executing all the methods.
Uninstall the Nahimic Companion Application
- Firstly, make sure the Nahimic application has been removed from the Apps & Features (if present).
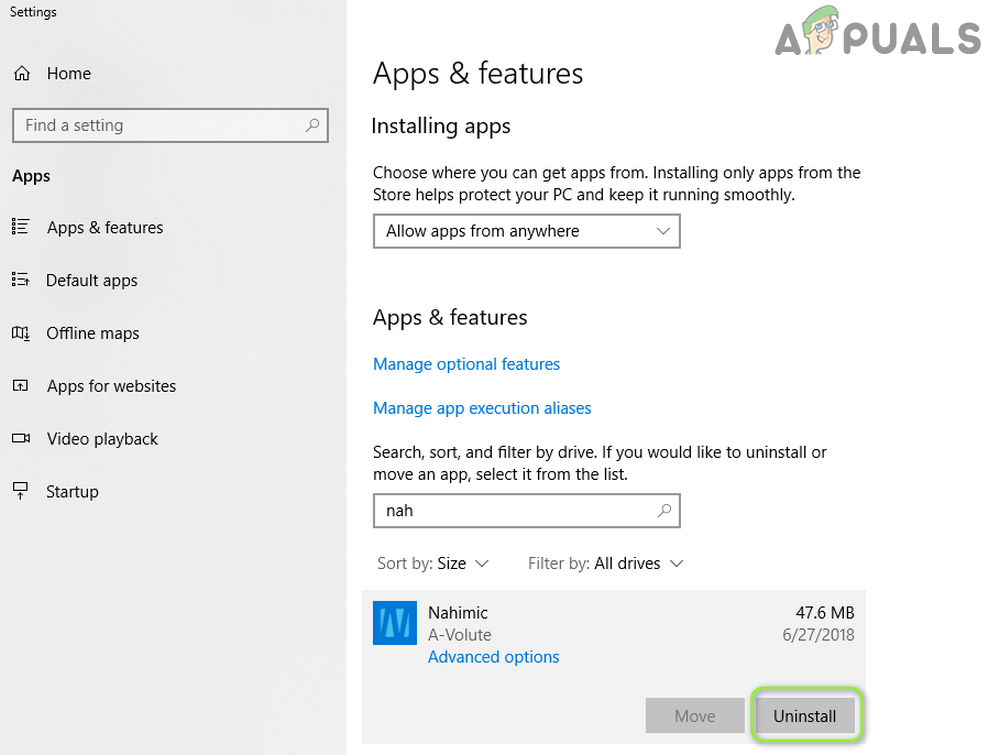
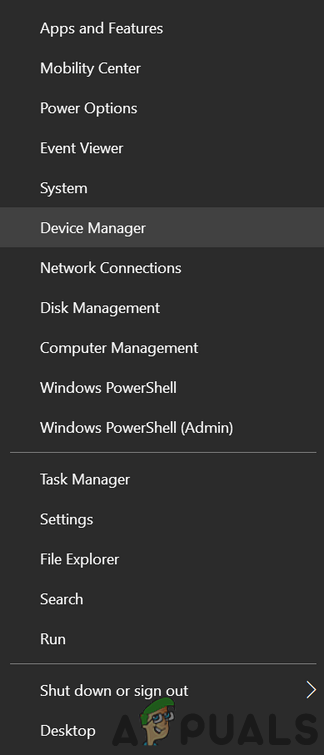
Uninstall Nahimic - Then, right-click on the Windows button, & in the Power User menu, open the Run command box.
- Now navigate to the following path (you may copy-paste the path):
\Program Files (x86)\MSI\One Dragon Center\Nahimic
or
%localappdata%/NhNotifSys
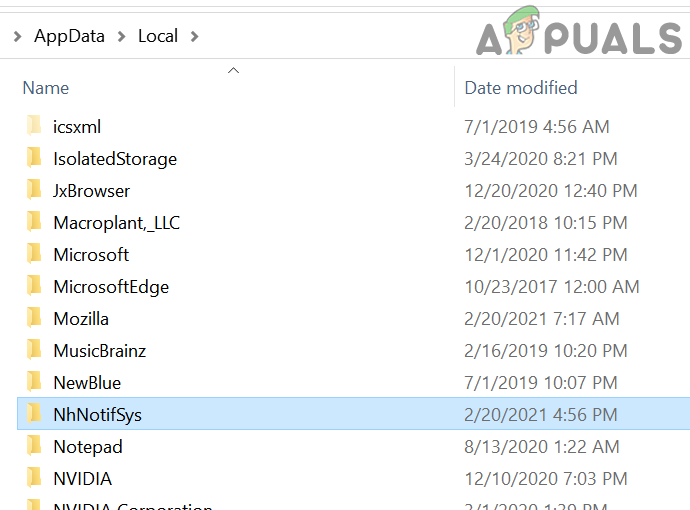
Run the Nahimic Uninstaller from the NhNotifSys - Then click on Uninstall & follow the prompts to complete the process.
- Now reboot your system & check if the Nahimic issue is resolved.
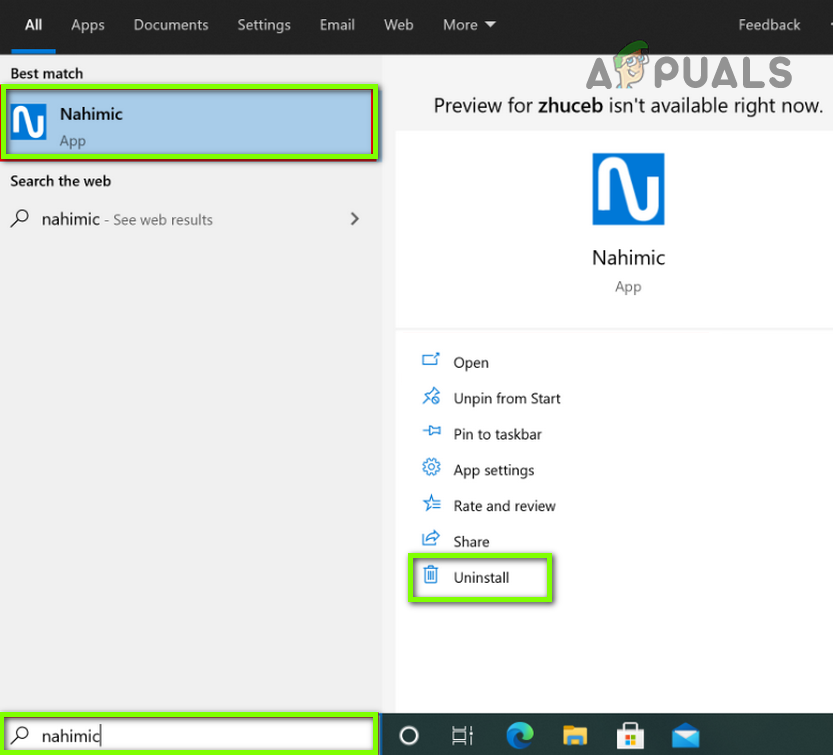
If the path mentioned above 2 is not available, then press the Windows key & type: Nahimic. Then right-click on the Nahimic Companion & select Uninstall. Then you may follow the prompts to remove the application.
Disable Nahimic Companion and its Service at the System Startup
- Firstly, make sure to uninstall the Nahimic application without rebooting your system.
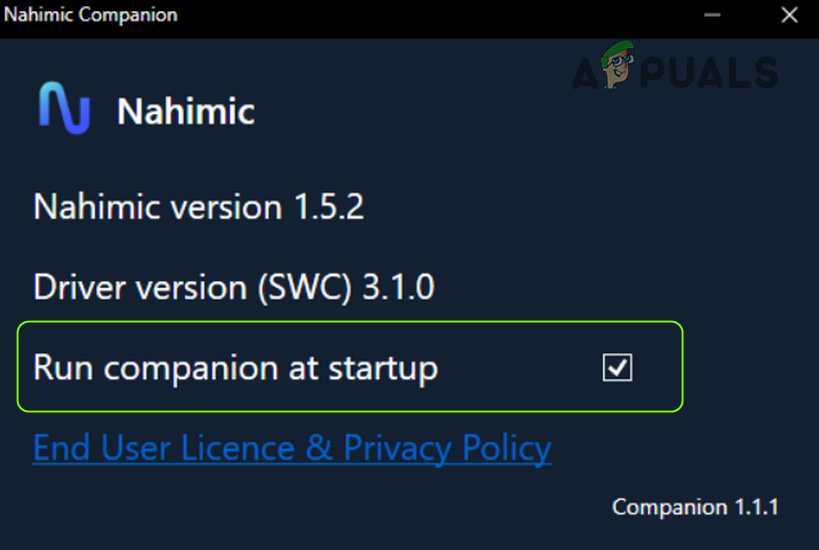
- Press the Windows key & in the search box, type: Nahimic. Then open Nahimic.
- Now uncheck the option of Run Companion at Startup & close the application (you may also use Autoruns as administrator to delete the Nahimic startup entries).
Uncheck Run Companion at Startup - Then press the Windows key & search for: Services. Now in the results list, right-click on the Services, & in the mini-menu, choose Run as Administrator.
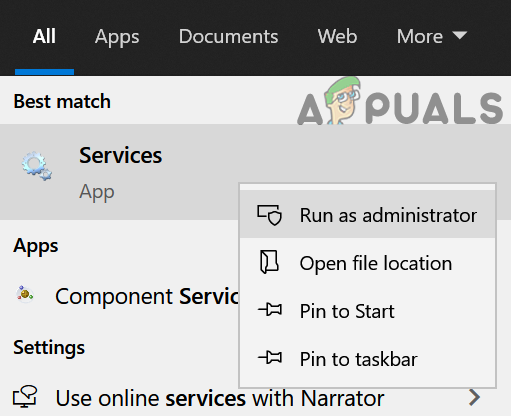
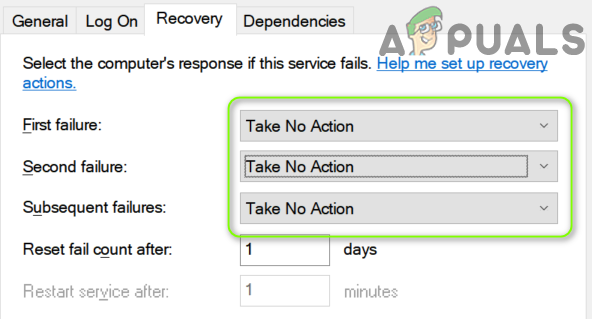
Open Services as Administrator - Now double-click on the Nahimic Service & change its Startup Type to Disabled.

Change the Startup Type of Nahimic Service to Disabled and Stop it - Then click on the Stop button & steer to the Recovery tab.
- Now, expand the dropdown of the First Failure & select the option of Take No Action.
- Repeat the same for the Second Failure & Subsequent Failures dropdowns to set their value as Take No Action. Then close the Services window.
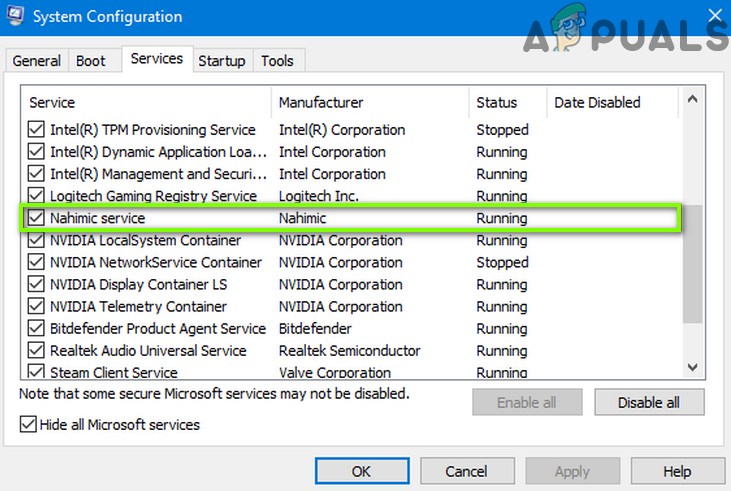
Set the Failures to Take No Action in the Recovery Tab of the Nahimic Service - Now press the Windows key & in the search box, type: System Configuration. Then open the System Configuration.

Open the System Configuration from the Start Menu - Then, in the Services tab, uncheck Nahimic Service & click on the Apply button.
Disable the Nahimic Service in the System Configuration - Now, in the Startup tab, click on Open Task Manager.
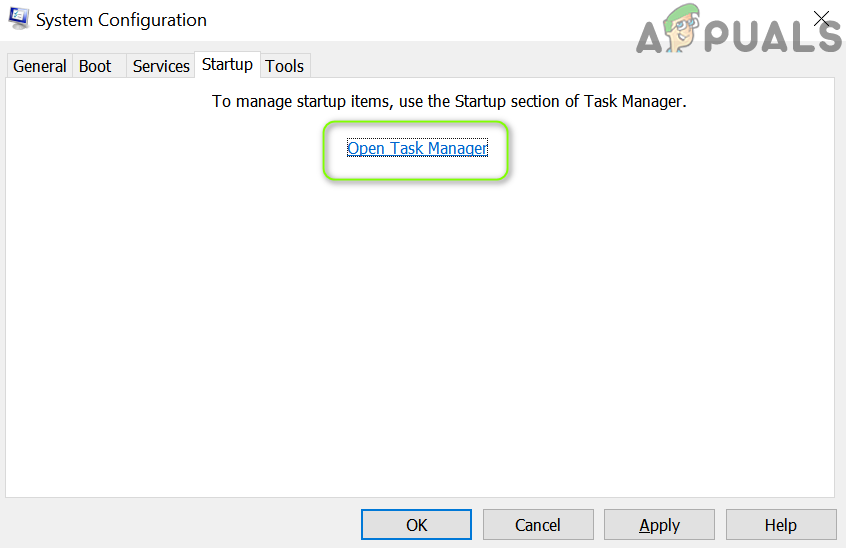
Click on Open Task Manager in the System Configuration - Then, make sure to disable all the processes/applications related to Nahimic & right-click on the Windows button.
- Then, in the Quick Access menu, open Windows PowerShell (Admin) & execute the following:
sc.exe delete "NahimicService"
- Now reboot your system & check if the Nahimic Companion issue is resolved.
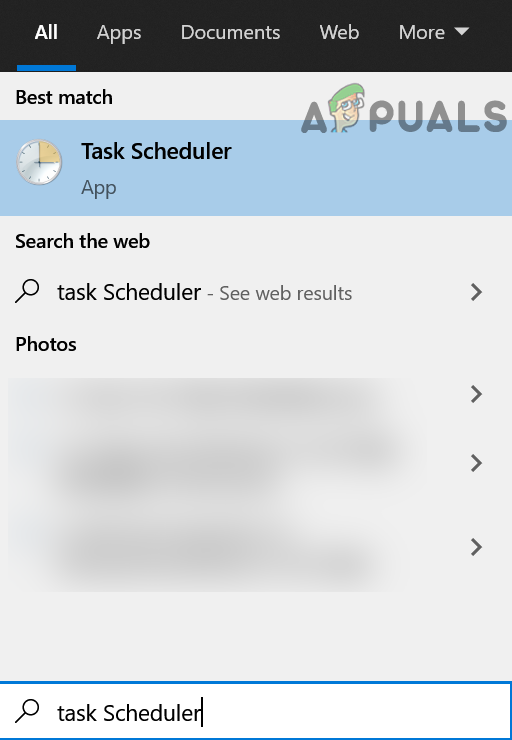
Delete the Tasks in the Task Scheduler
- Press the Windows key & search for: Task Scheduler. Then open the Task Scheduler.
Open the Task Scheduler - Now right-click on a task related to Nahimic (e.g., NahimcTask64) & choose Disable.
- Repeat the same to all the tasks/scripts related to Nahimic (a tedious task). Following tasks are also reported to trigger the behavior:
NahimcTask32

NahimicSvc64Run

NahimicSvc32Run
- Now close the Task Scheduler & uninstall the Nahimic Companion (as discussed above).
- Then reboot your PC & check if the Nahimic Companion is removed from the PC.
Disable/Remove the Nahimic Devices in the Device Manager
- Right-click on the Windows/Start menu button & in the Power User menu, choose the Device Manager.
Open Device Manager - Now expand the ‘Sounds, Video and Game Controllers’ & right-click on A-Volute Nh3 Audio Effects Component (or Nahimic Mirroring Device).
- Then choose Uninstall & in the next window, make sure to checkmark the option of Delete the Driver Software for This Device.
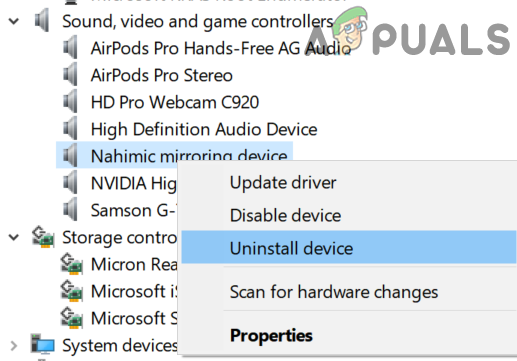
Uninstall Nahimic Mirroring Device in the Device Manager - Now click on Uninstall & let the process complete.
- Then repeat the same to remove the Nahimic Device in the Software Devices/Components. You may check other options as well to remove the mentioned component.
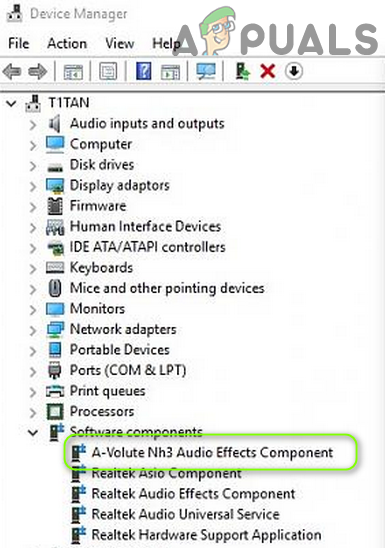
Delete the A-Volute Nh3 Audio Effects Component in the Software Components - Then reboot your PC & check if the Nahimic Companion application is removed.
- If not, repeat the above steps but in place of Uninstall, this time, choose Disable and check if the Nahimic problem is solved.
Use the Group Policy to Stop Uninstalling of the Nahimic Companion Driver
- Open the Properties of the Nahimic driver (A-Volute Nh3 Audio Effects Component or Nahimic Mirroring Device) in the Device Manager (as discussed above) & steer to its Details tab.
- Now expand the dropdown of Property & choose Hardware IDs.
- Then note down the Hardware IDs & press the Windows key.
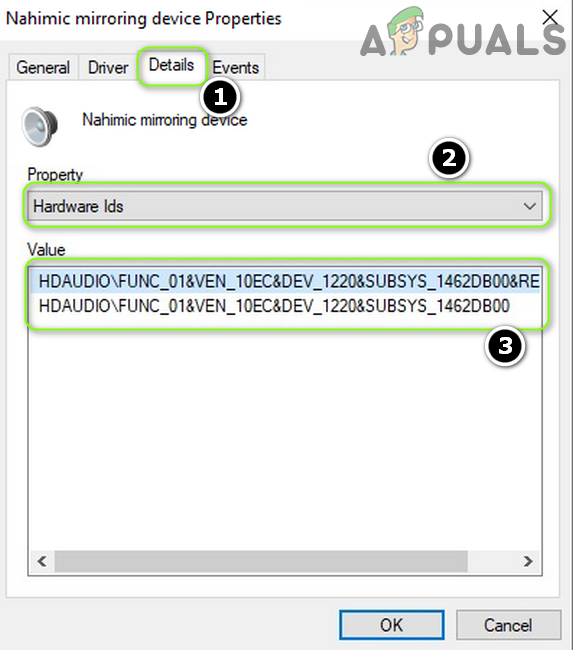
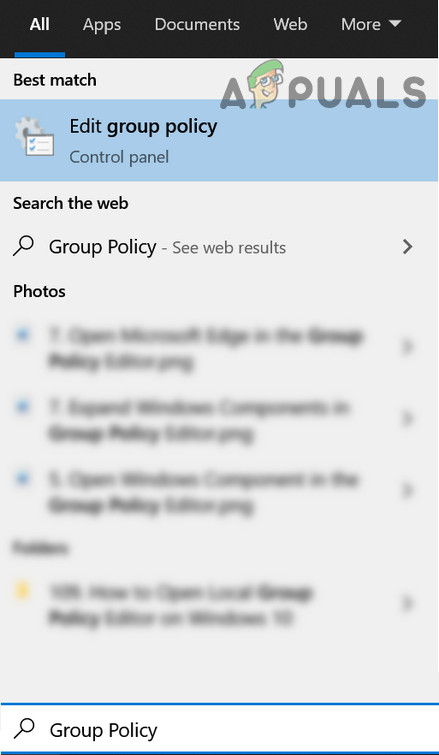
Note down the Hardware IDs of the Nahimic Mirroring Device - Now, in the search box, type: Group Policy Editor & open Edit Group Policy.
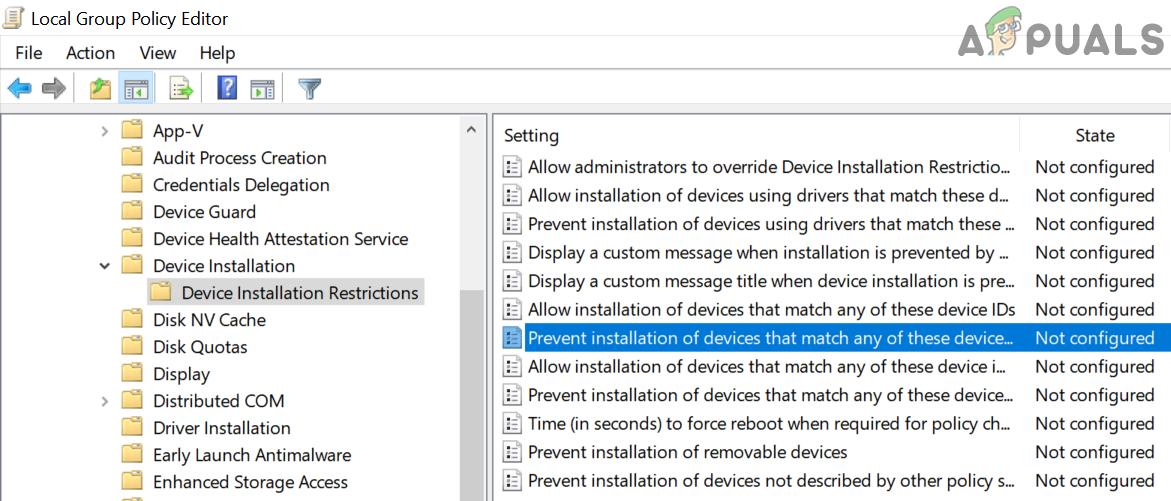
Open Group Policy Editor - Then, in the left pane, navigate to the following:
Computer Configuration>> Administrative Templates>> System>> Device Installation>> Device Installation Restrictions.
- Now, in the right pane, double-click on “Prevent Installation of Devices That Match Any of These Device IDs” & select the Enabled button.
Open Prevent Installation of Devices That Match Any of These Device IDs in the Group Policy Editor - Then, in the Options section, click on the Show button & click in the Value box.
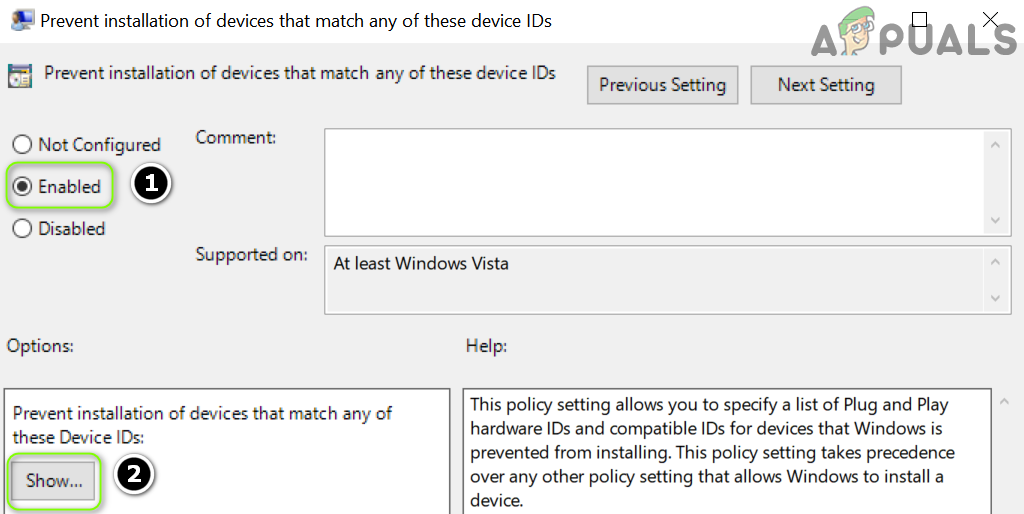
Enable the Prevent Installation and Click on Show - Now enter the Hardware ID & if there is more than one ID, then enter in the other value boxes one by one.
- Then apply your changes & exit the Group Policy Editor.
- Now remove the Nahimic application (as discussed in the above section) and reboot your PC to check if the Nahimic issue is resolved.
Rename/Delete the Files/Folders Related to the Nahimic Companion
- First, make sure the Nahimic Companion/application is removed in the Apps & Features (without rebooting).
- Then make sure to create a system restore point (because you may have to delete the System32 files & if done wrong, you may harm your OS/data).
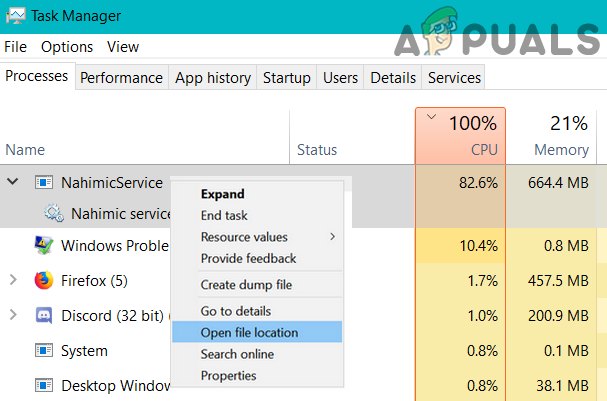
- Right-click on the Start menu/Windows button & choose the Task Manager.
- Now right-click on the Nahimic process (e.g., A-Volute NS) and choose Open File Location.
Open the File Location of Nahimic Service - Then minimize the window having Nahimic & end the Nahimic process in the Task Manager.
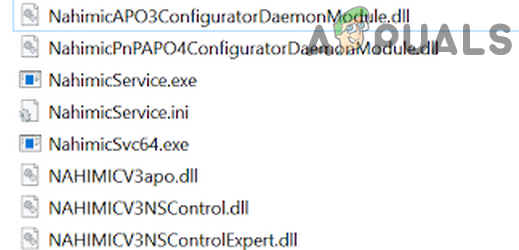
- Now switch to the Nahimic window & delete the folders/files (e.g., NahimicService.exe) related to Nahimic (if you want to play safe, then rename).
Delete the Nahimic Files and Folders - Then repeat the same for all Nahimic-related processes in the Task Manager (if you encounter the message that the file/folder is in use, then make sure to end the process in the Task Manager).
- Now, make sure to rename/delete the Nahimic files/folders (for example, NhNotifSys) at the following locations (if present):
%localappdata%
- Then download and install the Driver Store Explorer (a GitHub project). Then launch it and Force Uninstall the A-Volute Extension driver package.
- Now make sure to hide the driver update of the A-Volute extension.
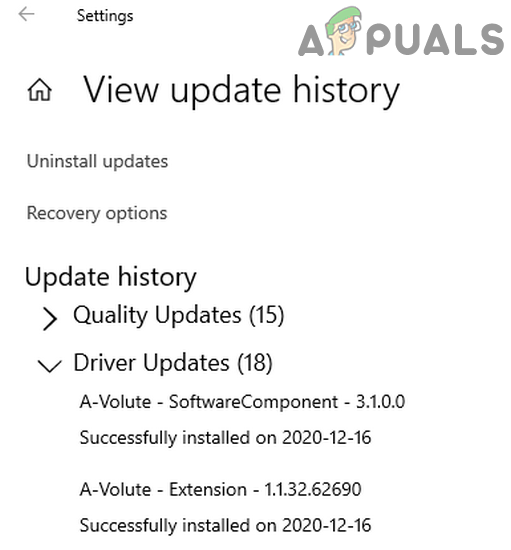
Hide the Nahimic Updates - Then restart your system and check if the system is clear of the Nahimic Companion.
If you do not want to rename/delete the files, then you may remove read/write permissions of these files or block the execution of these files (e.g., nhnotifsys.exe) through the antivirus of your system.
Solution 2: Edit the System’s Registry
If the issue persists, you may edit the system registry to stop the Nahimic Companion’s reinstalling or its execution.
Warning: Advance with extreme cause & at your own risk as editing the system’s registry is a proficient task and if done wrong, you may harm your OS/data/system.
Delete the Nahimic Registry Keys
- Firstly, make sure to back up the system’s registry (if things do not play well).
- Then uninstall the Nahimic Companion & disable its services (as discussed in solution 1).
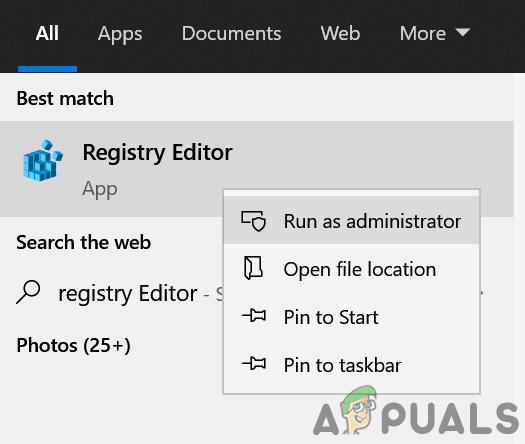
- Now press the Windows key & search: Registry Editor. Then, in the results list, right-click on the Registry Editor & choose Run as Administrator.
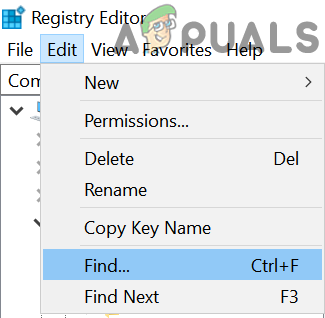
Open Registry Editor as Administrator - Now open the Edit menu & choose Find.
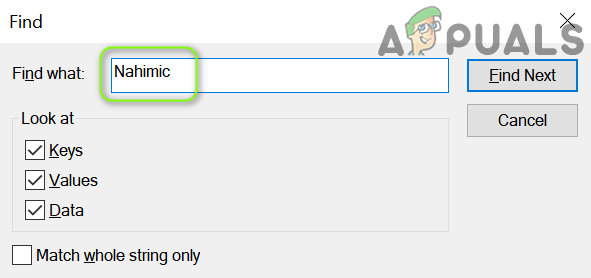
Open Find in the Registry Editor - Then type Nahmic & press the Enter key.
Search for Nahimic in the Registry - Once the first Nahmic key is found, delete it &press F3 to find the next key.
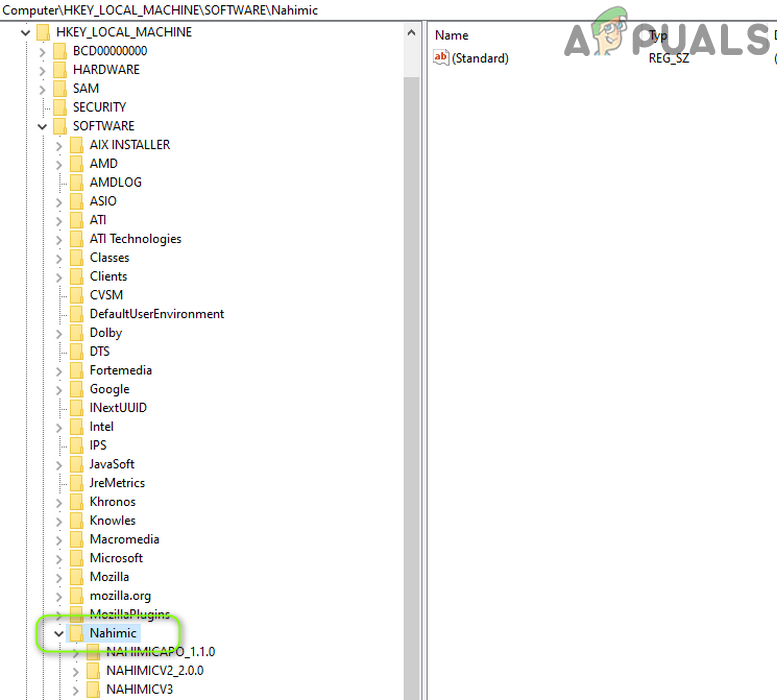
Delete the Nahimic Key in the Registry Editor - Now repeat the same to delete all the keys related to Nahimic till no key is left in the registry.
- Then close the editor and make sure to delete any setup files from the locations (and their sub-folders) mentioned below (copy-paste the address in the Run command box). You may have to enable the viewing of hidden files/folders.
Downloads

\Program Files\

\Program Files (x86)\

\ProgramData\

%localappdata%
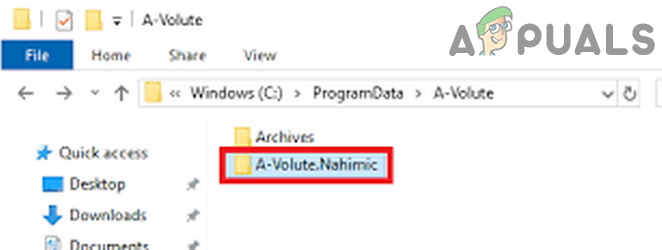
Delete Nahimic in the ProgramData Folder - Now reboot your PC and check if the system is clear of the Nahimic Companion issue.
Block the Execution of the Nahimic Companion Application
- Launch the Registry Editor as administrator (as discussed above) and navigate to the following path:
Computer\HKEY_CURRENT_USER\SOFTWARE\Microsoft\Windows\CurrentVersion\Policies
- Now, right-click on the Policies key (in the left pane) and choose New>>Key.
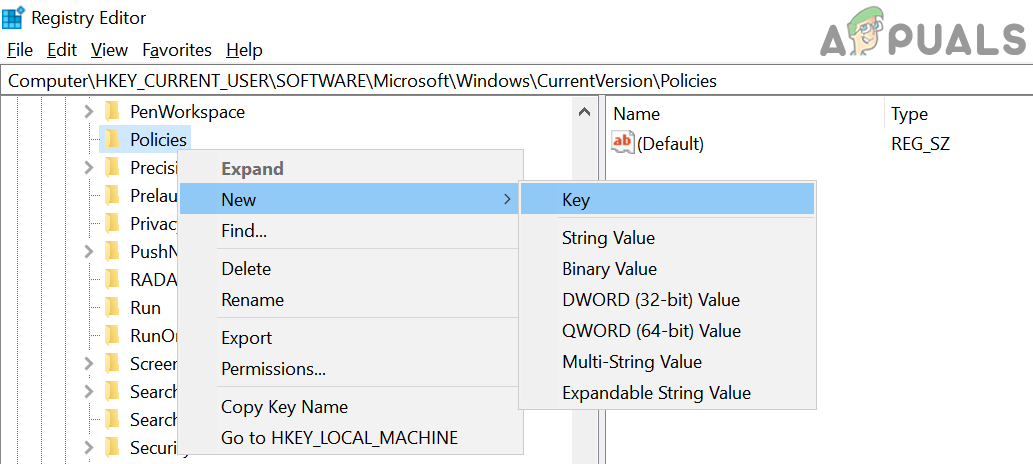
Create a New Key Under Policies - Then name it as Explorer and select it.
- Now, right-click on the Explorer key and select New > Dword (32-bit) value.
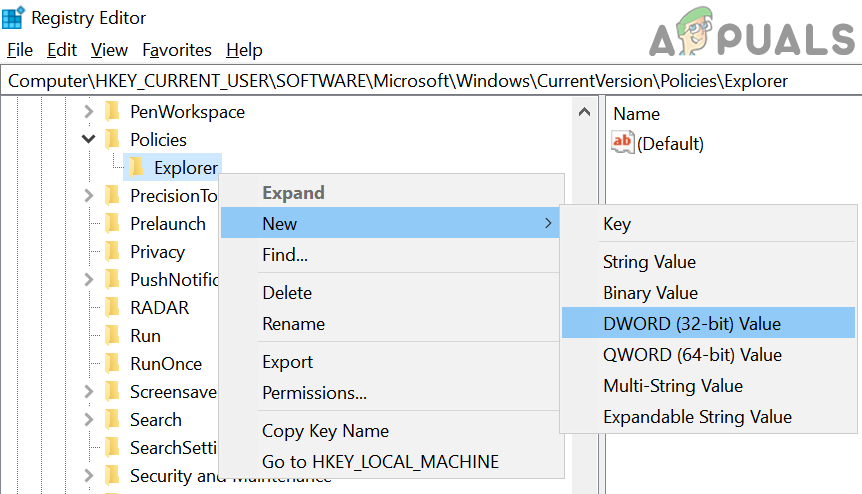
Create a New Dword (32-Bit) Value in the Explorer Key - Then name the value as DisallowRun (in the right pane) and double-click on it.
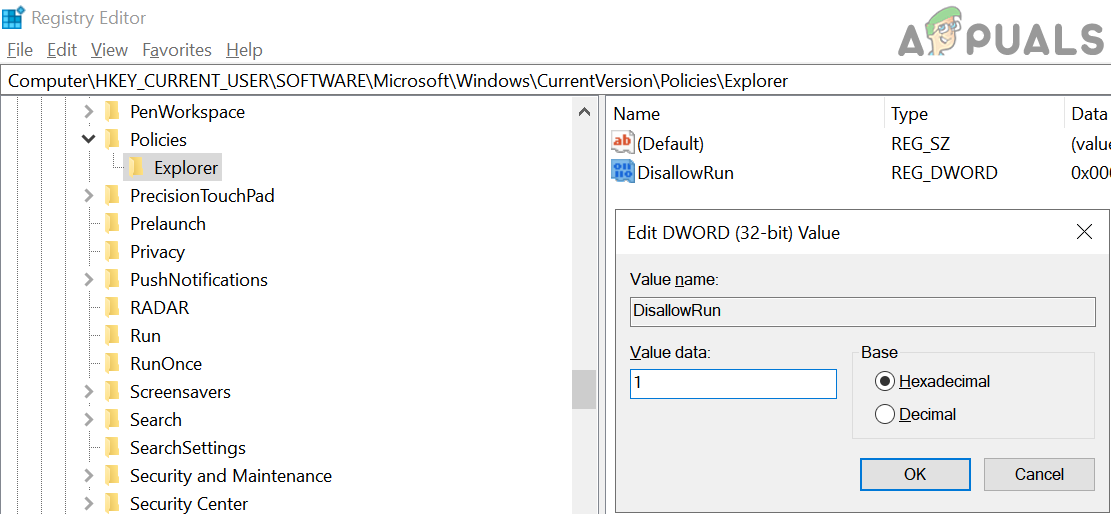
Set the Value of DisallowRun to 1 - Now set its value as 1 and again, right-click on the Explorer key in the left pane.
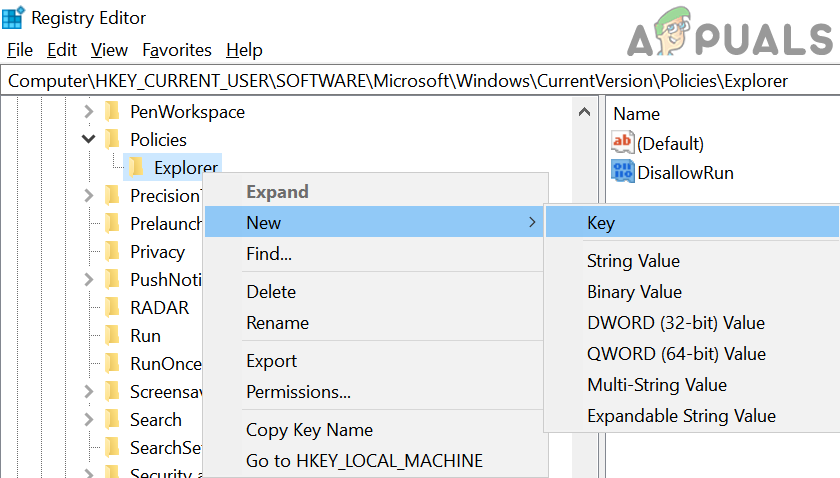
Create a New Key Under Explorer - Then choose New > Key and name it as DisallowRun.
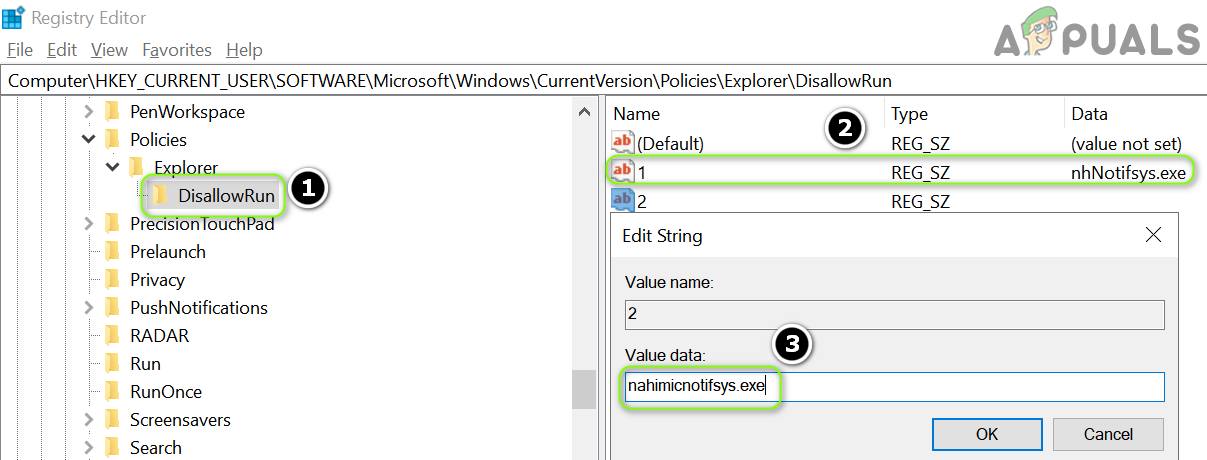
- Now, in the left pane, right-click on DisallowRun and choose New>>String Value.
- Then name it as 1 and set its value to nhNotifsys.exe.
- Now again create a String value with the name of 2 and set its value to nahimicnotifsys.exe. If you have noted any other EXE file of Nahimic, you may add it here with the name of 3 and onwards.
Block the Nahimic Companion Through the Registry Editor - Then close the Editor and reboot your PC to check if the system is clear of the Nahimic issue.
Solution 3: Disable the Onboard Audio Device in the BIOS
The Nahimic companion is usually part of the on-board audio driver and if you are using an additional audio/graphics card, then disabling the onboard audio device in the system’s BIOS may solve the problem. The instructions slightly vary from user-to-user basis.
- Uninstall the Nahimic Companion and disable its services.
- Then power off your system and boot it into the BIOS of your system (you may press the F2 key).
- Now navigate to Advanced and open Integrated Peripherals.
- Then disable the HD Audio Controller and exit the BIOS after saving the changes.
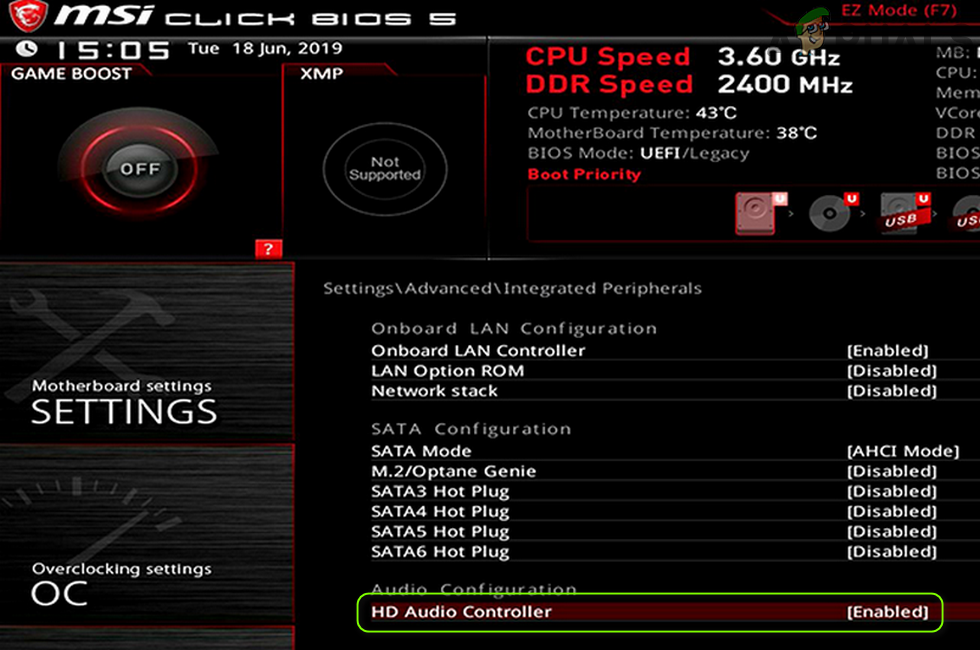
Disable Onboard Audio Device in the BIOS - Now boot your system into Windows and check if the Nahimic problem is solved.
If the issue persists (even after all the hassle), then you may install the strip version (without Nahimic by deleting the files/folders related to it in the downloaded driver folder) of the Realtek driver. If that did not solve the problem, you may try a 3rd party uninstaller (like using the Revo Uninstaller in the hunter mode) to remove all the traces of the Nahimic Companion. Even if the issue persists, then you may use a code editing application to scramble the code of the EXE files of the Nahimic Companion.


Bro, this has to be the best throughout nahimic uninstalling guild on the internet. Thank you so much, and I have followed every steps here. No more nahimic parasite for me!