How To Craft, Repair & Use an Anvil in Minecraft [Guide]
 Reviewed by Huzaifa Haroon
Minecraft has a lot of tools that have been deemed as essentials. Without these tools, your Minecraft gameplay would be nightmarish, and when one gets accustomed to these tools, it’s hard to imagine where you’d be without them. One such tool would the anvil. That’s why we’ll be taking a thorough look at the anvil today; its functions, its recipe, and how to use one properly.
Table of Contents:
What is an Anvil and What Does it Do?
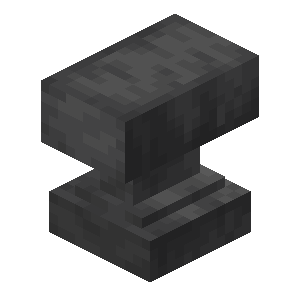
An anvil is a black block that has a square hole on the top. Similar to real life, an anvil is used to repair your tools/weapons, add enchantments to them, combine enchantments, renaming our tools/weapons or any mobs you’ve tamed, and repair tools/weapons with enchantments, without sacrificing those enchantments. It is a very beneficial tool and highly recommended for both beginners and veterans.
Read More: How to Make A Shield in Minecraft
How to Obtain an Anvil
There are 3 ways through which you can get an anvil:
- Finding one in villages
- Crafting one
- Obtaining a damaged anvil from the Forge Room of a woodland mansion (not recommended)
Of these 3 methods, we’ll only be discussing the 2nd one.
Requirements for Crafting an Anvil
To craft an anvil, first you’ll need to fulfill these requirements:
- 3 iron blocks
- 4 iron ingots
Alternatively, you need to have a total of 31 iron ingots.
Obtaining the Components
While obtaining the iron ingots isn’t that difficult, the quantity required makes this whole process a bit time-consuming. At any rate, here’s how to get iron ingots easily:
Crafting iron ingots
- Iron is pretty common and can be found in caves, ravines and cliffsides. Use a pickaxe to mine it.
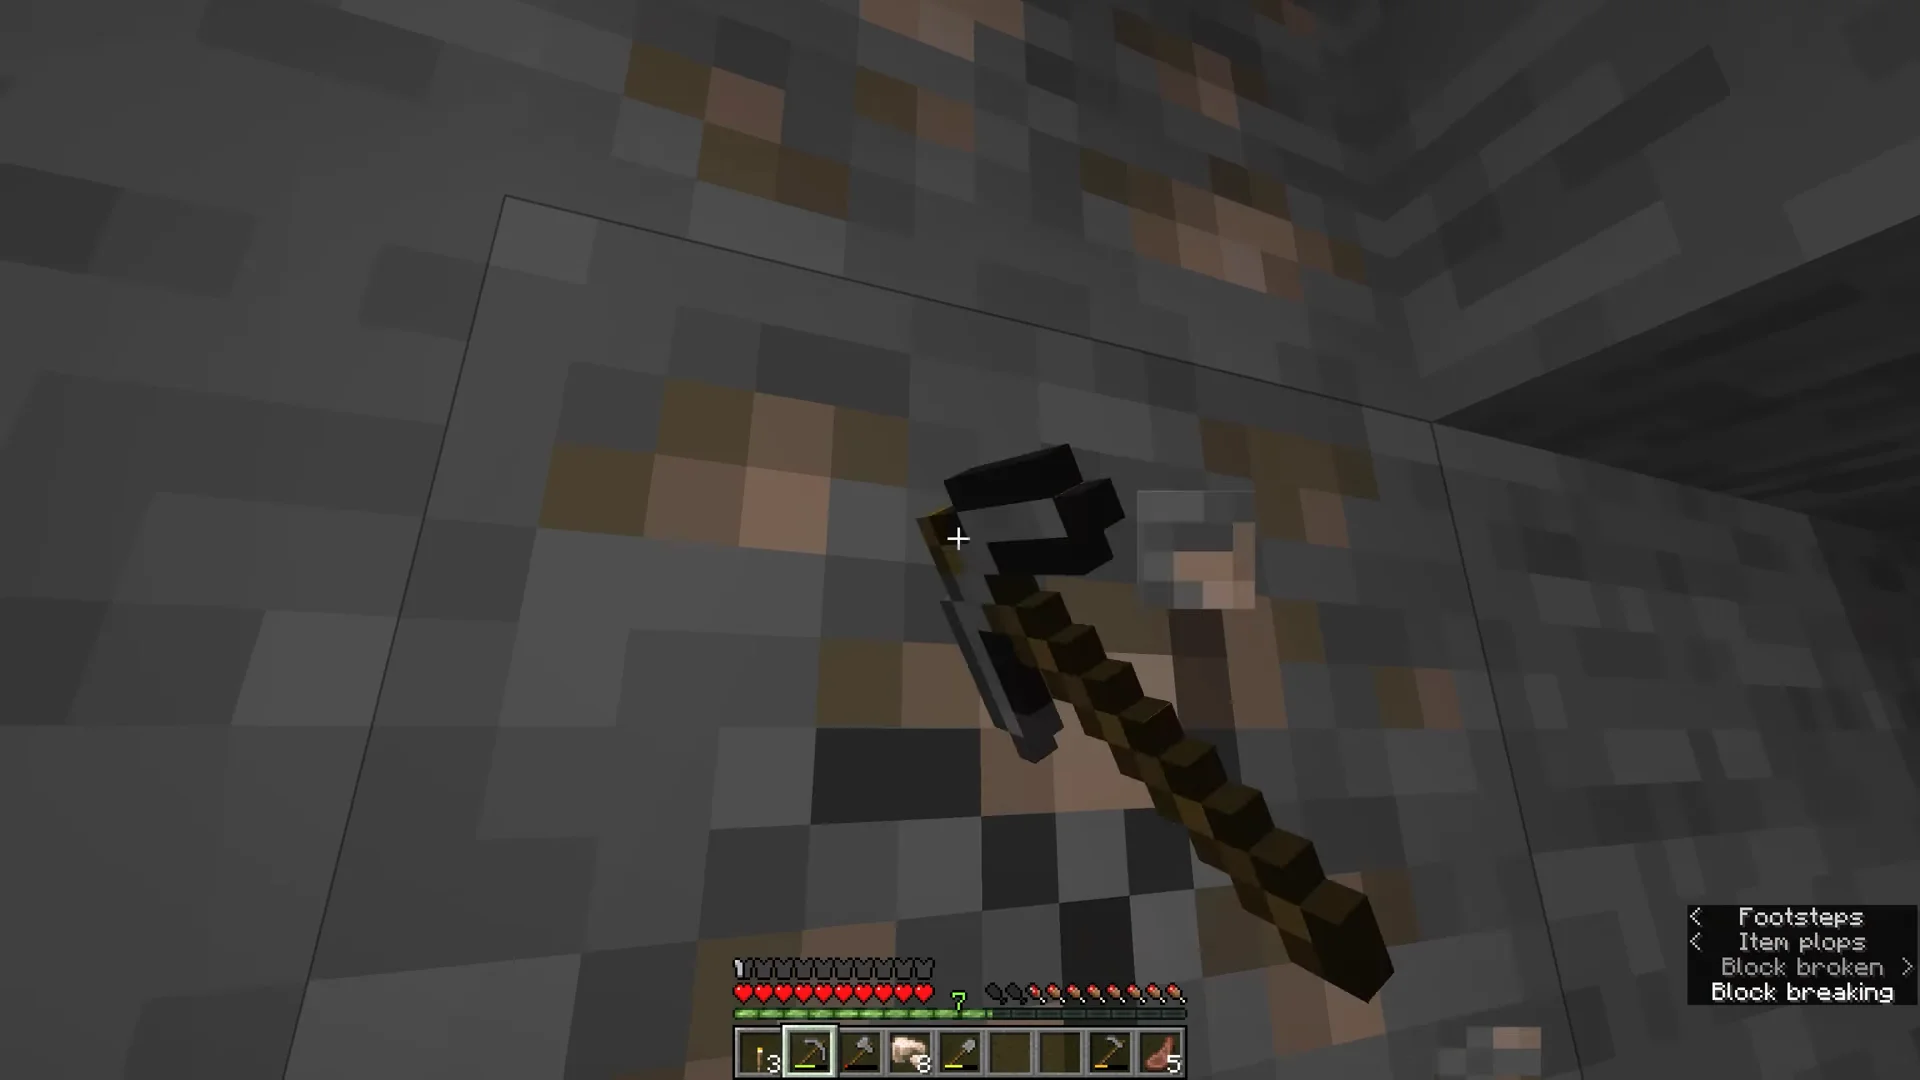
Using a pickaxe to mine iron ore - Next, you’ll need to smelt the iron from the ore. A furnace will be required for this. Furnaces can be found in villages, ships and other such places. Anyhow, place the iron ore in the top slot in the Furnace menu.

Place the iron ore in top slot of the Furnace crafting menu - Then, you’ll need some fuel to operate the furnace. While coal can be used and is easy to obtain as it spawns near iron, the leftover wooden planks from earlier can also be used. Place the fuel in the bottom slot.
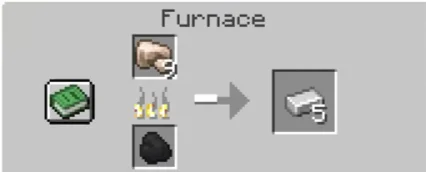
Place the fuel in the bottom slot of the Furnace menu to starts melting - Place the crafted iron ore in your inventory. Continue mining and crafting until you have 31 iron ingots.


Crafting iron blocks
Now, to craft iron blocks:
- Open up the crafting menu. Fill the 3×3 grid completely with iron ingots as shown below.
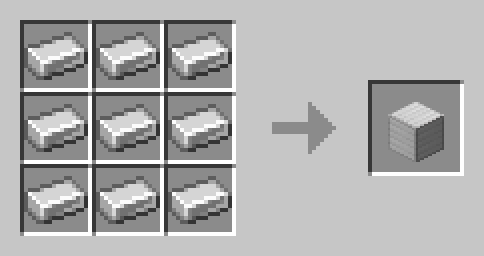
Fill the grid as shown -
Place the iron block in your inventory. Continue crafting until you have 4 iron blocks.
Now that we’re procured the ingredients, its finally time to craft an anvil.
How to Craft an Anvil
- Once again, open up your crafting menu. Now arrange the components in the grid exactly as shown below.
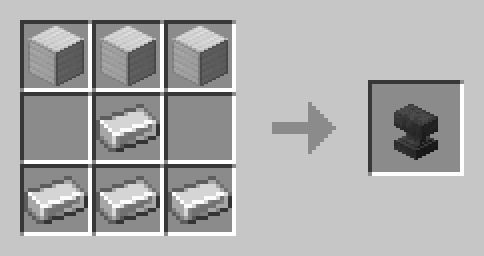
Arrange the components as shown and craft the anvil - Place the anvil in your inventory.
Using an Anvil
As we’ve mentioned previously, an anvil has a variety of uses. Here’s how you can make use of the anvil:
1. Repairing your tools/weapons
Repairing your tools/weapons is pretty easy with an anvil. All you need is the material your tool/weapon is crafted from. However, this only restores 25% of the durability e.g., using iron to repair an iron pickaxe. To completely restore it, you’ll need a duplicate of the tool/weapon you’re trying to restore. In the steps outlined below, a diamond pickaxe is repaired with another diamond pickaxe.
- When standing next to an anvil, right-click to open up the anvil interface.
- Next, place the broken item in the left slot and the item you’ll be repairing it with, in the right slot as shown.
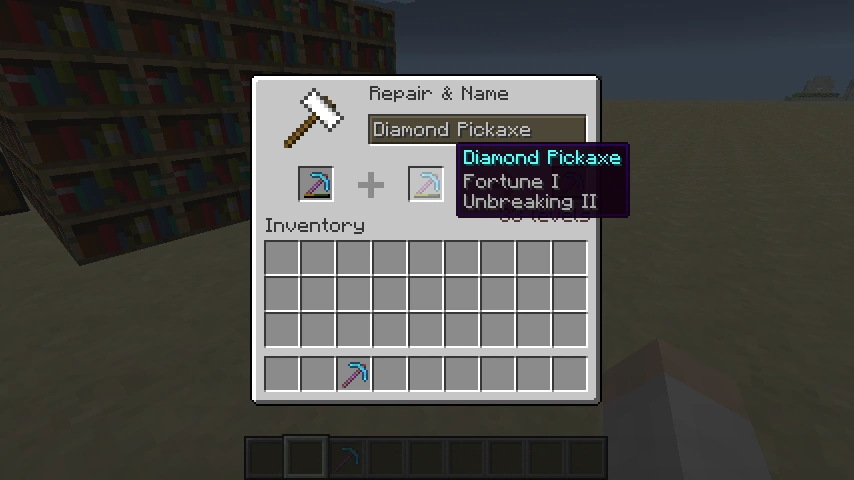
Place the broken item in the left slot and the item being used to repair it in the right slot | Fandom - The output item is shown on the right side of the arrow. Drag and add it to your inventory.
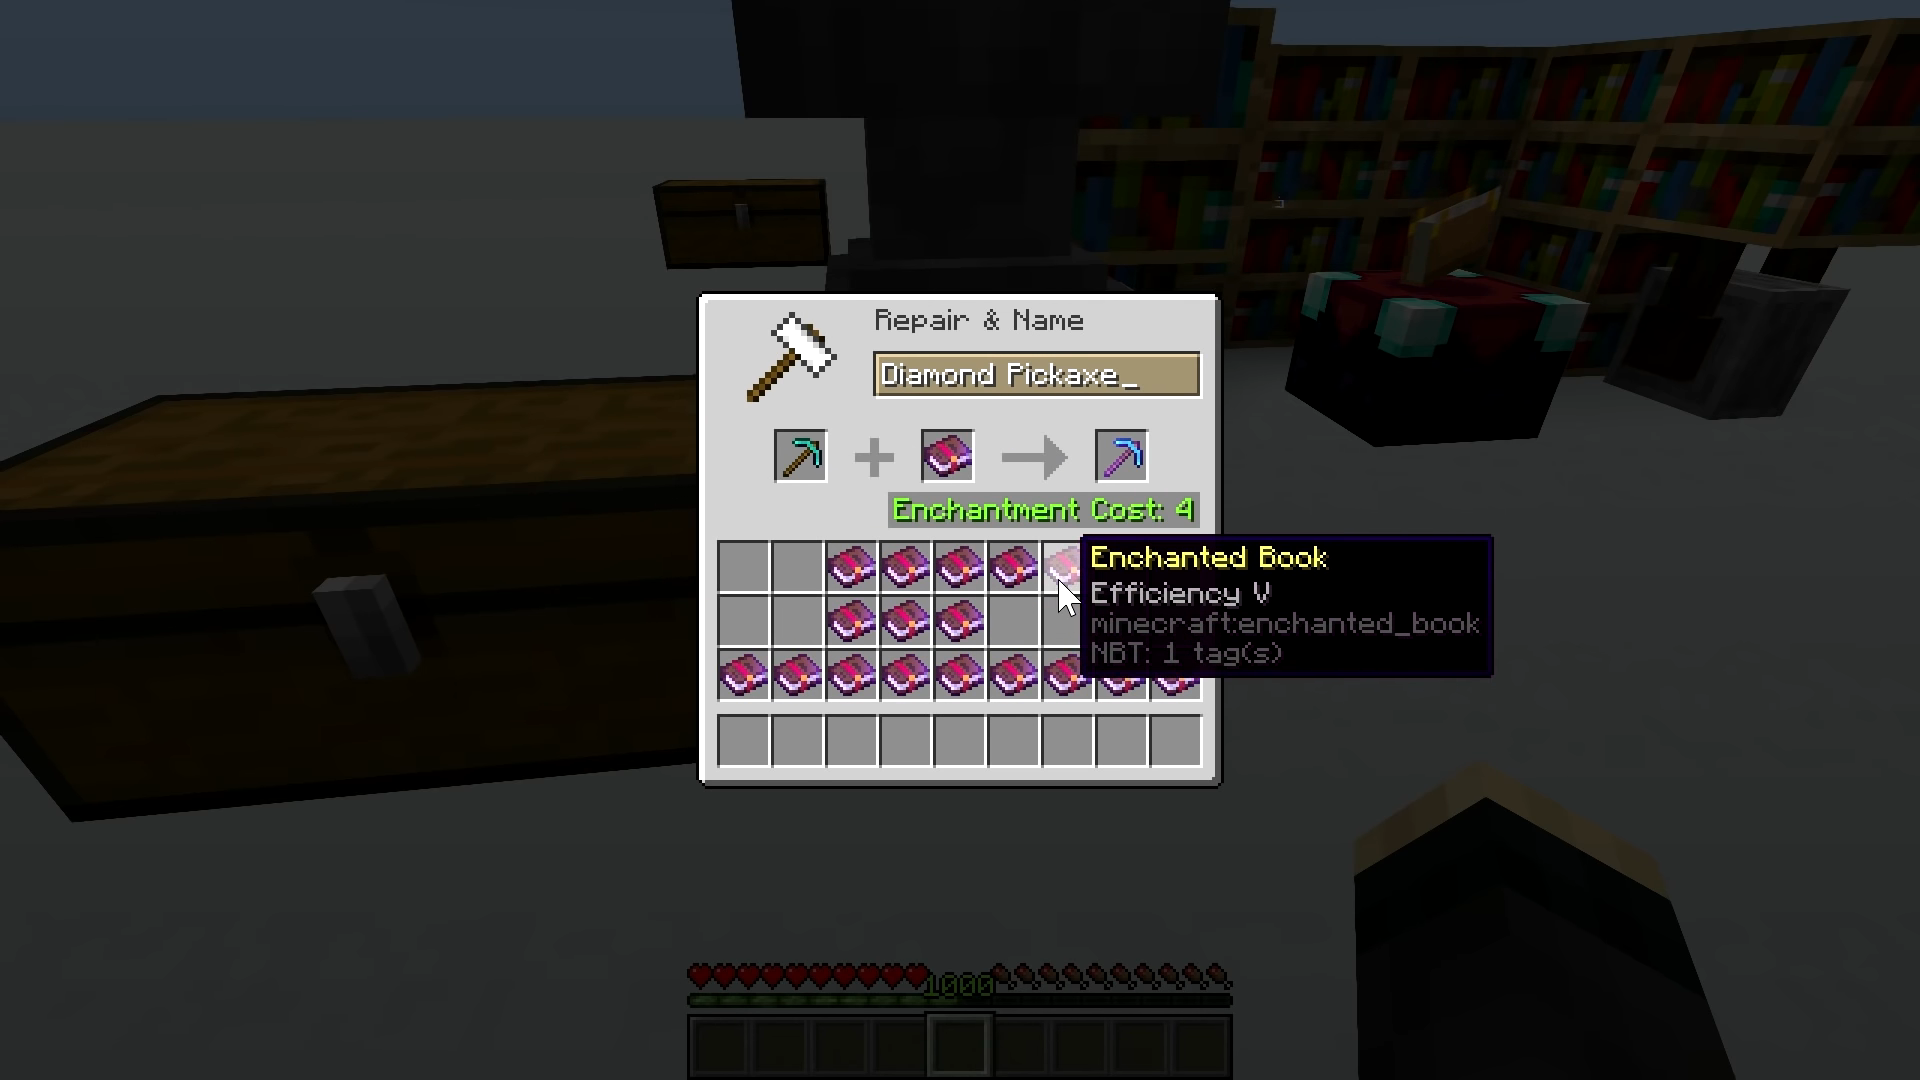
2. Enchanting a tool/weapon
Placing an enchantment on a tool/weapon is similar to repairing your tool/weapon. In the anvil interface, place the tool/weapon to be enchanted and the enchantment in the right. Preview the output and place it in your inventory.
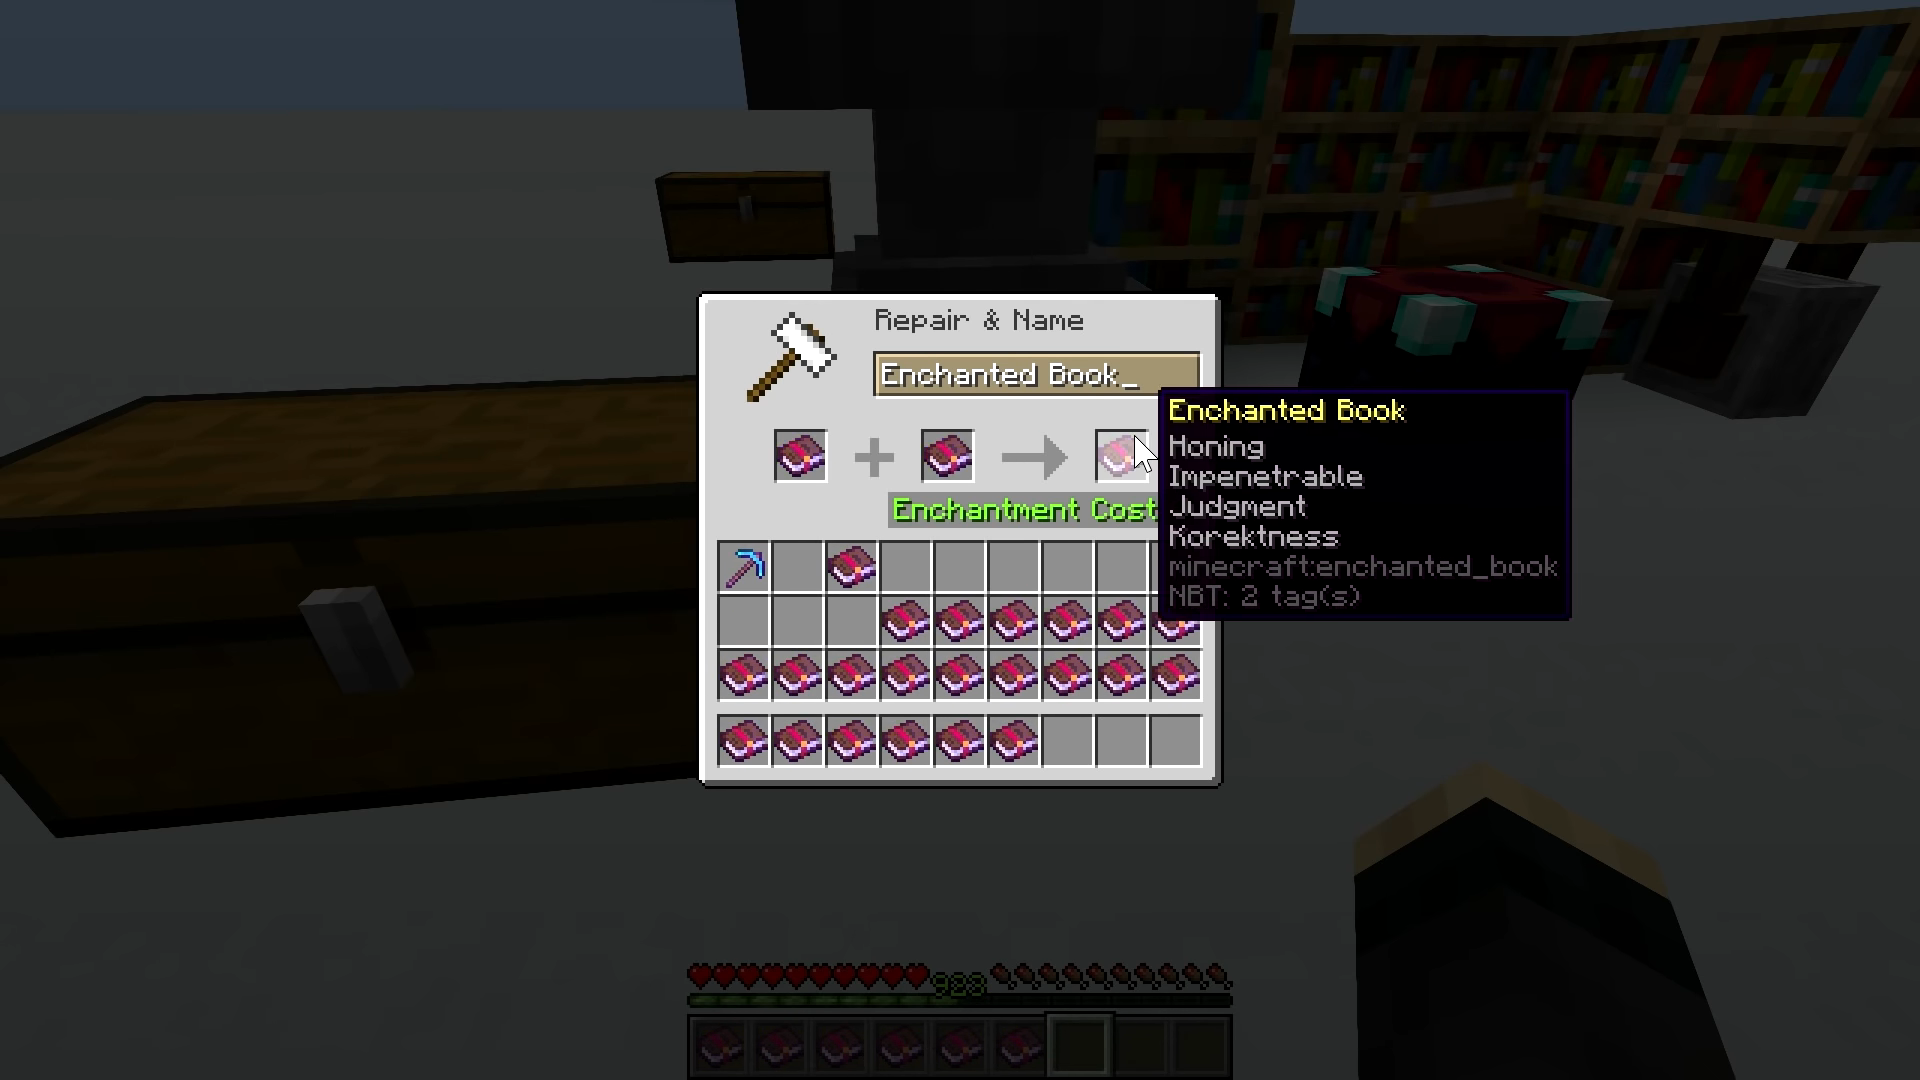
3. Combining enchantments
In the anvil interface, place both the enchantments in the slots and store the output in your inventory.
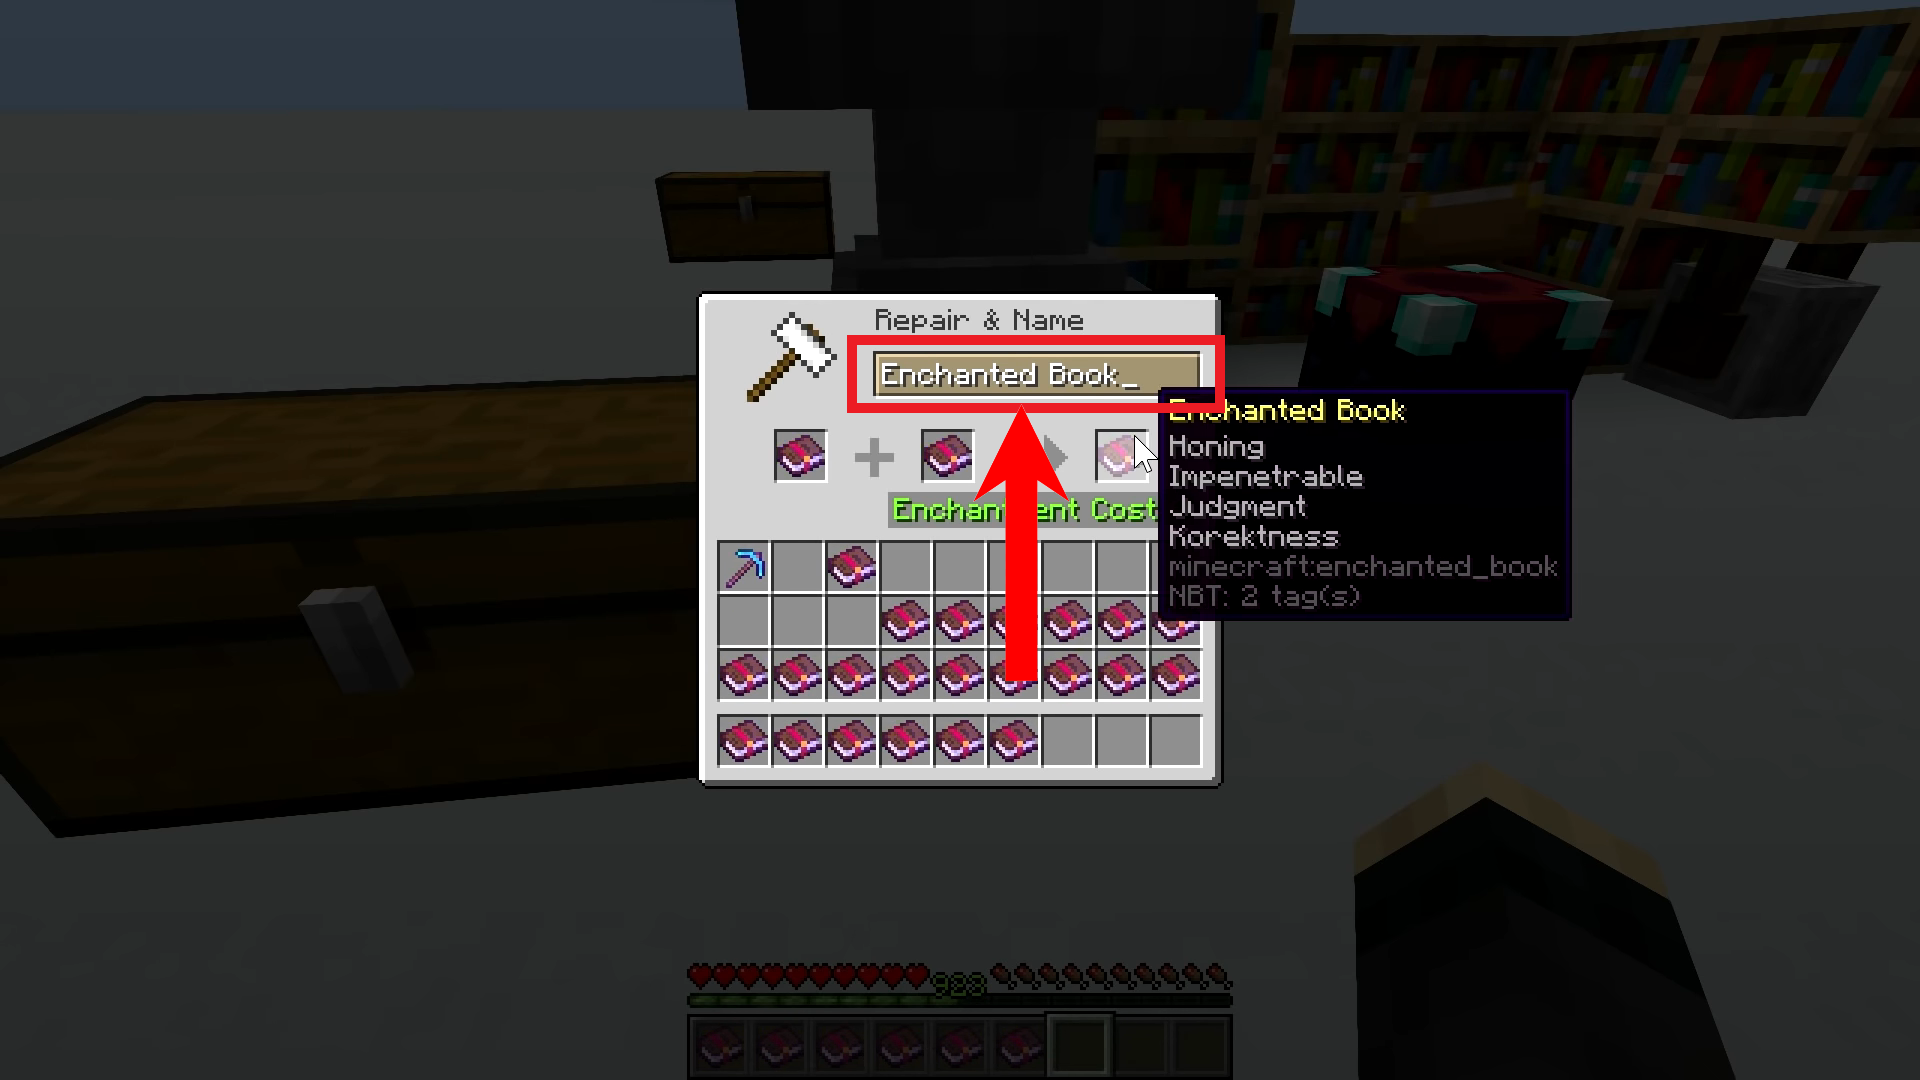
4. Renaming tools/weapons
To rename a tool/weapon, you just need to type in the new name in the text box of the anvil interface, as shown below.
How Do I Repair an Anvil?
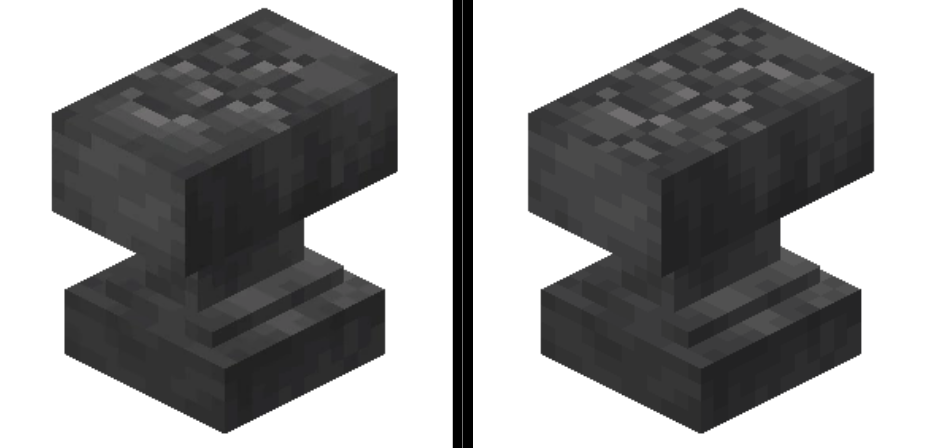
An anvil, like most things in Minecraft, has durability. The average anvil is observed to survive for 25 uses. An anvil’s condition is shown through the name that appears on it. There are 3 states of durability for an anvil. These states do not affect the capabilities of the anvil:
- Perfect (Anvil)
- Chipped (Java Edition)/Slightly Damaged (Bedrock Edition)
- Damaged (Java Edition)/Very Damaged (Bedrock Edition)
If the anvil is used in its “Damaged” state, it may break and drop nothing. Unfortunately, there’s no way to repair your anvil, so if your one is starting to wear down, its time to get back to mining.
Tips for Anvils
- Make sure that the anvil always has a support block under it. When an anvil falls, its durability decreases greatly.
- Use anvils only to repair your best tools/weapons, preferably those with enchantments. While the repair cost may sometimes be more than what you’d expect, if your tool/weapon has a rare enchantment, it might be worth the cost.
- Always have excess iron ingots ready. Convert them into iron block so they don’t occupy much of your inventory.
- Always have a backup anvil ready.
- Try not to use the anvil on the same tool/weapon/enchantment to strengthen it too many times. This will cause the enchantment/repair costs to become very high.
Conclusion
Anvils are an essential part of your Minecraft world. They allow you to repair your weapons while keeping your enchantments intact; a feature that sets it apart from the grindstone which has a similar function. While they’re easy enough to craft, the time it takes to gather the components can be very off-putting, therefore, its best to use it wisely, like how we’ve advised above.
FAQs about Anvils in Minecraft
To craft an anvil, you need 3 iron blocks and 4 iron ingots. Alternatively, you’ll need a total of 31 iron ingots.
An anvil can be used to repair your tools/weapons, rename them, enchant them, or add enchantments together to make even more powerful ones.
No, an anvil has durability, which has been observed to be 25 uses on average. The anvil has 3 states of durability: Perfect (Anvil), Chipped/Slightly Damaged, Damaged/Very Damaged. While these states have no effect on the anvil’s functionality, after the 3rd stage, the anvil will break down into nothing.
A grindstone repairs tools/weapons at the cost of any enchantments on the tool/weapon being discarded. An anvil allows you to repair you tool/weapon without discarding those enchantments.
Reviewed by Huzaifa Haroon


