How to Fix “Kernal Driver Not Installed (rc=-1908)” Error on Mac
Fix: VERR_VM_DRIVER_NOT_INSTALLED (-1908)
Oracle VM VirtualBox is one of the most notorious and free virtual machine hypervisors that is available for macOS along with other paid applications like VMware or Parallel. When you install VirtualBox on your macOS and try to use it by installing a virtual machine, it is very likely that you get the “Kernel driver not installed (rc=-1908)” error message. The error message here does not matter on the operating system that you are trying to install on the virtual machine but rather the problem in question appears when you install Oracle products like VirtualBox for the first time on your Mac.
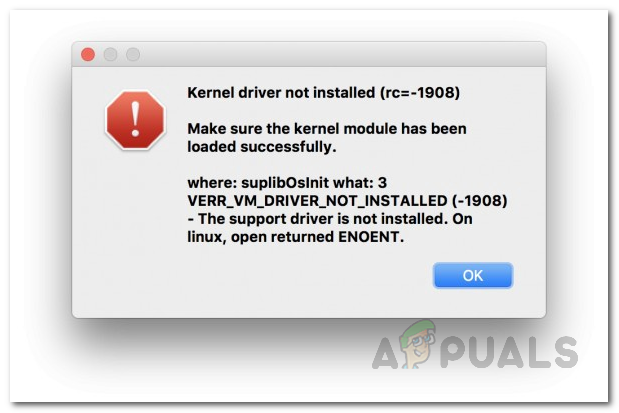
As it turns out, the problem is pretty similar to the VirtualBox installation failed error that appears when you are trying to install VirtualBox on your machine. The error message is caused because the Oracle certificate is blocked by your operating system i.e. macOS. In addition to this, the kernel extensions for VirtualBox are disabled by macOS as well during the installation process which is why you are facing the error message in question here. To resolve this, you will have to allow the Oracle certificate by adding it to the authorization list. This has to be done explicitly by giving VirtualBox the required permissions.
You can do this in multiple ways. First, of all, you can allow the certificate through the System and Privacy settings located in the System Preferences menu. In addition to that, you can also use the terminal on your system and execute a few commands that will load the kernel extensions and allow it to be run on the system. With that said, without further ado, let us show you can do this in more detail so just follow through.
Allow Oracle Certificate through System Preferences
As it turns out, the first way you can resolve this problem is through the System Preferences menu on your machine. When macOS blocks software from loading kernel extensions or anything else, you will be shown a message in the System and Privacy settings.
However, this message is only there for 30 minutes and if you have been facing the error message for a while, you will have to uninstall VirtualBox from your system. Once you have uninstalled VirtualBox, move the App to the trash folder and also delete any remaining files. After doing that, you can go ahead and download the installer again to install VirtualBox on your system. Once you have installed VirtualBox, you will have to quickly follow the instructions given down below within the first 30 minutes or it will disappear again and you will have to start over again. With that said, follow the instructions given down below to allow Oracle through the System Preferences menu:
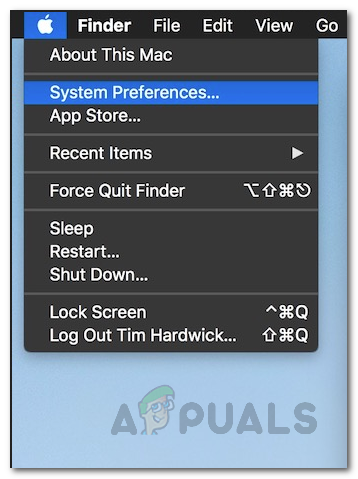
- First of all, open up the System Preferences app by clicking on the Apple icon located on the menu bar at the top. From the drop-down list, choose System Preferences.
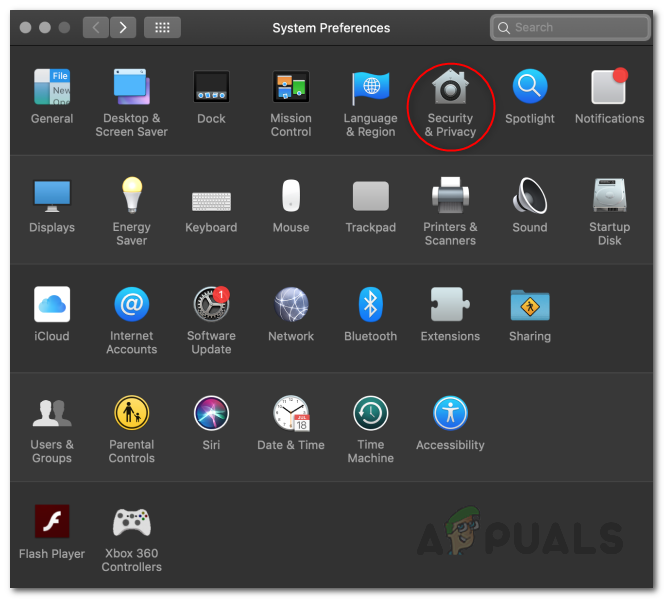
Opening up System Preferences - Then, once you have opened the System Preferences window, click on the Security and Privacy option.
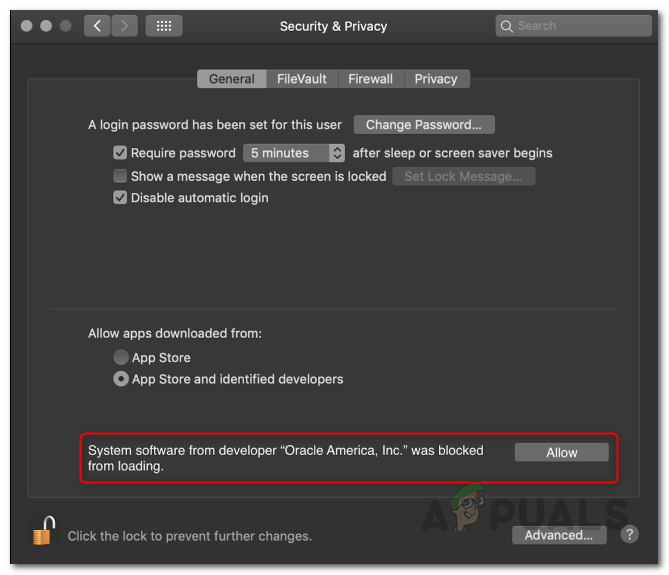
Opening Security and Privacy through System Preferences - On the Security and Privacy screen under General, at the bottom, you should see a “System Software from developer ‘Oracle America, Inc.’ was blocked from Loading” message. In case you do not see this, that means 30 minutes have passed as it is only there for the said time period like we mentioned above. If this case is applicable, go ahead and reinstall VirtualBox on your system to be able to do this.
- In case you see the message, simply go ahead and click the Allow button.
Allowing Oracle through Security and Privacy - After you have done that, open up VirtualBox again and try installing a virtual machine to see if the issue persists.
Allow VirtualBox Kernel Extensions through the Terminal
For the more tech-savvy and hardcore users out there, there is also another way you can resolve the issue which requires you to enter a command to the Terminal prompt. This will do the same thing that we were doing above, just through the Terminal window. In addition, if you choose to follow this method, it won’t require you to reinstall VirtualBox as it did in the method mentioned above as we will be using the Terminal here.
However, to do this, we will have to boot into the Recovery Mode in order to do this. Recovery mode lets you restore Mac to a previous date as well as allowing you to reinstall macOS along with many more other things. Follow the instructions given down below to do this:
- First of all, go ahead and restart your Mac by clicking the Apple icon in the top menu bar and then choosing Restart from the drop-down menu.
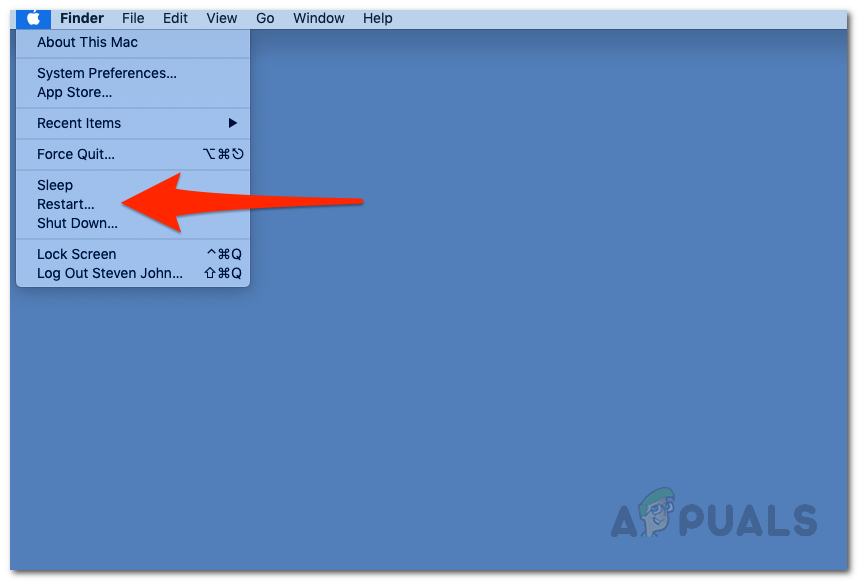
Restarting Mac - As your Mac restarts, hold down the Command and R keys on your keyboard until you see the Apple logo on the screen.

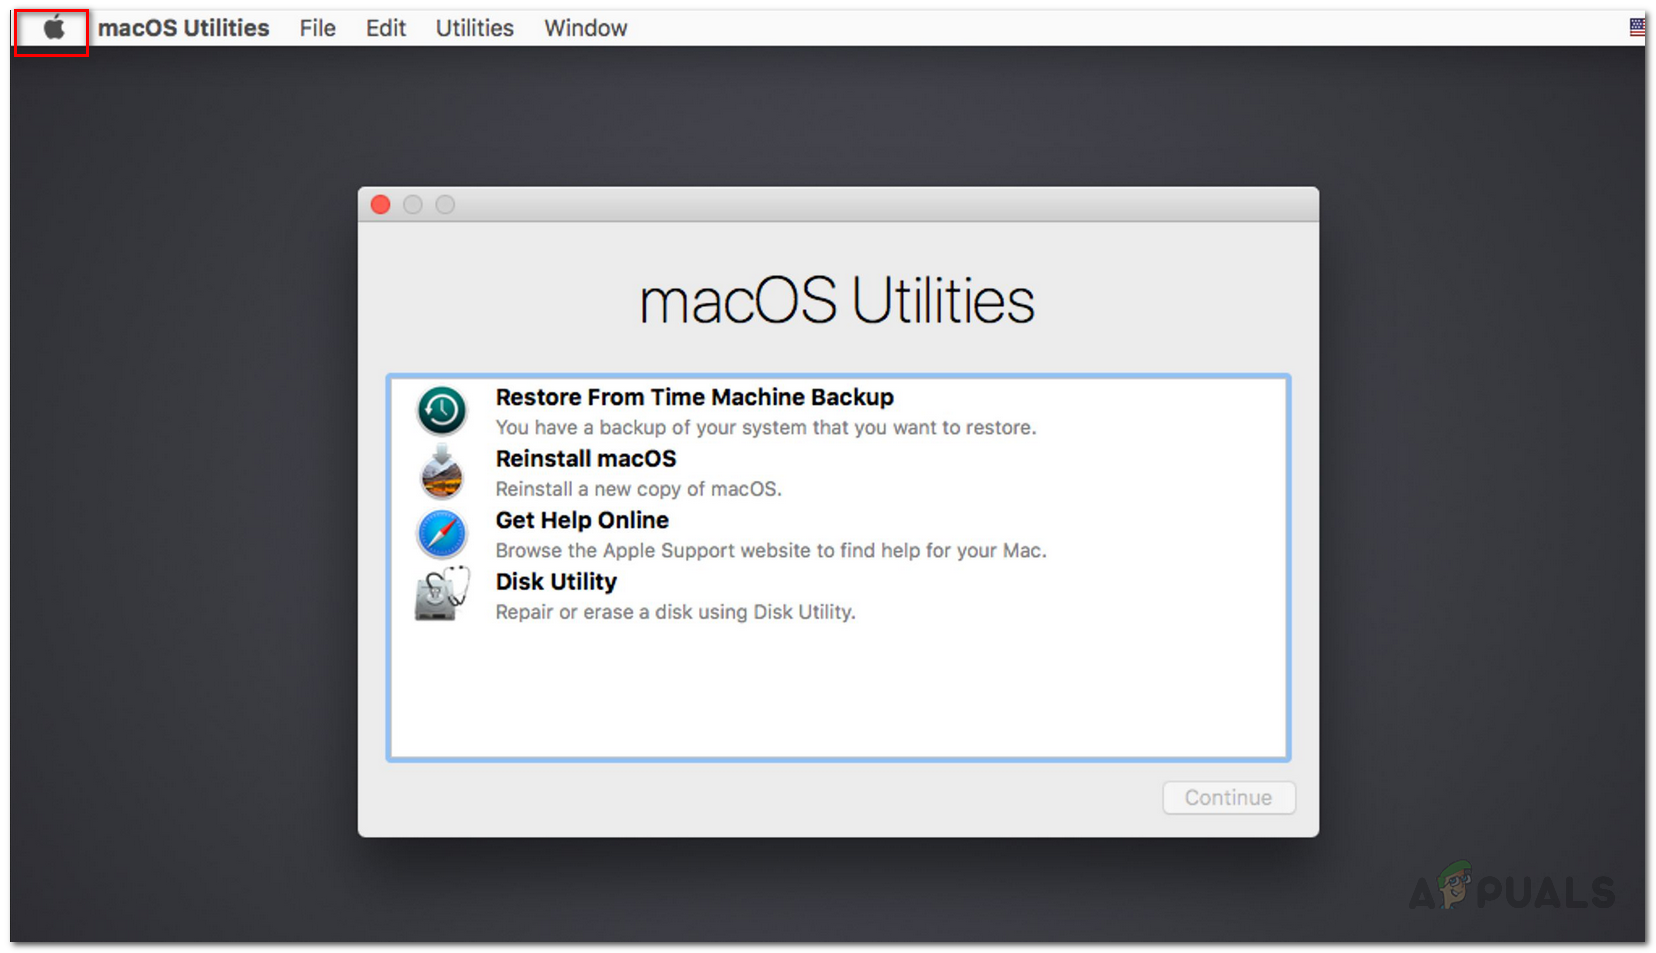
Hold Down Command and R to Boot into Recovery Mode - This will boot your Mac into Recovery Mode and you will be shown the macOS Utilities window.
- On the top menu bar, click the Utilities drop-down menu and then choose Terminal from there.
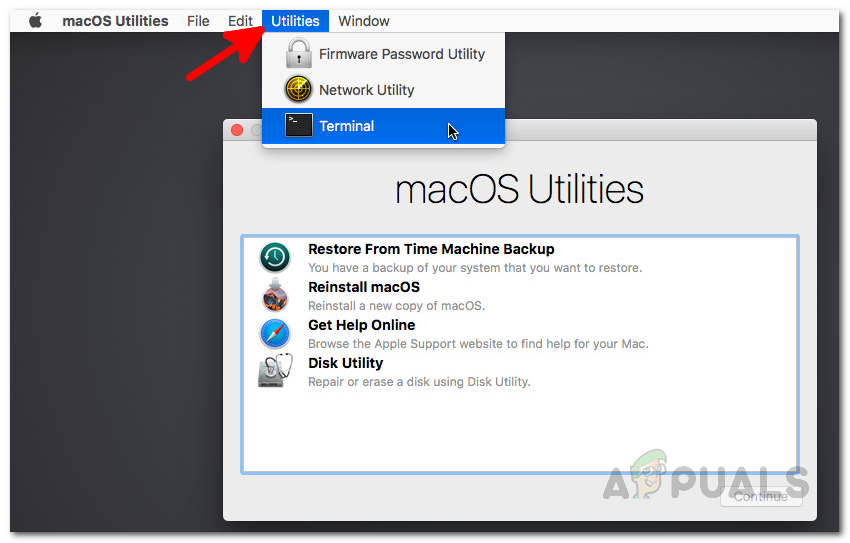
Opening up Terminal in Recovery Mode - Once the Terminal window has opened up, type in the following command and then hit the Enter key:
spctl kext-consent add VB5E2TV963
- After doing that, go ahead and restart your device again. To do this, in your Terminal window, enter the following command:
sudo shutdown -r now
- Alternatively, you can click on the Apple logo on the top menu bar and choose Restart from the drop-down menu.
Recovery Mode - Once your device boots up, open up VirtualBox again and see if you face any issues while installing a virtual machine on your Mac.
Disable Secure Boot on your Mac
If the above methods do not work out for you, in some cases, the issue can also be related to the Secure Boot on your BIOS. Secure Boot is basically a security feature of UEFI, also known as Unified Extensible Firmware Interface. When you have Secure Boot enabled and configured, it can help your computer resist malware attacks and infections. As it turns out, since it is a security feature, it can also cause issues with some applications on your device which could be the case here.
Therefore, you will have to disable it on your machine and see if that works out. To do this, follow the instructions given down below:
- First of all, go ahead and boot into the Recovery Mode as shown above.
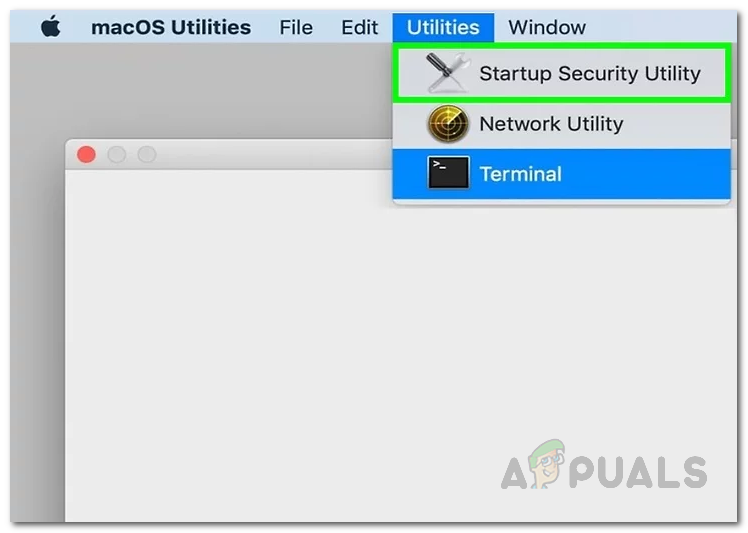
- Once you are in the Recovery mode, click on Utilities located on the top menu bar.
- From the drop-down menu, choose Startup Security Utility.
Opening up Startup Security Utility - On the Secure Boot prompt that appears, choose No Security.
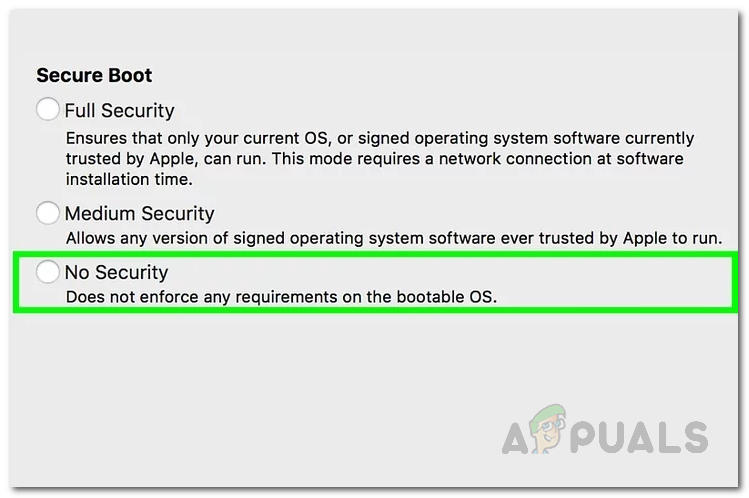
Disabling Secure Boot - Once you have done, go ahead and restart your device by clicking the Apple icon in the menu bar and choosing Restart.
Recovery Mode - After your Mac boots up, open up VirtualBox to see if the issue is still there.
In case you are not able to disable Secure Boot from Recovery mode, then in such a case, you will have to get into your BIOS settings and change it from there.


Thank you so much. The Terminal method worked — PHM