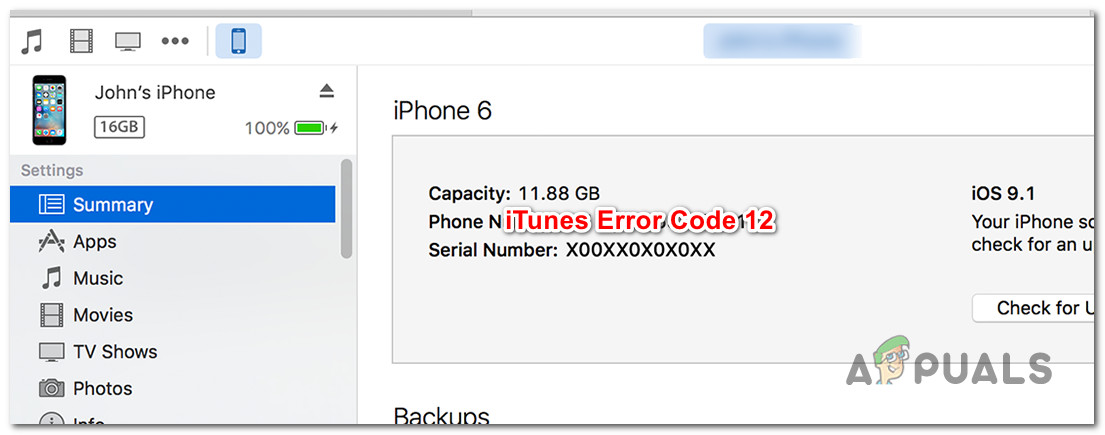
How to Fix iTunes Error Code 12
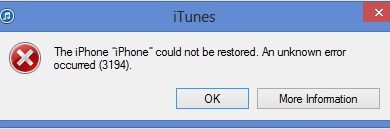
Some iTunes users are encountering the iTunes error code 12 when trying to restore their iPhone, iTunes, or iPad to a previous state via Recovery Mode. This error code pops up when the restore process ultimately fails. This problem is reported to occur with both the Windows and macOS version of iTunes.
As it turns out, there are several different causes that might cause this particular error code to appear. Here’s a shortlist of potential culprits:
- 3rd party antivirus/firewall interference – According to some affected users, this problem can occur due to some kind of interference caused by an overprotective suite. If this scenario is applicable, you should be able to fix the problem by disabling or uninstalling the 3rd party suite.
- Broken USB cable – As it turns out, this problem can also occur due to a corroded or non-congruent cable that is making it hard for iTunes to stay connected with your Apple device. In this case, you should be able to fix the problem by replacing your current cable with a new one before repeating the procedure.
- Corrupted iTunes installation – Under certain circumstances, you can expect to see this issue if you’re dealing with some kind of corrupted files inside your iTunes installation folder. To resolve this issue, you should reinstall the main iTunes application along with every associated dependency.
Method 1: Disabling or Uninstalling 3rd party suite (Windows Only)
If you’re encountering this problem on Windows 7, Windows 8.1, and Windows 10 and you’re using a 3rd party security suite, chances are it ends up conflicting with your local iTunes installation and causing the 12 error code.
This problem is confirmed to occur by a lot of Windows users (particularly on Windows 10).
If this scenario is applicable, you should be able to fix the problem either by disabling the real-time protection or by uninstalling the overprotective AV suite.
If you’re using a 3rd party antivirus or firewall, start by right-clicking on your security suite icon (in your tray-bar icon) and look for an option that allows you to disable the real-time protection of your security suite.
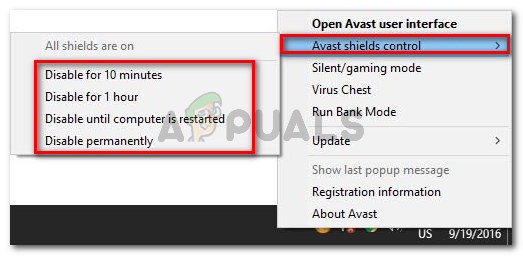
Note: Keep in mind that this operation will be different depending on the 3rd party suite that you’re actively using. Some of them might not allow you to do this directly from the tray bar menu.
But keep in mind that in case you are using a 3rd party firewall or a security suite that includes one, disabling the real-time protection will not fix the issue since the same security suites will remain firmly in place.
In this case, the only thing you can do is uninstall the 3rd party suite altogether and see if the error code 12 stops occurring.
Here’s a quick guide on how to do this:
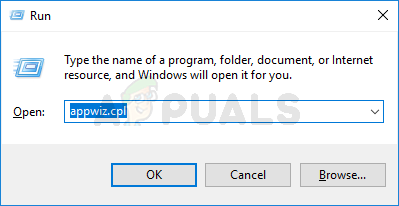
- Press Windows key + R to open up a Run dialog box. Next, type ‘appwiz.cpl’ and press Enter to open up the Programs and Features menu.
Type appwiz.cpl and Press Enter To Open Installed Programs Page - Once you’re inside the Programs and Features menu, scroll down through the list of installed programs and locate the antivirus that you think might be responsible for this issue.
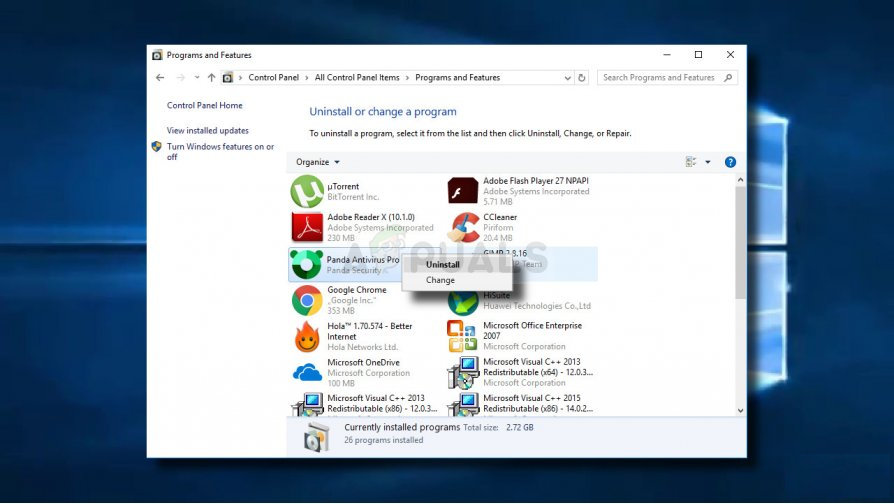
Uninstalling your antivirus - Inside the uninstallation window, follow the on-screen prompts to complete the uninstallation sequence, then restart your computer.
- Once the next startup is complete, repeat the action that was previously causing the problem and see if the error code 12 stops occurring.
If the same error code is still occurring, move down to the next potential fix below.
Method 2: Check or Replace the USB cable
According to the official documentation provided by Apple, you can also expect to see this error code if you’re dealing with a faulty micro-USB cable. In most documented cases, issues like this will occur due to corroded or non-congruent cables that will ultimately force the recovery utility to throw the 12 error code.
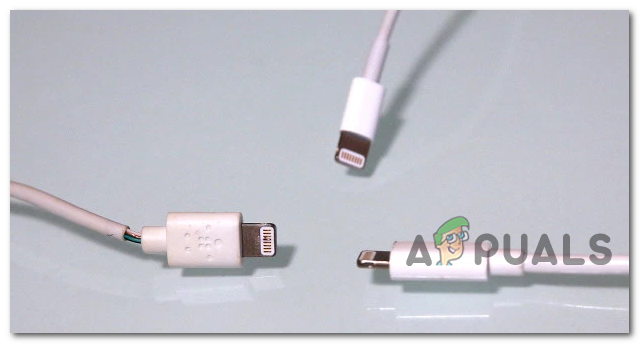
If you are actually dealing with a faulty cable, the only thing you can do is replace it and see if the same 12 error code is still occurring once you start using the new cable for the same exact procedure.
If replacing the cable didn’t make a difference as you’re still encountering the same error code, move down to the next potential fix below.
Method 3: Reinstalling the iTunes Application
If none of the methods above have allowed you to fix the iTunes 12 error code, there’s a high chance that you might be dealing with some type of corruption originating from the iTunes folder. This issue is confirmed to occur on both macOS and Windows.
To fix this problem, you’ll need to reinstall the main iTunes application (and support application on Windows).
Of course, the instructions for doing so will be different depending on which operating system you’re using – on macOS, the instructions are far easier, while on Windows you’ll need to reinstall both the main iTunes app and the supporting apps (depending on which iTunes version you’re using).
Depending on if you’re using Windows or macOS, follow the appropriate sub-guide below.
A. Reinstalling iTunes on macOS
On macOS, the steps of reinstalling an iTunes app that is giving you troubles are pretty straightforward. All you need to do is open the App store on your Mac computer and click on your name in the bottom left corner (or click on your name in case you are not already signed in).
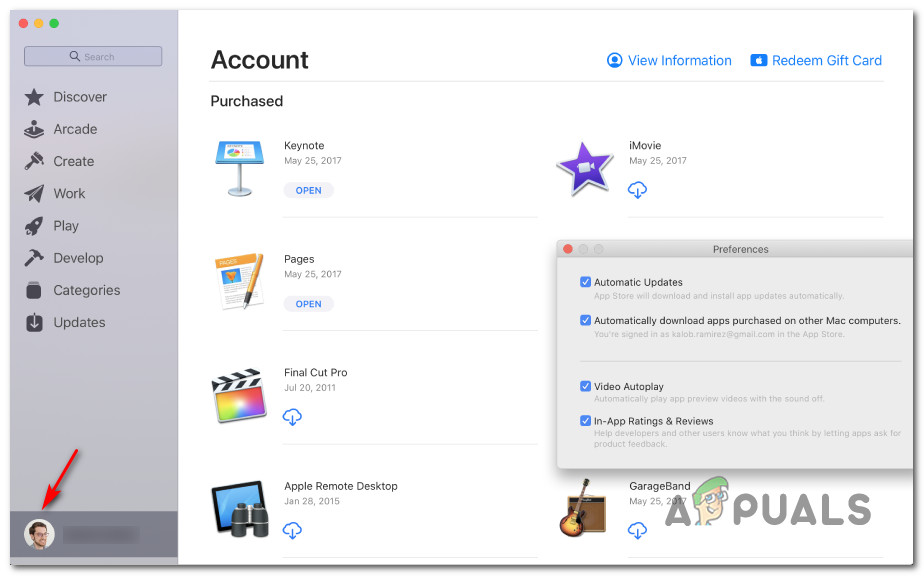
Next, locate the iTunes app and click the Re-download button to reinstall the app once again and restart your system at the end of this operation.
B. Reinstalling iTunes on Windows
If you’re encountering this problem on a Windows computer, keep in mind that the exact instructions of reinstalling the iTunes app will be different depending on which version you’re using – iTunes desktop or iTunes UWP (Universal Windows Platform).
Follow the guide applicable to the iTunes versions that you’re using on your Windows computer.
Reinstalling iTunes desktop
- Press Windows key + R to open up a Run dialog box. Next, type ‘appwiz.cpl’ and press Enter to open up the Programs and Features menu.

Type appwiz.cpl and Press Enter To Open Installed Programs Page - Inside the Programs and Features screen, scroll through the list of applications and locate the iTunes entry.
- When you manage to locate it, right-click on it and choose Uninstall from the newly appeared context menu.
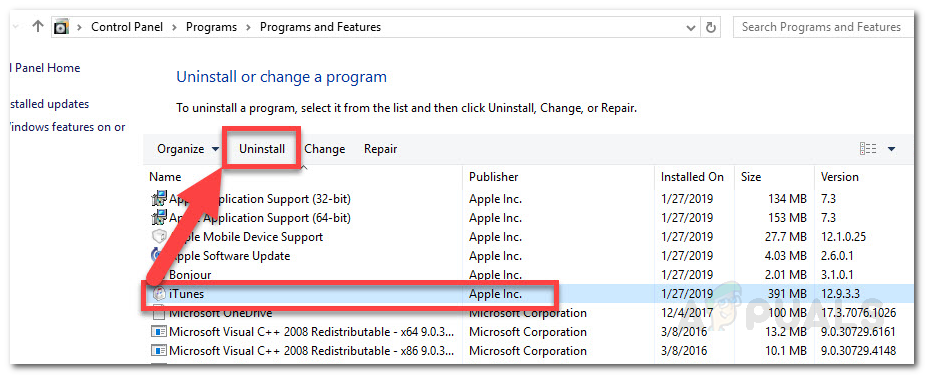
Uninstalling problematic application - Follow through with the uninstallation of the main iTunes app, then click on the Publisher column at the top so you can clearly see all the remaining iTunes dependencies. Now that you can clearly see them, go ahead and uninstall everything left behind that’s signed by Apple Inc.
- After you manage to uninstall every supporting software belonging to Apple, restart your computer and access the download link for iTunes desktop once the next startup is complete.
- Once you’re inside the download page, scroll down to the Looking for other version section and click on Windows to download the latest version of iTunes.

Downloading the desktop version of iTunes - Once the download is complete, open the installation executable and follow the on-screen prompts to install the latest available version of iTunes on your computer.
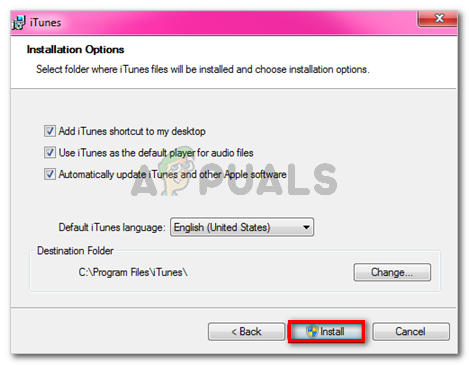
Installing iTunes on your computer Note: When you’re prompted by the UAC (User Account Control), click Yes to grant admin access.
- At the end of this procedure, restart your computer and see if the 12 error code is fixed once the next startup is complete.
Reinstalling iTunes UWP
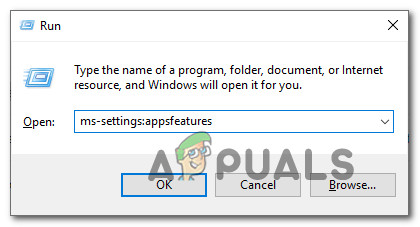
- Press Windows key + R to open up a Run dialog box. Next, type ”ms-settings:appsfeatures” inside the text box and press Enter to open up the Apps & Features tab of the Settings app.
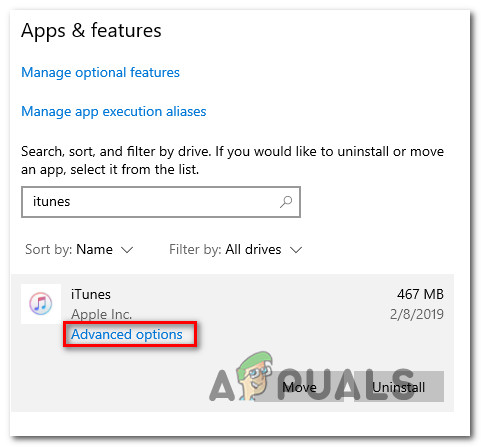
Accessing the Apps & Features menu of the Settings app - Once you’re inside the Apps & Features menu, use the search function to search for ‘iTunes’. Next, click on iTunes from the list of results, then click on Advanced Options from the newly appeared context menu.
Accessing the Advanced Options menu of iTunes - Once you’re inside the Advanced menu of iTunes, scroll all the way down to the Reset tab and click on the Reset button to start the reinstallation process.
- After the operation is complete, restart your computer and open iTunes once again to see if the 12 error code is now fixed.