Troubleshoot iPhone Not Connecting to Wi-Fi Issue
If you are unable to connect your iPhone to Wi-fi, it means that there is an issue with the router or your iPhone’s settings. In most cases, users face Wi-fi connectivity issues after a bad update. To get your iPhone back to its normal connectivity strength, you have to update the iOS or configure the network settings on your device.
Before moving to the complex troubleshooting steps, ensure that your Wi-fi is working properly. Try connecting another device to the Wi-fi and if it connects smoothly, there is an issue with your iPhone for sure.
Whatever the reason may be, you can fix the Wi-fi connectivity issues by following the troubleshooting steps mentioned below. Apply these methods in chronological order to avoid using complicated methods if the error gets fixed with the simple ones.
1. Restart Your iPhone and Wi-Fi Router
Restarting your Wi-Fi router or device has worked for many users facing connectivity problems. A restart shuts down all the processes and programs running on your device. It clears the RAM’s data, along with any old app data.
Once you restart your iPhone, it initiates all programs afresh and fixes glitches. This method is simple yet very effective; therefore, it should be at the top of your troubleshooting steps.
- To restart your Wi-Fi device, unplug the Ethernet and power cables from the device.
- If your Wi-Fi device has a backup battery, remove it.
- The device may take 2 to 3 minutes to fully turn off; ensure that all the lights are off.
- Wait for another 5 minutes, then connect the ethernet and power cables to your Wi-Fi device.
- Next, restart your iPhone.
If you have an iPhone X or a later, press the upper or lower volume button and hold it along with the side button.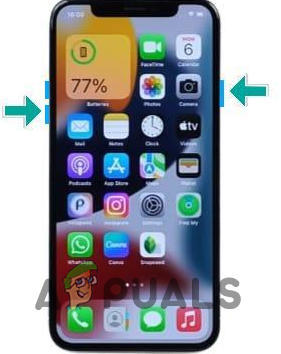
Press and hold the volume and side button If you have a 2nd or 3rd generation iPhone, only press and hold the side button until the power slider shows up.
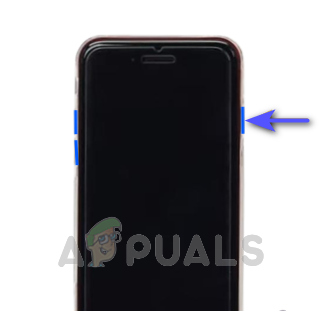
Press and hold the side button - Drag the slider to turn off your iPhone.
- Wait for 2 to 3 minutes, then turn on the iPhone by pressing and holding the side button until the Apple logo appears on the screen.
- Next, connect your iPhone to the Wi-fi and see if the issue has been resolved.
2. Reset Your Network Settings
Network Settings are responsible for all the connectivity functions of the iPhone. Whether it’s a local network or the internet, any issues that occur regarding connection strength can be fixed by resetting the network settings.
After a reset, all the saved Wi-fi passwords and names, Bluetooth pairing, login credentials, VPN connections, etc. are cleared from your device. This reset allows your iPhone to remove glitches preventing it from connecting to the Wi-fi. Save important network names and passwords to reconnect after a network reset.
For iOS 15 or later:
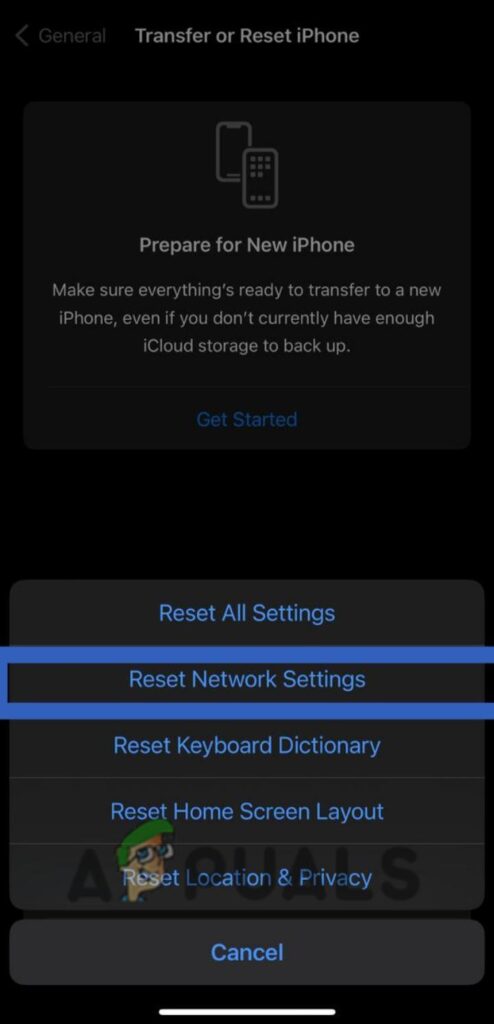
Go to Settings > General.

Select Transfer or Reset iPhone > Reset.
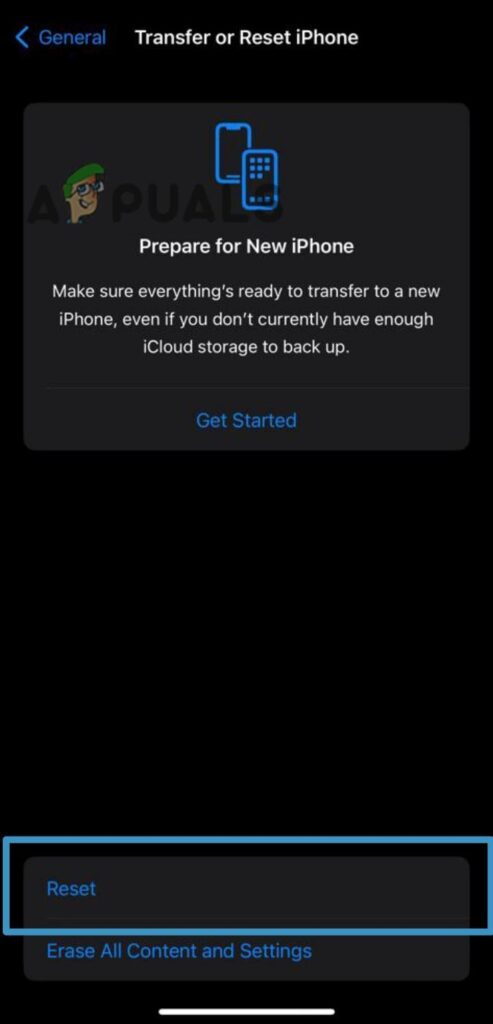
Then tap on Reset Network Settings.
For iOS 14 or earlier:
Go to Settings > General.
Tap Reset and select Reset Network Settings.
3. Turn Off the VPN
If your iPhone is experiencing difficulties connecting to Wi-Fi while using a VPN, it could be due to issues with the VPN server or incorrect settings on your iPhone.
To troubleshoot, first, check if the problem is with your iPhone by using the VPN on a different device. If the VPN works on another device, the issue is likely with your iPhone’s settings, which can be resolved by resetting your network settings.
However, if the problem persists, it may be with the VPN itself. In this case, disabling the VPN and potentially switching to a different server can resolve the issue.
To disable VPN directly from the VPN application. Open the app and look for the turn–off option. If the VPN app does not have this option, you can reset your network settings as described below.
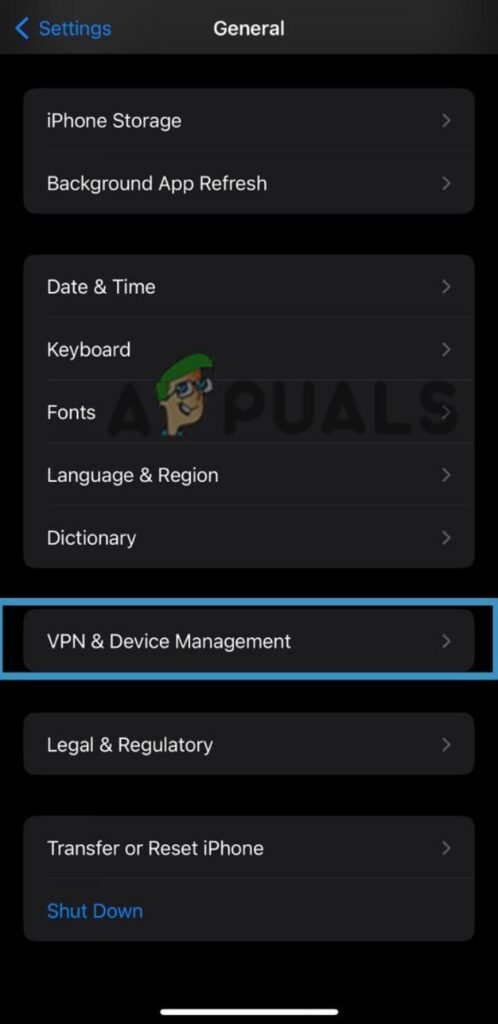
Go to Settings > General.
Scroll down and select VPN & Device Management > VPN.
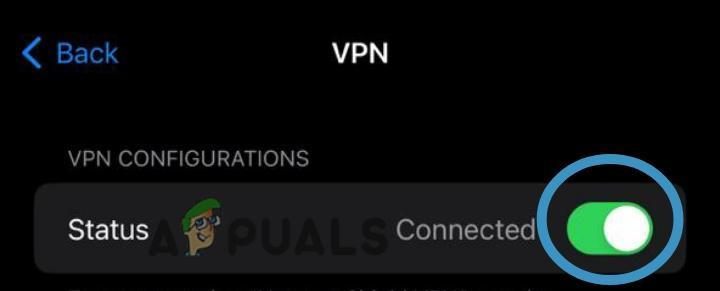
Turn on the toggle key for the Status option.
Source:
Comment
by u/Only_Track_7811 from discussion My iPhone won’t connect to my WiFi when all my other devices can, but it can connect to other networks. I’ve reset the network settings on the phone, rebooted the phone and rebooted the router multiple times and nothing works
in applehelp
4. Try DFU Restore
DFU (Device Firmware Update) is a mode on the iPhone that allows it to be restored or updated in cases where normal procedures are not working or are not possible.
When an iPhone is in DFU mode, it can communicate with iTunes on a computer and be restored or updated using firmware files. DFU mode is a low-level mode that bypasses the iOS operating system and allows the iPhone to interface directly with iTunes.
DFU mode can be used to resolve various issues on your iPhone, but it also erases all data and settings on your device, so make sure to back up your iPhone before entering DFU mode.
- Connect your iPhone to your PC using a lightning cable.
- Press the volume up button and release it.
- Then press the volume down button and release it.
- Next, press the side button and hold it for a few seconds until your iPhone turns off (do not release the side button).
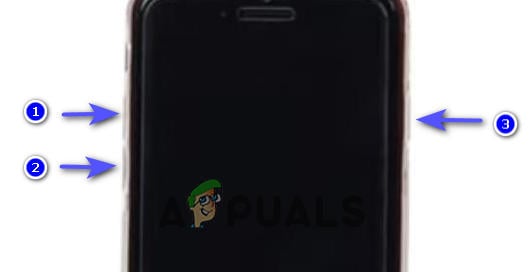
Key combination - When the screen turns black, continue to hold the side button, and at the same time, press the volume down button and hold it for around 5 seconds.
- After holding both buttons for 5 seconds, release the side button, but continue to hold the volume down button and wait until your device shows on the PC.
- Your iPhone’s screen will remain black when in DFU mode. If anything shows up on it, your device is not in DFU mode.
- On your PC, click OK > Restore iPhone.
- Once it is restored, you need to exit the DFU mode by a hard reset on your iPhone.
- Press the volume up button, then release it.
- Press the volume down button, then release it.
- Press the side button on your iPhone and hold it until you see the Apple logo on the screen. At this point, you will notice that your iPhone has disappeared from your PC screen.
- Set up your iPhone and connect it to the Wi-fi.
If none of the above methods prove effective for you, it’s time to contact Apple Support. Explain your issue to the support team and mention all the troubleshooting steps you’ve applied so far. This would help the support team to better understand the cause of the error and find a solution accordingly.


