How to Install the Android 12 Public Beta on Supported Devices
Android 12, codenamed Snow Cone, is the next major release to the family of the Android operating system. Google announced the operating system at its I/O 2021 keynote and after months of developer builds, the operating system is ready enough to be used as a daily driver. With Beta 4, Android 12 has gained enough platform stability that Google has opened its doors to public users, thus the Public beta. The beta is offered to a number of devices only as not all smartphones are supported.
Since this is a major release, everyone is excited to try out the new features packed inside the Android 12 and for good reason. The operating system is currently still in beta so that means there are going to be bugs here and there but if you can’t wait for the stable release of the operating system and wish to get your hands on it right now, you have come to the right place. We’ll be showing you how you can install the Android 12 Public beta in this article.
Android 12 Supported Devices
Before we proceed, however, you have to make sure that your device is compatible with the Android 12 beta program. This is not only limited to phones from Google known as Pixel but rather, there are devices from other companies like Asus, Oppo, etc as well that can try out the public beta. Following is the list of phones that are compatible with the Android 12 beta:
- Pixel 3 XL, 3, 3A, 3A XL
- Pixel 4, 4X XL, 4A, 4A 5G
- Pixel 5
- OnePlus 9, Oneplus 9 Pro
- Oppo Find X3 Pro (model CPH2173)
- Vivo iQOO 7
- Xiaomi Mi 11, Mi 11 Ultra, Mi 11I, 11X Pro
- ZTE Axon 30 Ultra 5G
- along with models from Realme, Sharp and Tecno
Install Android 12 Public Beta
There are multiple ways using which you can install the Android 12 public beta on your phone. The easiest and most simple way of doing this would be to use the Android Beta Program. Keep in mind that the methods mentioned in this article are mainly for Pixel phones. However, if you wish to install the public beta on any other of the supported devices, simply head to this link and choose your brand. It will take you through the process of installing the public beta on your device.
With that said, you can use one of the following methods to install the Android 12 beta on your Pixel device:
Android Beta Program
- To get the Android 12 beta on your phone via the Android Beta program, simply go to the Android Beta portal by clicking here.
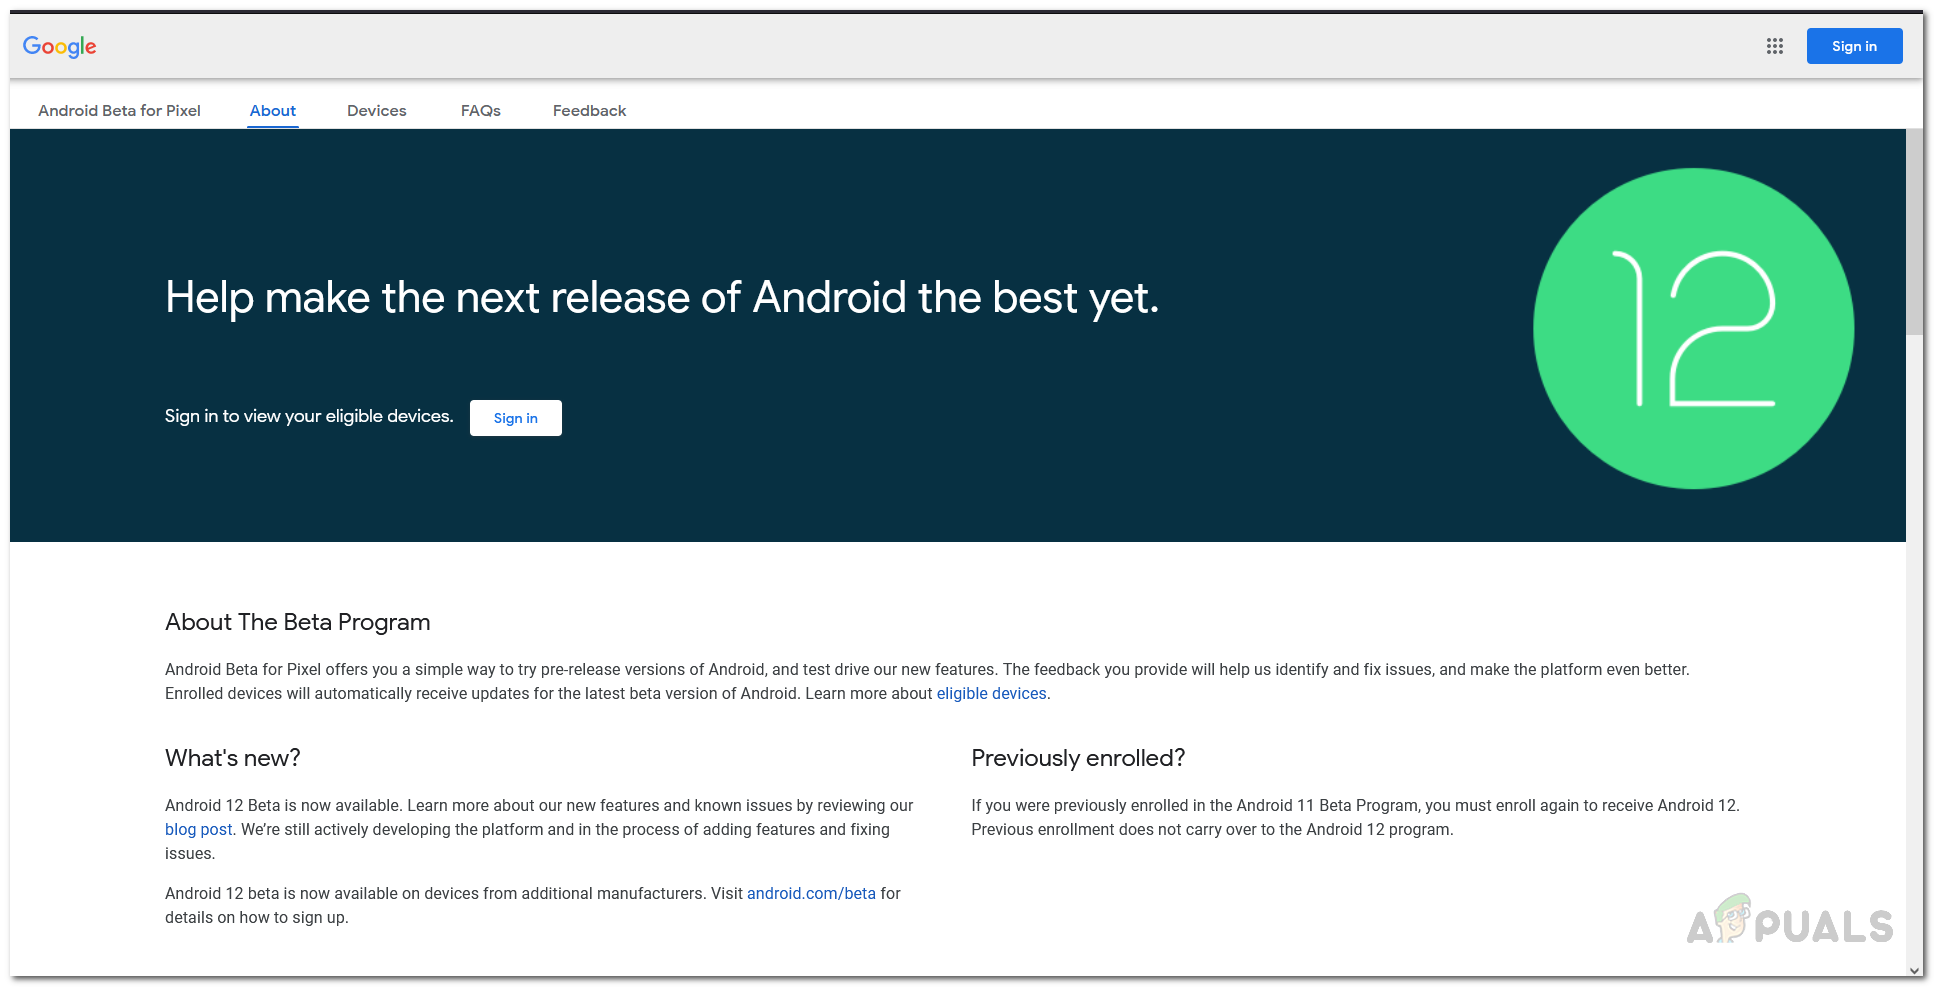
Android 12 Beta Portal - On the beta portal, sign in to the Google account that is connected to your smartphone.
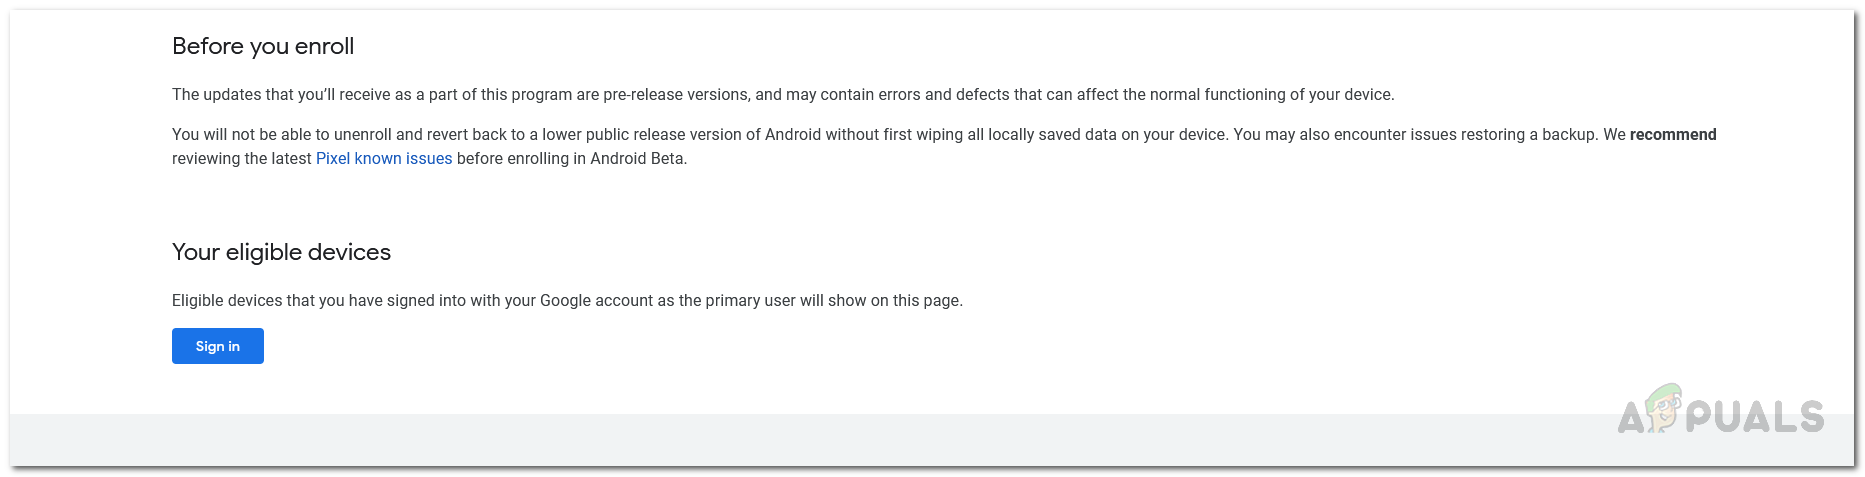
Eligible Devices - From the list of devices, select the eligible device and then tap on the Opt-in button.
- After that, simply follow the on-screen prompts to start the over-the-air download of the Android 12 beta on your phone.
Android Flash Tool
In addition to the Android Beta program, you can also use the Android Flash tool to install the Android 12 beta on your phone. This is basically a web-based version of the ADB developer tool. That is why, for this, you will be requiring a PC with yourself. Before we proceed, you will have to make sure that USB Debugging and OEM Unlocking are enabled on your phone through the Developer options menu. To do this, follow the instructions down below:
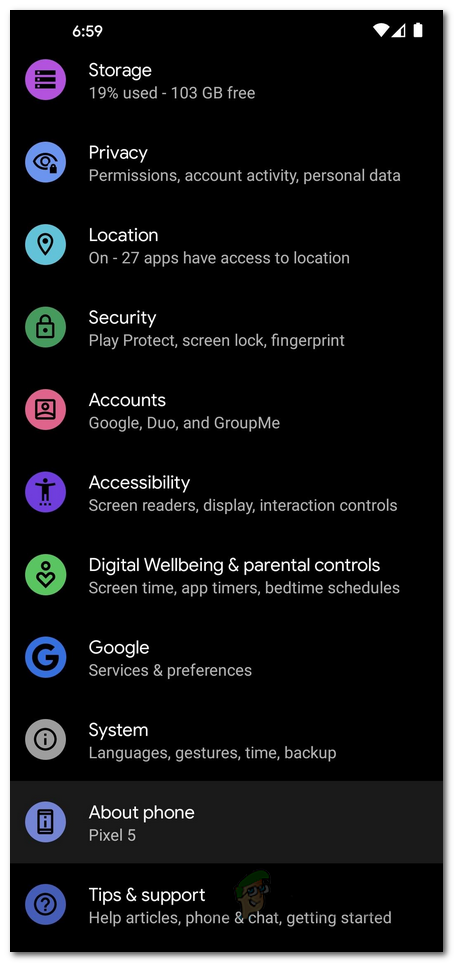
- First of all, open up the Settings app on your phone.
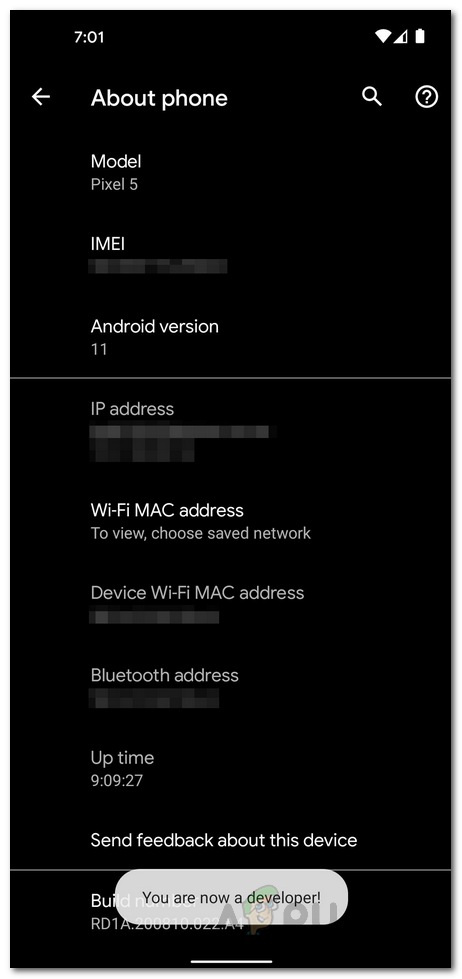
- There, make your way to About Phone at the bottom.
Android Settings - Once again, scroll to the bottom. Tap the Build Number option 7 times rapidly.
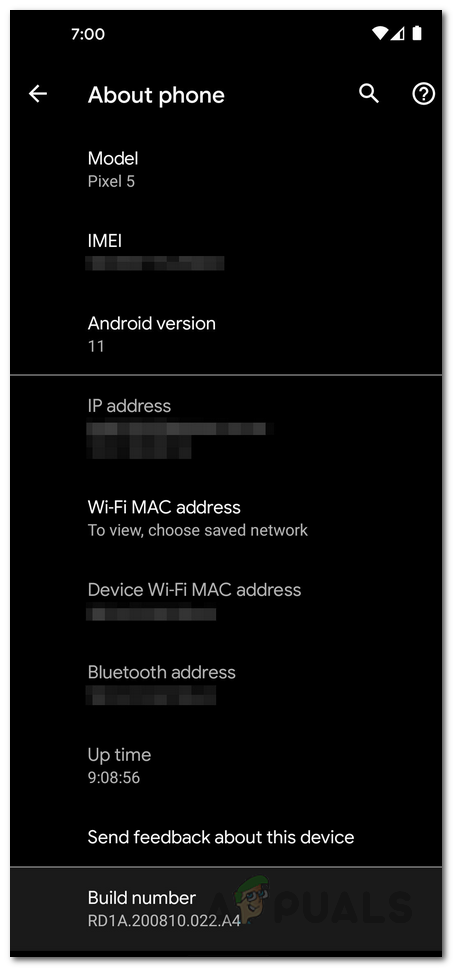
About Phone Settings - You will see a “You are now a developer!” message upon success.
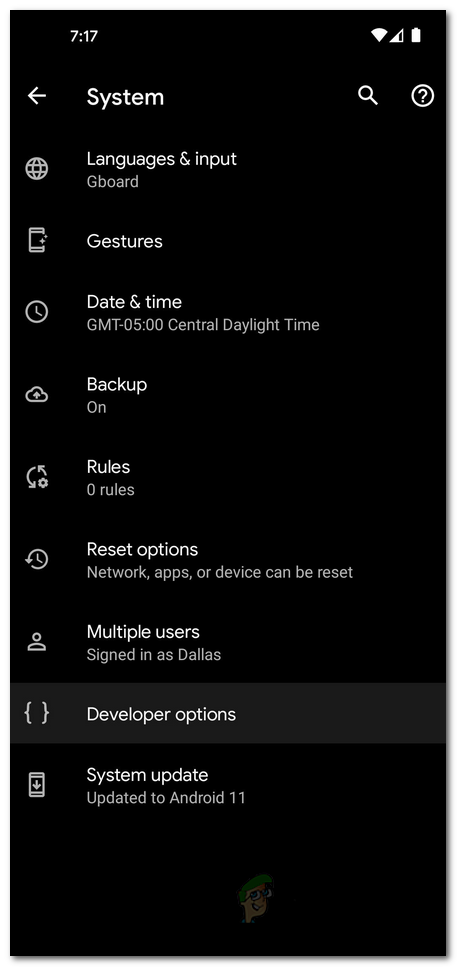
Enabling Developer Mode - Go back to Settings and then make your way to System.
- There, tap on Developer options.
Developer Options - Under the developer options, enable USB Debugging and OEM Unlocking.
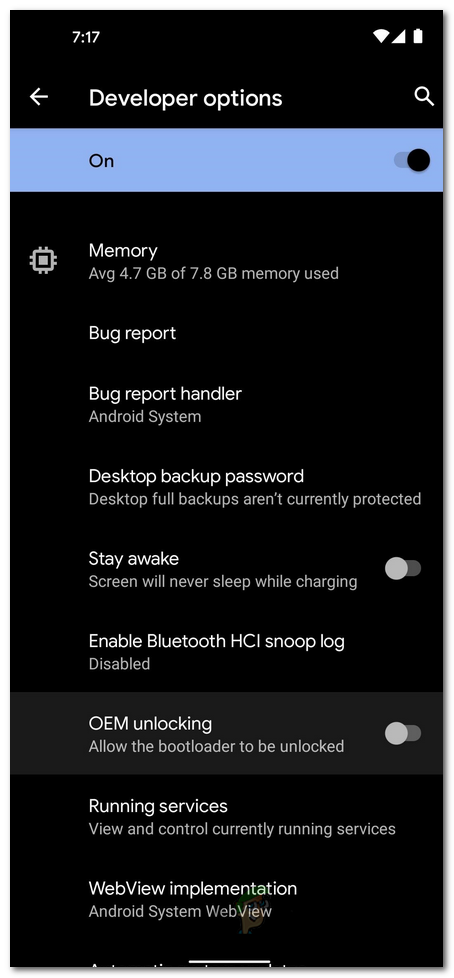
Enabling OEM Unlocking
Once you have enabled USB Debugging and OEM Unlocking, follow the instructions down below to install Android 12 beta using the Android Flash tool:
- First of all, connect your Pixel smartphone to your laptop or PC. You will have to download the Google USB driver from this link here. The website gives you a complete walkthrough of how to download and install the USB driver so just follow through that.
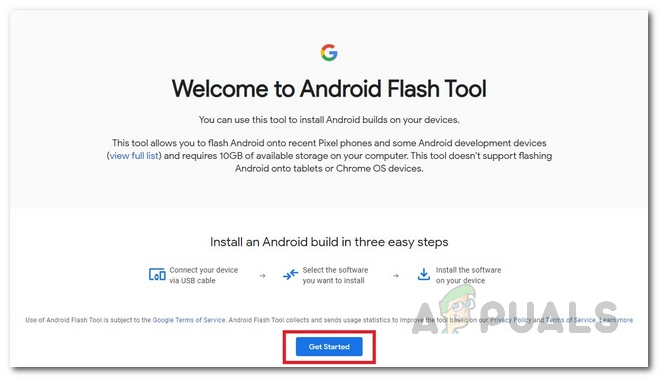
- Once you have installed the Google USB driver, go ahead and open up the Android Flash Tool website by clicking here. This requires you to be running the Google Chrome browser so make sure you are opening with Chrome.
- On the website, click on the Get Started button.
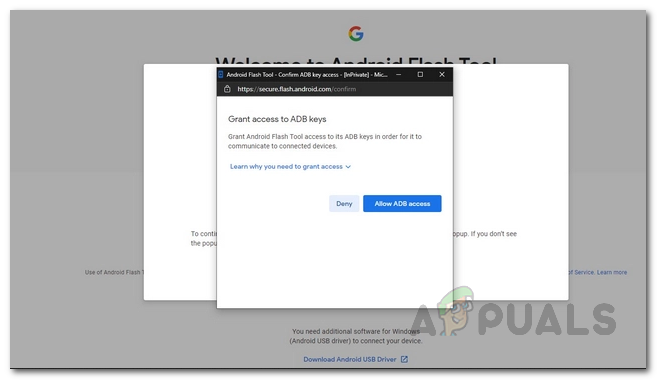
Getting Started with Android Flash Tool - This will bring up a pop-up window. Here, you will have to grant access to ADB keys. To do so, simply click the Allow ADB access button.
Allowing ADB Access - Once you have granted it access, click on the Add new device button.
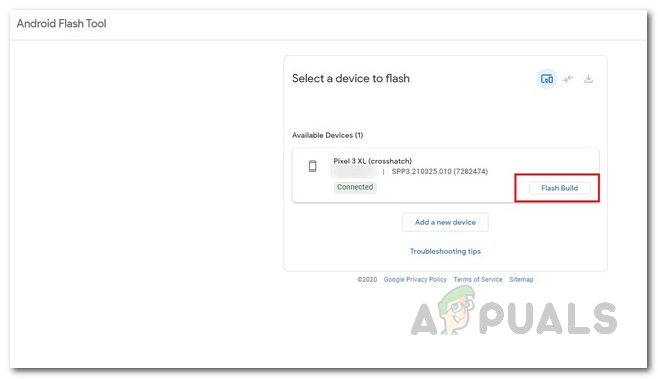
- Clicking this will bring up your device in a prompt under the address bar. Choose your device and then click the Connect button.
- After you have done that, click on the Flash Build button on the Select a device to flash menu.
Flashing Pixel Device - Finally, at this point, you will have to select the latest beta version available from the drop-down menu and then click on the Install button.
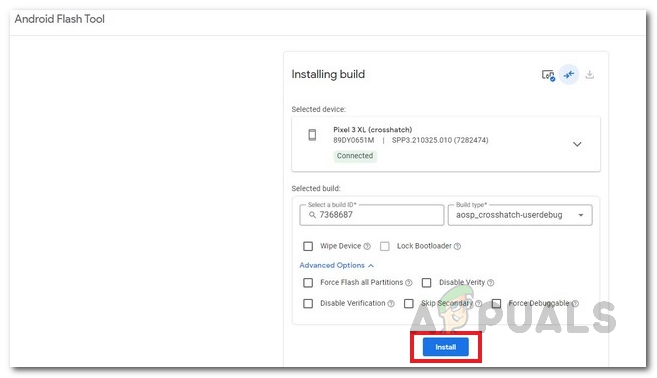
Installing Beta - Now, the Android Flash tool will start downloading the beta build that you selected and then install it on your phone.
- Wait for it to finish. Once completed, you will have successfully installed the Android 12 beta on your phone.