How to Clean Install Windows 11
Windows 11 is an upgraded version of the previous iteration, but with a new design, apps, tools, and sounds. All the new features and the freshness is what attract people and this is why a lot of Windows users are in the process of clean installing or upgrading to Windows 11.
In case you’re still on an older Windows version, the easiest way to get access to Windows 11 is to sign up for the Windows Insider Program, downloading the latest version that Microsoft made public.
But while upgrading the Windows and remaining with all the files, it also transfers the corrupted files, junk, and performance problems.
Fortunately, you can avoid this issue altogether by doing a clean install of Windows 11, deleting everything on the driver you installed Windows 11 on. This will make your computer run as smoothly as possible.
Windows 11 Requirements
But before you do this, take the time to check the requirements of Windows 11 to make sure that your system meets them.
Note: In the past, Microsoft had a tool (PC Health Check) on their official site that compares the Windows 11 system requirements with your PC specs. But since that’s no longer supported officially, you can use an alternative like WhyNotWin11.
If you want to stay away from using third-party tools, you can just as easily compare your PC specks manually using the list below:
Processor: 1 gigahertz (GHz) or faster with 2 or more cores on a compatible 64-bit processor or System on a Chip (SoC
Memory: 4 GB RAM
Storage: 64 GB or larger storage capability
System firmware: UEFI, Secure Boot capable
TPM: Trusted Platform Module (TPM) version 2.0
Graphics card: DirectX 12 compatible / WDDM 2.x
Display: >9” with HD Resolution (720p)
Internet connection: Microsoft account and internet connectivity required for setup for Windows 11 Home
Once you’re certain that your PC is Windows 11 ready, you can safely follow the instructions below to Clean install Windows 11:
How to Clean install Windows 11 on compatible hardware
- Firstly, you need a bootable Windows 11 installation USB that supports UEFI mode, if you don’t have it already. You can download the latest Windows 11 ISO from UUP Dump and make it boot from a flash drive using Rufus.
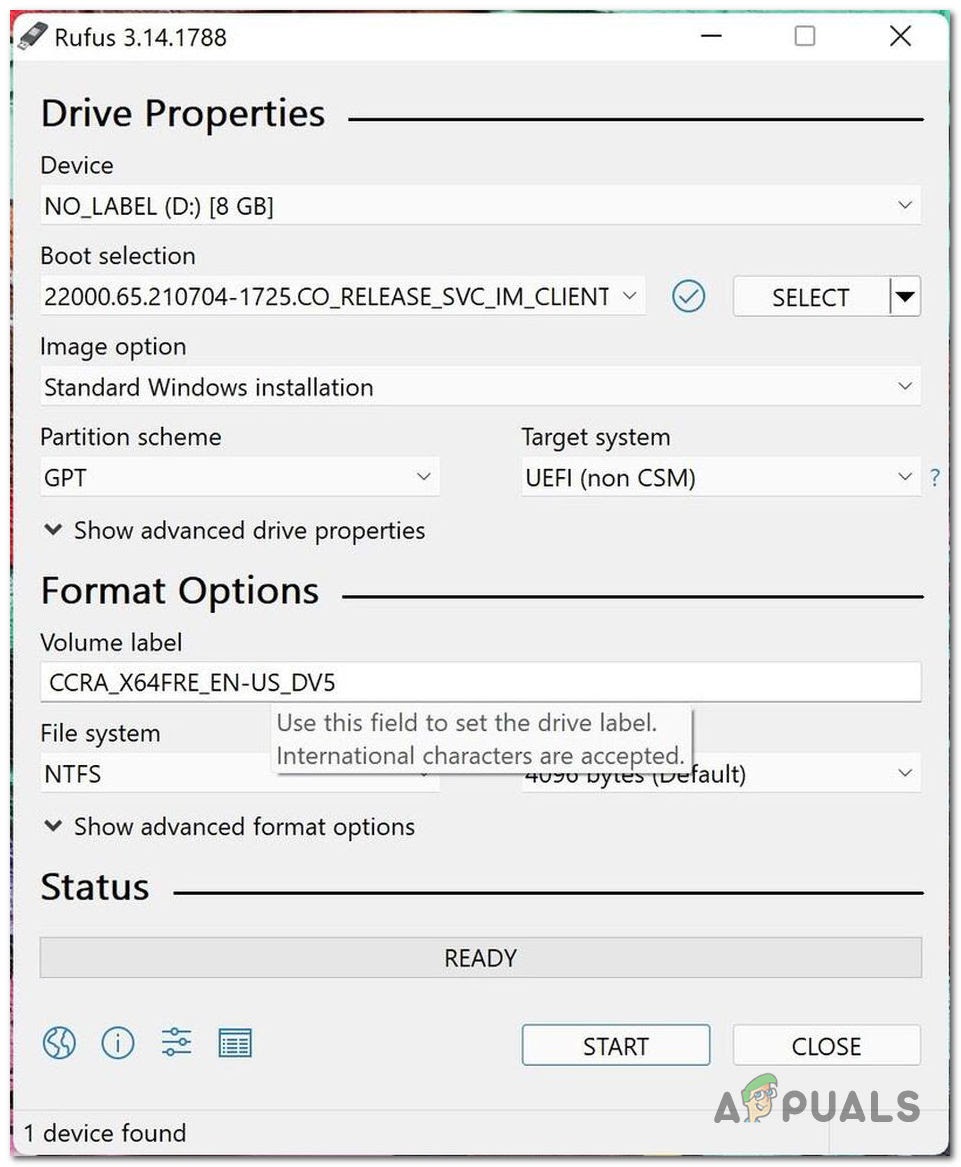
Using Rufus to create Windows 11 bootable flash drive Note: If you have hardware that only supports MBR BIOS Mode (Legacy), follow these instructions to install Windows 11.
- To avoid the risks to delete or format the wrong disk, disconnect all non-OS hard drives until you successfully install Windows 11.
- After this, you need to boot to the UEFI firmware settings for your motherboard, enabling UEFI and disabling the Legacy BIOS (CSM) mode. You can do this by pressing the Setup key during the initial screen.

Accessing the Setup screen by pressing the dedicated key Note: The Setup key should be visible on screen, but just in case it’s not, you can search online for it.
- While you’re inside the BIOS / UEFI screen, ensure that the boot order is set to boot from the USB first if you’ve previously created the Windows 11 installation media on a flash drive.
- Restart your computer and press any key when your PC asks you wif you want to boot from the installation media.

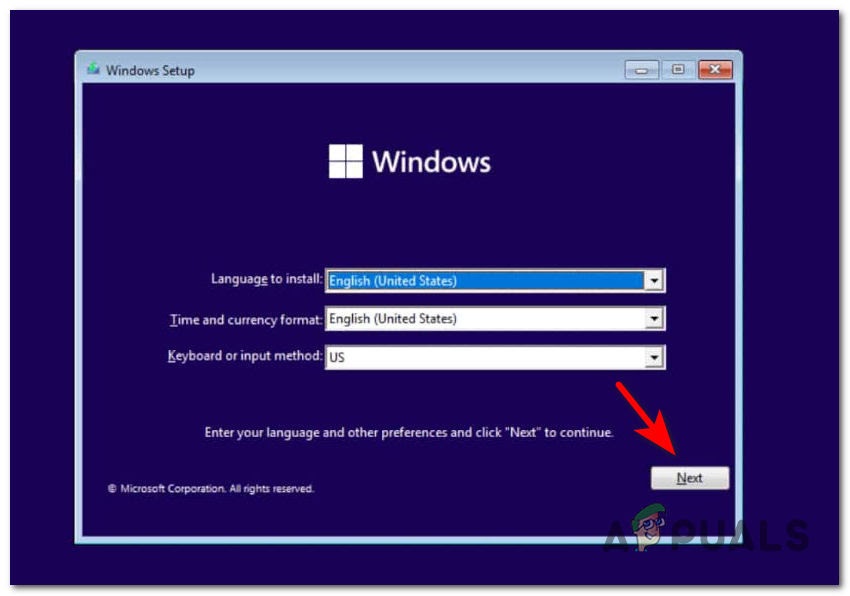
Press any key to boot from installation media - After you successfully boot from the Windows 11 installation media, the Windows Setup will appear on your screen. Select your language, time and currency, and keyboard or input method, then click on Next.
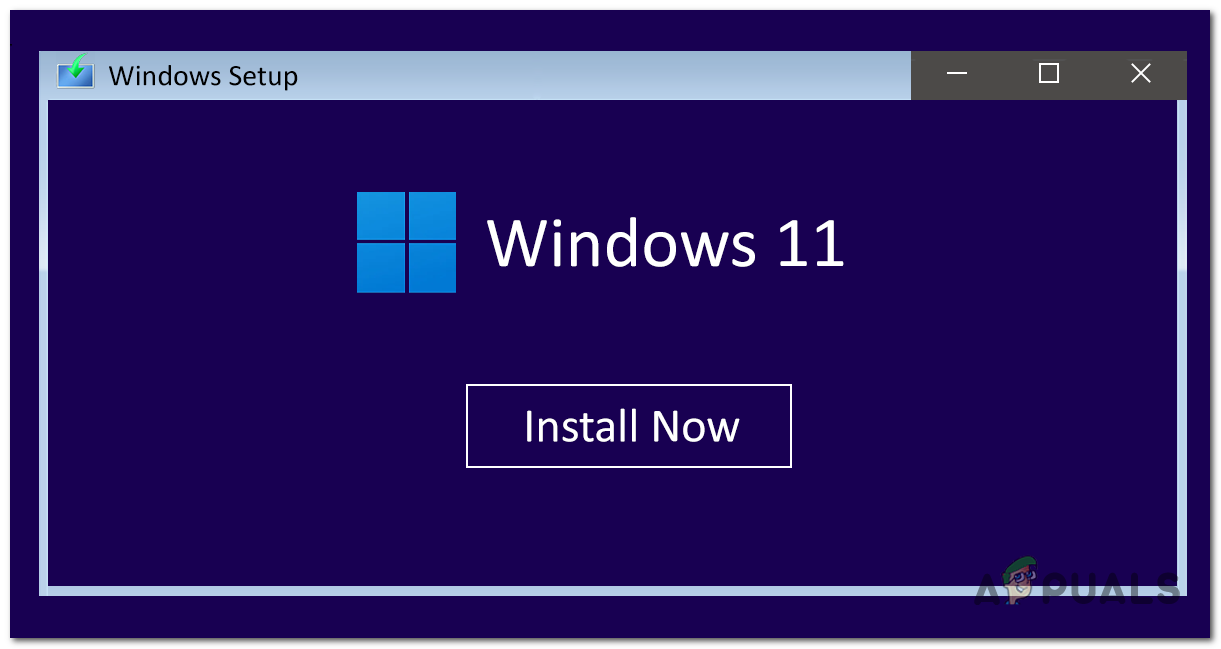
Establishing the initial settings - At the next, screen, start the installation by clicking on Install Now.
Install Windows 11 screen - If you don’t have or don’t want to use a product key, click on I don’t have a product key. Else, Enter it in the associated box.

Installing Windows 11 with or without product code Note: Keep in mind that if you already have a product key from an older Windows version, it should work for Windows 11 as long as you’re trying to install the same version.
- After that, select the Windows 11 version you want to install and click on Next.

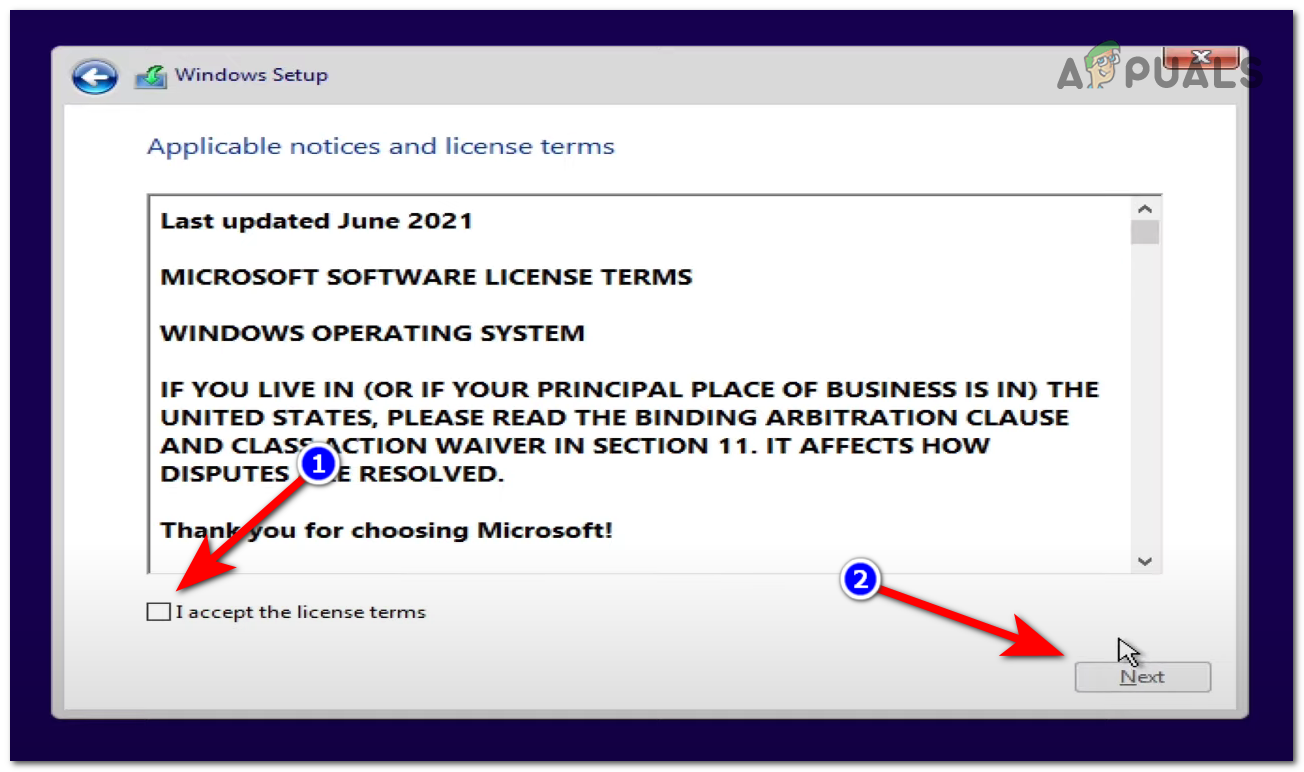
Choosing the Windows 11 version - Now the Microsoft Software License Terms will appear on your screen. Before pressing Next, you need to click on the check box located right under the terms to accept the terms.
Accepting the Windows 11 TOS - Select Custom: Install Windows only (advanced) to not keep your files.

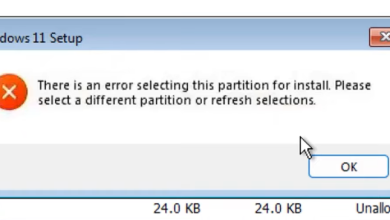
Creating a Custom Windows 11 installation - Now you need to delete all the partitions on the drive you are using, when it says Unallocated Space, select it and click on Next.

Partitioning your SSD or HDD Note: You can also select a Primary or unallocated partition on the driver you are installing Windows 11 on, then delete the partition if it is not already unallocated, confirm it by pressing OK and click on Next.
- Now you need to wait for Windows 11 to install.

Waiting for Windows 11 to install - After the installation is finished, select your country or region, then click on Yes.

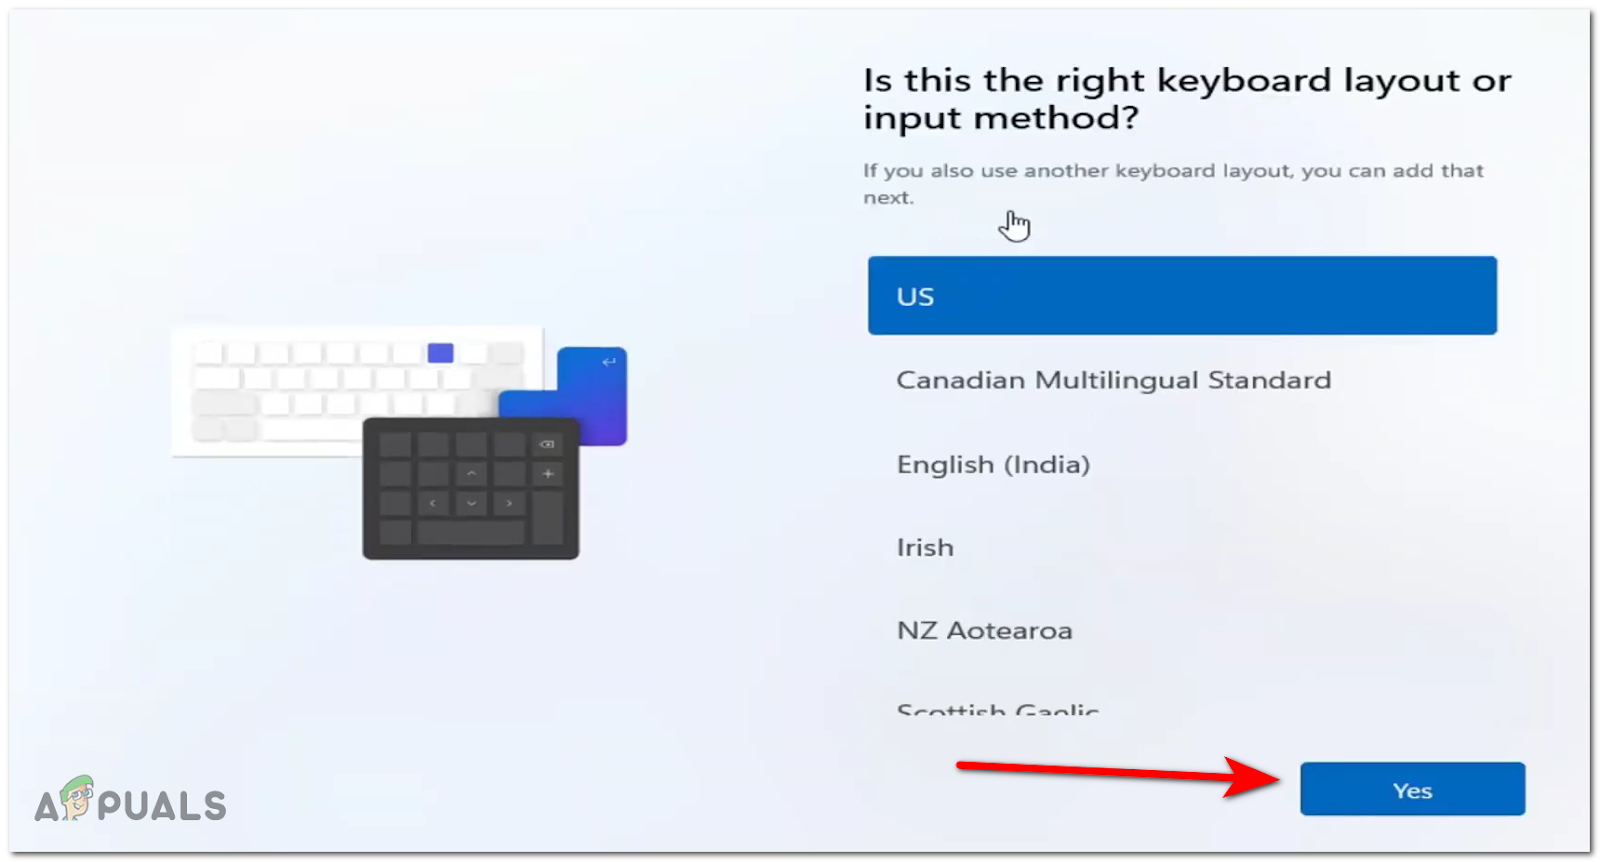
Choosing the language for Windows 11 - Now select the keyboard layout, then click on Yes.
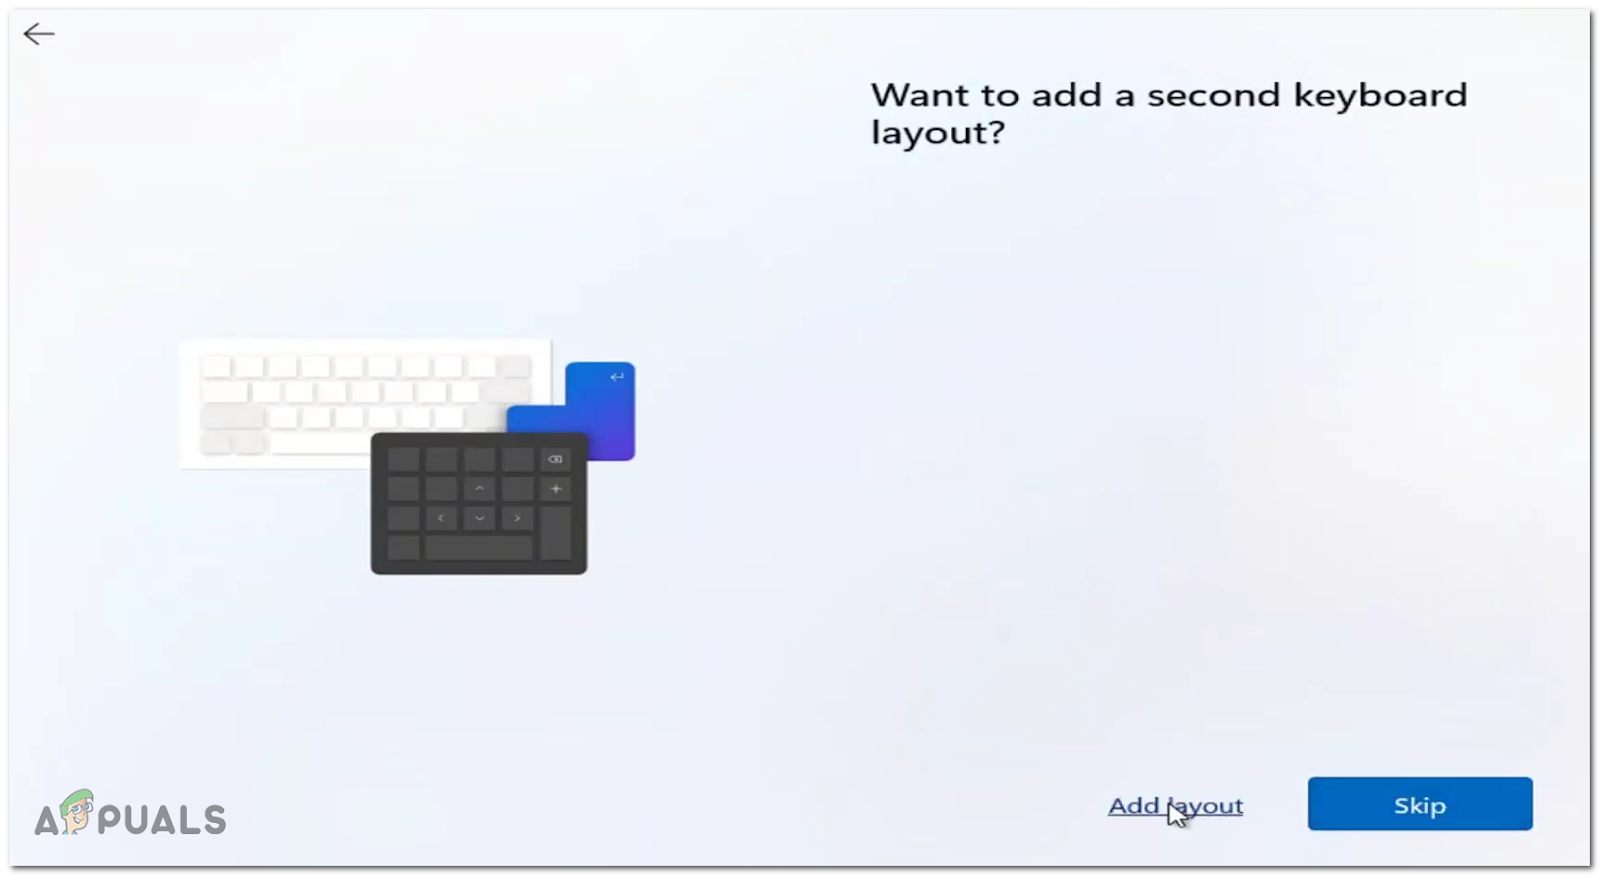
Choosing the keyboard layout - In case you want to add a second keyboard layout, select Add layout, and if you don’t click on Skip.
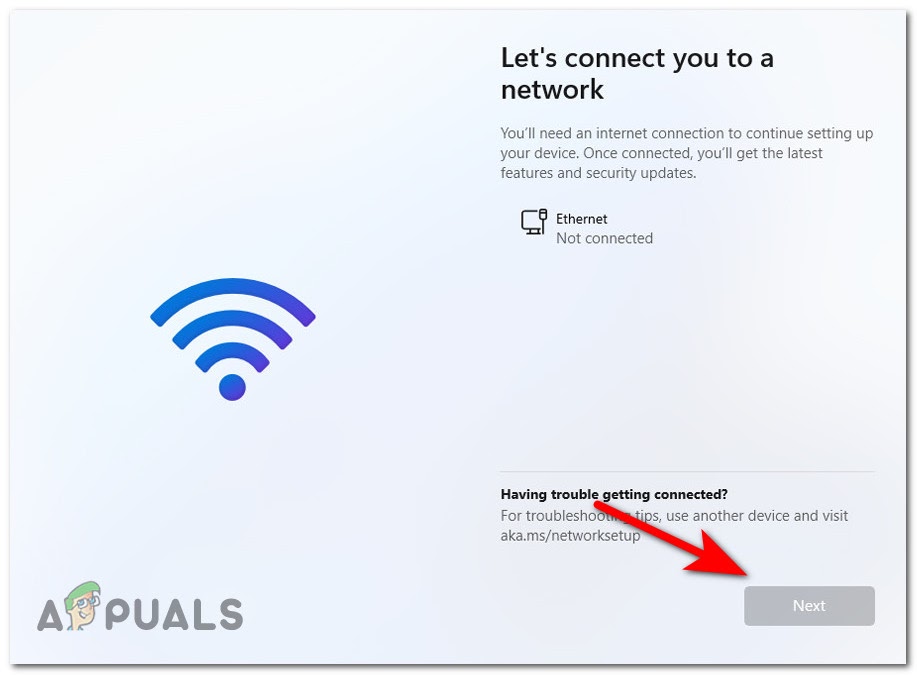
Adding a new layout for your keyboard - Now the Windows will look for an internet connection. After you manage to connect, click on Next. If you don’t have an internet connection, click on I don’t have Internet and Continue with limited setup.
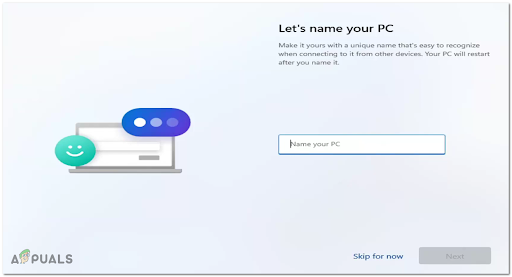
Choosing a network connection - Now give your PC a name and click on Next. The name can be changed later on if you want to.
Name your PC - If you’re installing Windows 11 Pro, you will need to select between Set up for personal use or Set up for work or school.
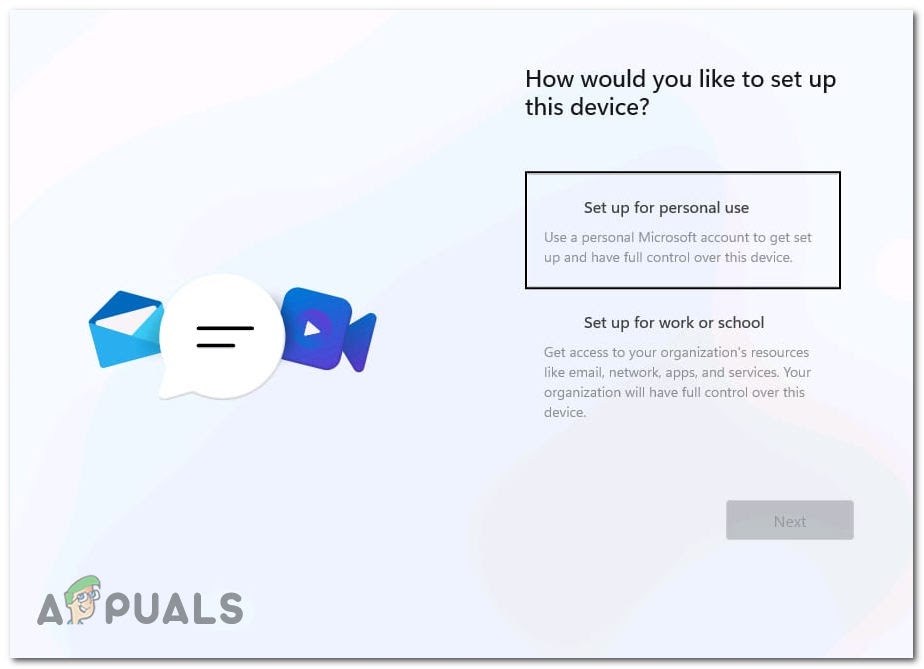
Set up for Personal use Note: If you install a different version, you will not see this screen at all.
- To sign in to Windows 11, you need to set up a local account or Microsoft account. Depending on which you choose, below are guides for both scenarios.
A. Configure Windows 11 with a Microsoft Account
- Write the email address you use for your Microsoft account, then proceed by clicking on Next.
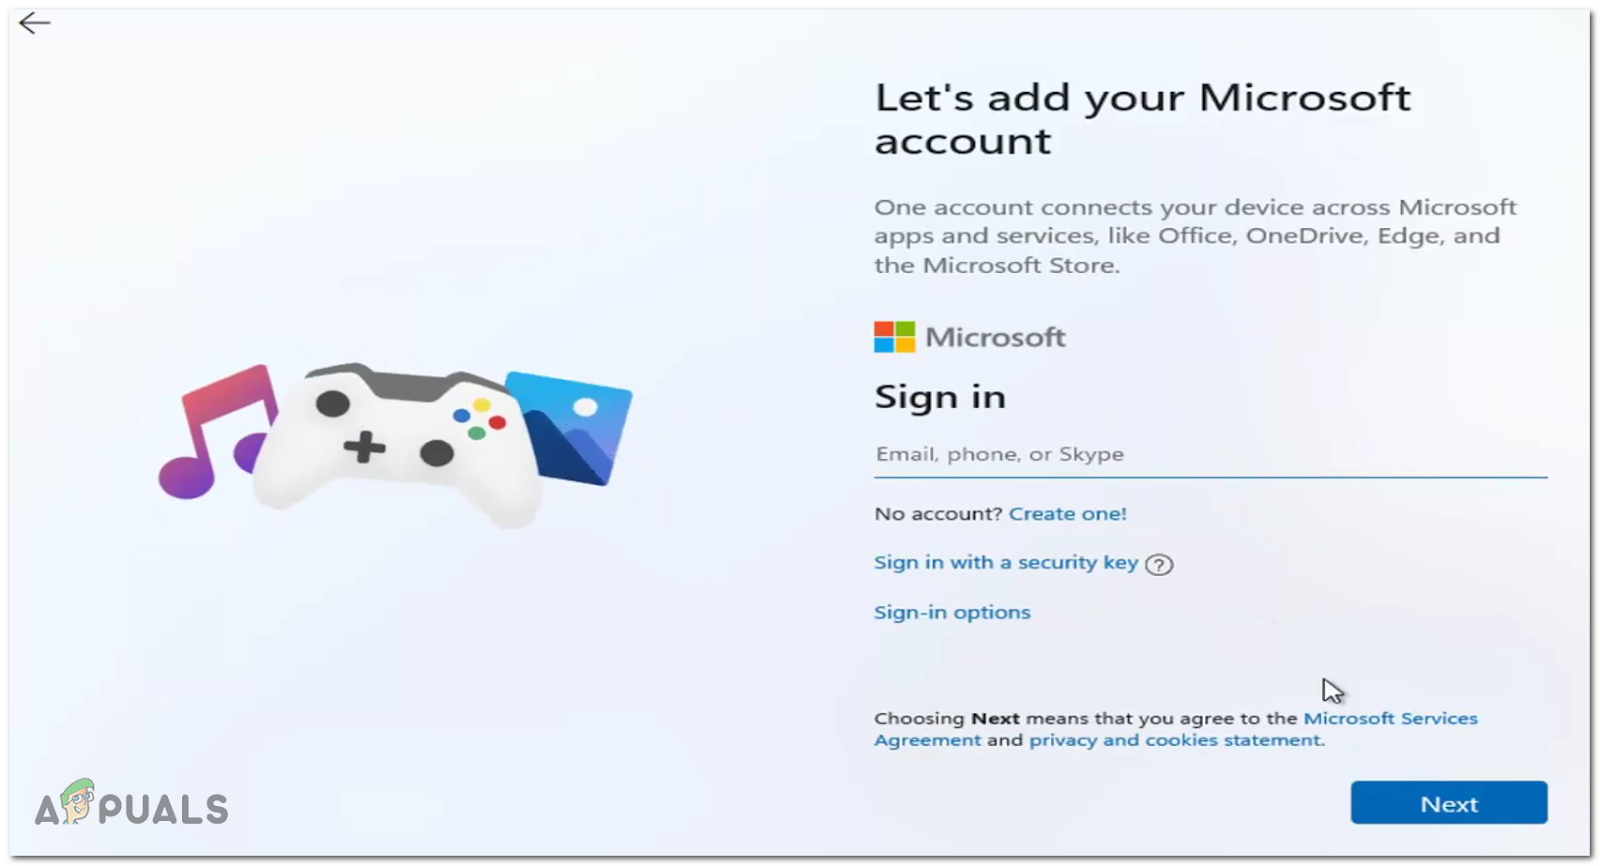
Add Microsoft Account Note: If you don’t have a Microsoft account, click on Create one and follow the given instructions.
- Now insert your Microsoft password as well, then proceed to the next screen.
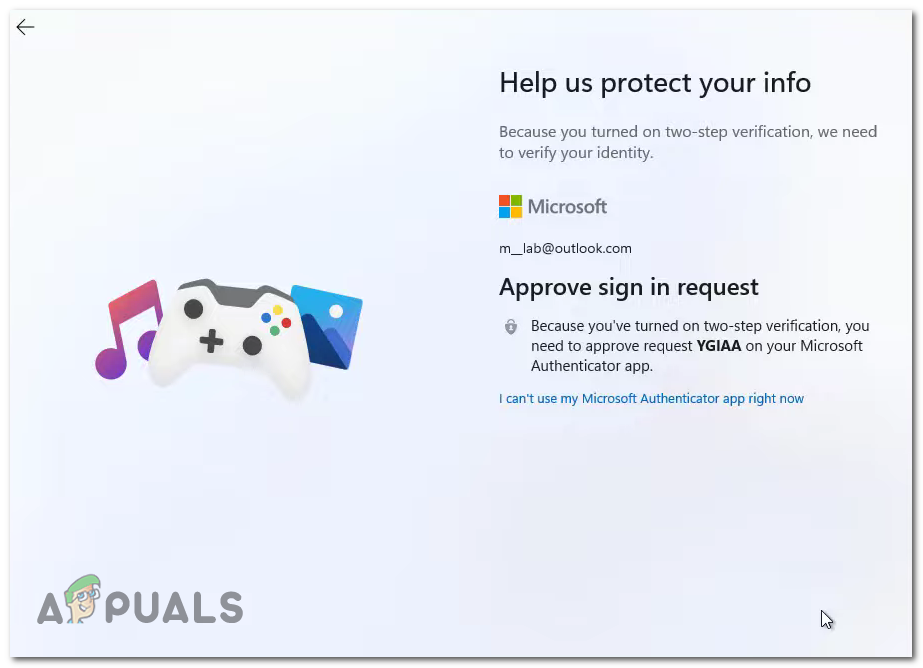
Approving the Sign Up Request - Depending on the way you choose to verify your account, write what it requests, then click on Next.
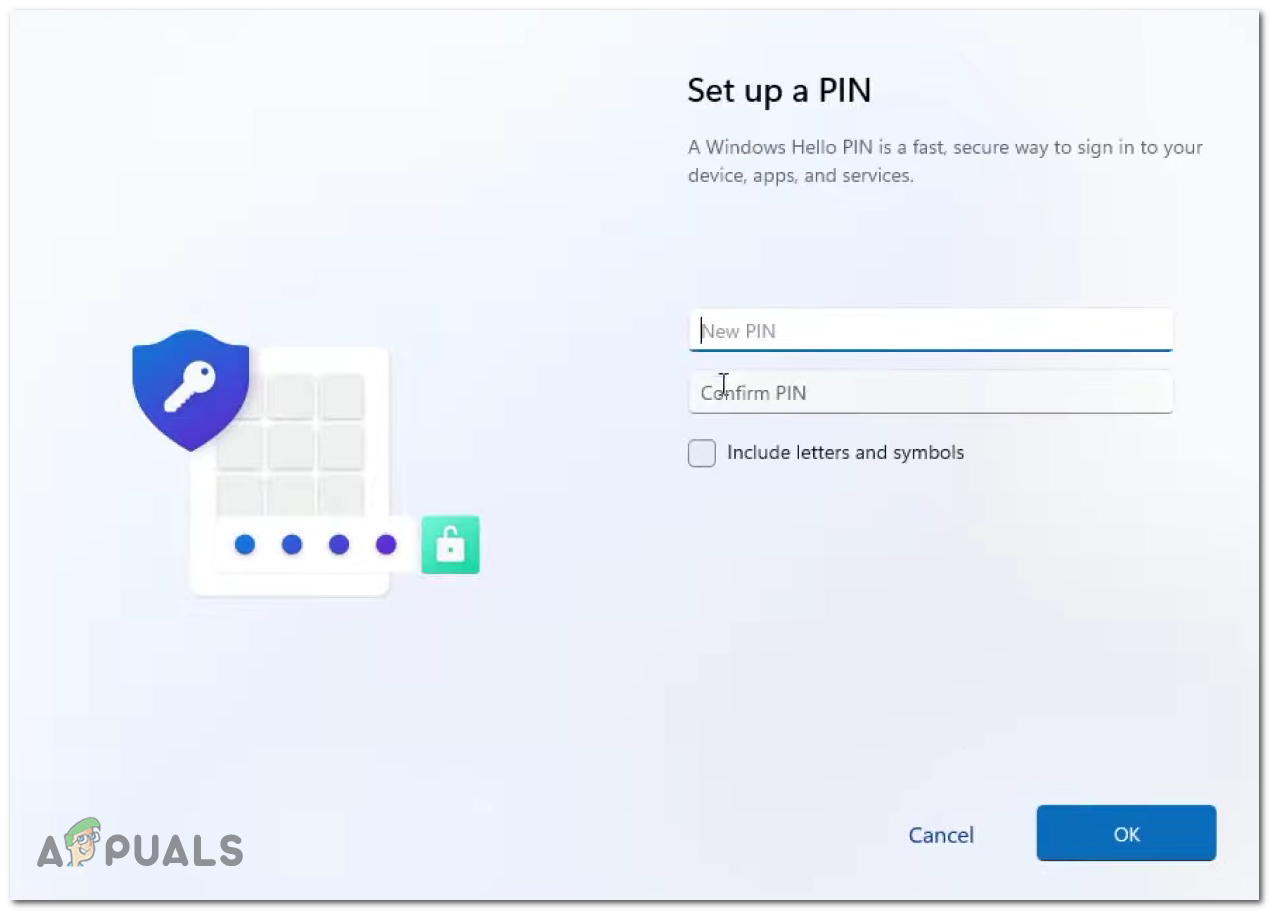
Note: Keep in mind that if you have two-step verification enabled, you will need to approve the request via the Authenticator app that you use. - After you managed to complete the verification, now you can need to create a PIN for your computer. Click on Create a PIN.

Creating a PIN for your Windows 11 - Now enter the PIN, then confirm it, and tap on OK.
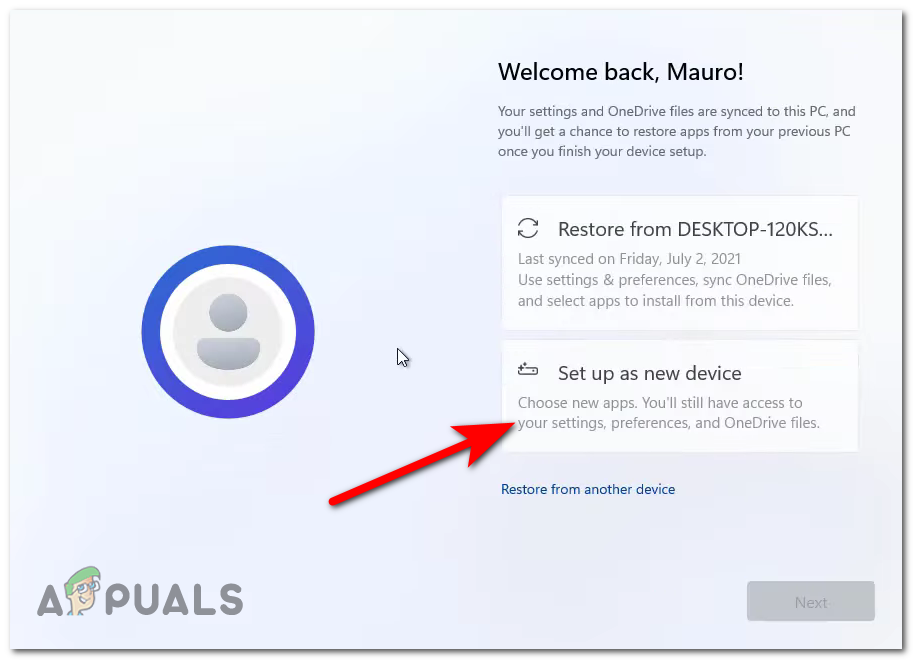
Entering the PIN for Windows 11 - After you created a PIN, you will have the option to restore your settings, preferences, and synced OneDrive files, but if you want to do a clean install you need to select Set up as new device, then click on Next.
Setting up a new device for Windows 11 - Now you will need to choose your privacy settings, they are all turned on by default but you can turn them off if you want. Next, click on Next.
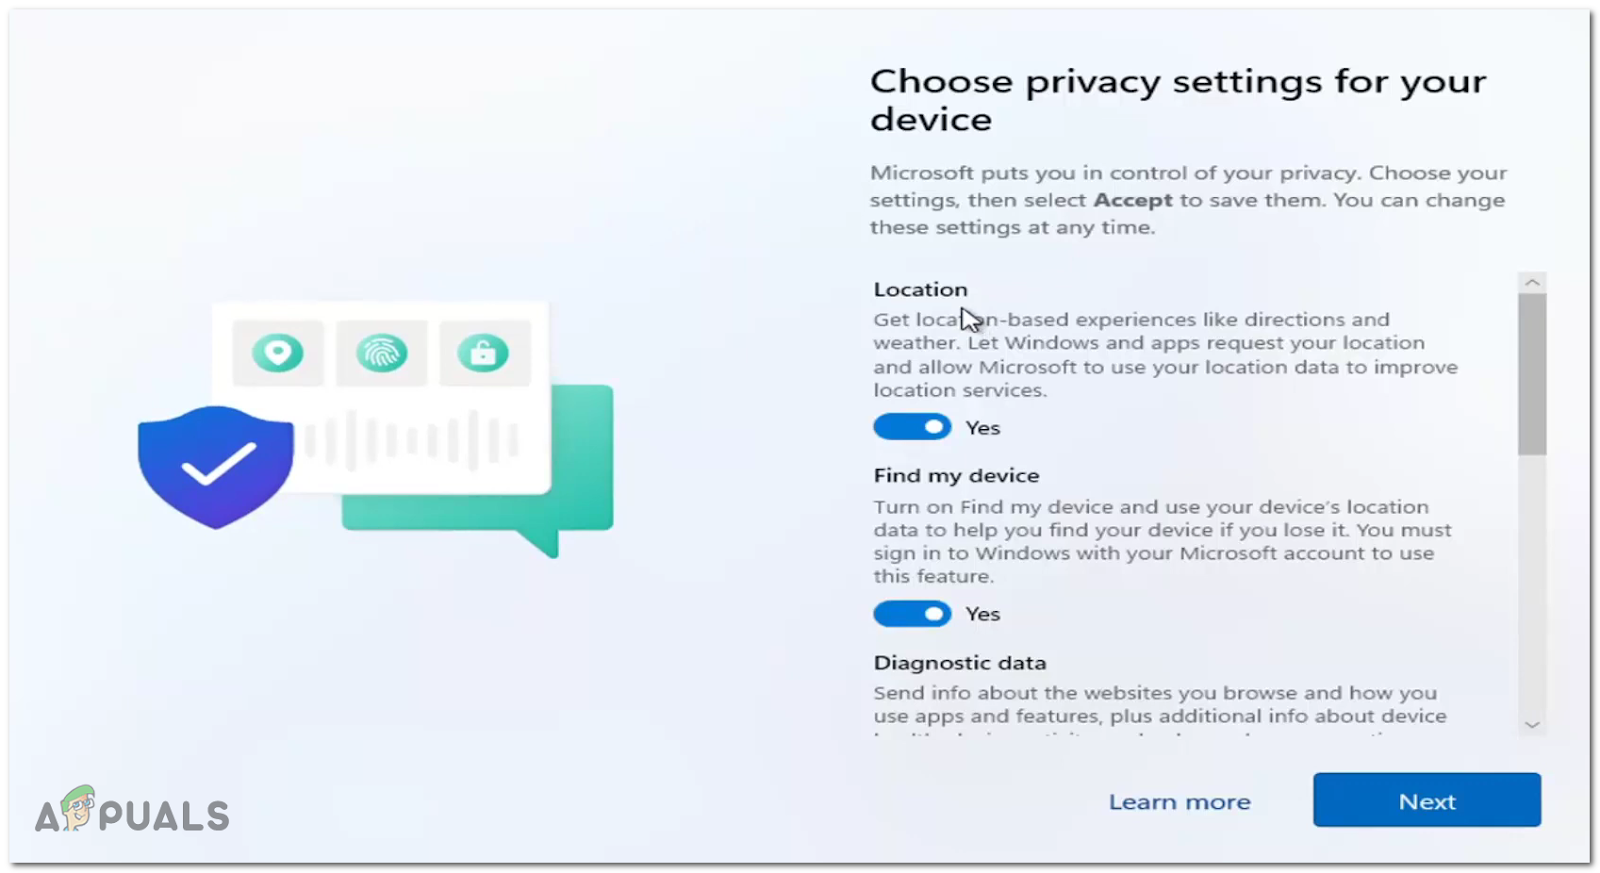
Privacy Settings Windows 11 Note: Keeping some of these options disabled will likely mean that you won’t be eligible to receive certain updates available through the Insider program.
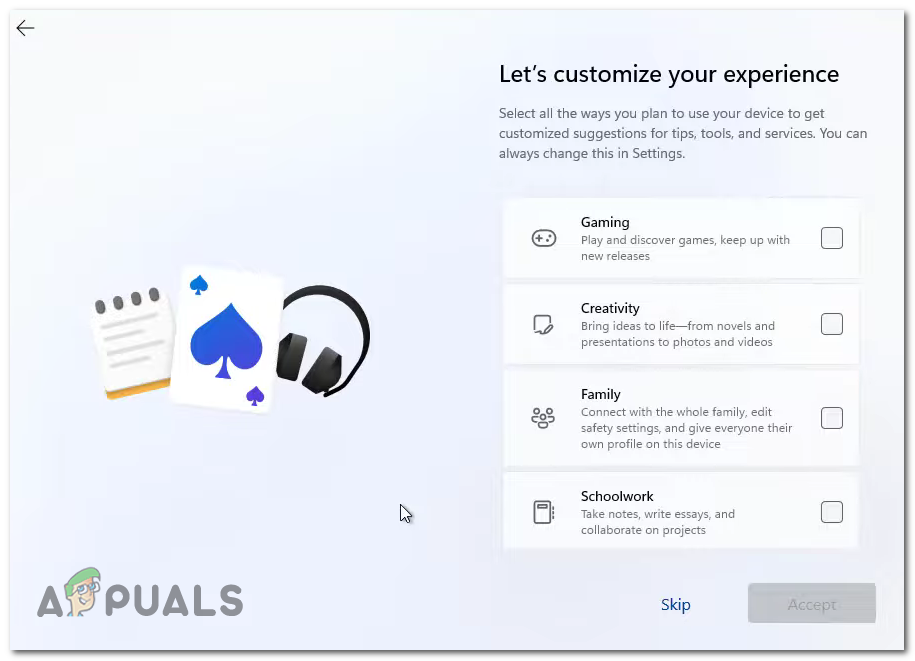
- You will have the option to select the plan to use your device. If you don’t want to choose any device usage plan, tap on Skip.
Customizing the experience on Windows 11 - Now you have the option to choose if you want to store the files only on the computer, or you want to automatically store the files on OneDrive. After you make your choice, click on Next.

Configure OneDrive on Windows 11 - After that, you will be asked if you want to try premium Office, make your choice by clicking on Try for free or No, thanks.

Configuring Microsoft 365 on Windows 11 Note: If you are already paying for a Microsoft 365 subscription, click on the I have a product key hyperlink instead.
B. Configure Windows 11 with a Local Account
- Start by tapping or pressing on the Sign-in options link.
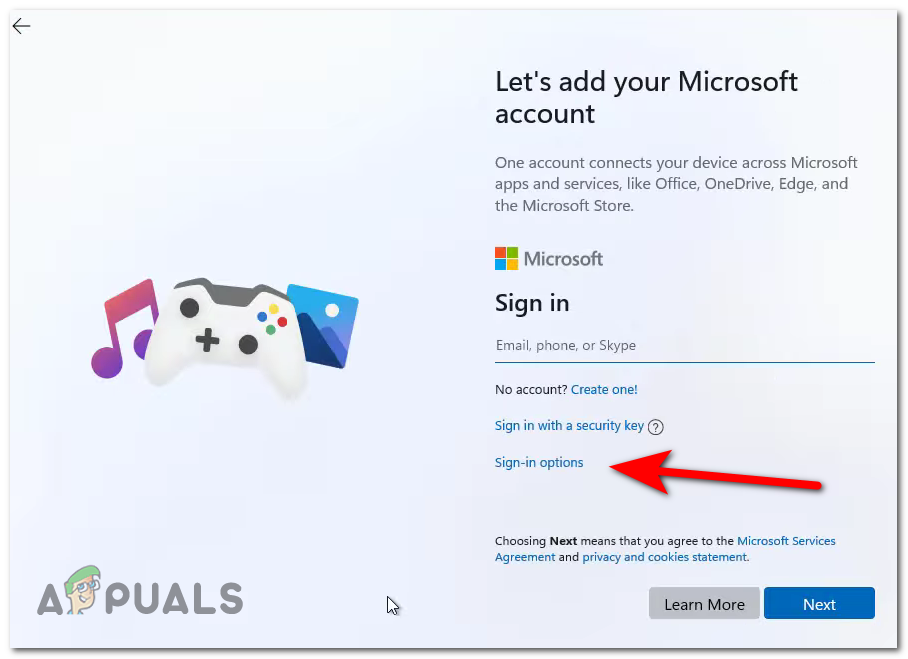
Accessing the Sign-in Options menu - At the next screen, you will need to ensure that you have an active Internet Connection in order to be able to complete the process.
- If you’re trying to install Windows 11 Home, you’ll need to enter a fake email and password and hit Sign in so you’ll be prompted by the Oops something went wrong message. After this prompt, you will be able to click on Don’t sign in with a Microsoft account.
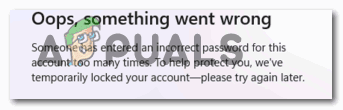
Forcing the creation of local account Note: As of now, this is the only way of installing the Home version if you don’t have a viable license key.
- If you’re trying to installing a different version, follow the instructions below depending on your Windows 11 version of choice:
For Windows 11 PRO - Click on Set up for personal use, then tap or click on Offline Account.
For Windows 11 Enterprise - Click on Set up for work or Scool, then tap on Domain join.
For Windows 11 Education - Click on Domain join (no additional option available)
- Locate the Limited experience button at the bottom right and click on it.
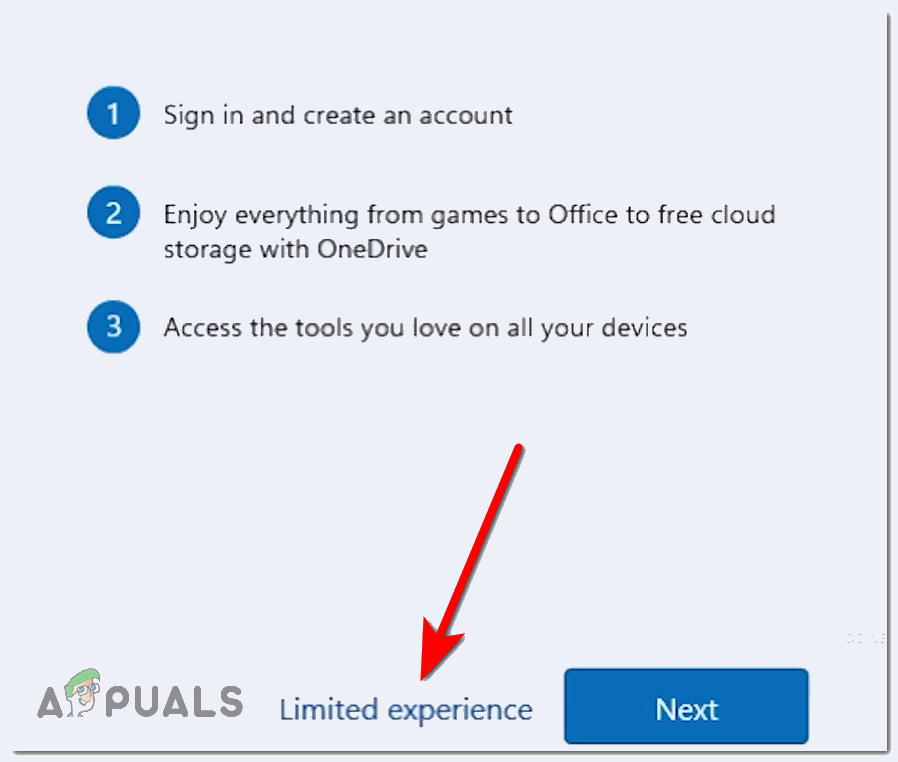
Accessing the Limited Experience tab - Now you need to write the name that you want your local account to have. After that click on Next.

Configuring the usernames on Windows 11 - Enter a password if you want to, if you don’t leave the space blank, then click on Next.

Configuring the password - Confirm the password and click again on Next.
- Now you need to select three security questions. Write the answers down, then hit Next.
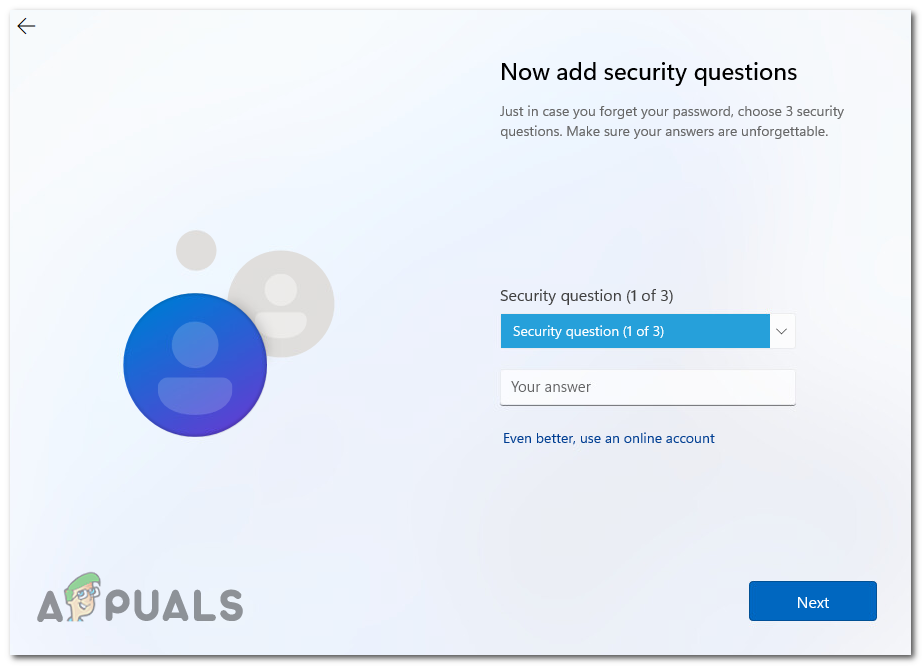
Answering the security questions on Windows 11 - After the installation is complete, the new desktop will appear on your screen with the Start menu opened.