How to use Gmail Offline in Chrome
There’s a limited number of things you can do on Chrome when you’re offline. You can work on Google Docs, Sheets, Slides. You can also use some extensions or apps that work offline, like Pocket or Google Calendar, and you can also manage your email with Gmail Offline.
Gmail Offline lets you read, archive, categorize and reply to email while you’re offline. Of course, these actions won’t be synced to the Gmail servers till you’re connected to the internet. All the messages you send will also be saved under Outbox and then sent automatically when you connect to the internet.
Here’s how to get Gmail Offline for Chrome. Note that the process is different for the old Gmail, and the new Gmail from 2018 if you’ve activated that. We’ll go over the classic Gmail method first. If you’re on the new gmail, scroll down to the second half of the article for that tutorial.
Note : Activate Gmail Offline only on your personal computer. Saving all your Gmail data on a public or shared computer is a privacy risk you probably don’t want to take.
For Classic Gmail
- Install the app from Chrome Web Store.
- Once installed, search for ‘Gmail Offline’ using the search key on your Chromebook keyboard, or go to https://mail.google.com/mail/mu.
- You will be asked for permission to store Gmail offline the first time you open Gmail Offline. If you want to use Gmail Offline, you will have to ‘Allow Offline Mail’, which will use local storage to store Gmail data offline.
- Check ‘Allow Offline Mail’, and press continue.

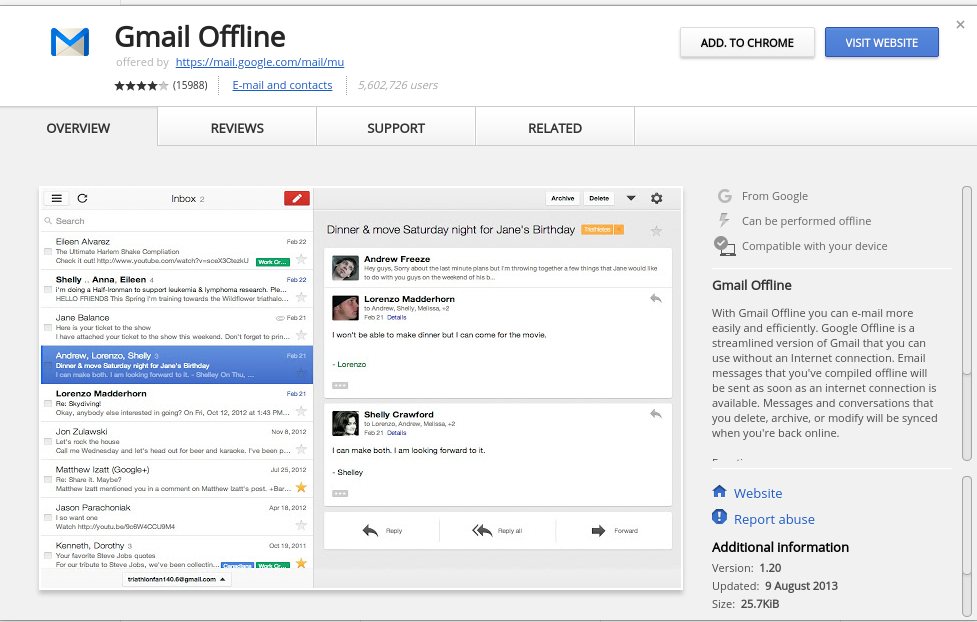
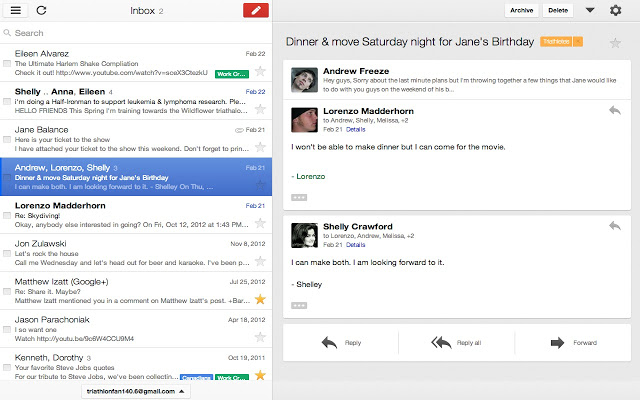
- Once you allow offline mail, you will be taken to the main interface of Gmail Offline, which is quite different from the online version. But it works. You can deal with email that came to your inbox before you went offline, and schedule actions that will take place after you go online.
- If you want to activate Gmail offline for a secondary account, you will have to go to the sidebar menu, accessed from the three lines on the top left of the Gmail Offline interface.

- On the sidebar, you will see the current email id for which Gmail Offline is activated on the bottom. Click on the box with the email id to access secondary accounts and add a new account to use with Gmail Offline. You will, of course, have to be online if you’re setting up Gmail Offline for an account for the first time.
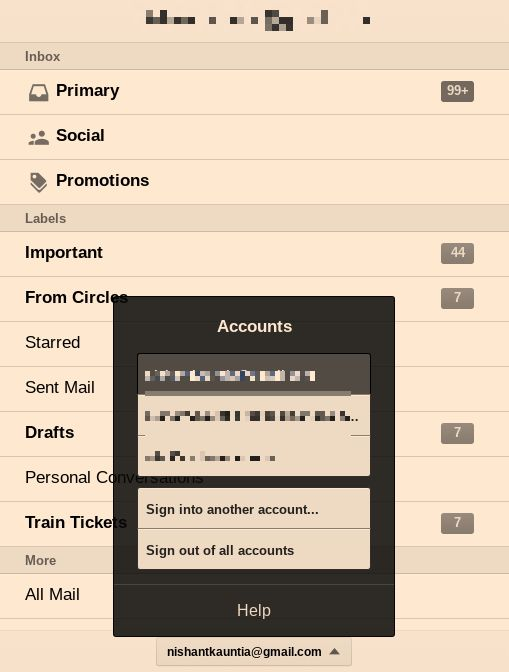
You will have to give the ‘Allow Gmail Offline’ permission described in Step 3 for each of your accounts, if you plan on using Gmail Offline for multiple accounts.
How to remove Gmail Offline
If you no longer want Gmail Offline on your computer, there is a bit of a process to clean a computer of all your Gmail data. You will have to manually remove that data from your cache. But it’s not very hard. Just follow the steps below –
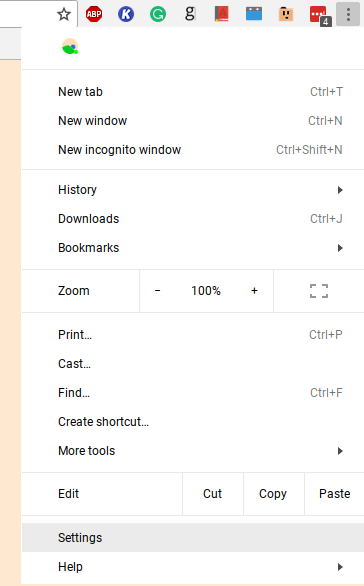
- On the top right corner of your Chrome browser, there is a three dot menu. Click on it and go to ‘Settings’ from the dropdown that appears.
- Scroll down to the the bottom of the Settings page, and click on ‘Advanced’.
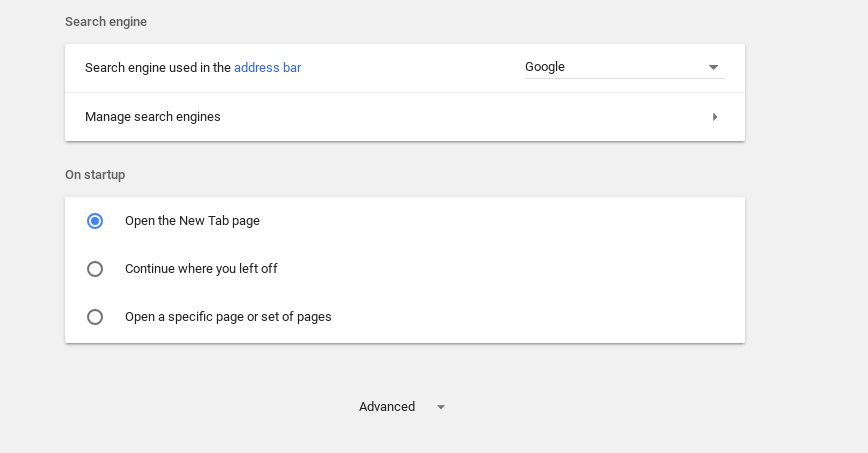
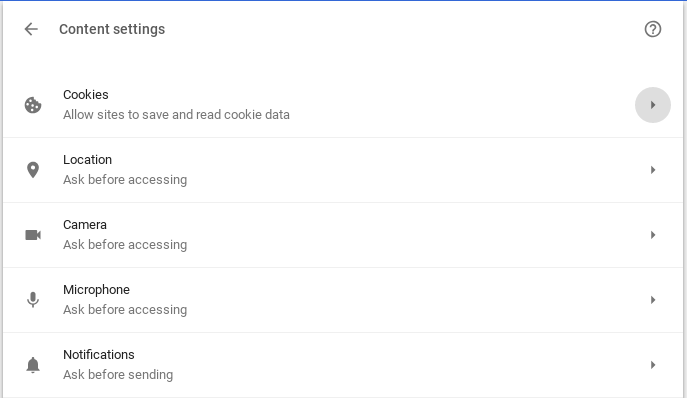
- Scroll down to ‘Privacy and Security’ in the Advanced settings menu. Then click on the ‘Content Settings’ option.

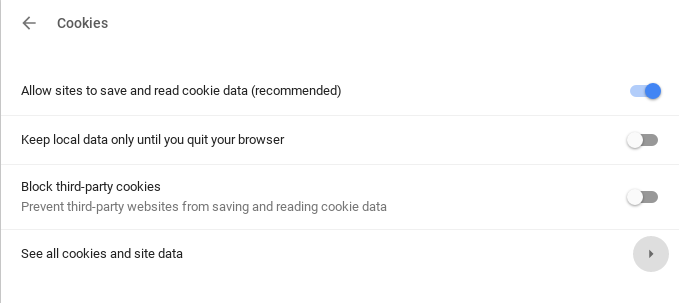
- Under Content Settings, go over to the ‘Cookies’ submenu.
- Under the Cookies menu, click on the ‘See all cookies and site data’ option
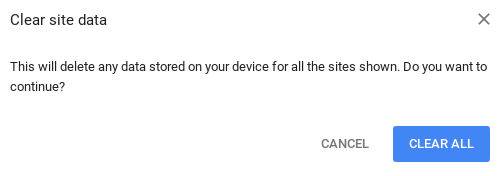
- Under ‘See all cookies and site data’, you will find the option to ‘Remove All’. Click that.

You will get an additional warning sign, but don’t worry. This will not lose you any of your valuable offline data. It will just clear out all the stuff from websites that Chrome saved for convenience. Go ahead and click on ‘Clear All’.
Once you do that, you will have made sure that all your Gmail Offline data is removed from the computer. Now, you just have to remove the Gmail Offline app. To do that, search for ‘Gmail Offline’ in your app drawer if you’re on a Chromebook, or else go to chrome://apps, and delete it from there.

That’s it. If you followed all of these steps, you will have removed Gmail offline successfully from your computer.
For New Gmail
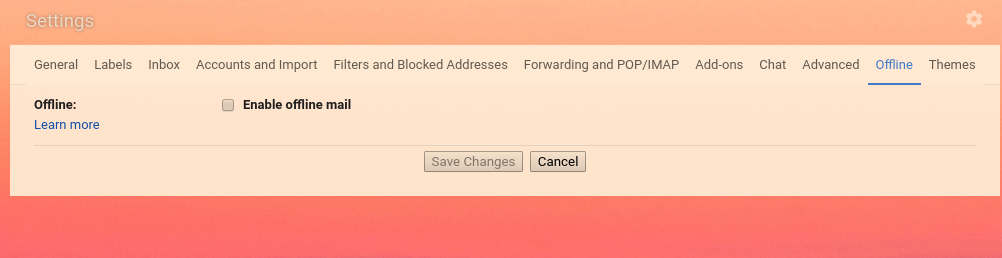
- Go over to Gmail Offline Settings, and check the Enable Offline Mail box.
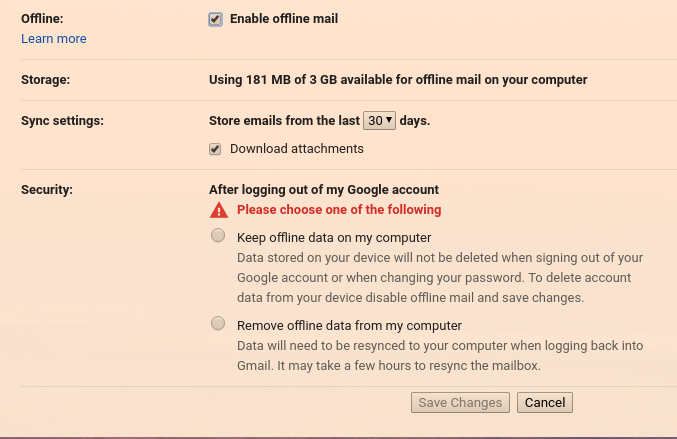
- Once you check the option, a new set of options will show up on the screen, allowing you to choose the number of days to sync mail for, and what happens when you log out of your computer. This is pretty self explanatory, so choose the options based on what you’d prefer, and click ‘Save Changes’.
That’s all you have to do to enable Gmail Offline for the new Gmail.
Removing Gmail Offline on the New Gmail
For the new Gmail as for the old Gmail, removing offline mode requires that you clear all your Cookies and site data. So follow the steps from 1 to 6 in the ‘Removing Gmail Offline’ tutorial for classic gmail given above.
Once you’ve cleared all site data, go over to Gmail Offline Settings, and uncheck the ‘Enable Offline Mail’ box and click ‘Save Changes’.

That’s it. Gmail Offline will be removed from your computer.