How to Start Steam in Offline Mode
Steam requires an internet connection if you want to play any game’s multiplayer or play online against friends. There are dedicated servers allocated in each region. You connect to the region nearest to you and the algorithm sets up matchmaking according to the people who are also connected to that server.
Steam also has an option of an offline mode where you can play the games which are installed offline against bots or you can pursue the single player campaigns available. There are many cases where Steam fails to enter the offline mode. There is also a fact that Steam doesn’t allow the usage of offline mode for consecutive 2 weeks unless you connect with the internet. It has a type of timer and after 2 weeks, you cannot access the offline mode.
For the cases where you can’t launch offline mode before 2 weeks, we have listed down the solution you can perform to fix the problem.
Before we continue, I would like to clarify that these solutions are meant to work IF you have your credentials saved in Steam. Meaning you have “Remember password” box checked when you logged into Steam the last time. If you don’t, there is no remedy present and you have to go online once in order to start it in offline mode later on. We have already listed on how to enable “Remember me” in solution 3. Scroll to it and see if you have checked the correct box; if you have, you can follow the solutions listed below.
Solution 1: Change the date
Like we mentioned before, Steam has a date counter. After it is over, you have to connect to the internet to reset it again. Many users reported that changing the date to a week earlier on their PC solved the problem and they we able to launch the offline mode with ease. This solution may or may not work, but, it is worth a shot before resorting to more technical methods.
- Press Windows + R button to launch the Run application. In the dialogue box type “ms-settings:”. This will launch the Settings applications.
- Once in the Settings application, look for the option named “Time & Language”. It should be somewhere in the middle.

- After clicking the option, you will be taken to the Date and Time menu. By default, your pc will have “Set time automatically” and “Set time zone automatically” checked. Uncheck them and click on the option which says “Change date and time”.
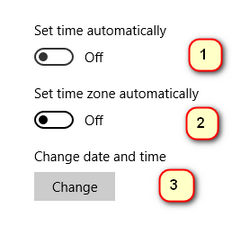
- After you click Change, a new window will pop up where you can change the date as well as time. Change the date to one week or a few days early and save changes.
- Launch your Task Manager by pressing ⊞ Win + R button. This should launch the Run application.
In the dialogue box write “taskmgr”. This should open up the task manager.
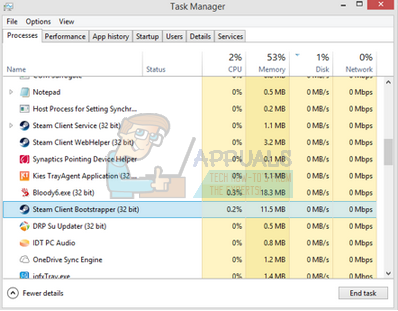
- End all Steam related processes starting from the process ‘Steam Client BootStrapper’. If there are no Steam processes active already, proceed to the next step.
- Re-launch Steam. If your Steam is able to start in offline mode, well and good. If not, resort to the other solutions listed below.
Solution 2: Opening from main game folder
Another remedy is to open the game you are playing directly from its installation folder. We can try bypassing the Steam client and force the game to open without the internet connection.
- Open your Steam directory. The default location of it is C:\Program Files (x86)\Steam. Or if you installed Steam in another directory, you can browse to that directory and you will be good to go.
- Navigate into the following folders
Steamapps<common
- Now you will see different games which are installed in your PC. Select the game in which Steam overlay isn’t working.
- When inside the game folder, open the folder named “game”. When inside the folder, open another folder named “bin”. Now you will see two folders named win32 and win64. Open win32 if your computer has a 32-bit configuration or win64 if it has a 64-bit configuration.
The final address of would look something like this.
![]()
- Here you will the game’s main launcher for example like “dota2.exe”. Right click it and select the option Run as administrator. Check if the game gets launched in offline mode.
Solution 3: Checking if “remember me” is enabled
Another reason why you may be unable to launch Steam in offline mode can be because you didn’t check the “remember me” tag while logging into Steam. For this solution, we need access to the internet so we can login into Steam the correct way and check if the offline mode launches or not.
- Log out of Steam by clicking on the option of “Change User” present if you click your account title on the top.
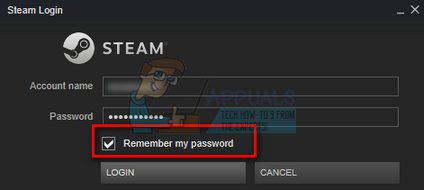
- After clicking the option, you will be given a login screen where you have to enter your credentials. After inputting your credentials, check the box which says Remember my password. Click the button Login.
- Click on the Library tab present on the top. Here all your installed games will be listed. We need to verify the integrity of game files to make sure that all the files are complete and don’t require any further updates.
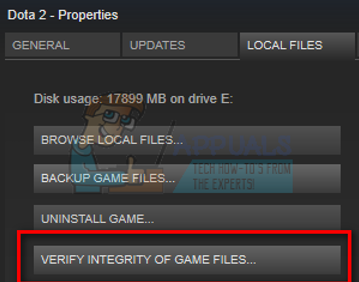
- Right click on the game which you want to play and select Properties.
- Once in the properties, browse to the Local Files tab and click on the option which says Verify Integrity of Game Files. Steam will then start verifying all the files present according to the main manifest it has. If there is any file missing/corrupted, it will download that files again and replace it accordingly.
- Now navigate to your Settings by pressing the Settings option after clicking Steam present in the bottom left corner of the screen. Once in the Settings, open the Downloads tab present at the left side of the interface.
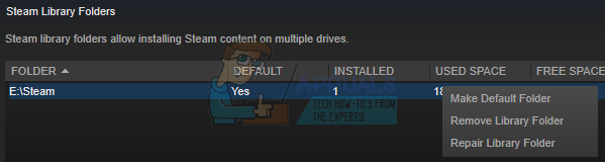
- Here you will see a box in which it is written “Steam Library Folders”. Click it

- All your steam content information will be listed. Right click on it and select “Repair Library Files”.
- Restart Steam and open it using Run as administrator. Open and play the game to ensure that it is working properly.
- Now click on Steam present in the upper right corner of the screen and select Settings again. Navigate to the Account tab Look towards the bottom and you will see a check box like this.
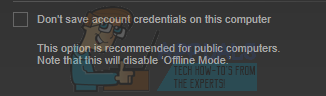
- Make sure that this checkbox is unchecked. If it is checked, your Steam will not enter offline mode through anyway.
- Now click on the Steam menu present in the top left corner of the screen and select Go Offline. You will be able to go into offline mode immediately.
Solution 4: Adding –offline to your Steam shortcut
This method worked for the majority of the people. It manipulates the shortcut of Steam and adds a command line parameter in its properties.
- Locate your Steam client. The default location is C:/Program Files (x86)/Steam.
- Create a shortcut of Steam in the same directory.
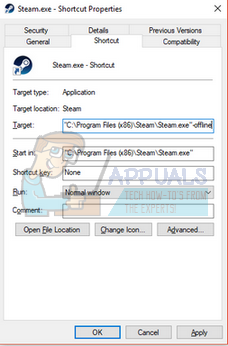
- Click ‘Properties’ and head over to the ‘General’ tab.
- In the ‘Target’ dialogue box, add ‘offline’ in the end. The final result looks like this “C:\Program Files (x86)\Steam\Steam.exe”-offline
- Open task manager and end all Steam processes like explained above.
- Re-launch Steam using the shortcut and click Go Offline by clicking Steam located on the top left side of the client.
Solution 5: Checking your Firewall and Antivirus
It is a very common reality that your firewall and antivirus software conflicts with Steam. Steam has a lot of processes going on at once to ensure that your gaming experience is nothing but the best. However, many antivirus software mark these processes as potential threats and quarantine them resulting in some processes/applications not working. We have put together a guide on how to put steam as an exception in antivirus. Follow the steps here.
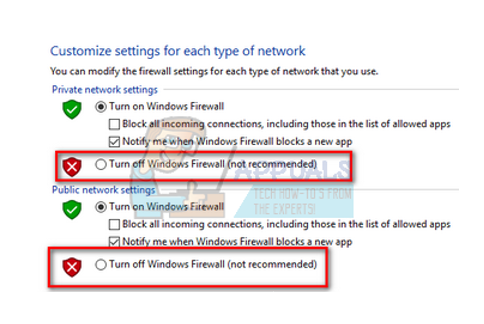
For disabling the Windows Firewall, follow the steps listed below.
- Press Windows + R button to bring up the Run application. In the dialogue box type “control”. This will open your computer’s control panel in front of you.

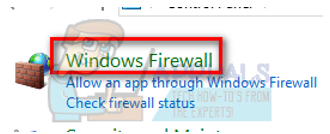
- On the top right there will be a dialogue box to search. Write firewall and click on the first option that comes as a result.
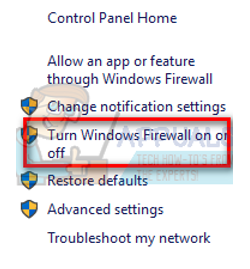
- Now at the left side, click the option which says “Turn Windows firewall on or off”. Through this, you can turn your firewall off easily.
- Select the option of “Turn off Windows Firewall” on both the tabs, Public and Private Networks. Save changes and exit. Restart Steam and launch it using the option Run as administrator.
Solution 6: Making a steam.cfg file
Although we are highly aware that some people can mess up their entire Steam installation by resorting to very technical methods, we will try our best to help you guide through this solution. In this remedy, we will make a steam.cfg file and add the parameters so Steam is forced to open in offline mode. Please note if your credentials are not saved in Steam, this method won’t work. In fact, if you don’t have your credentials saved (by checking the box Remember password on login window), there is no way around it. You have to get internet connection and check the box which says Remember my password.
- Navigate to your Steam directory. The default location for your directory is
C:/Program Files (x86)/Steam. Or if you have Steam installed in another location, you can browse to that directory.
- Once in the directory, create a new .txt file either by right clicking on the white empty space, or selecting New option present in the upper left corner of the screen.
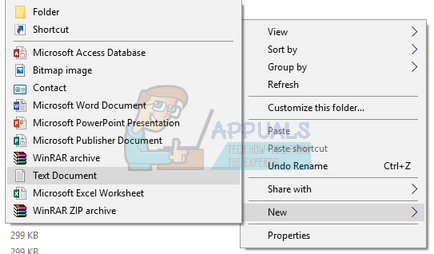
- Once you have created the .txt file, open and write the following lines into it exactly.
BootStrapperInhibitAll=enable
ForceOfflineMode=enable
Make sure that these are on separate lines.
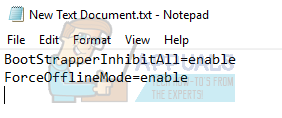
- Save changes and exit. Rename the .txt file as “steam.cfg”. Press ok and exit.
![]()
- Now start Steam and hopefully, you will be taken into offline mode.
Note: If you ever want to go to online again, you have to delete this file. What this .txt does is force Steam to open into offline mode, even if there is an internet connection present. You have to remove it and restart your computer if you wish to go online again. There is no remedy for this. Do read this carefully or you will be stuck/will have to reinstall Steam again.
Final Solution: Refreshing Steam files
If the error still persists at this stage, we have no choice but to refresh Steam files. Refreshing Steam files will reinstall Steam on your computer again. We will delete some of the configuration folders to ensure that they get renewed upon the installation and all the bad files get removed.
Please note that any interruption during the copy process will corrupt the files and you will have to re-download the entire content over again. Only proceed with this solution if you are sure that your computer won’t be interrupted.
- Navigate to your Steam directory. The default location for your directory is
C:/Program Files (x86)/Steam.
- Locate the following files and folders:
Userdata (folder)
Steam.exe (Application)
Steamapps (folder- only preserve the files of other games in it)
The userdata folder contains all the data of your gameplay. We don’t need to delete it. Furthermore, inside Steamapps, you will have to search for the game that is giving you problem and only delete that folder. The other files located contain the installation and game files of other games you have installed.
However, if there all the games are giving you problems, we suggest that you skip deleting Steamapps folder and proceed with the following step.

- Delete all other files/folders (except the ones mentioned above) and restart your computer.
- Re-launch Steam using administrator privileges and hopefully, it will start updating itself. After the update is complete, it will run as expected.