How to Setup Database Mail in SQL Server using Gmail?
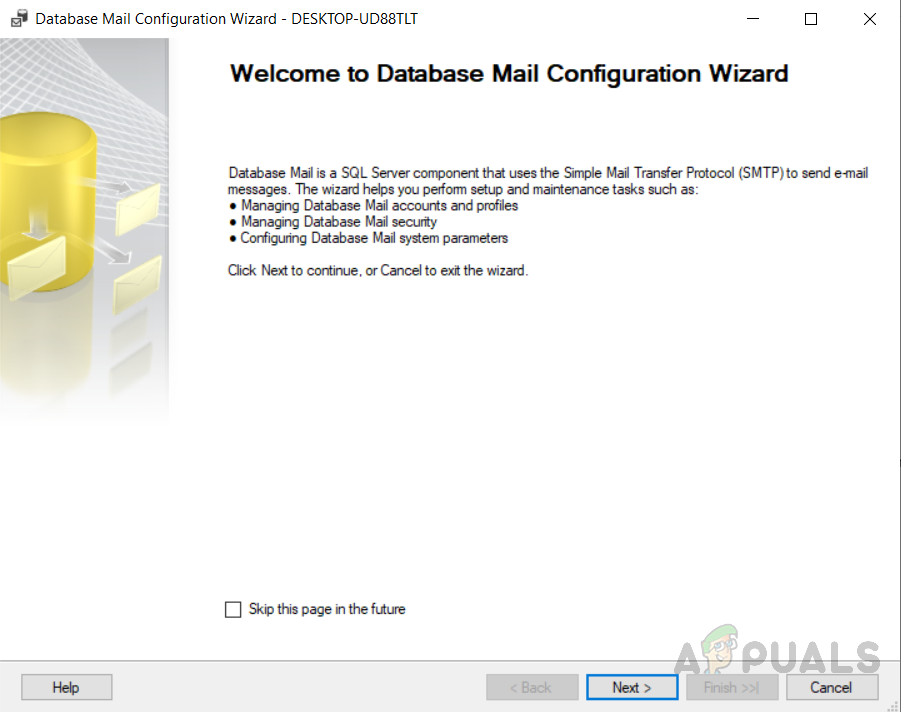
With SQL Server 2005 many things have been changed. In earlier versions in order to make it work, SQL Mail relied on having a MAPI mail client installed like Outlook. This has changed with SQL Server 2005 and later, and now the mail services are using an SMTP server to send emails, making it much easier to set up and maintain. In this article, we will learn how to set up database mail based on SMTP authentication in Microsoft SQL Server using Gmail with SQL Server 2005 and later.
As a user of the SQL server, you may want to receive automatic email updates on specified conditions from the database. You might have some jobs running on SQL Server. For example, you want to get alerts when any of the database objects are created or altered or any of your SQL jobs fail. Manually monitoring these jobs needs a lot of hectic work. So we need automatically generated email alerts which can be used in triggers to send you an email notification when needed. So in order to send alerts, we need to learn how to configure database mail using the Gmail account.
Setting up Database Mail in SQL Server using Gmail
There are two ways to set up Database Mail, either using the stored procedures included with SQL Server or using SQL Server Management Studio (SSMS). In this article, we will discuss how to configure Database mail using SSMS.
Setting Gmail account to enable less secure apps to be accessed.
In order to enable access to the less secure app in the Gmail account to follow the following steps.
- Click on the “Account settings” option
- Choose “Turn on” under “Allow for less secure apps”
Setting up SQL Server Mail Database to use Gmail by using GUI /SQL Server Management Studio
In this example, we will discuss steps to set up the configuration of the Database Mail. Follow these steps in order to configure the mail database to use Gmail using SSMS.
- Connect to the database using SQL Server Management Studio.
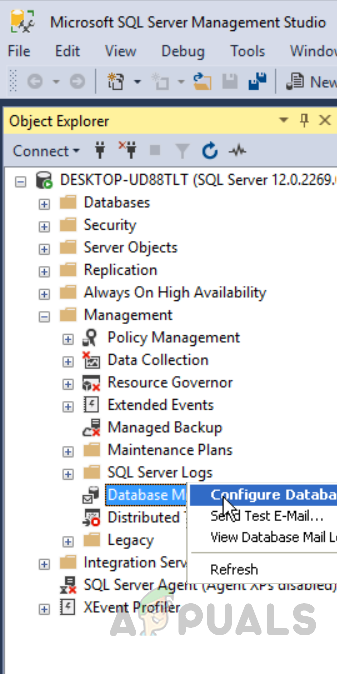
- Right-click on “Database Mail” under the “Management” tab in object explorer.
Configuring database - Now click on “Configure Database mail”. You will see “Database Mail Configuration Wizard”. Click on next
Database Mail Configuration Wizard - Select “Set up Database Mail by performing the following task” and click next
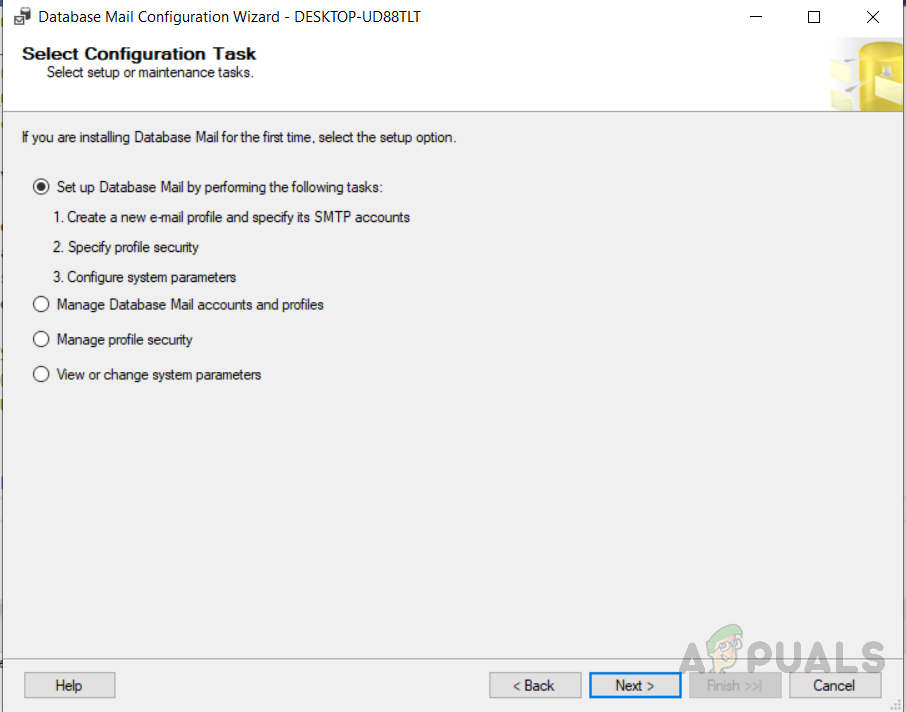
Select “Set up Database Mail by performing the following task” - If Database Mail has not been activated, a screen will be To activate it, simply click “Yes“. This display does not appear if it has already been activated.
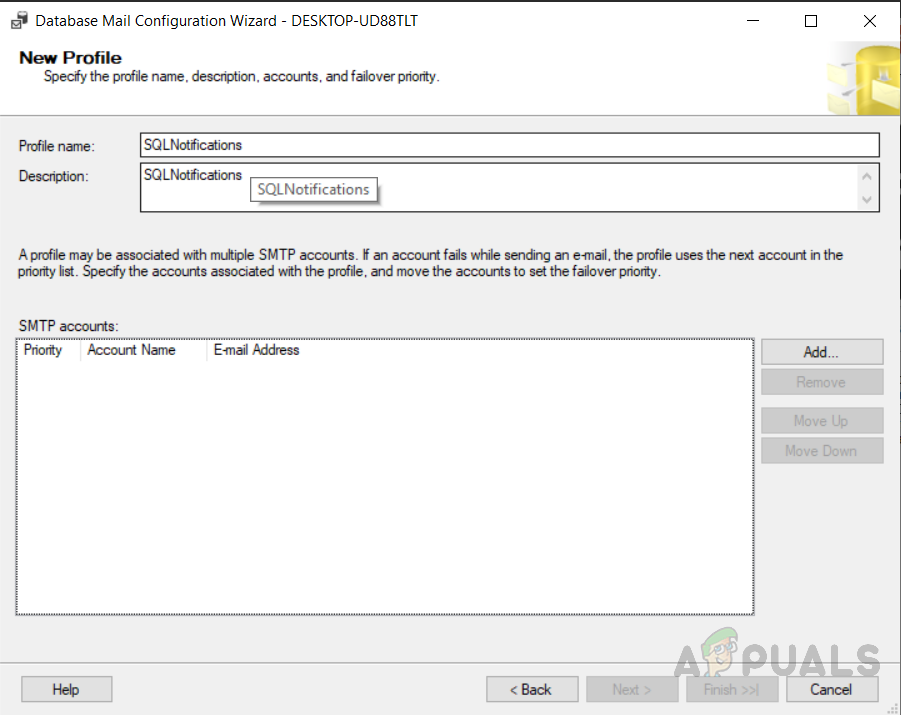
- Write the profile name and description and click “Add”. We are writing “SQLNotifications” as a profile name and description.
Creating a new profile - Now click on “New Account” following screen will appear. Fill out the details of the email you will be using to send emails from SQL Server. Check “This server requires a Secure Connection (SSL)” which is optional. When you are done click on “OK”.
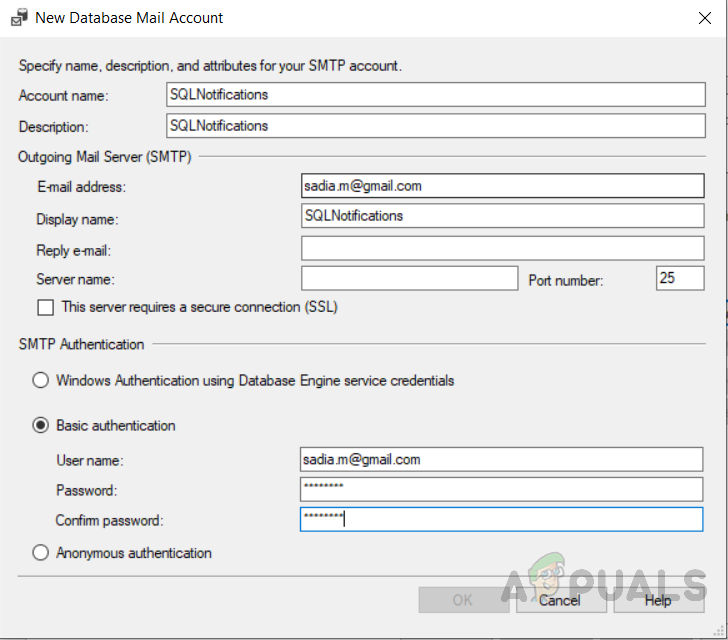
Fill out the details of email you will be using to send emails from SQL - You will be taken back to the previous screen after you have to select “OK”, and the SMTP information will now be shown for the account you’re just setting. Select “Next” to proceed.
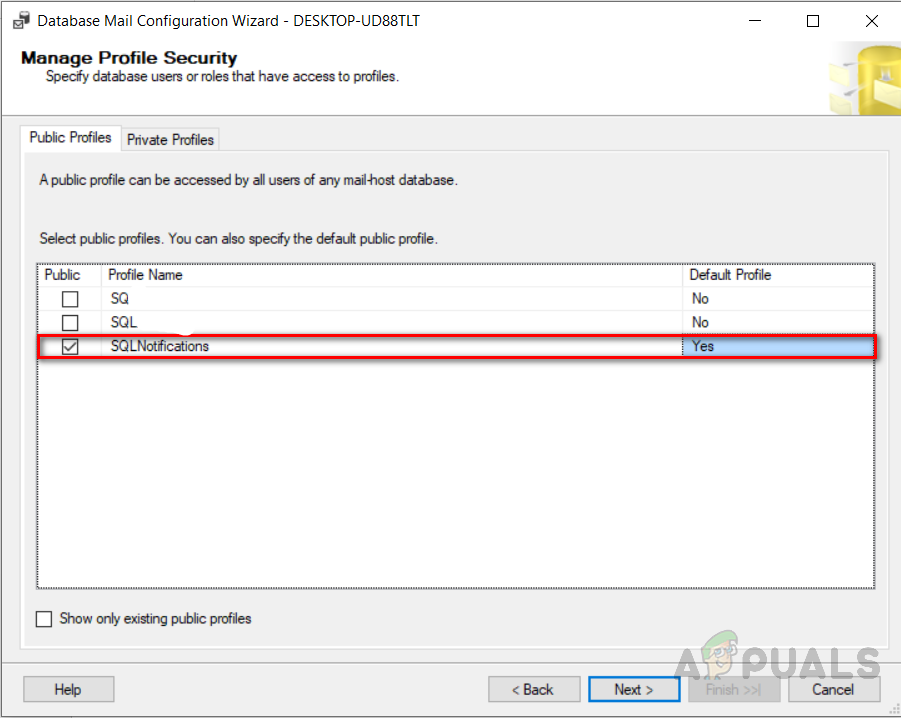
- A new profile has been created for you, now check “public” and select “yes” under “Default profile” option.
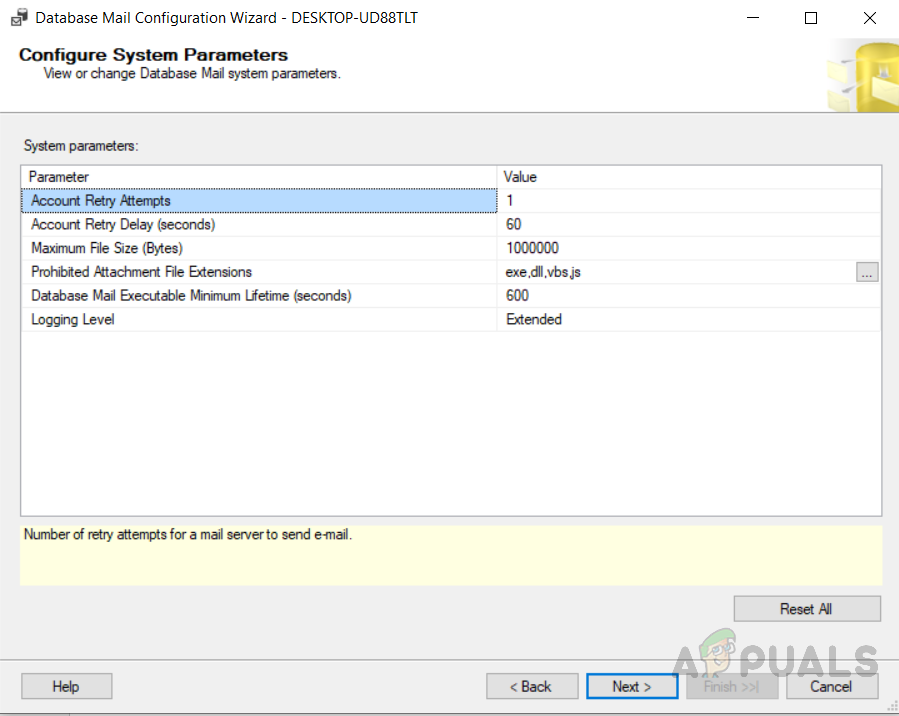
Manage profile security - Some additional parameters can be set in the following screen to control how mail is sent. You can make modifications or leave the defaults. Click “Next” when you’re done. A summary screen will appear showing you all the selected options. Click “Finish” or click “Back” to go back and make changes if required.
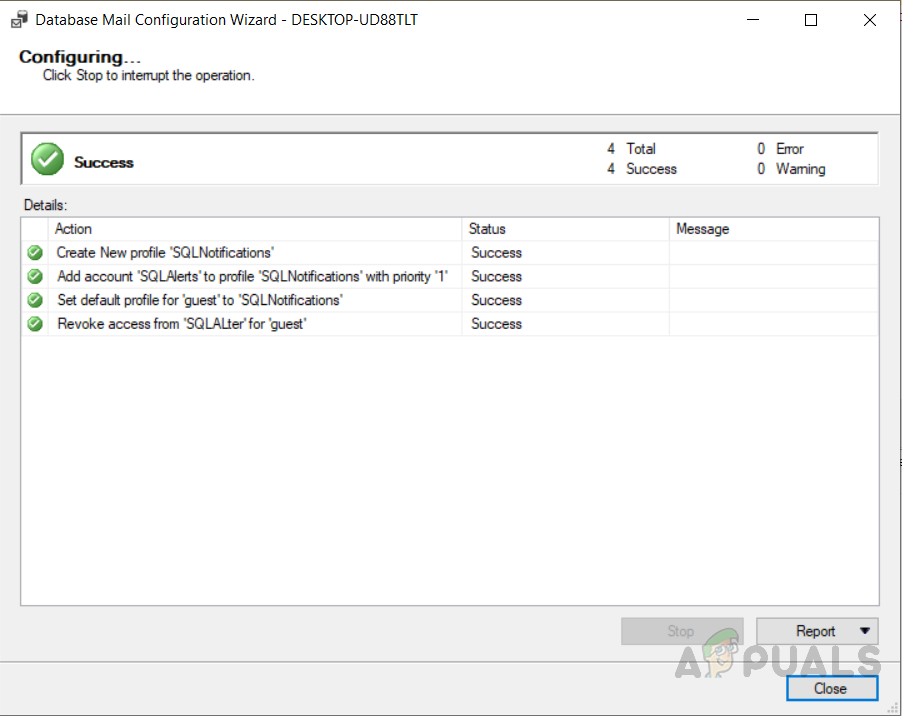
Configure system parameters - You enabled the server mail after successfully completing the above steps. The next screen will appear when you will select “Finish” which shows you the status of installing Database Mail. Please click “Close” to close this window when this is over.
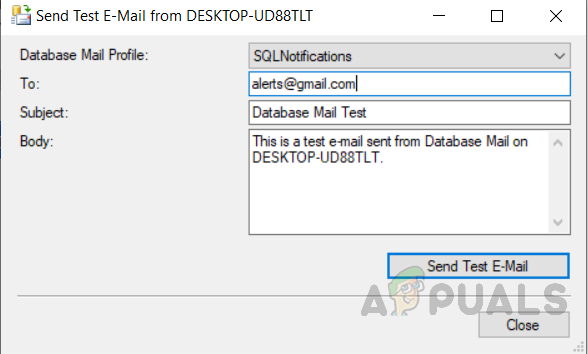
Profile created successfully - To test Database Mail, right-click Database Mail and choose “Send E-mail Test”.
The opening window for “Sending test email” - Fill in the email address of your choice in the “To:” tab and change the email body if you want, then click on “Send Email”
Send test email - Check the inbox and the email from “SQL Server Database Mail” can now be viewed.
- You will receive this message box after you have sent the email to verify whether or not the email has been If it was, you could either click “OK” to close the window or click “Troubleshoot” to begin the support details to see what the problem could be or how it could be solved.
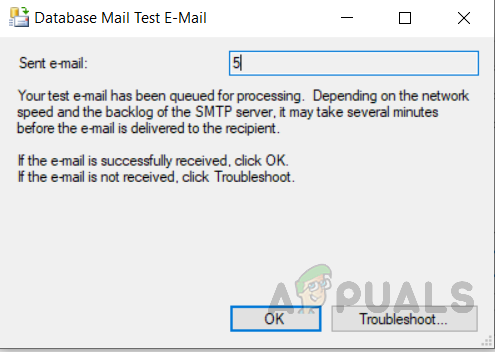
Click on “ok” if the email received else troubleshoot
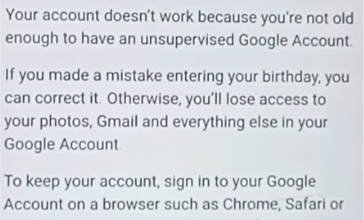
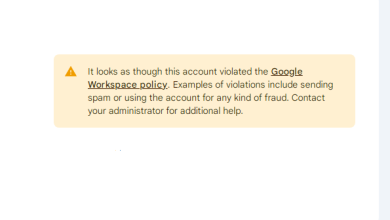
This option is not supported anymore, is there a workaround??
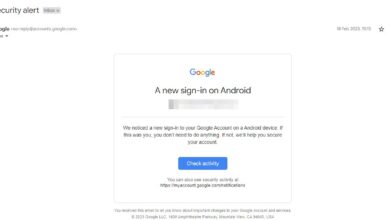
Less secure apps & your Google Account
To help keep your account secure, from May 30, 2022, Google no longer supports the use of third-party apps or devices which ask you to sign in to your Google Account using only your username and password.
Important: This deadline does not apply to Google Workspace or Google Cloud Identity customers. The enforcement date for these customers will be announced on the Workspace blog at a later date.
For more information, continue to read.