How to Extend C:\ Drive In Windows 10
In order to back up data and for safety reasons, you are always advised to partition your hard disk. These drives will then act independently of each other. This way, when one drive becomes corrupt, the other partition will still be perfectly okay saving invaluable data unless the whole hard disk fails.
However, this poses a limitation on drive C: Soon or later, if you don’t manage your space well, you will start getting messages that your drive C is almost full. When your drive is eventually full, your system will become painfully slow. Most programs run by creating temporary files in your system, and when they cannot find available space, your computer freezes or slows down. The remedy is to free space or repartition the drive C: to allocate more space to it.
If you have unallocated space (this can be created by deleting a drive in the disk management tool), you can easily add it to your system partition. To do this, we have prepared some of the best ways for you. You can create an unallocated space by shrinking a volume or deleting a volume (partition). If method 1 does not work for you, choose either of the remaining methods.
Method 1: Use the inbuilt disk management tool
Windows comes with a disk manager that you can use to extend your system volume by adding the unallocated space to it. The built-in partitioning utility has limitations, however; it can only expand if the unused space is immediately adjacent to the C: partition (usually to the right), otherwise the extend option will not be available.
- Press Windows Key + R to open run
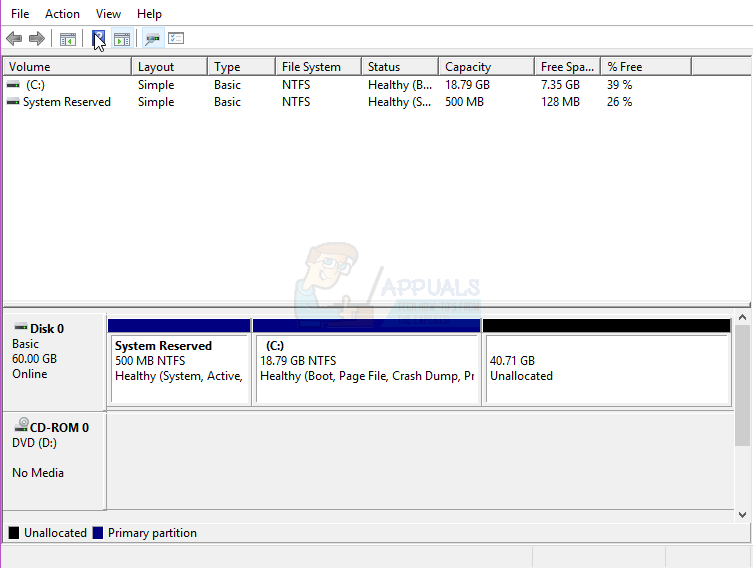
- Type “diskmgmt.MSC” and hit enter to open the disk manager utility
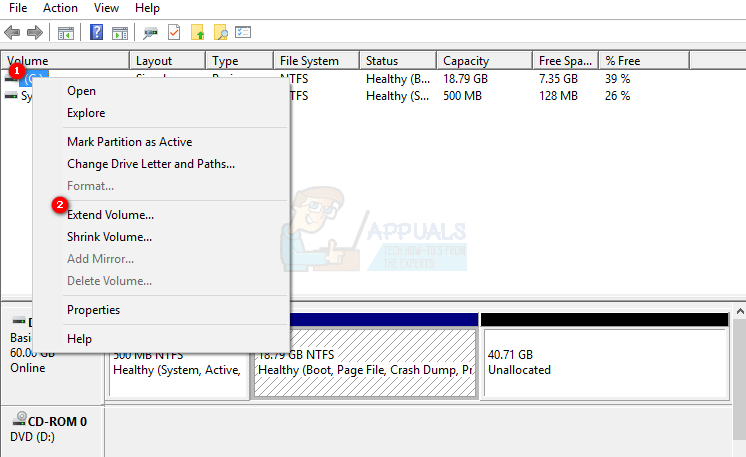
- Right-click on the partition (C :\) you want to Extend into the now unallocated partition and click on ‘Extend Volume’.
- Click on Next; this will open a window with the title ‘Welcome to the Extend Volume Wizard window’
- Select the amount of space in MB you want to use from the unallocated partition to use to extend your drive C: partition.
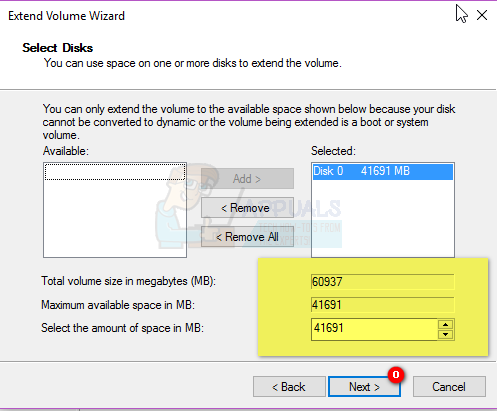
- If you want to make them one partition again, then select all of the available space for the unallocated disk. If there were other drives with free unallocated space, they would be shown under the available selection.
Note: It is advised that you do not extend a volume on one disk with free space from another disk. If one of the drives has a hardware failure, then all the data on that partition (volume) will be deleted.
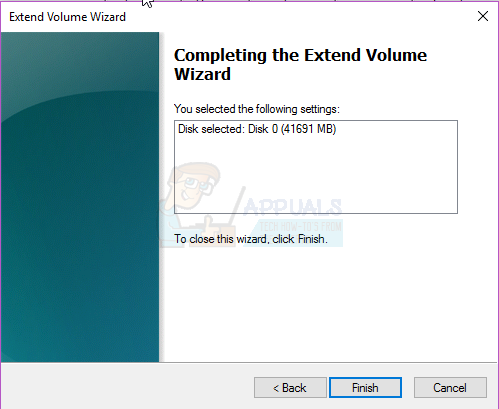
- Click on Next and then click on Finish in the ‘Completing Extend window’. You will now see the Disk Management console with the new extended partition volume ready to be used.
- Close Computer Management. Open Windows/File Explorer to see your new extended partition volume. You should have more space now.
Method 2: Use AOMEI Partition Assistant
To escape the limitation of the inbuilt disk manager, you can use a third-party application like AOMEI partitioning tool. AOMEI Partition Assistant will allow you to move the unallocated space such that it is adjacent to your drive C: You can thereafter add the unallocated space to drive C:
- Download AOMEI Partition Assistant Standard Edition here, or if you need more advanced features, download AOMEI Partition Assistant Professional (PA Pro) here.
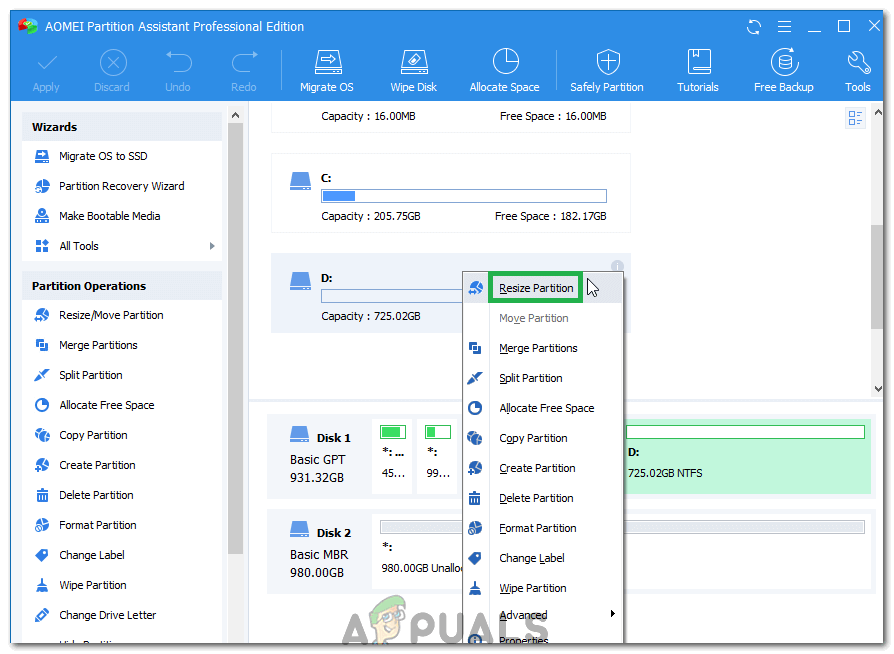
- Install and launch AOMEI Partition Assistant Professional
- After the tool loads, right-click on the drive that is immediately before the unallocated space, e.g. right-click on drive D:
- Select “Move Partition“.
Move Partition - In the pop-up window, click and drag D: partition rightwards. Click “OK”.
- You will find that the unallocated space was moved after drive C: partition. If you have more than 1 drive between C: and the unallocated drive, repeat steps 3 – 5 until the unallocated space comes after drive C:
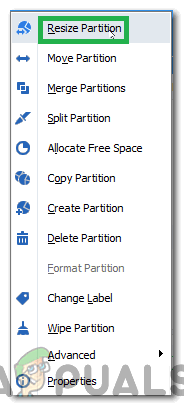
- Right-click on system partition C: and select “Resize Partition”
Selecting “Resize Partition” option - In the pop-up window point your mouse at the right-hand end of your drive C: till two arrows pointing opposite directions appears. Drag right handle of C: partition rightwards to add unallocated space into the partition.
- Click “OK” to preview the changes. To save changes, click “Apply” on the toolbar. Other buttons, “Undo”, “Redo” or “Discard” are used for correction.
- After several minutes, you will find that adding unallocated space to system partition is done.
- Restart your PC if prompted to
- Open Windows/File Explorer to see your new extended partition volume. You should have more space now.
Method 3: Use EaseUS Partition Manager
EaseUS offers the simplest way to extend your partition. You don’t have to move any partition. You just have to choose the partition to extend and the software will automatically find unallocated space that you can then use to extend your drive. You can also use the merge tool to join two drives.
- Download EaseUS partition tool from here
- Install and launch it. Right-click the system partition C: and choose “Resize/Move partition”
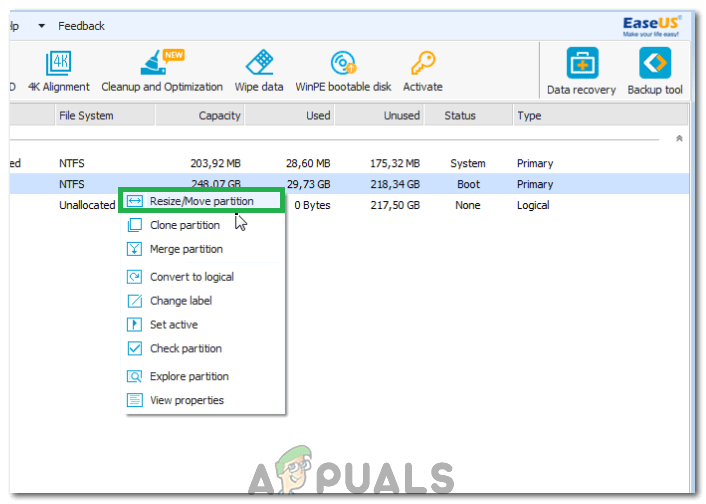
Clicking on the “Resize/Move Partition” option - On the pop-up window that appears drag the right side of C: drive to the right to add the unallocated space into C drive. To merge it into one, drag all the way to the right. Sometimes the unallocated space may be to the left of drive C: in which case, you will have to drag the resizing bar to the left.
- Click OK to preview changes. You can use the ‘Undo’ and ‘Refresh’ buttons to undo changes
- Click ‘Apply’ and wait for the unallocated space to be added to drive C: You can refresh after it is done to make sure unallocated space was added to drive C:
- Restart your PC if prompted to
- Open Windows/File Explorer to see your new extended partition volume. You should have more space now.
You are always advised to take a system restore point of your PC before attempting changes on your HDD. You might not get your data and partition configuration back, but your operating system can be restored if any changes are made to the system.
uh…it seems like I have found a little mistake in your article. Two “Method 2”? Anyway, this tutorial illustrates the way to extend system drive clearly. AOMEI Partition Assistant is my favorite. Bravo!