How to Repartition a Hard Drive on Windows
There are many Windows users out there who don’t even know it’s possible to actually repartition their computers’ hard drives. Most people just leave the partitions of their hard drives as they are from the beginning, never making any alterations to them. However, not only is it possible to repartition a hard drive on the Windows Operating System but Windows even has a built-in utility that can be used specifically for this purpose. Windows users can repartition their hard drives using nothing but Windows’ built-in hard disk management utility on all versions of Windows that are currently supported by Microsoft.
When you repartition a hard drive, what you basically do is that you shave free space from the existing partitions of the hard drive you want to repartition. The free space you shave off is turned into unallocated space by Windows – this unallocated disk space is not part of any of the partitions of your hard drive, and can be used to create a new partition on the hard drive altogether. Repartitioning hard drives doesn’t even have to involve deleting existing partitions (unless you want to) or getting rid of the existing data on the partitions of your hard drive as you can simply repartition the drive using nothing but the free disk space on it.
How to Re-Partition a Hard-Drive in Windows?
The process you need to go through in order to repartition a hard drive on Windows is quite similar to all currently supported versions of Windows. To repartition a hard drive on Windows, you need to:
- Perform a general cleanup of the hard drive you want to repartition. Don’t delete anything of importance – just get rid of stuff you don’t need such as unused files or data in your Recycle Bin. Doing so maximizes the amount of free disk space you will have to work with when you repartition the disk drive.
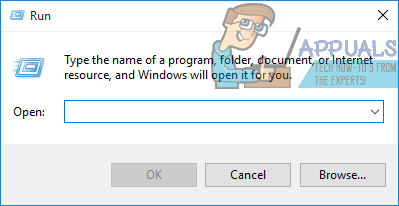
- Press the Windows Logo key + R to open a Run dialog.
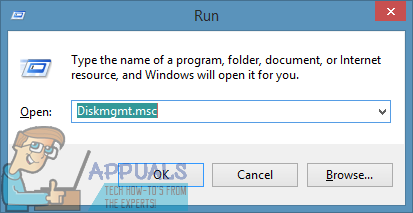
- Type diskmgmt.msc into the Run dialog and press Enter to launch Windows’ native Disk Management utility.
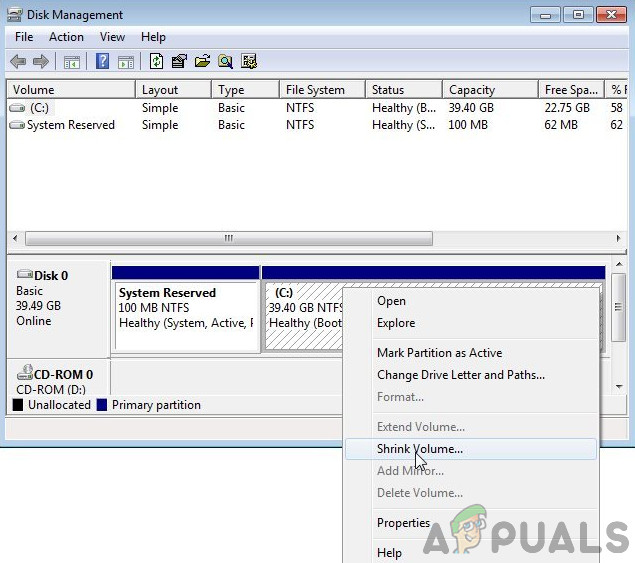
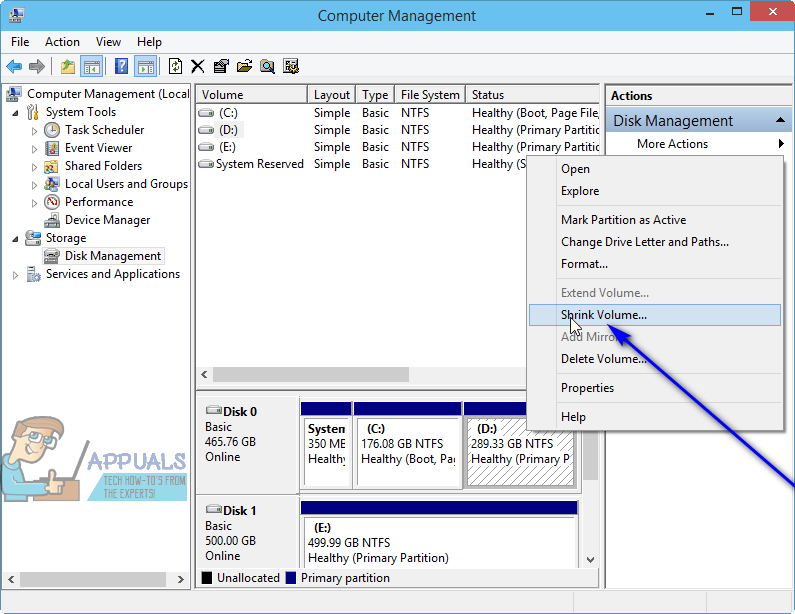
- Right-click on an existing partition on the hard drive you want to repartition – be wary though, as this cannot be the partition of the drive Windows is installed on or a partition or drive that is not on the same drive as the one you want to repartition.
- Click on Shrink Volume… in the resulting context menu.
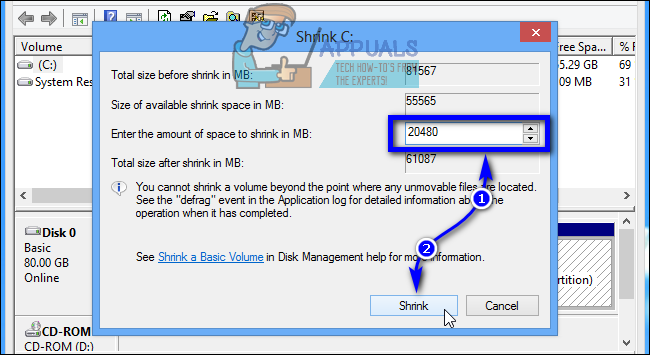
- Type the amount of free disk space (in MBs – 1 GB is equal to 1024 MBs) you want to shave off the selected partition into the Enter the amount of space to shrink in MB: field and click on Shrink. The amount that is already in this field by default is the maximum amount of disk space you can shave off the selected partition – you can shave off a smaller amount, but you can’t shave off a larger amount.
- The utility will shrink the selected partition by the specified amount, and the specified amount of disk space will then show up in the utility as Unallocated space. If you would like to shave off more free disk space from other partitions of the hard drive as well, simply repeat steps 4–6 for each of the other partitions that you want to shrink.
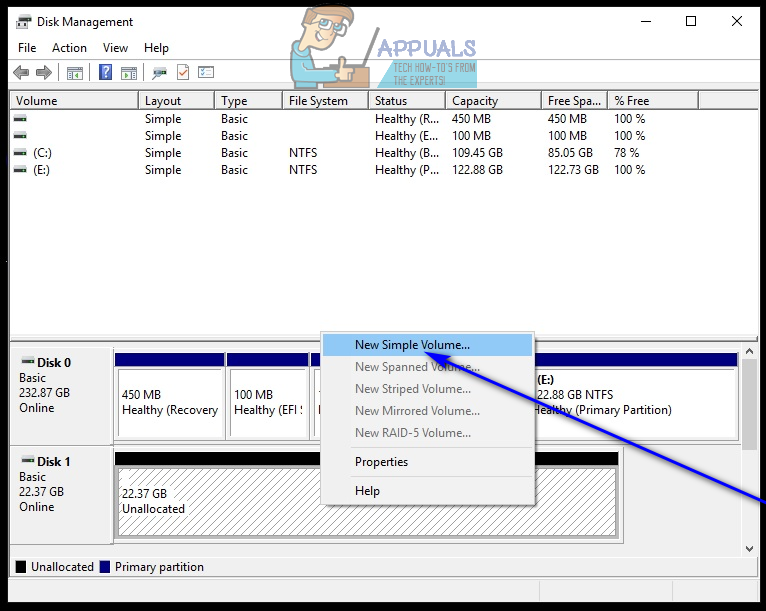
- Right-click on the Unallocated space you see and click on New Simple Volume…
- Click on Next.
- Type the amount of disk space you want the new partition you create to have into the Simple volume size in MB: field. The value in this field by default is the maximum amount of disk space the new partition can have – if you specify a value less than this, the remaining disk space will remain Unallocated space (it is recommended that you do this only if you plan on creating yet another new partition on the same drive in the future).
- Click on Next.
- Follow the onscreen instructions and prompts (choosing a drive letter for the new partition, for example), and click on Next.
- Make sure the Format this volume with the following settings option is enabled (meaning that it is checked).
- Ensure that NTFS is selected as the file format the partition will be formatted in.
- Click on Next.
- Click on Finish, and then wait for the Disk Management utility to turn the selected Unallocated space in to a new partition on the hard drive. The amount of time this operation takes depends on just how fast your computer is and just how large the partition you are creating is. The Disk Management utility will, however, display the progress of the drive’s creation to you in real-time.
- Once the new partition has been created, it will be assigned the drive letter you selected for it. At this point, you can go ahead and close the Disk Management utility as you have succeeded in repartitioning your hard drive. Alternatively, if you chose to not use all of the Unallocated space for the new partition in step 10 and still have some Unallocated space left on the drive, you can go ahead and create however many other new partitions you want to create on the drive using the Unallocated space left on it.


