How to Pixelate an Image on Desktop & Mobile [Easy Steps]
Editing an image has become a part of our everyday lives. Whether it’s for our socials, for work, or for any other reason, its guaranteed that you’ll find yourself editing an image. One of the most common aspects of editing is pixelating an image, which is the topic of today’s discussion.
Table of Contents
- What Does Pixelating an Image Do?
- Why Would I Need to Pixelate my Image?
- Pixelating an Image on Desktop (Windows/macOS)
- Step 1: Open ImgTools’ blur tool on your browser
- Step 2: Upload your image
- Step 3: Selecting the Pixelate option
- Step 4: Highlighting the area to be pixelated
- Step 5: Pixelating the entire image
- Step 6: Determining the intensity of pixelation
- Step 7: Downloading your pixelated image
- ↪ Alternative Method for Windows
- ↪ Alternative Method for macOS
- Pixelating an Image on Mobile (Android/iPhone)
- Step 1: Signing in to Picsart
- Step 2: Granting permissions
- Step 3: Selecting the image
- Step 4: Using the Selection tool
- Step 5: Highlighting the area to be pixelated
- Step 6: Choosing Effects
- Step 7: Choosing Pixelate in Blur section
- Step 8: Specify the degree of pixelation and confirm the pixelation
- Step 9: Confirm the edits
- Step 10: Save your pixelated image
- ↪ Alternative Methods
- Conclusion
What Does Pixelating an Image Do?
When you pixelate an image, you increase the size of the individual pixels present in an image. This causes the image to look blurry and it becomes incomprehensible in most cases. The larger the size of the pixel, the more incomprehensible and blurrier the image becomes. This allows you to hide unwanted details on an image or hide the whole image altogether.
READ MORE: How to Create Stunning AI Images on MidJourney ➜]
Why Would I Need to Pixelate my Image?
Here are some common reasons why you might want to pixelate your image:
- Censor sensitive details present in the image: If you’re sending images of sensitive documents like your government-issued ID, your passport, or your credit/debit card, it would make sense to hide some of the details on theme e.g. your account number, or your ID number etc.
- Hide irrelevant details in the background: If you’re sending a photo to your work group chat, or any other chat, and want to hide unnecessary stuff in the background, you’ll want to pixelate it.
- Turn NSFW into SFW: If you’ve come across a funny meme that’s a bit NSFW, just pixelate it so that it becomes more SFW.
Pixelating an Image on Desktop (Windows/macOS)
After going through multiple tools and testing them rigorously, we’ve identified the best solution possible. Online image tools are both accessible and free to use, while getting the job done quickly and that’s why we’ve picked one. This method works on both Windows and Mac.
Here’s how you can pixelate an image on your desktop device:
Step 1: Open ImgTools’ blur tool on your browser
Open up your browser and head on over to ImgTools’ blur tool.

Step 2: Upload your image
Upload the image you wish to pixelate by clicking on the Browse button and browsing through your device.

Step 3: Selecting the Pixelate option
Once the picture is uploaded, click on the Effect drop-down and select Pixelate.

Step 4: Highlighting the area to be pixelated
Now, select the part of the image you wish to pixelate by holding down the left-click and dragging the cursor across the image. By default, the selection will be made in a rectangular form, but you can change it by clicking on the Circle option present on the Toolbar. You can highlight multiple areas on the image which need to be pixelated.

Step 5: Pixelating the entire image
In case, you want to pixelate the entire image, just select the whole image by dragging the cursor diagonally from a top corner to a bottom corner, or vice versa.

Step 6: Determining the intensity of pixelation
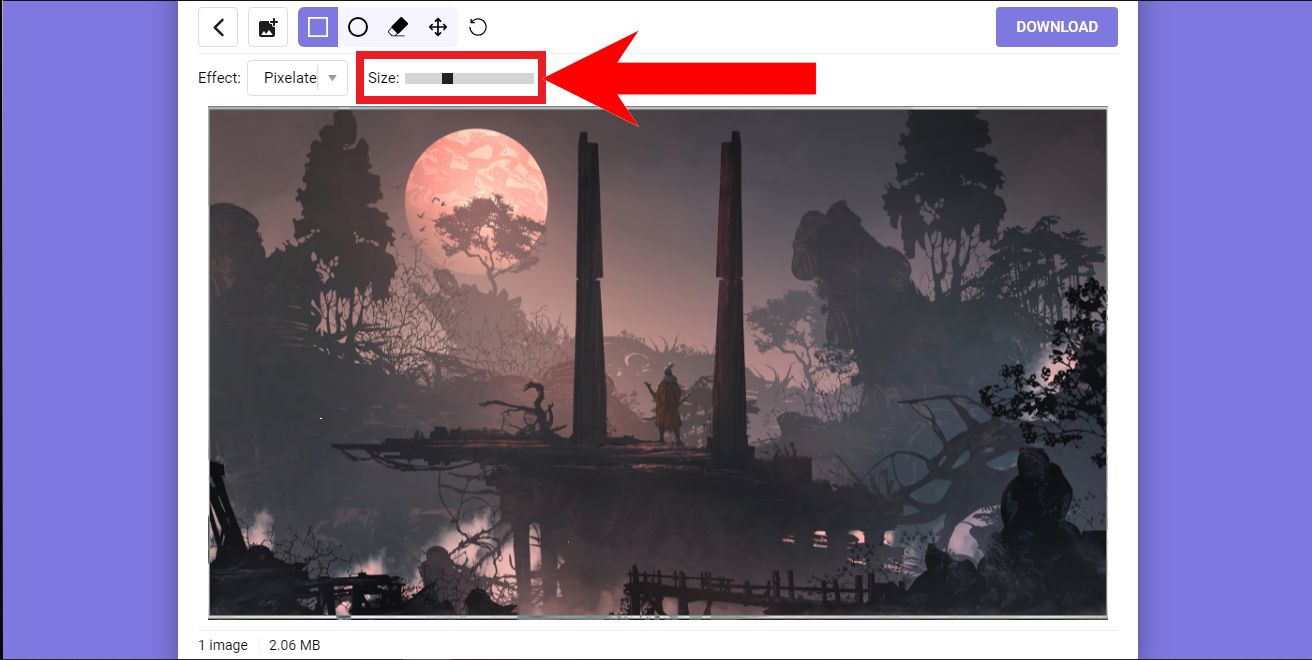
You can use the Size slider to determine how much pixelated the area you’ve selected needs to be.
Step 7: Downloading your pixelated image
Click on the Download button on the top-right corner of the editing area. A pop-up will appear confirmin that the image is ready to download. Click on Download to download your pixelated image.

↪ Alternative Method for Windows
An alternate way to pixelate an image on Windows devices is to use the built-in Paint app. Paint is one of the most basic image editors on any Windows device, and it can be used to pixelate an image by selecting an area, or the whole image and resizing it to a fraction of its original size. This results in a pixelated effect.
Here’s how you can do this:
- Open up File Explorer and navigate to where your image is stored.

Open up the directory where your image is stored - Right-click on the image and click on Edit.

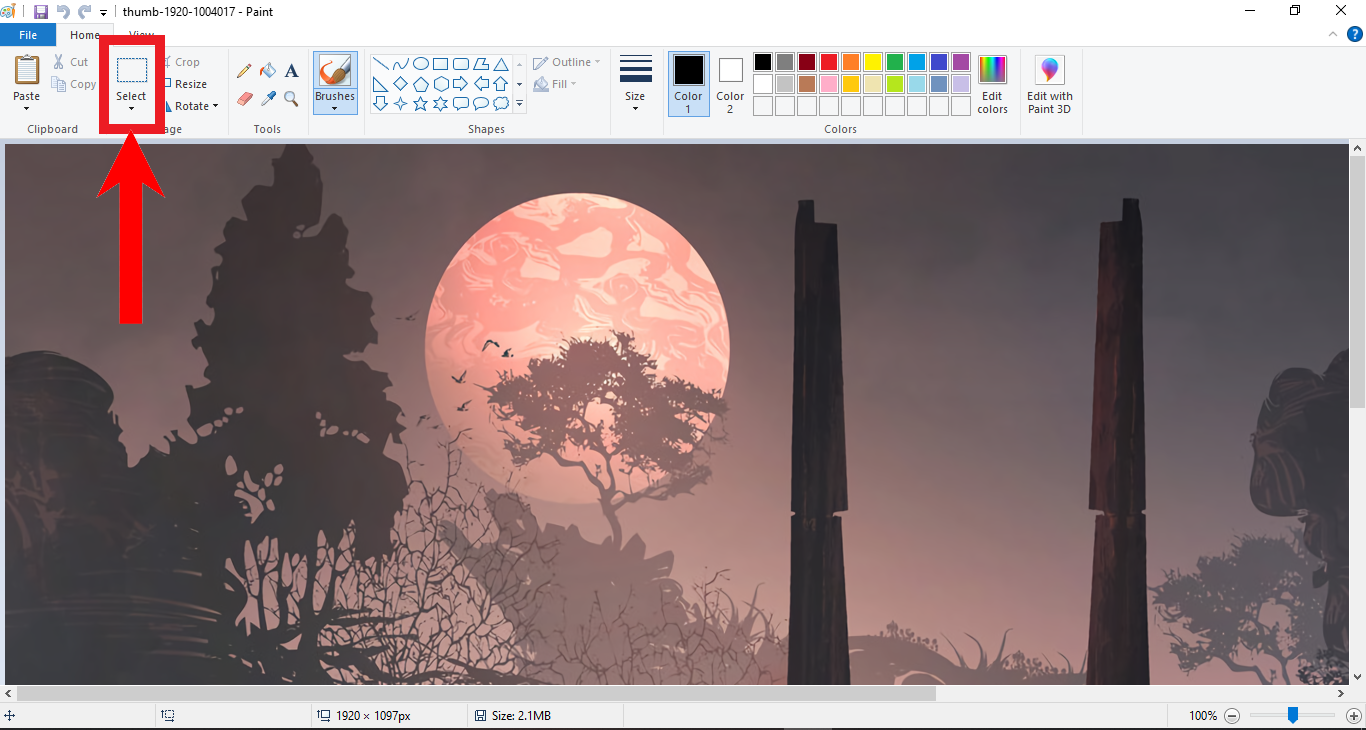
Right-click and select “Edit” - The image will open up in Paint. From the Toolbar, click on the Select tool.
Click on the “Selection” tool - Now, hold down the left-click and drag the cursor over the area that you wish to pixelate.

Select the desired area - Once you’ve done this, click on the Resize option next to the Select tool.

Click on the “Resize” tool - In the dialog box that appears, enter the value 10 in the Horizontal and Vertical field of the Resize section and click on OK. (You’re free to use any other value; the lower the value the more the pixelation.)

Enter your desired values and click on “OK” - The area you selected earlier will now have shrunk down (the lower the value, the smaller the area becomes), leaving a large white space that shows the area it occupied. Drag one of the corners to return the portion to its original size.

Use the corner handles to restore the portion’s original dimensions - Once enlarged, you’ll see that it has become pixelated.

The area has become pixelated - Finally, click on File and click on Save from the drop-down to save your changes (choose Save As if you want to save the pixelated version as a separate image).

Click on “File” and select “Save”
In case you want to pixelate the whole image, just use the Select tool to highlight the whole image from a top corner to a bottom corner in a diagonal manner.

↪ Alternative Method for macOS
On macOS, you can use the Retouch feature in the built-in Photos app to hide sensitive stuff in your images, although it’s worth noting that this is not technically a pixelating tool. The Retouch features tries to hide the area you’ve highlighted by blending it in the background as best as it can.
To use the Retouch feature, follow these instructions:
- Open up the Photos app on your Mac.

Open up the Photos app on your Mac - Click on File. From the drop-down, click on Import.

Click on “File” and then click on “Import” - Browse and select your image.

Select your image from your files - After the image has finished loading, double-click on it and click on Edit.

Click on “Edit” on the top-right corner - From the toolbar on the right, click on Retouch. Choose any size you want.

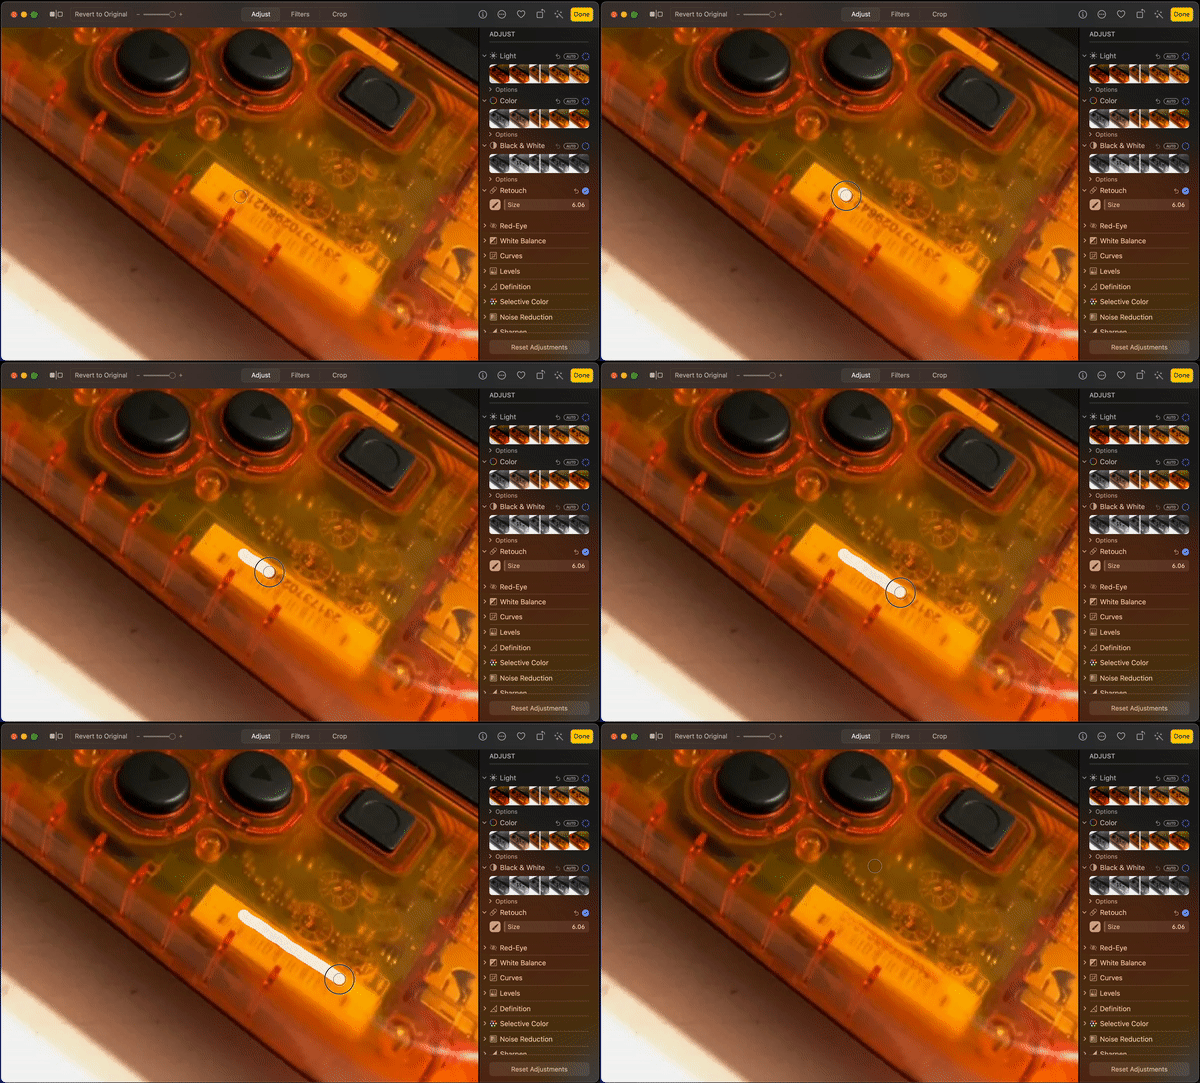
Click on the “Retouch” tool on the right toolbar and adjust the size according to your preference - Now, highlight the area on the image you want to hide. The tool will try to hide that part of the image, giving the impression of a smudge, or as if something has been erased.
This is how the Retouch tool works - Finally, save your image.
Pixelating an Image on Mobile (Android/iPhone)
Although ImgTools’ blur tool works great on mobile devices, on the rare occasion you find yourself pixelating images on a regular basis, there are several third-party apps that you can use offline.
Picsart is a free image editing app available for both iPhone and Android. It has wide assortment of tools that allow you to edit your photos and bring out their maximum potential.
Here’s how you can pixelate your photos using Picsart:
Step 1: Signing in to Picsart
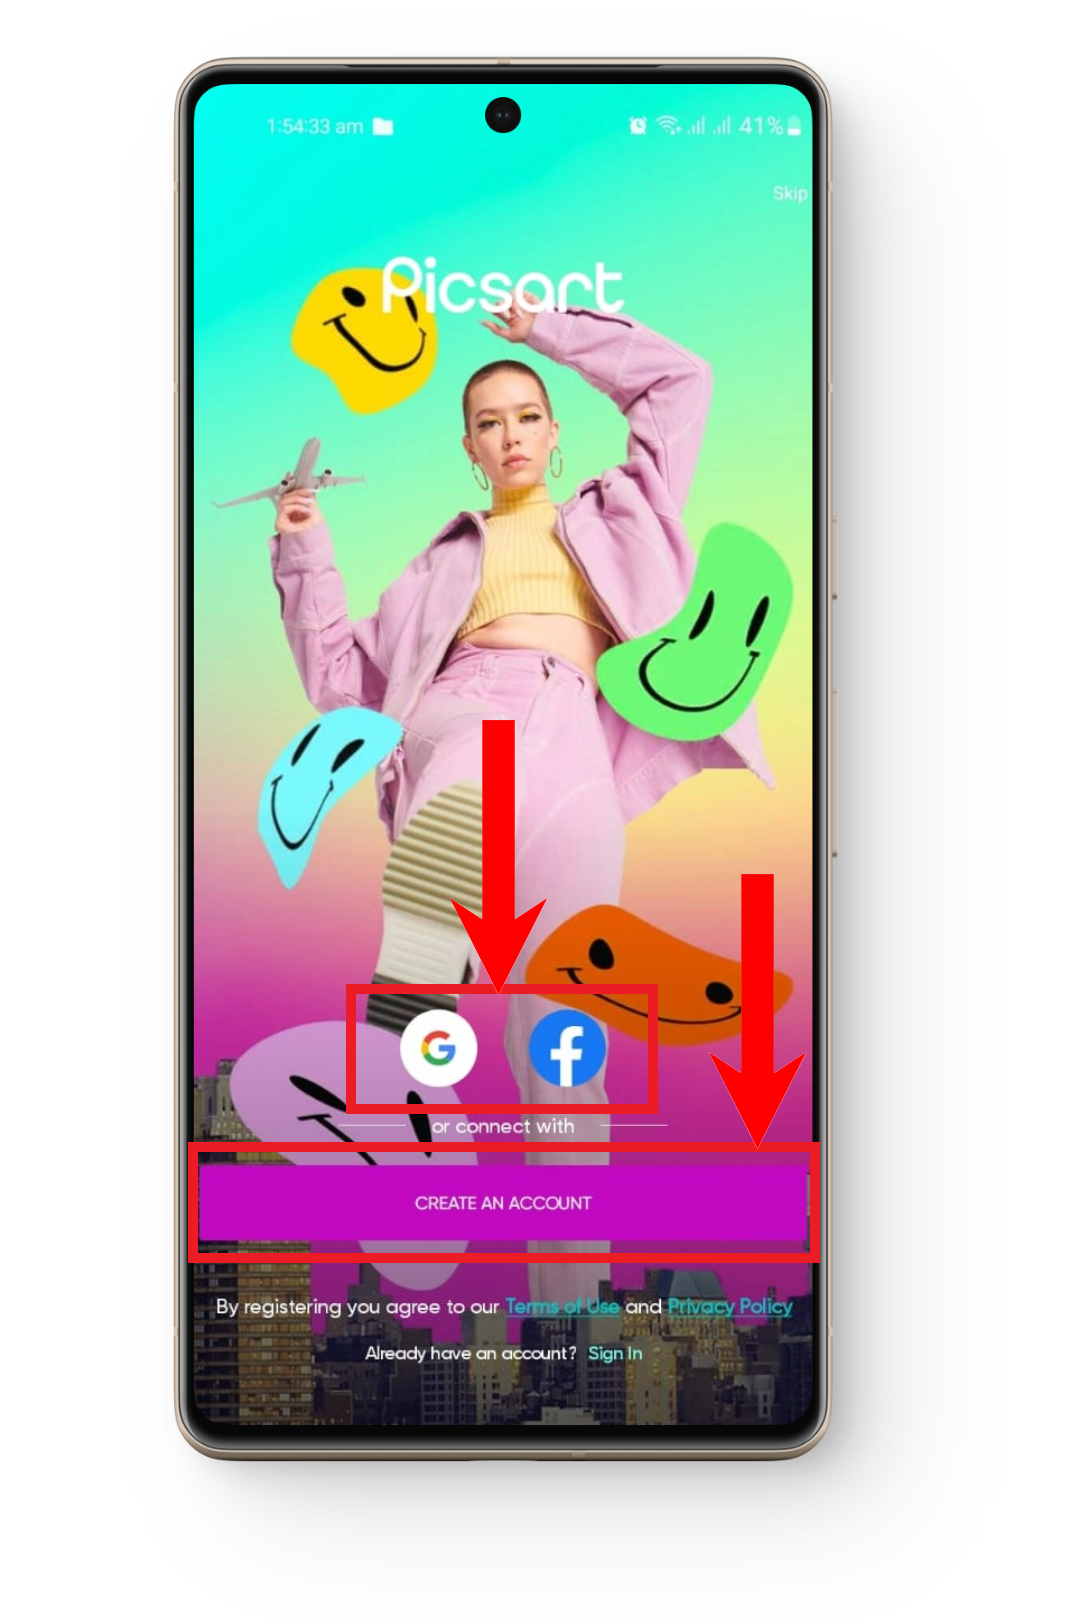
First off, open the Picsart app. Create a Picsart account or use your Google or Facebook account to sign-in.
Step 2: Granting permissions
Next, allow it access to your phone’s media and storage.

Step 3: Selecting the image
On the homepage, tap on the Plus icon in the bottom center of the screen and browse around the image to be pixelated.

Step 4: Using the Selection tool
Once you’ve selected the image, you’ll be directed to the editing page. Tap on Tools. From the options present, choose Selection.

Step 5: Highlighting the area to be pixelated
Now, simply highlight the area you want to pixelate using your finger. A rectangle will form according to your selection. You can also use other options like the Circle or Brush to highlight the area according to your requirements. In case you want to pixelate the entire image, use the Selection tool and highlight the image from a top corner to a bottom corner in a diagonal fashion.

Step 6: Choosing Effects
After you’re done selecting the area, tap on the Effects option.

Step 7: Choosing Pixelate in Blur section
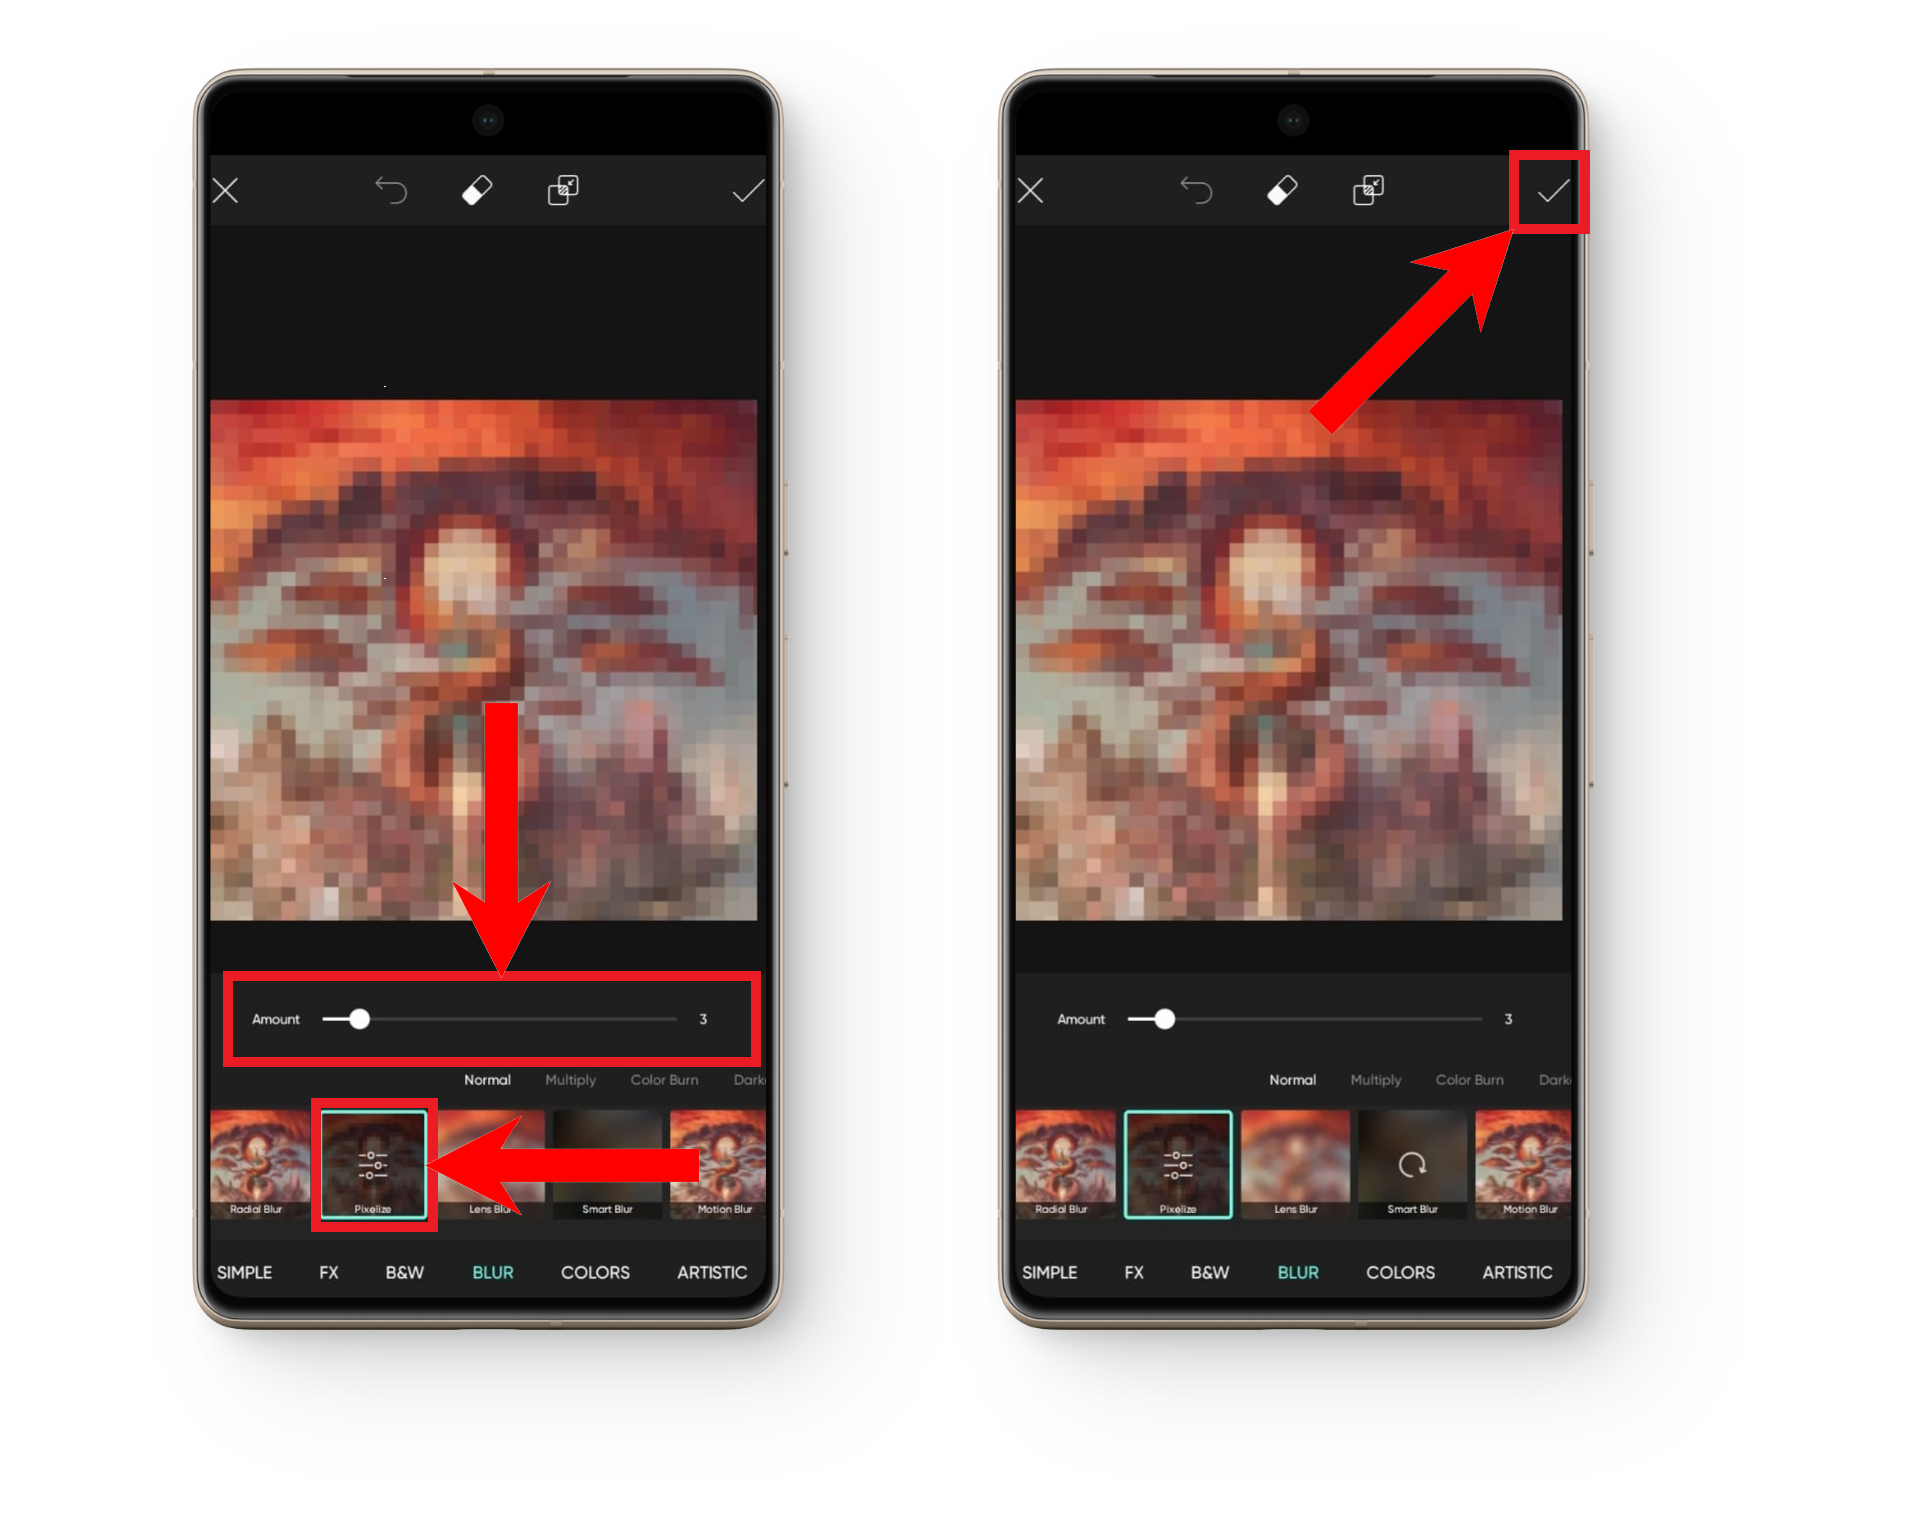
From the various effects offered, tap on the Blur section and select the Pixelate option.

Step 8: Specify the degree of pixelation and confirm the pixelation
Upon selecting the Pixelate option, the area you highlighted earlier will be shown pixelated. Tap on the Pixelate option again to access a slider that can determine the intensity of the pixelation. Choose the intensity as per your requirements. Tap on the tick mark on the top-right corner when you’re done.
Step 9: Confirm the edits
When you’ve made other edits that you want, tap on the tick mark on the top-right corner again to confirm your changes.

Step 10: Save your pixelated image
Finally, tap on the Save option. Your pixelated image will be saved as a separate image and you can find it in your phone’s gallery.

↪ Alternative Methods
While the iPhone Gallery also offers the Retouch feature, it is by no means a proper pixelation tool. Google Photos on Android offers a blur tool, although it does not create the pixelation effect. Furthermore, it does not allow you to blur out specific parts and also requires a Google One subscription.

READ MORE: How to Identify Plants Using Google Lens & Its Best Alternatives ➜
Conclusion
There are countless photo editors available, along with multiple online tools for image editing dedicated to a sole function. What tools you use don’t matter; they should pixelate the image in such a way that the hidden areas/image are incomprehensible and undecipherable when exposed to any kind of reverse-engineering.
FAQs
Pixelation refers to the process of increasing the size of each individual pixel present in an image.
You might need to pixelate images to remove unwanted stuff in the background, hide sensitive information present in the image or either block out NSFW images.
Of course. There are countless photo editing software and online tools available and its impossible to list each and everyone, Therefore, yes, you can use other tools to pixelate your image.


