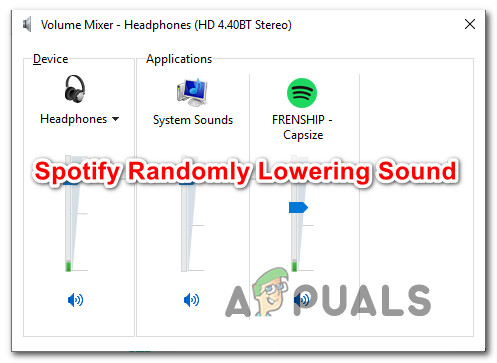
How to Fix ‘Spotify Randomly Lowering Sound’ on Windows 10
Several users have been reaching us for assistance after noticing that their volume automatically goes down while they’re listening to Spotify. The vast majority of user reports that we identified about this issue are occurring on Windows 10. Some users have discovered that if they stand still without making any sounds, the volume will return back to normal after a couple of moments.
What is causing Spotify to randomly lower sound?
We investigated this particular issue by looking at various user reports and the repair strategies that are commonly being used to fix this particular issue. As it turns out, there are several potential different culprits that are known to cause this particular issue:
- Volume normalization is ON – The desktop version of Spotify includes a feature meant to make every song played at the same volume. But as it turns out, the feature doesn’t always work as intended, as the adjustment is sometimes made after the song begins playing. If this scenario is applicable, you should be able to resolve the issue by disabling Volume Normalization from the Settings menu of Spotify.
- Windows is adjusting the volume during communications – Windows 10 and older versions alike include an option that will automatically lower the volume while audio is being passed around. The Spotify app (especially the UWP) version is known to be affected by this feature. In this case, you should be able to resolve the issue by disabling automatic volume adjustments from the Communications tab.
- Corrupted or updated headset driver – If you’re encountering the issue with a headset, it’s likely that you’re facing a driver issue. Several affected users finding themselves in the same situation have reported that the issue was fixed after they updated or installed the headset driver.
- Sound enhancements are enabled – Built-in Windows sound enhancements or 3rd party equivalents can also lead to this particular issue. Some audio enhancements are known to conflict with the UWP version of Spotify, causing the automatic sound adjustment to occur randomly. If this scenario is applicable, you should be able to resolve the issue by disabling sound enhancements altogether.
- ‘Compressor waviness’ issue with Firefox – Mozilla Firefox seems to have a weird bug where the sound seems to go up and down while Spotify is playing from the web version. In this case, you should be able to resolve the issue by updating Firefox to the latest version available or moving to a different browser altogether.
- Digital audio limitation – Another distinct possibility is an audio limitation caused by the digital audio channel that you’re using. Your system might automatically lower the volume for all audio sources when the combined loudness exceeds the maximum value. In this case, you should be able to stop these automatic adjustments by lowering the volume of Spotify and compensating from the system volume.
If you’re currently searching for a way to resolve this issue, this article will give you several troubleshooting ideas. Down below, you’ll find several potential fixes that other affected users have successfully used to resolve the problem for good. Each of the methods featured below are confirmed to be effective by at least one affected user.
For the best results, we advise you to follow the troubleshooting guides in order (they are ordered by efficiency and difficulty) and discard those that aren’t applicable to your scenario. Eventually, one method is bound to resolve the issue regardless of the culprit that ends up causing the problem.
Let’s begin!
Method 1: Disabling Volume normalization
Some affected users have reported that the reason why their volume was automatically being lowered was a built-in feature called Volume Normalization. This feature is supposed to make every song played at the same volume, but some users have reported that the adjustment occurs several seconds after the song is started, which tends to annoy some users.
If you don’t care about volume normalization, you should be able to resolve the issue by disabling the feature from Spotify’s Settings menu. Here’s what you need to do:
- Open the Spotify UWP app and click on the action button (three-dot icon) in the top-left section of the screen.
- From the newly appeared context menu, go to Edit and click on Preferences (at the bottom of the context menu).
- Once you reach the Settings menu of Spotify, scroll down to the Music Quality tab and uncheck the toggle associated with Normalize volume – Set the same volume level for all songs.
- Restart your Spotify app and see if the issue has been resolved.
In case this procedure didn’t allow you to resolve the automatic volume adjustment problem with the Spotify app, move down to the next method below.
Method 2: Disabling Volume Adjustment during Communications
As a couple of affected users have discovered, Windows 10 (and older versions) includes an option that will automatically lower the volume while audio is being recorded. Normally this function is only used by communication apps, but it’s not that uncommon for other applications (including Spotify) to use this Windows setting as well.
This setting can be found inside the Sound tab of Control Panel. By default, it’s set to reduce the volume of all other sounds (aside from the communication task) to 80%. Several affected users have reported that Spotify stopped automatically adjusting the volume after they changed the default behavior.
Here’s a quick guide on how to disable automatic volume adjustment from the classic Control Panel interface:
- Press Windows key + R to open up a Run dialog box. Then, type “control” inside the run box and press Enter to open up the classic Control Panel interface.
- Once you’re inside Control Panel, use the search function on the right to search for “sound” and press Enter to retrieve the results. Then, click on Sound from the results.
- Inside the Sound window, select the Communications tab from the horizontal menu at the top.
- Inside the Communications tab, change the default behavior for “When Windows detects communications activity” to Do Nothing.
- Click Apply to save the changes, then restart your computer. Once the next startup sequence is complete, open the Spotify app and see if the automatic volume adjustment has stopped.
If the same issue is still occurring (Spotify volume goes down automatically), move down to the next method below.
Method 3: Updating / Reinstalling headset driver (if applicable)
If you’re only seeing this issue occur while you’re using a headset, chances are you’re actually dealing with a driver issue. Several affected users have reported that they managed to resolve the issue by updating or reinstalling their headset drivers and rebooted their computer.
If this scenario is applicable to you, follow the guide below to update/reinstall your headset driver and see if that manages to resolve your issue:
- Press Windows key + R to open up a Run dialog box. Then, type “devmgmt.msc” and press Enter to open up Device Manager.
- Once you’re inside Device Manager, scroll through the list of devices and expand the drop-down menu associated with Sound, video and game controllers.
- Double-click on your headset from the list of sound devices.
Note: If you’re using a Bluetooth headset, chances are you will have two different listings – one for Stereo and one cor communications. To ensure that this method is effective, you’ll need to repeat the steps below with both. - Inside the Properties screen of your headset, select the Driver tab from the menu at the top of the screen. Then, start by clicking on Update Driver.
- From the next screen, click on Search automatically for updated driver software. Wait until the procedure is complete, then follow the on-screen instructions to install the newest version if a different build is found
- Restart your computer and see if the issue has been resolved once the next startup is complete.
- If the same issue is still occurring, follow steps 1 to 4 once again to return to the Properties menu of your Headset driver.
- Once you return there, click on Uninstall Device and follow the on-screen prompts to complete the uninstallation. When the process is complete, restart your computer to allow Windows Update to automatically reinstall the missing driver during the next startup sequence.
- Check if the issue has been resolved by opening the Spotify app once again.
If the same issue is still occurring, move down to the next method below.
Method 4: Disabling Sound Enhancements
As it turns out, this particular issue can also occur if you have Sound Enhancements enabled from your Windows sound settings. Several affected users have reported that the issue was resolved after they disabled all audio enhancements.
These audio enhancements are known to cause problems with the UWP version of Spotify. If you want to ensure that you avoid any sort of conflict that might be caused by these audio enhancement packages, follow the steps below to disable them completely:
Note: If you’re using a dedicated audio card, it’s likely that it comes with its own audio enhancement options. If that’s the case, you should disable them from the dedicated utility because disabling the Windows equivalents will not resolve the issue.
Update: If you’re using SRS Premium Sound or SRS Premium Sound, uncheck the box associated with Audio Enhancement to resolve the issue.
- Press Windows key + R to open up a Run dialog box. Then, type “control” inside the Run box and press Enter to open the classic Control Panel interface.
- Once you’re inside Control panel, use the search function (top-right corner) to search for Sound. Then, click on Sound from the results.
- When you’re inside the Sound screen, make sure that the Playback tab is selected, then right-click on the playback device that you’re encountering the issue with and choose Properties from the context menu.
- Inside the Properties screen of your playback device, select the Enhancement tab (from the horizontal menu) and check the box associated with Disable all enhancements.
- Click Apply to save the changes, then restart your computer and see if the issue has been resolved once the next startup sequence is complete.
Method 5: Updating Firefox or moving away from it (if applicable)
If you’re encountering this issue with the Spotify web player and you’re using Firefox, you might deal with a recurring problem that is commonly referred to as ‘compressor waviness’. Several Spotify users have reported about this issue, as it only seems to occur with Mozilla Firefox.
Most affected users that encountered this issue have reported that moving to Chrome stopped the automatic volume adjustments from happening any more. If you’re not that fond of Firefox, try downloading the latest version of Chrome (here) and see if resolves your issue.
If you don’t want to let go of Firefox, ensure that you’re on the latest build available – the issue might be resolved via a hotfix by now. Here’s a quick guide on doing this:
- Open Firefox and click on the action button (three dot icon) in the top-right section of the screen.
- From the context menu that just opened, expand the Help section and click on About Firefox.
- Inside the About Mozilla Firefox menu, click the Restart to update Firefox button.
- After the update is complete and your browser restarts, verify if the issue has been fixed by opening the web version of Spotify once again.
Method 6: Dealing with a digital audio limitation
If none of the methods above have allowed you to resolve the issue, chances are the issue is being caused by a limitation of the digital audio channel that you’re using. Keep in mind that a PCM stream (audio data stream) has a maximum loudness value that is always determined by the Windows master volume setting.
If the combined loudness of all programs is close to exceeding that maximum value, the system is automatically wired to lower the volume of all audio sources in order to hit that volume. If this scenario is applicable to your current situation, you will be able to resolve the issue by lowering the volume of Spotify and increasing the system volume to compensate.


Hello Guys! the Method 4: Disabling Sound Enhancements works for me!
Thanks a lot!